IBM 107 Key Model F 4704 Restoration Thread

User avatar
pyrelink

04 Oct 2014, 02:00

Thanks! I get an equal amount of enjoyment, taking photos and writing about them later, as I do, actually doing the project.

Its funny that you mention reading the back of the paint can. I have been using the same basic Rust-Oleum paint for a while now, and when it comes to painting plastic or wood, I have a very specific method that I follow, that (assuming I did proper prep-work) gives an excellent, long lasting result. However I do not paint metal all that often, and the procedure I usually follow did not work very well at all. Yesterday, and today, I went for a better approach. Not nearly as good as yours, but I waited about 3 hours between coats, with 1500 grit light sanding between each coat, and then I clear coated it at 15 minute intervals, and now leaving it to cure for 3 days. If that still doesn't turn out well, then I will go the extra mile like you did. Sand everything off and give it a couple days between coats... Granted I could have done that in the first place :lol:

Lets hope it works this time 8-)

cinnamonrollz

04 Oct 2014, 07:56

My crappy phone really cant capture the purple font etc, But heres some pics!

Image
Image
Image

It definitely overpowers my 15.6 inch lappy!
Im keeping the original connector because Hasu's converter and that dfj (with help from soarer) is making a teensy based solution Id go xwhatsit but I need more experience with a teensy and soldering iron first. Ill definitely be getting some craft foam Like you did! I hope the pm with flipper layout helped.

User avatar
pyrelink

04 Oct 2014, 08:48

Looks nice! Remember, only replace the foam if you need it. It's a good bit of effort. Still kinda confused about your replacement connector though. As far as I know Hasu, made a preliminary converter that mostly worked but wasn't super stable. XWhatsit made a huge advancement by replacing the controller entirely. I think that HaaTa is working on a alternate replacement controller as well, but no matter the way you convert your board, your gonna be using USB.

And yeah, thanks for the PM, I hadn't noticed that!

xwhatsit

07 Oct 2014, 10:09

pyrelink: beautiful! Hopefully I'm still going to pick a 107-key up from Cindy/elecplus, I think the shipping to NZ is giving her a bit of a headache though :)

You can use the DFJ controller, which is an alternative capsense controller. It's all through-hole and uses a plug-in Teensy for the brains of it (running TMK firmware). You still wouldn't use the original connector though, as it's also something you solder into the 30-pin ribbon cable, just like my controller. Hasu did a converter (that uses the original controller and cable), but as Muirium pointed out it had a couple of issues; I believe the main problem was in diagnostic mode you could type a bit faster than the converter/controller could keep up? The DFJ controller is supposed to work pretty nicely though, and being based on TMK firmware will have all the goodies people have come to expect like layers and macros etc. I like my controller but that's only because through-hole freaks me out :lol:

If you did want to order a controller from me instead of building it yourself, I'm about to open up Round 3 for orders very shortly. That said, I ordered plenty of PCBs, so there's no need to rush to make up your mind. I think there's 26 Model F PCBs in total; I've just ordered enough parts for around 12 of them, and it doesn't take long to get the bits to do another 14.

andrewjoy

07 Oct 2014, 10:20

Round 3 = awesome !

Can you sign mine, it may become a work of art in years to come :P

xwhatsit

07 Oct 2014, 10:24

I already defaced them with my crappy hand-drawn-90-and-45°-angles-only line drawing and CAD text logo :lol:

User avatar
pyrelink

07 Oct 2014, 12:47

Thanks! I was not actually aware of the "DFJ Controller", looks quite cool. It will add the much needed competition into the IBM Capsense USB Controller after-market ;) :lol:

As I have stated before, my biggest concern was being able to afford everything I needed, to restore this board in a timely fashion. Luckily I am interviewing for a new job later this week! If I happen to get it, then you will be the first person I call. Well... actually not really. I wouldn't call you, I would probably PM you or post in your thread. And you wouldn't be the first. You would still be like the third maybe? And you would certainly be the only one I mentioned IBM controllers to, so that's a plus.

Sorry I just woke up. A little crazy right now. Anyway, there will be more updates posted later on today. Including the possibility of BOLT MODDING my wonderful Model F. Stay tuned for news at 11.

andrewjoy

07 Oct 2014, 12:55

i want to bolt mod my AT and possibnly my 122 as the area between the PF keys and the main area is a bit loose.

Good luck with the interview just had one myself, and well now i have to support mac, time to get maverics in a VM to brush up on my skills

quantalume

07 Oct 2014, 13:12

If you read fohat's thread on GH regarding F-122 restoration, he recommends against bolt modding it. However, I still think, if done carefully and properly, it would be the best way to put these beasts back together. IBM used a low-durometer foam to compensate for the uneven clamping pressure, but a better solution would be to make the clamping pressure even over the entire surface area with regularly-spaced bolts. I have an XT board that I paid all of $5 for that I may experiment on soon...

User avatar
pyrelink

07 Oct 2014, 13:24

Ooh Mac support. That will be fun. :lol:

I will post more in depth later this afternoon, but its basically down to bolt modding, or finding and cutting out a new material. The second piece of foam that I used, worked as it should. It made the center rows perfectly firm and not wobbly and pingy. However the center barrels are now, no longer pushing through the plate as far as they used to, and the keycaps have reduced travel. The keys next to stabilizers (even the keys by the space bar stabs) also get stuck and can barely buckle with an average press. I have been getting a ton of help from Fohat.Digs over on Geekhack in his guide, and his comments, but the one main difference is that this is is a 107 key, and he and his guide is mostly centered around the F-122. So I will need to look into find the best places for bolt placement.

Also before I submit this, quantalume: I have been talking to fohat, as I said, as well as this post (still haven't figured out how to link directly to a specific post inside a thread...) it seems that he no longer agrees with his original method of completely replacing the tabs with bolts, but that bolts are very useful for holding together the middle rows. Something that I really need. It is certainly quite an undertaking, and leaves a much greater possibility of screwing something up. If I am very careful though, and ensure that I don't drill into any traces on the PCB, a bolt mod will be just what my Model F needs!

And if I were you I would save that XT for this!

andrewjoy

07 Oct 2014, 13:32

Don't kill an Xt they re the best built of all the F's i have used ( never used a 4704 ) They don't need no bolt modding.

User avatar
Hypersphere

07 Oct 2014, 17:55

Likewise, I would recommend not putting any bolts in a Model F. However, it would be good to see how others get on with some well-placed bolts. It might turn out to be a good thing after all.

Regarding foam replacement, I have used 1/8-inch silicone foam in an XT. This is probably the upper limit of foam thickness and it was difficult to slide the plates back into position, but it kept all rows firm with no wobble anywhere. Next time, I think I might try somewhat thinner foam of 3/32-inch thickness.
Last edited by Hypersphere on 07 Oct 2014, 17:57, edited 1 time in total.

User avatar
snoopy

07 Oct 2014, 17:57

Are you really sure that you need a bolt mod?

I think if the foam has the right size, everything should be fine.

User avatar
pyrelink

07 Oct 2014, 19:52

I was considering it, but I think you guys are right. Properly sized foam is really all that I need. Bolt mod seems a bit too risky on a board like this, and if anything probably pretty unnecessary.

@Hypersphere, what do you mean exactly when you say that it was difficult sliding the plates back into position? How were you going about it? I myself am now using fohat's method of clamping down the edges, getting a really long clamp to hold the PCB steady, and then using basically a plastic mallet, to beat the plate into place.

I don't know the dimensions of the craft foam that I have, but it is just barely too thin. 2 pieces of the foam is way too much. 1 piece is just too little.

xwhatsit

07 Oct 2014, 22:18

There is kind of charm to the slightly uneven pressure across the board causing pitch-variations in the pings. I'm assuming that's what causes the pitch-variations; that would be one explanation to why my F122 is particularly musical (larger plate etc.).

If you were to bolt mod, wouldn't you still need some sort of foam or solid shim to take up the room for the barrel plate flanges? Trying to get the (very thick and strong) plates to match the height of each flange would surely require so much pretty as to be potentially crushing some of the plastic?

User avatar
pyrelink

08 Oct 2014, 13:54

I myself have never been one to complain off too much noise or pingy-ness emanating from my keyboards, and its not really the ping that bothers me. There is a noticeable difference in feel when it comes to hitting the really solid top and bottom row keys and then hitting the middle rows. Especially when not hitting a key dead center. That is what I would like to change. The extra ping definitely seems to be a bi-product of the not as compressed areas of the plate though.

And If I do understand your second question correctly: yes, I would still have foam in the board if I were to bolt mod. From what I understand, the bolt mod would mean that either the single piece of foam would be compressed enough to be useful, or that the 2 pieces of foam would be compressed far enough that the barrels would adequately push through the plate far enough.

In the end though, I think that while a bolt mod would work, a slightly thicker piece of foam would work just as well. And the foam is a hell of a lot easier to install and work with.

User avatar
Hypersphere

08 Oct 2014, 16:07

@pyrelink: Yes, I used the clamping method you described -- small clamps perpendicular to the plates to hold them in place and a long bar clamp to apply horizontal pressure to slide the plates into position. It was still difficult to get the top plate to slide because of the thickness of the foam and the friction between the plate and the surface skin of the silicone foam.

The art foam that some people are using looks like it would be easier to work with than the silicone foam I used, but the art foam might be a tad too thin.

JBert

08 Oct 2014, 21:27

andrewjoy wrote: Don't kill an Xt they re the best built of all the F's i have used ( never used a 4704 ) They don't need no bolt modding.
The only F which might need a bolt mod is a terminal F with 122 keys. And even then you only need a couple of bolts in the middle because the outer edges still have enough clamping force.

User avatar
pr0ximity

23 Oct 2014, 01:41

pyrelink wrote: Remember, only replace the foam if you need it.
This is something I'm wrestling with right now. Just got my 107-key from Cindy in the mail, and it looks to be in pretty fantastic condition internally (at least in comparison to how my Model M was when I first got it). No rust on the plate, just some discoloring. All of the springs look nearly brand new, as does the controller. All of the keys feel very nice to me as well, and all buckle nicely.

Is foam replacement and assessment really only necessary if you're opening the internal assembly to sand/protect the plate and clean the barrels more thoroughly? I was thinking of cleaning as best as I could without separating the plates and foam and keeping all of the internals original. Thoughts?

A couple internal pics with the cell phone:

Image
Image

Awesome thread pyrelink, really great documentation that is sure to come in handy in the future!

User avatar
pyrelink

23 Oct 2014, 01:52

If you can clean up your barrel plate nicely, externally, then by all means, skip the plate/pcb separation. It saves a hell of a lot of headache. The picture you posted is kind of hard to make out, but if it truly is just discolored and not rusted/corroded then you got lucky!

andrewjoy

23 Oct 2014, 10:12

Looks quite clean but i always take every model f i have apart, you never know what lurks under the plate and you don't want any contamination on that pcb, it also gives you a chance to give the barrels a good clean and check the condition of the springs.

i have found most of the time on the older model f's that as long as the foam is not disturbed its usually ok if you can slide the barrels out without damaging it go for it . I have had 5 model F's apart and never replaced the foam.

i do agree with pyrelink however , unless you are quite experienced with taking a model f to bits i would not disassemble anything this rare unless you need to. The amount of times i have ripped my 122 apart i feel quite comfortable taking any model f apart, however not the XT never the XT with its attached controller that thing is a pain to put back together.

User avatar
pr0ximity

23 Oct 2014, 14:44

I gave it a good external cleaning last night and it seems to be not too bad. There are a couple small rust spots I missed when I glanced it over that I really want to take care of though, so I think I'll be separating it once I have a bit more workshop space and some more time.

It's encouraging to know that it's not impossible to separate the plates without disturbing the foam. I don't have any experience working on Model F's but I'm a pretty patient person so I don't mind taking my time.

User avatar
pyrelink

23 Oct 2014, 21:47

Sliding the plates apart is not what ruins the foam. If the foam is in good condition, you can reuse the foam when putting it back together. Problems occur when the foam has already deteriorated. Then you have to replace the foam just so you can put everything back together. But I am sure you know all that.

Also I will say again, this board was my first time taking apart a Model F and the first time I have done any real modification/restoration on an IBM board. That is to say, that as long as you are careful, there's not much to worry about.

User avatar
fohat
Elder Messenger

26 Oct 2014, 02:44

pyrelink wrote:
7bit wrote: This is an insane work that should be automatised.
:-)
After cutting both of those mats out, I can't agree more! However I am cheap, impatient, and lazy
It takes maybe 10 minutes with a hammer, a 5/8" punch, and a block of wood.
Attachments
F-122-H03-pad-cut-new-003.JPG
F-122-H03-pad-cut-new-003.JPG (277.65 KiB) Viewed 5792 times

User avatar
pyrelink

28 Oct 2014, 06:15

I'll definitely be using leather punches next time I am at it, which will hopefully be soon. With many great thanks to Xwhatsit, I have a controller on the way, and I plan to order a small assortment of recommended foams from McMaster-Carr (probably some of the weather resistant neoprene super soft in 1/8th inch and 1/16th inch) in a couple weeks.

I cannot wait to get this board back in action!

User avatar
elecplus

01 Nov 2014, 19:22

Somebody asked what to use to clean the PCB. We use MEK (methyl ethyl keytone) here at the shop. Make sure you ventilate well! We don't soak any boards, but we do use a soft old toothbrush, or cotton swabs, or foam pads, and occasionally even nylon dish scrubbers when necessary! People who smoke around their computers seem to have no idea of the devastation, and that layers of dust and nicotine and pet hair and who knows what other crap can carry quite an electrical charge.

70% alcohol can also leave a residue; denatured alcohol does not.

We have one guy that is proud his cat sleeps with its tail curled around his CPU fan! He insists on leaving the cover off, because the cat is old and arthritic. I told him a cheap heating pad from the drug store would be sooo much more cost efficient than replacing his clogged/burned out computer once a year. He looked at me like I was nuts!

At any rate, glad these old banking boards are being received well, and that you are able to bring them back to life! Excellent post! I really like the pics!

User avatar
elecplus

01 Nov 2014, 19:28

A note on the clear caps:

I noticed that they seem to be very thin and mushy, not always identical in size and shape, and generally somewhat yellowish, from slightly to very.

We have a local place that makes small plastic parts for me. If anyone is interested, I can see what he would charge to make some sets of sturdy non-yellowing clear caps of the proper size and fit to snap over these keys. Any preferences as to plastic type?
Last edited by elecplus on 01 Nov 2014, 19:50, edited 1 time in total.

User avatar
Muirium
µ

01 Nov 2014, 19:46

Those clear caps you can stick paper under with your own label are called relegendable caps, by the way. I avoid them, and I think most of us here do. Difficult to make them look good in any circumstances, and they don't often feel good either.

I assume the different switch types they work with mean that making replacements would be complex.
elecplus wrote: We have one guy that is proud his cat sleeps with its tail curled around his CPU fan! He insists on leaving the cover off, because the cat is old and arthritic. I told him a cheap heating pad from the drug store would be sooo much more cost efficient than replacing his clogged/burned out computer once a year. He looked at me like I was nuts!
Our old cat likes to sleep on a couple of these guys:

Image

One warm base station for 2.4 GHz and another for 5 GHz. Works for both of us!

User avatar
pyrelink

06 Nov 2014, 04:06

As some have probably read, I have successfully gotten my 107 key up and running with one of Xwhatsit's controllers! Even though it worked, I am still a good ways from finished with it. Since starting this work log, I have realized the truly vast amount of content surrounding Model F restoration out here already. When I started, the photo aspect of this project was at the front of my mind, and recently I have been making progress, forgetting to take pictures. As the board nears completion, I will try and take more pictures. Anyway, here is what I have done and what I have learned:
DSC_0344.jpg
DSC_0344.jpg (897.67 KiB) Viewed 5669 times
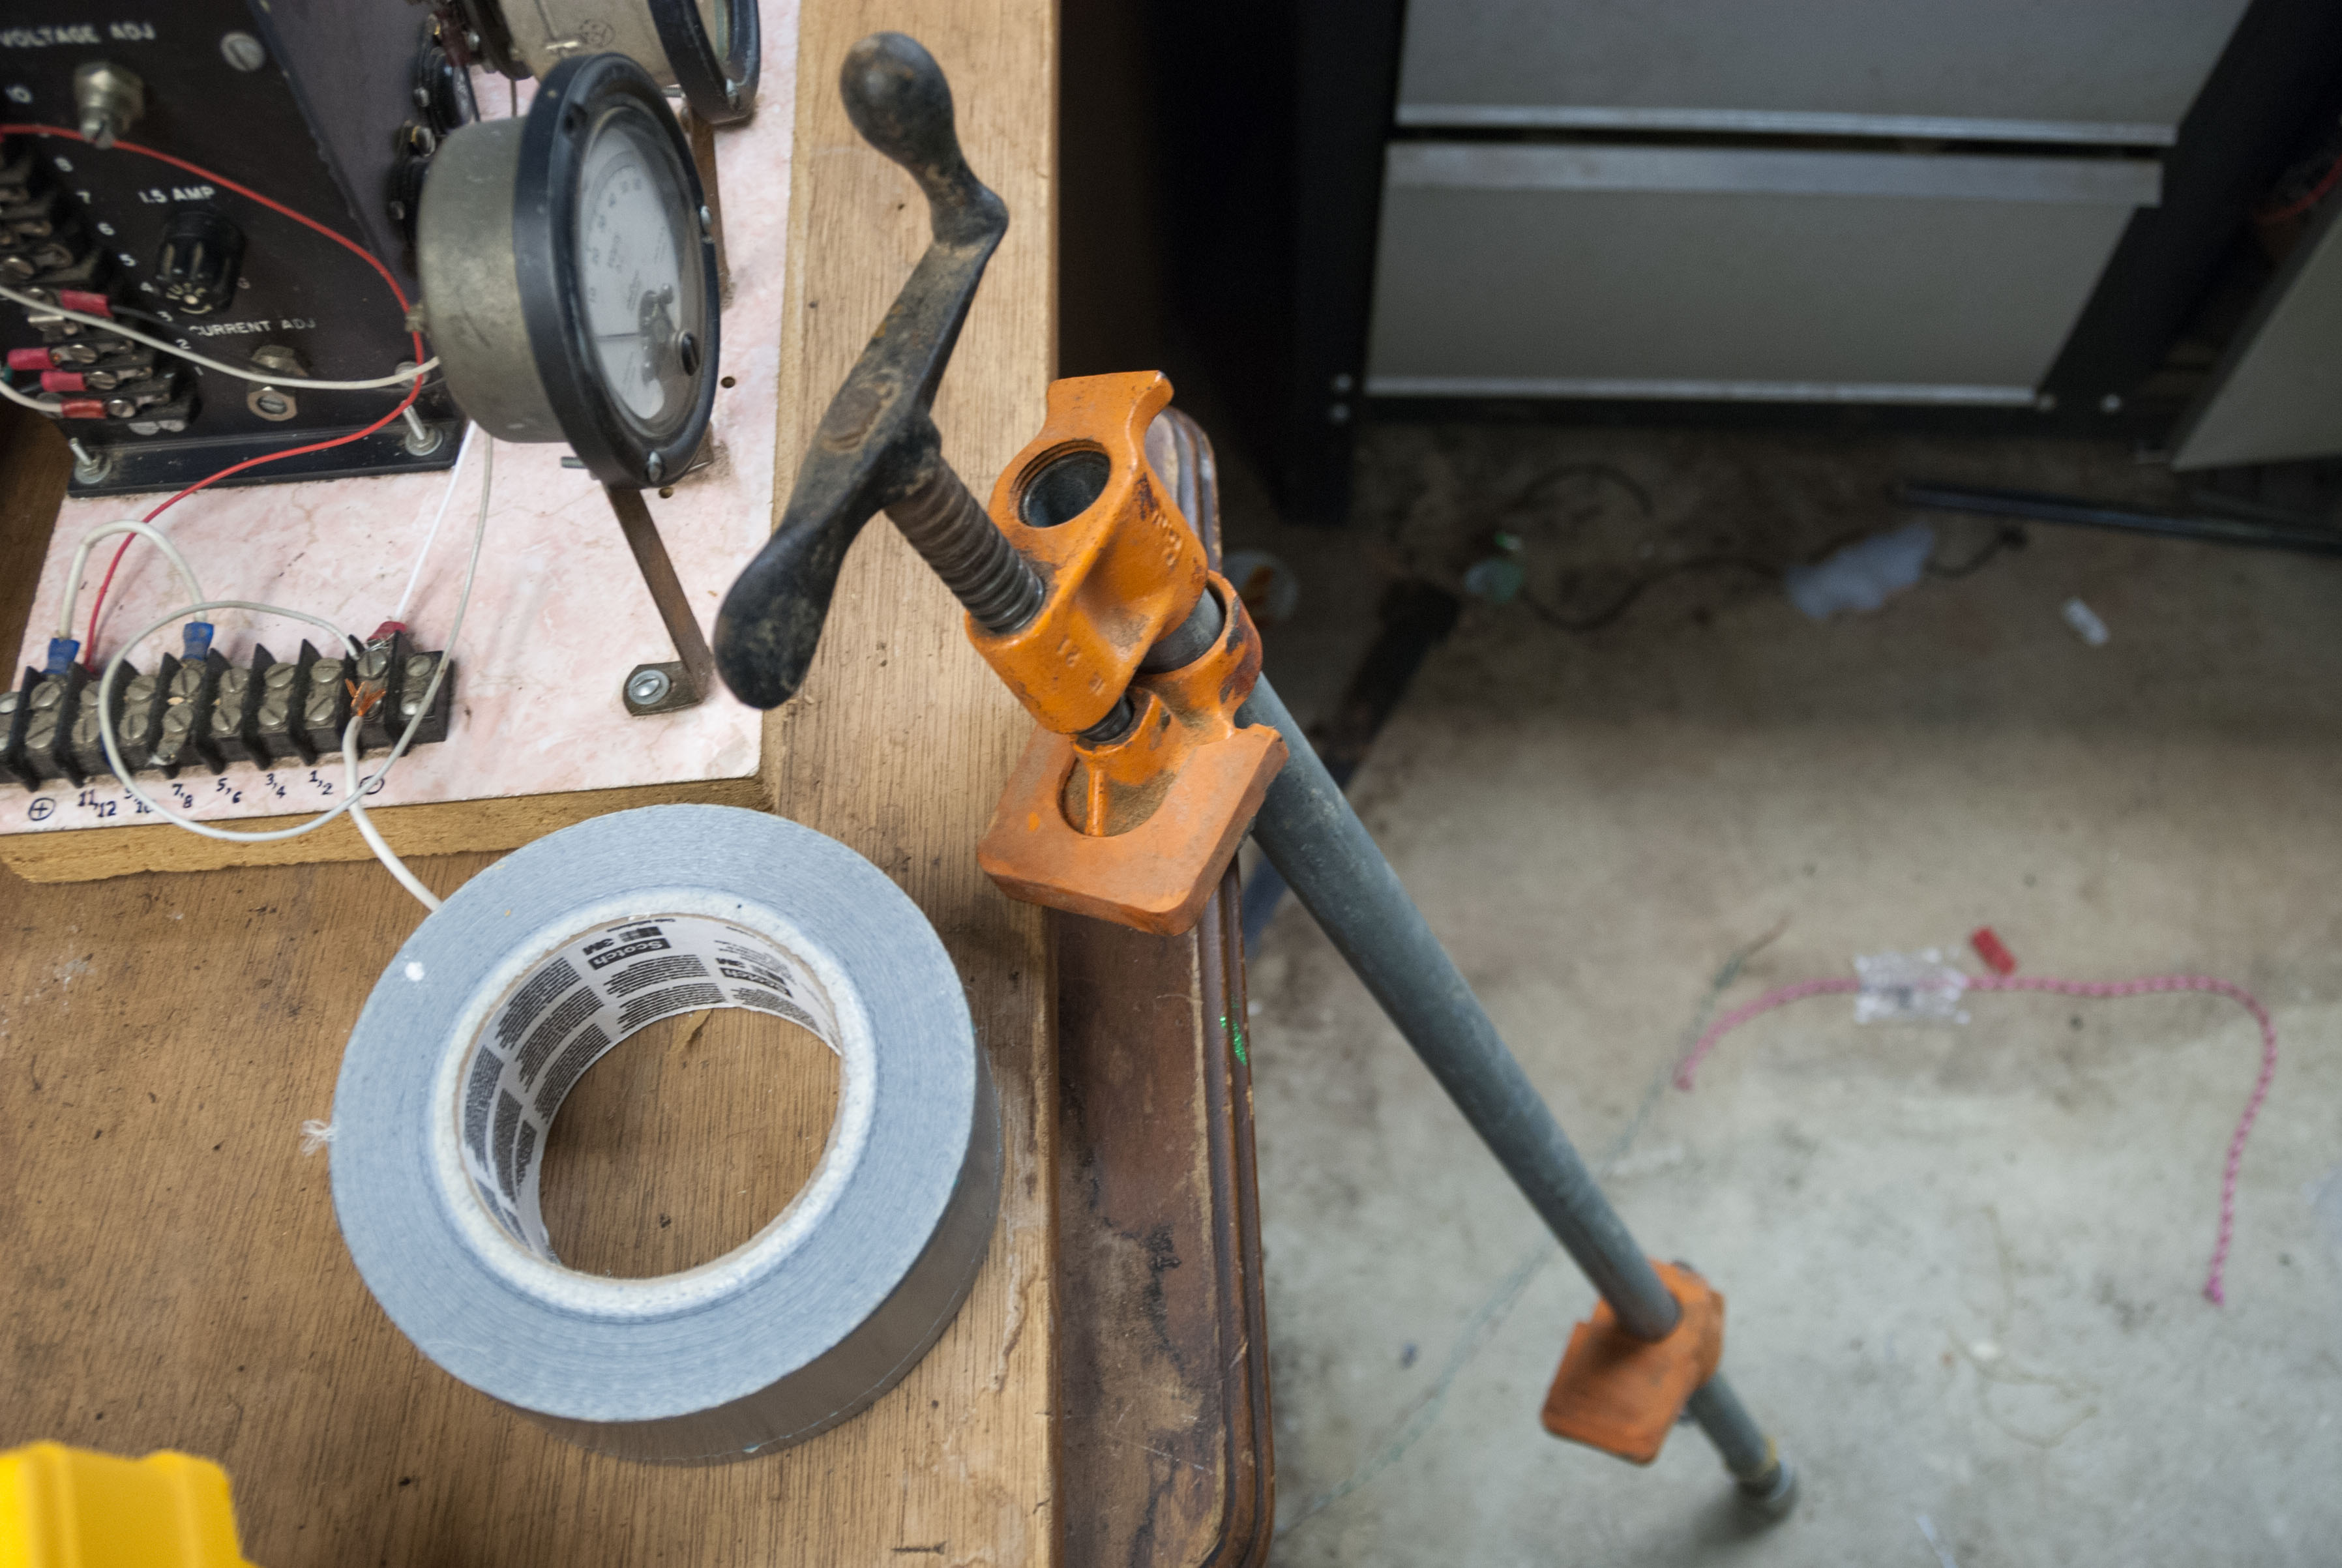
If I haven't already stated it enough, I was very wrong about bending the metal tabs, in order to put the barrel plate and PCB back together. As Fohat pointed out, the PCB and barrel plate need to be force fit into place. As others have suggested, the best method is to use a really long clamp to hold the PCB. Then use a rubber/plastic mallet/hammer to smack the plate into place, and then bend the top left tab back over (the large tab is the only one that should/needs to be bent.
DSC_0350.jpg
DSC_0350.jpg (785.01 KiB) Viewed 5669 times
I have since realized that Hypersphere is right. When it comes to painting these damn barrel plates, you have to rigorously follow the directions on the spray can. He recommends doing 1 coat per 24 hours, with light sanding (1500 grit or so) in between each coat. Stick to general painting guidelines (you put on too much paint if it looks wet) and don't put on too many coats. Then let the plate cure for a good 3 days before trying to reassemble it.

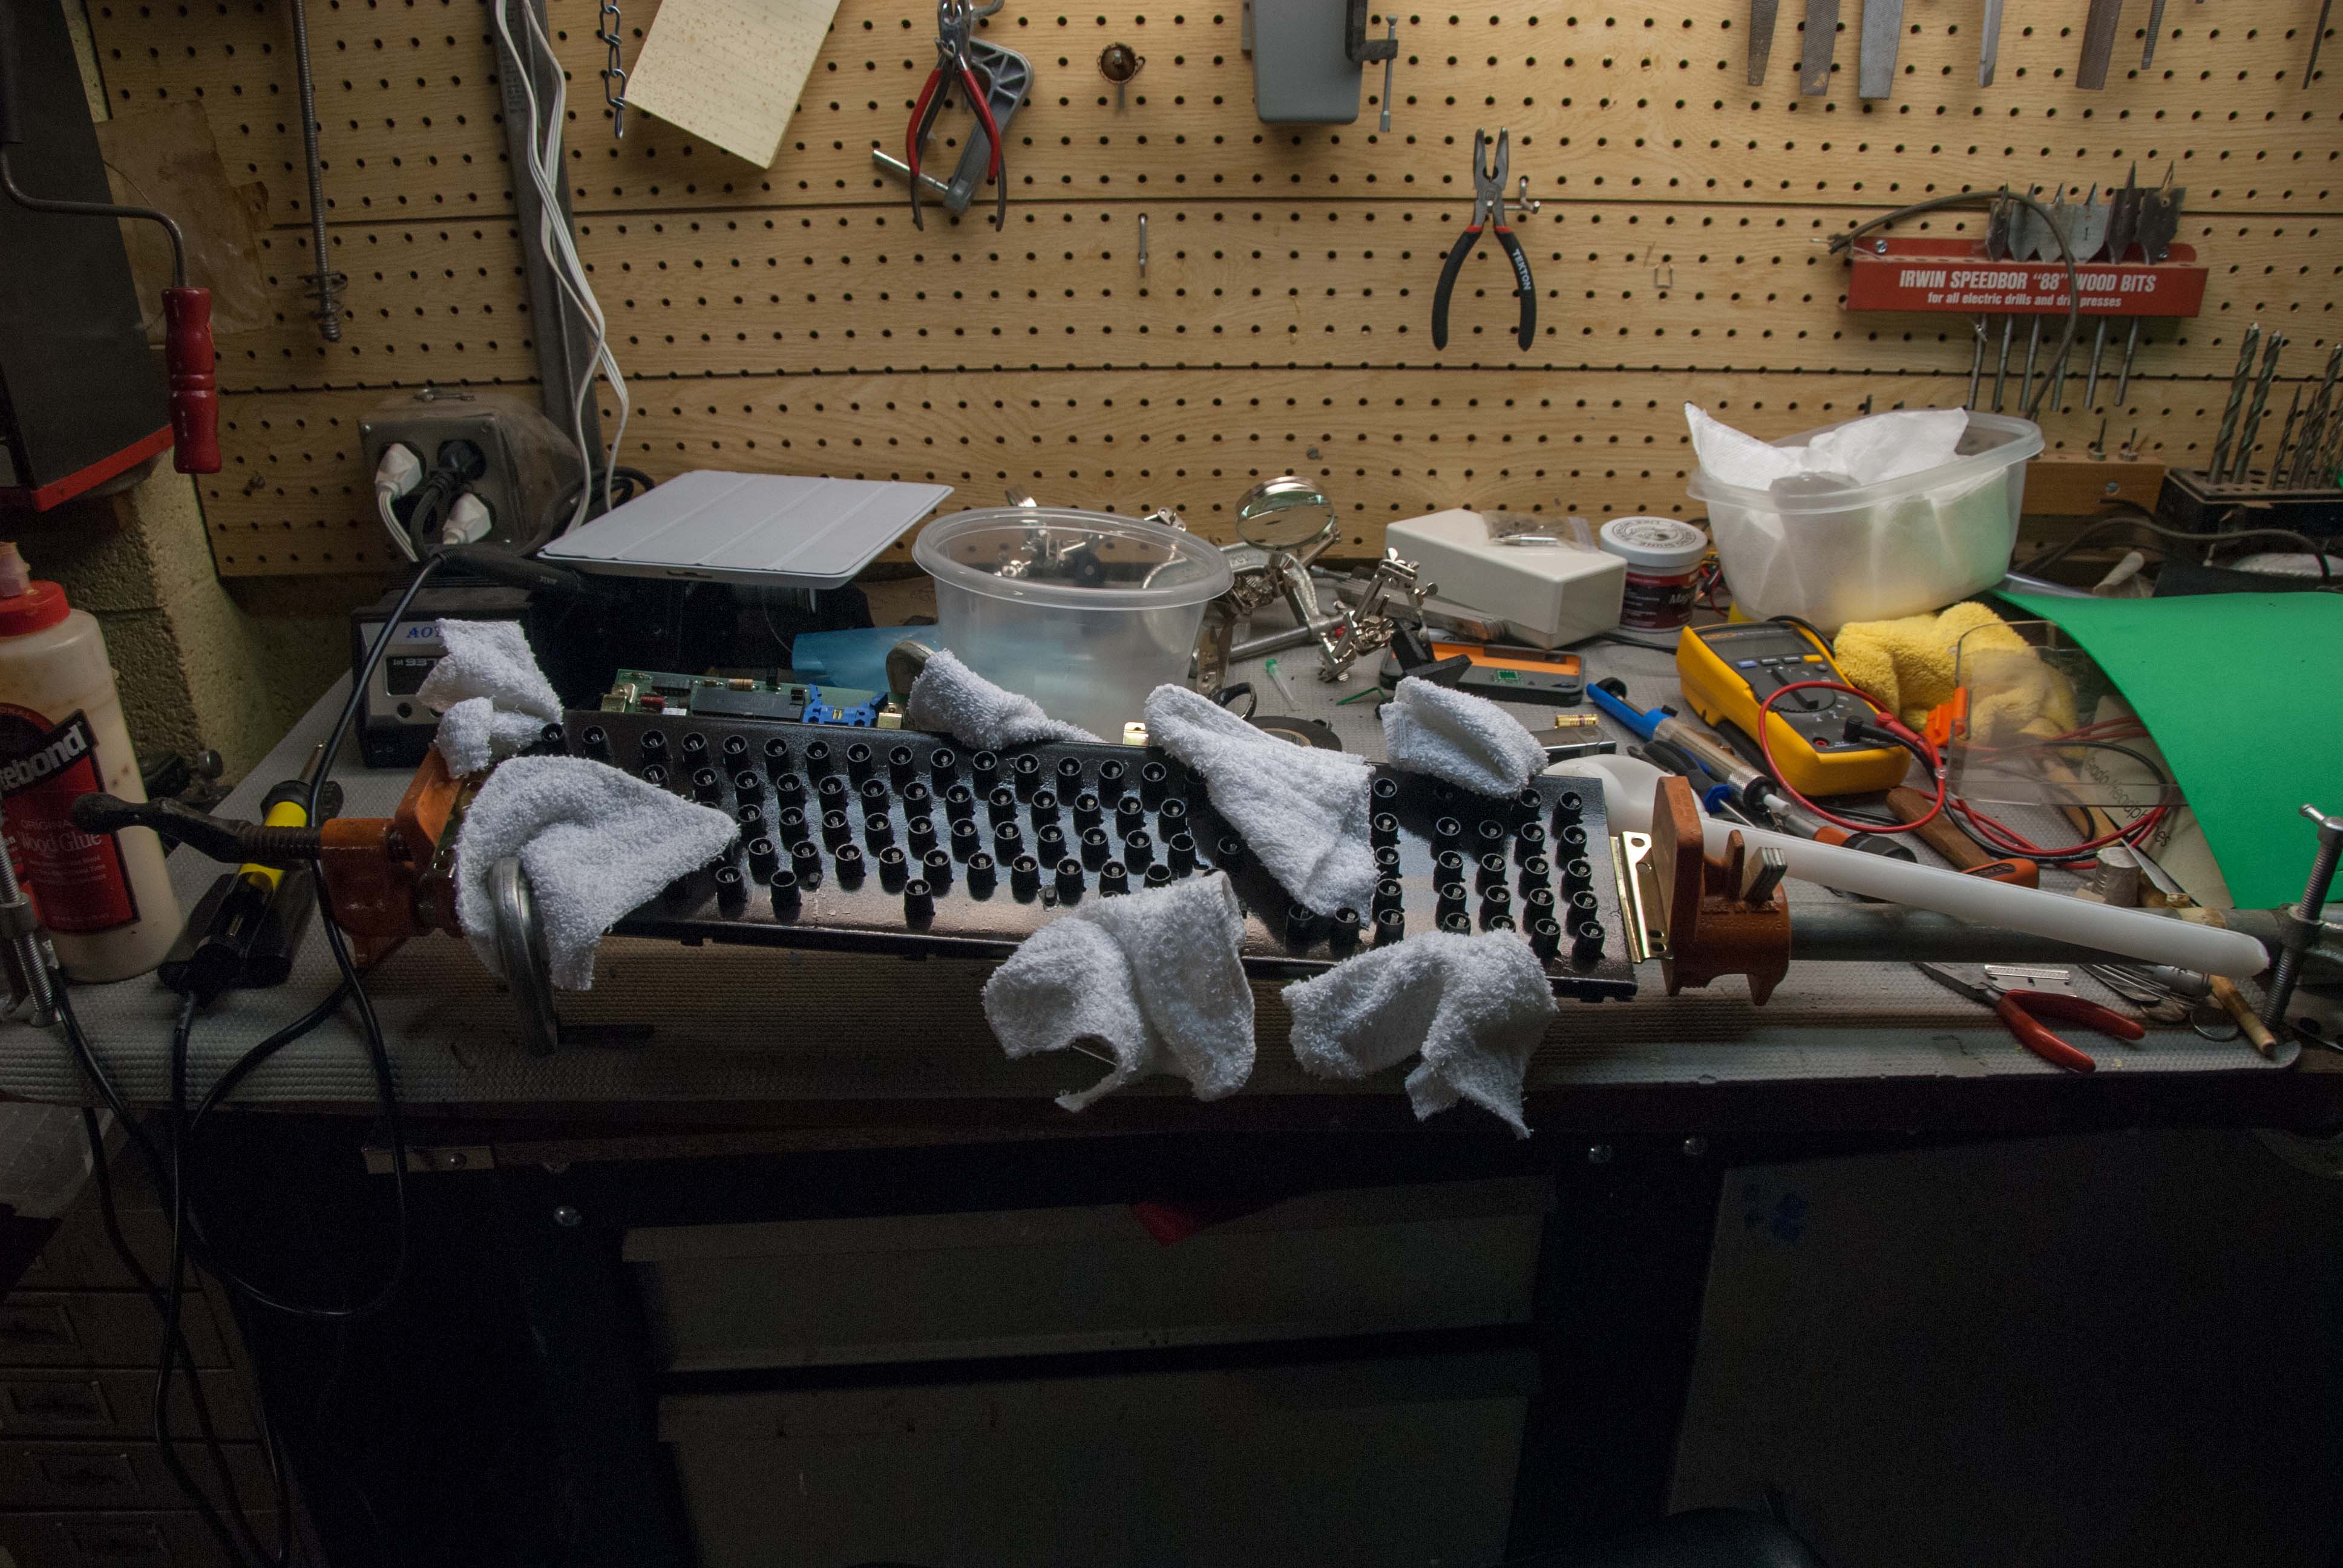
In addition, I found that wash cloths were ineffective for protecting the back PCB plate and the barrel plate from marks when clamping down the board for reassembly. This could be for an assortment of different reasons (types of clamps, binder clips, amount of clamping force, etc) but something I picked up from Quantalume was to use spare bits of foam on either side of the clips. I can confirm that foam works quite well.
DSC_0417.jpg
DSC_0417.jpg (813.17 KiB) Viewed 5669 times
DSC_0384.jpg
DSC_0384.jpg (937.08 KiB) Viewed 5669 times
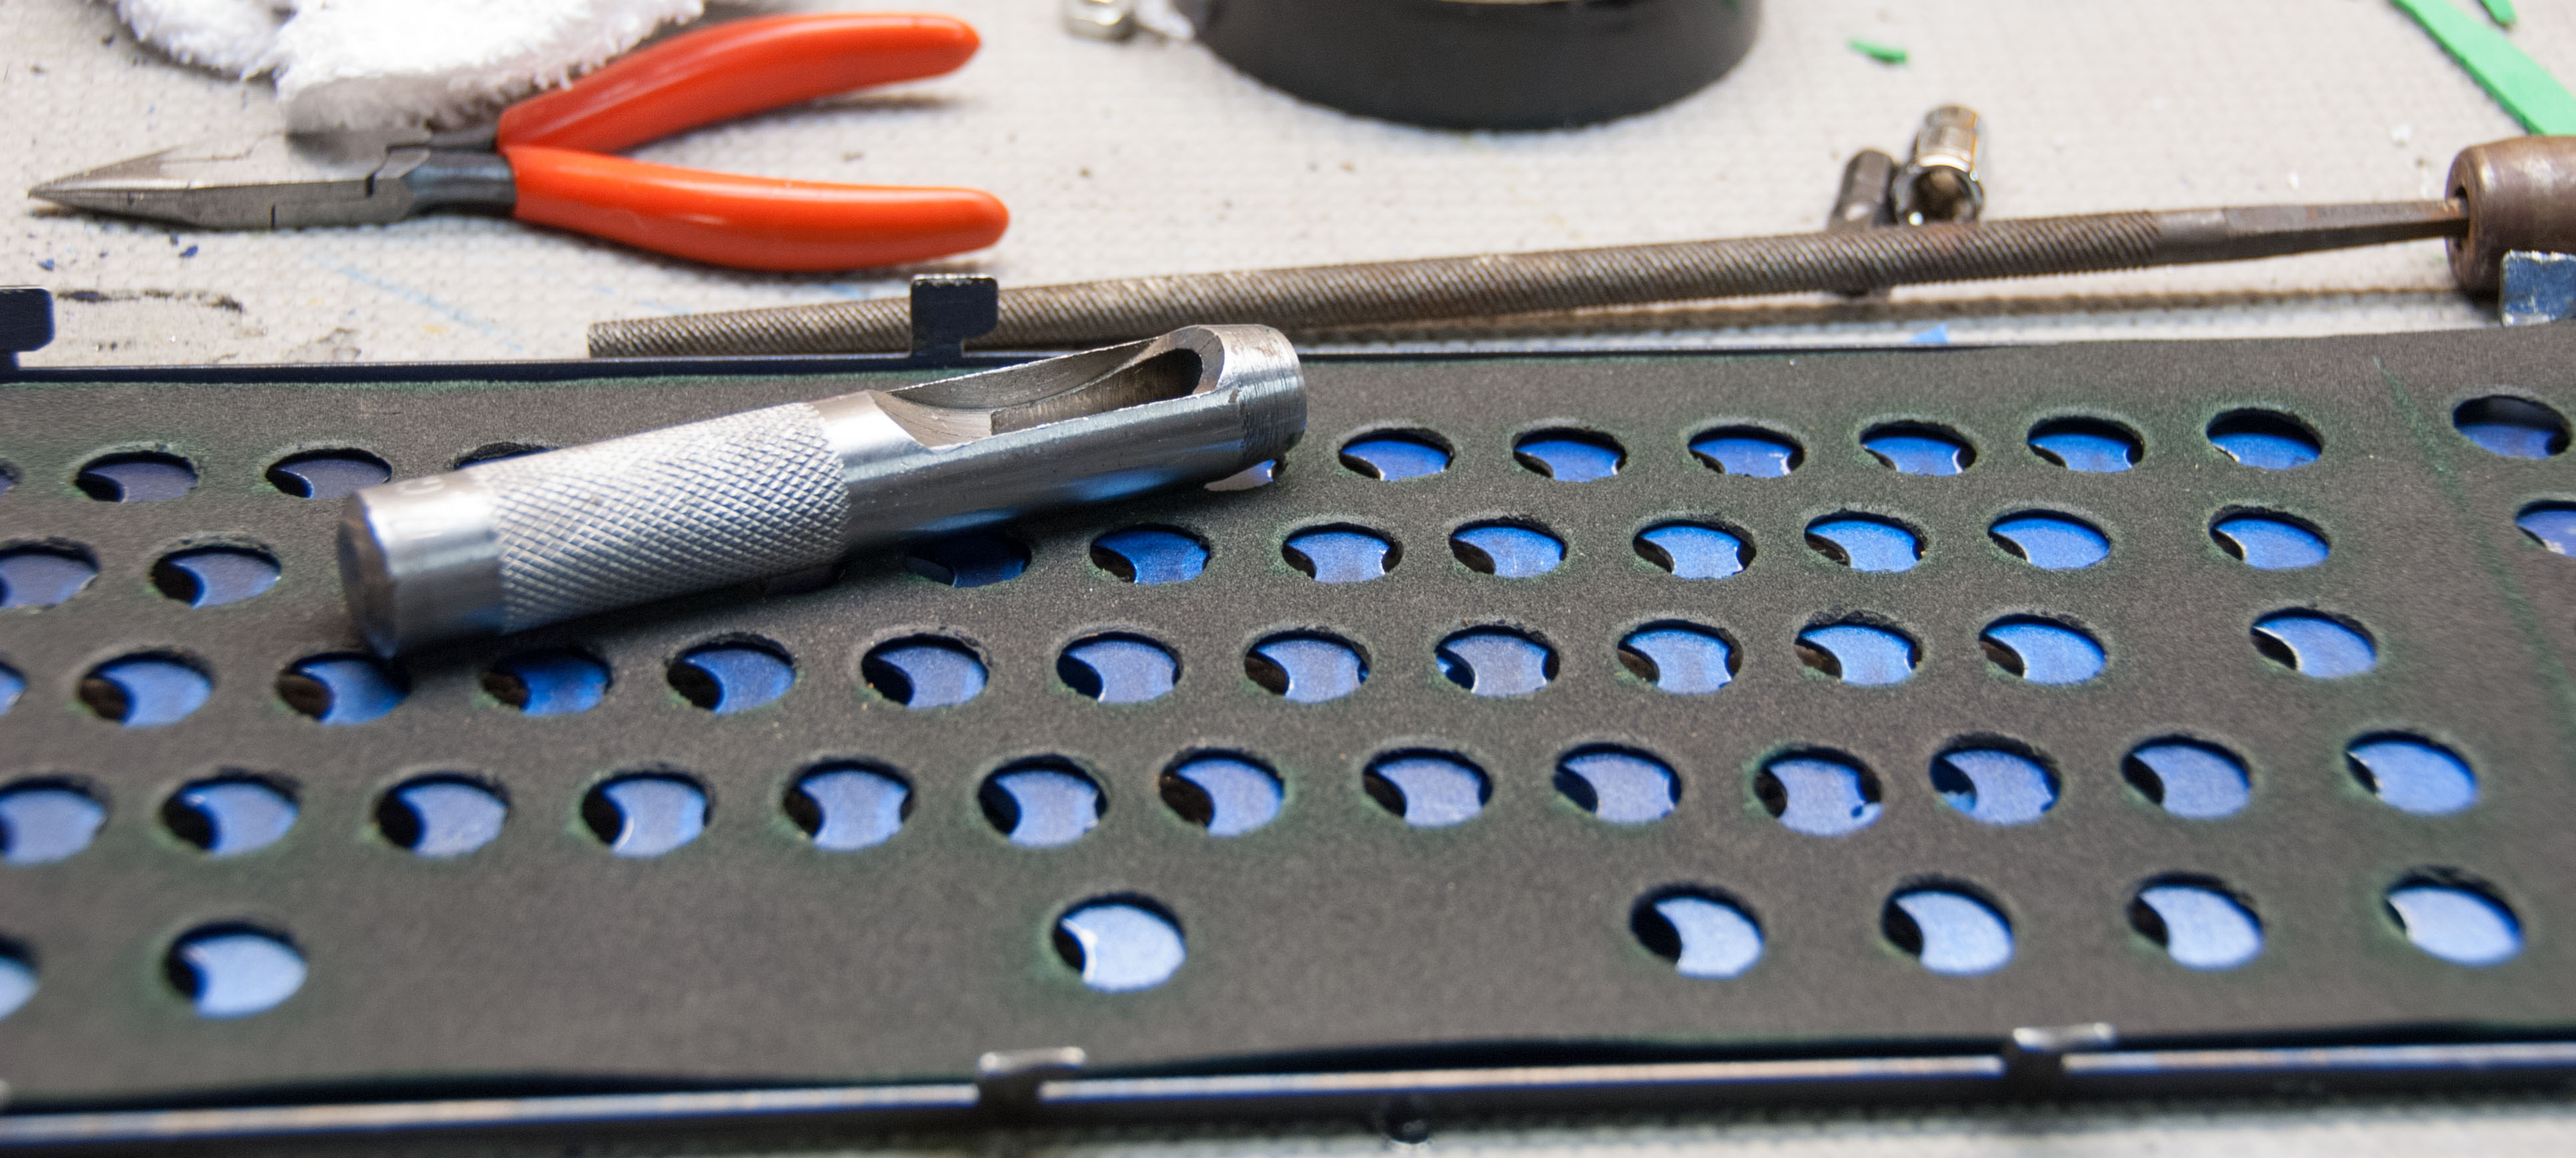
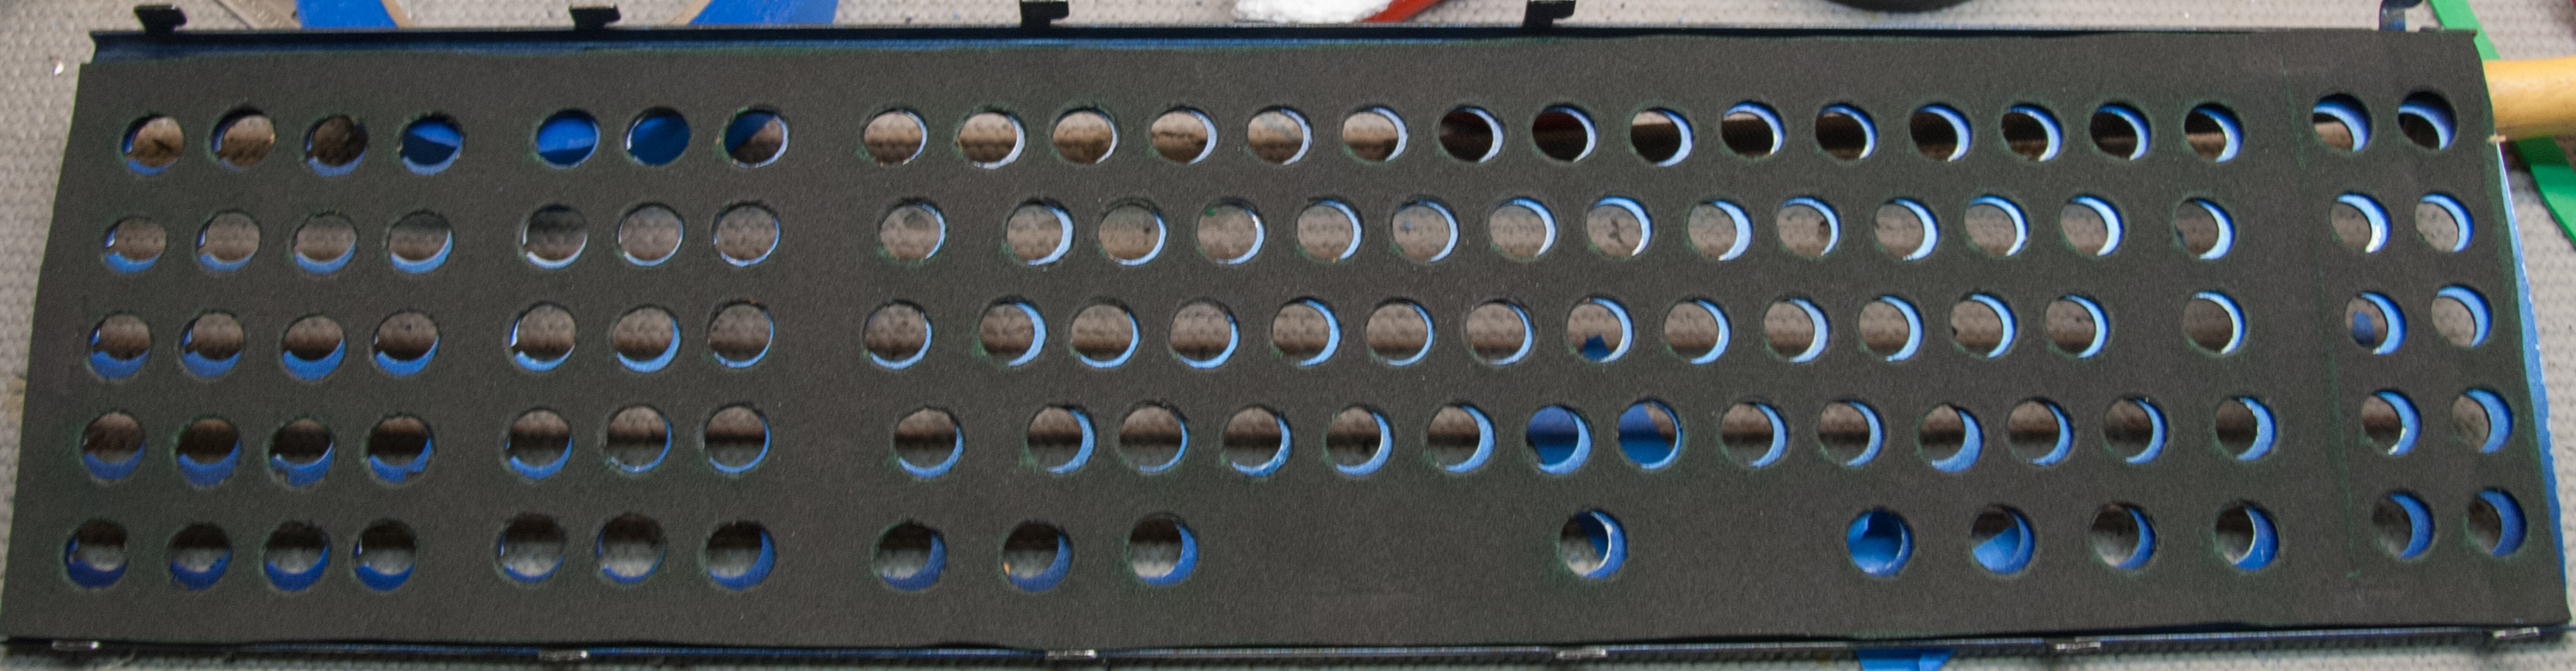
Don't be an idiot like me. Use a leather punch for your foam layer. 5/8" worked perfectly for each of the holes, and only took me 20 mins to punch out all the barrels. Just make sure you have a softer piece of wood under the foam, and that you are not punching directly into a preexisting hole. Foam can tear easily.
DSC_0382.jpg
DSC_0382.jpg (822.54 KiB) Viewed 5669 times
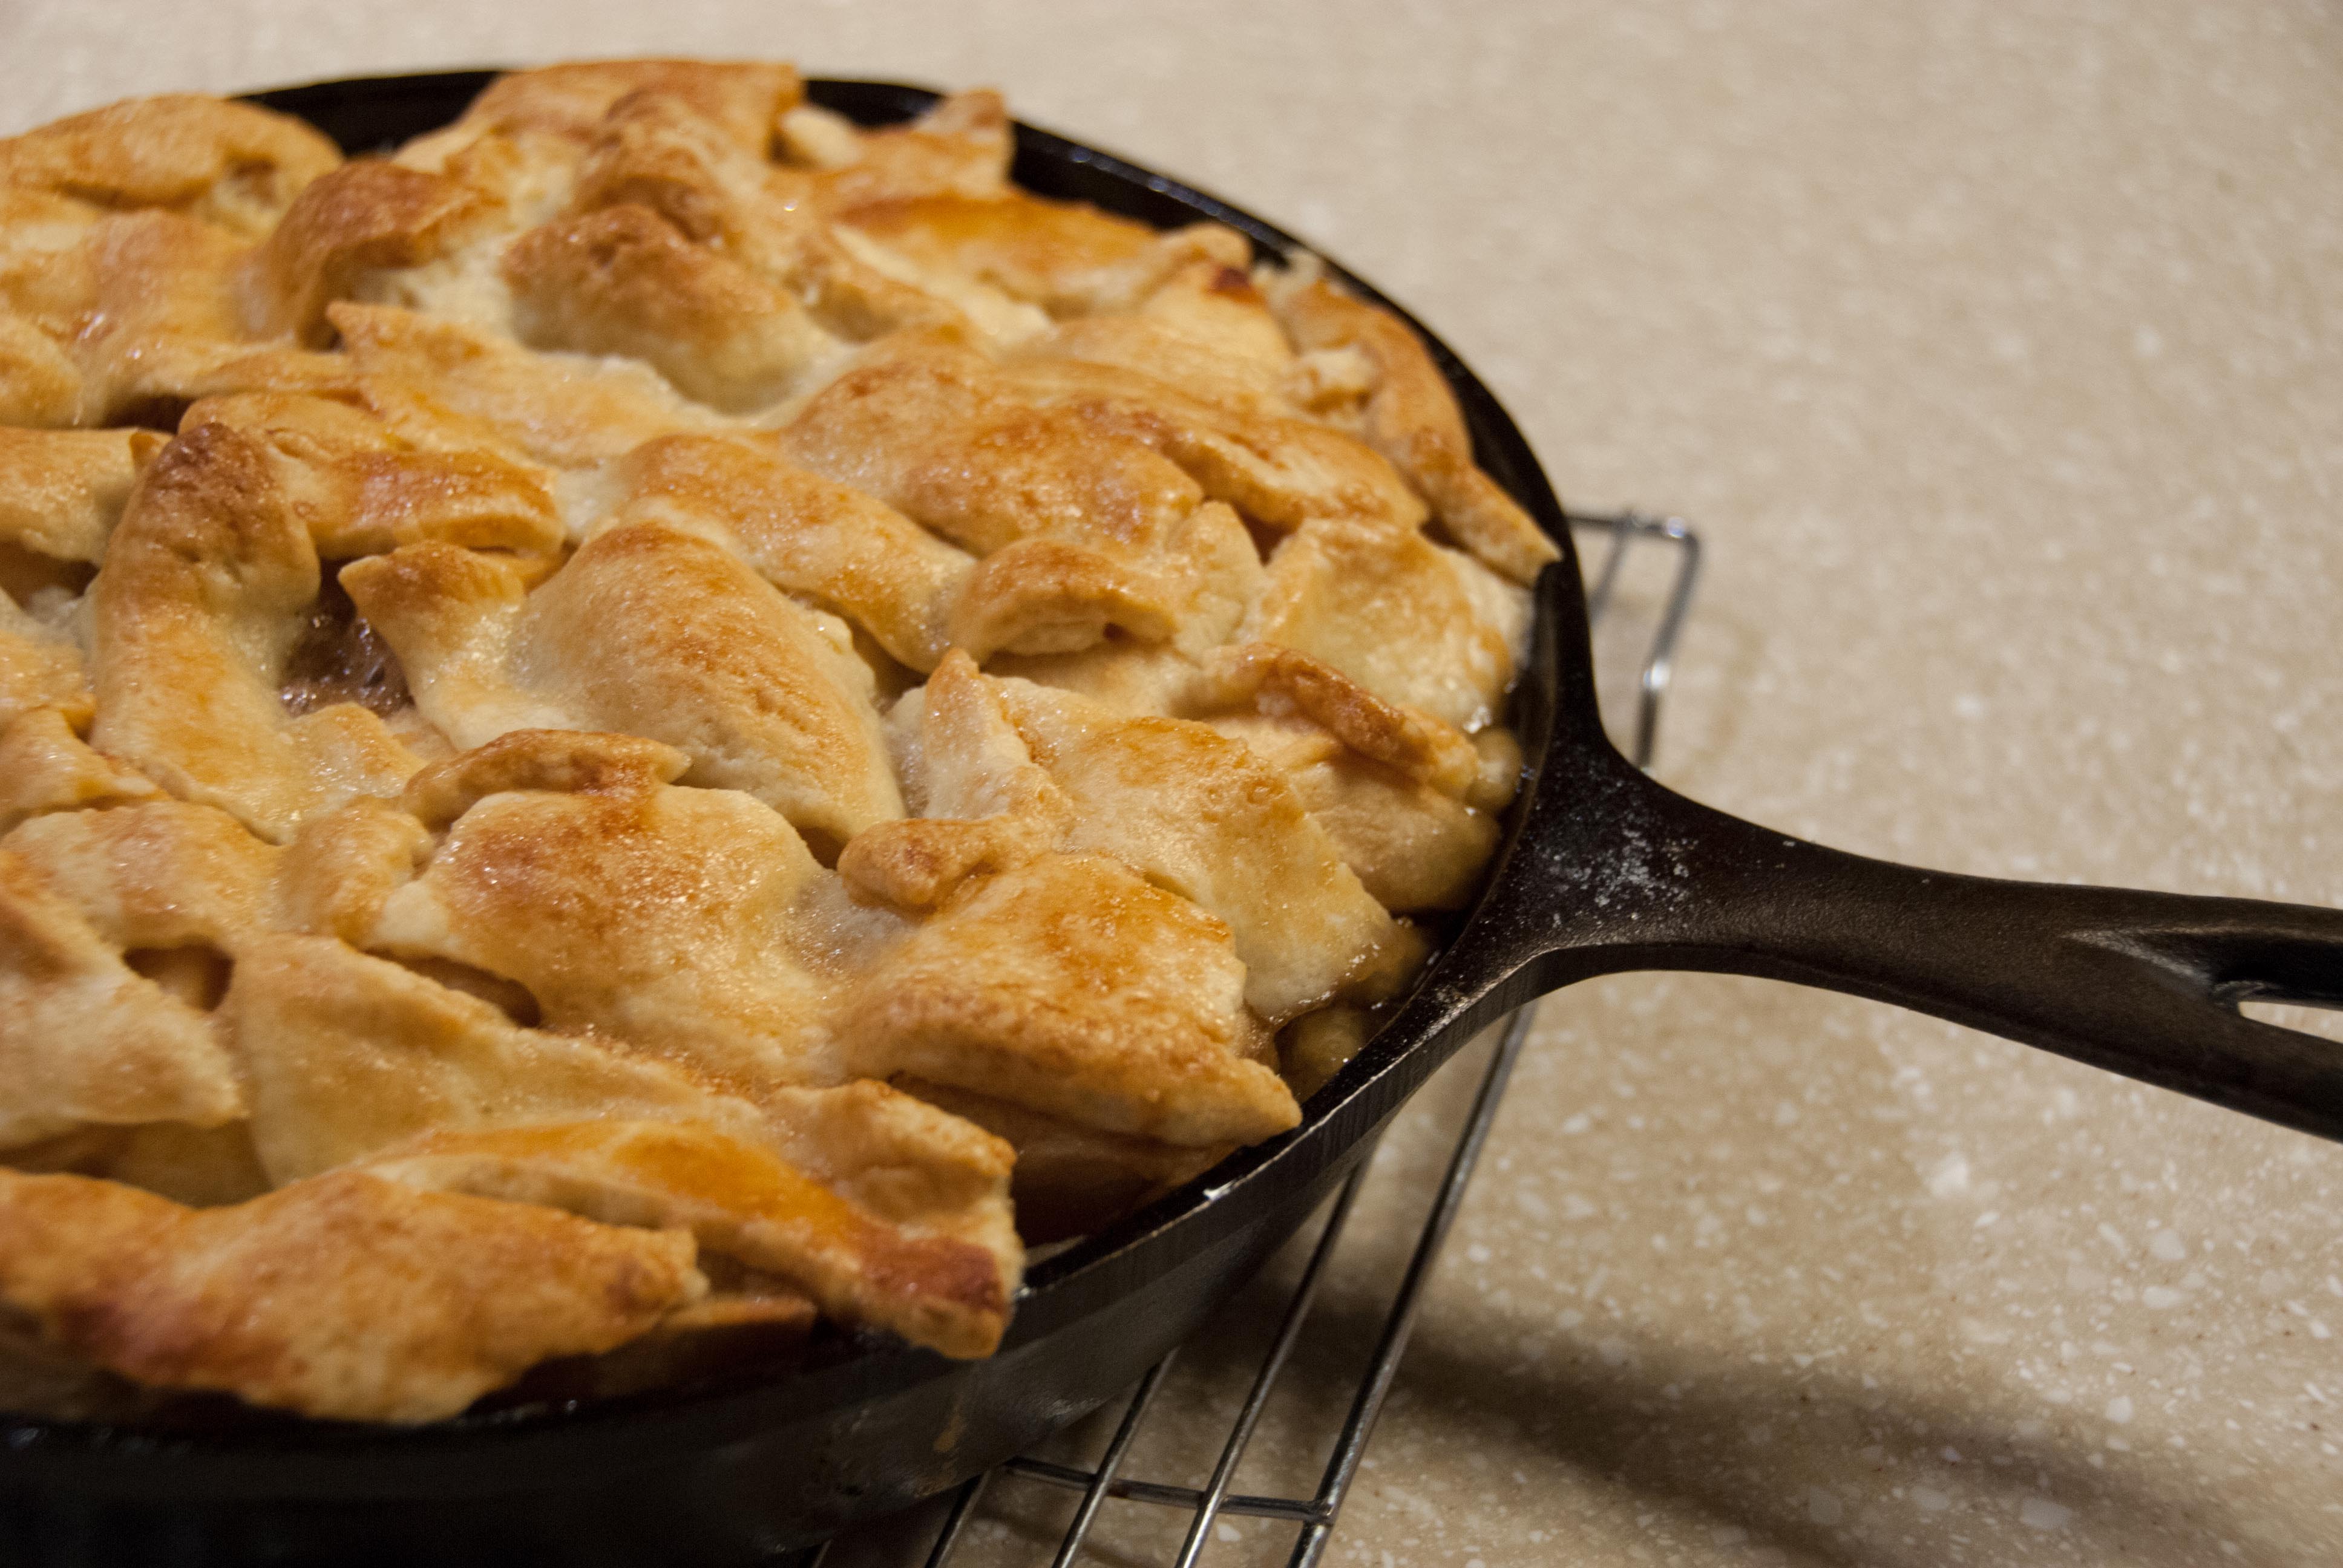
While I was waiting for my Xwhatsit controller I baked an Apple pie in a cast iron pan, from some left over apples we got from a local orchard. I didn't really spend much time making the crust look nice, but it was damn tasty. And yes, I did eat close to the entire pie, myself, in the matter of 2 days (I know that's what everyone was thinking :lol: )
DSC_0421.jpg
DSC_0421.jpg (866.66 KiB) Viewed 5669 times
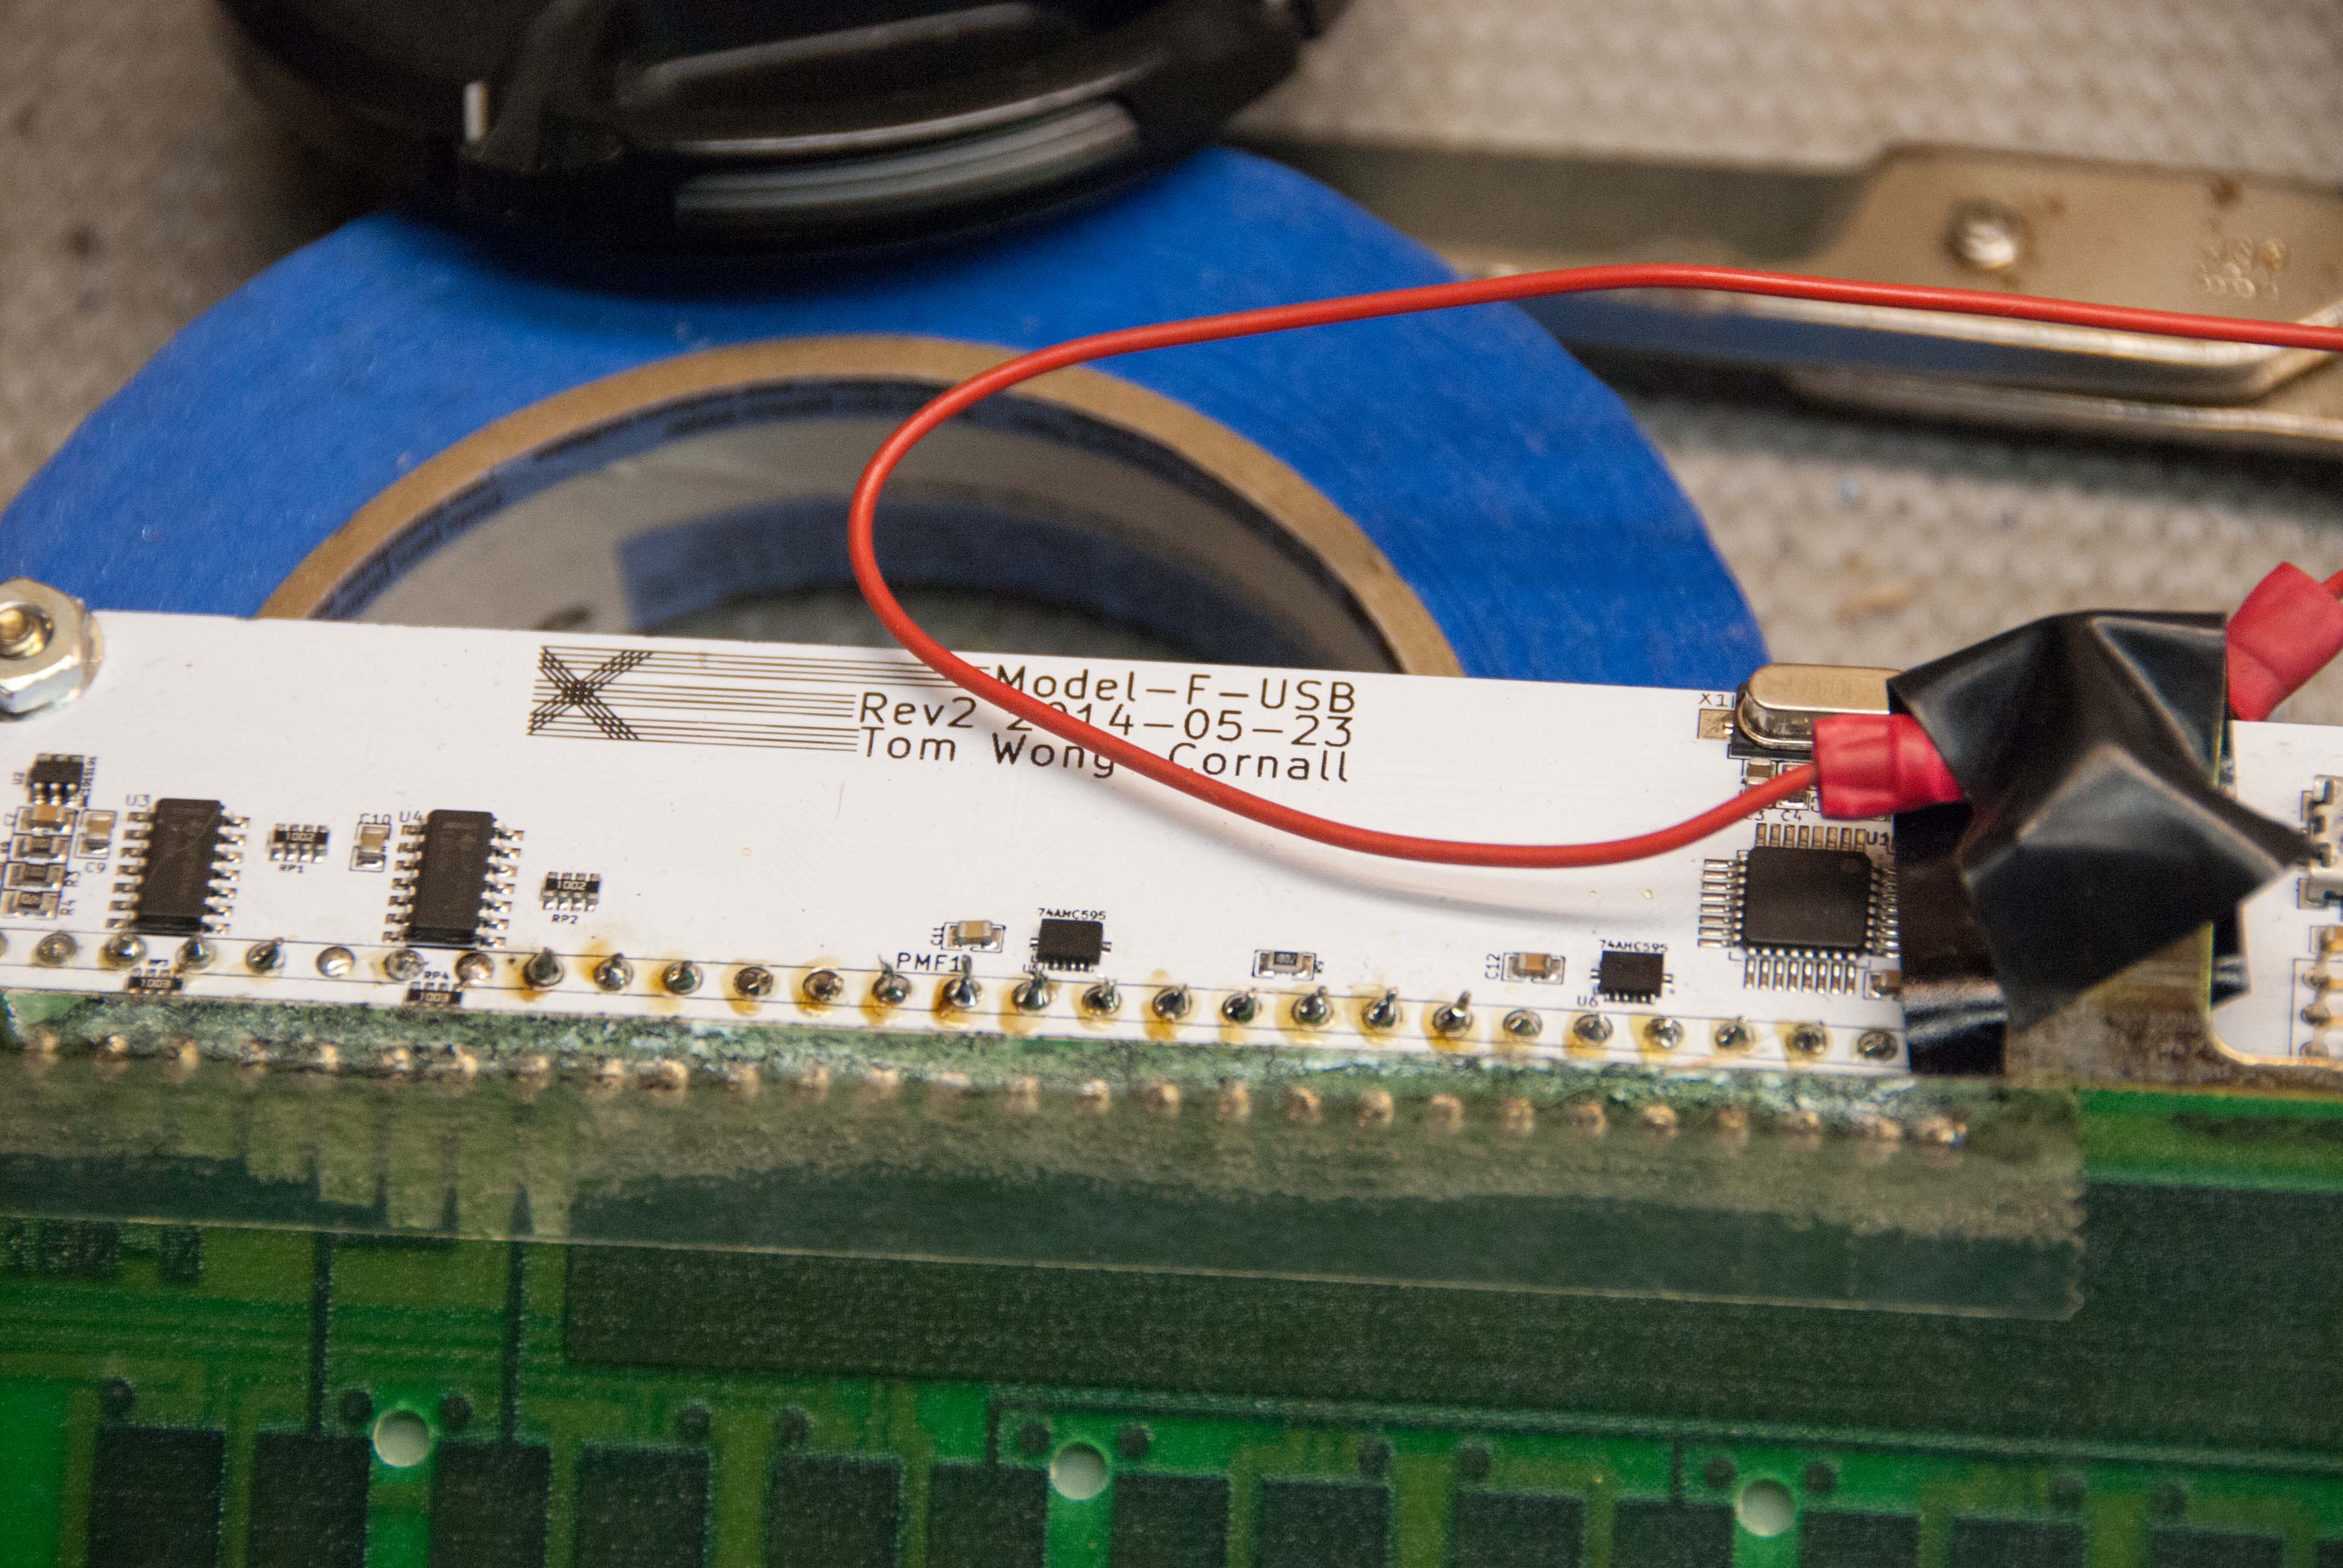
I need to clean up the excess solder flux, but it didn't turn out... too badly. The heating element in my soldering pencil in my soldering station is still damaged. So until I order a new one, I had to use a Weller, "plug in the wall" iron, with no temperature control :o Reckless I know...
DSC_0422.jpg
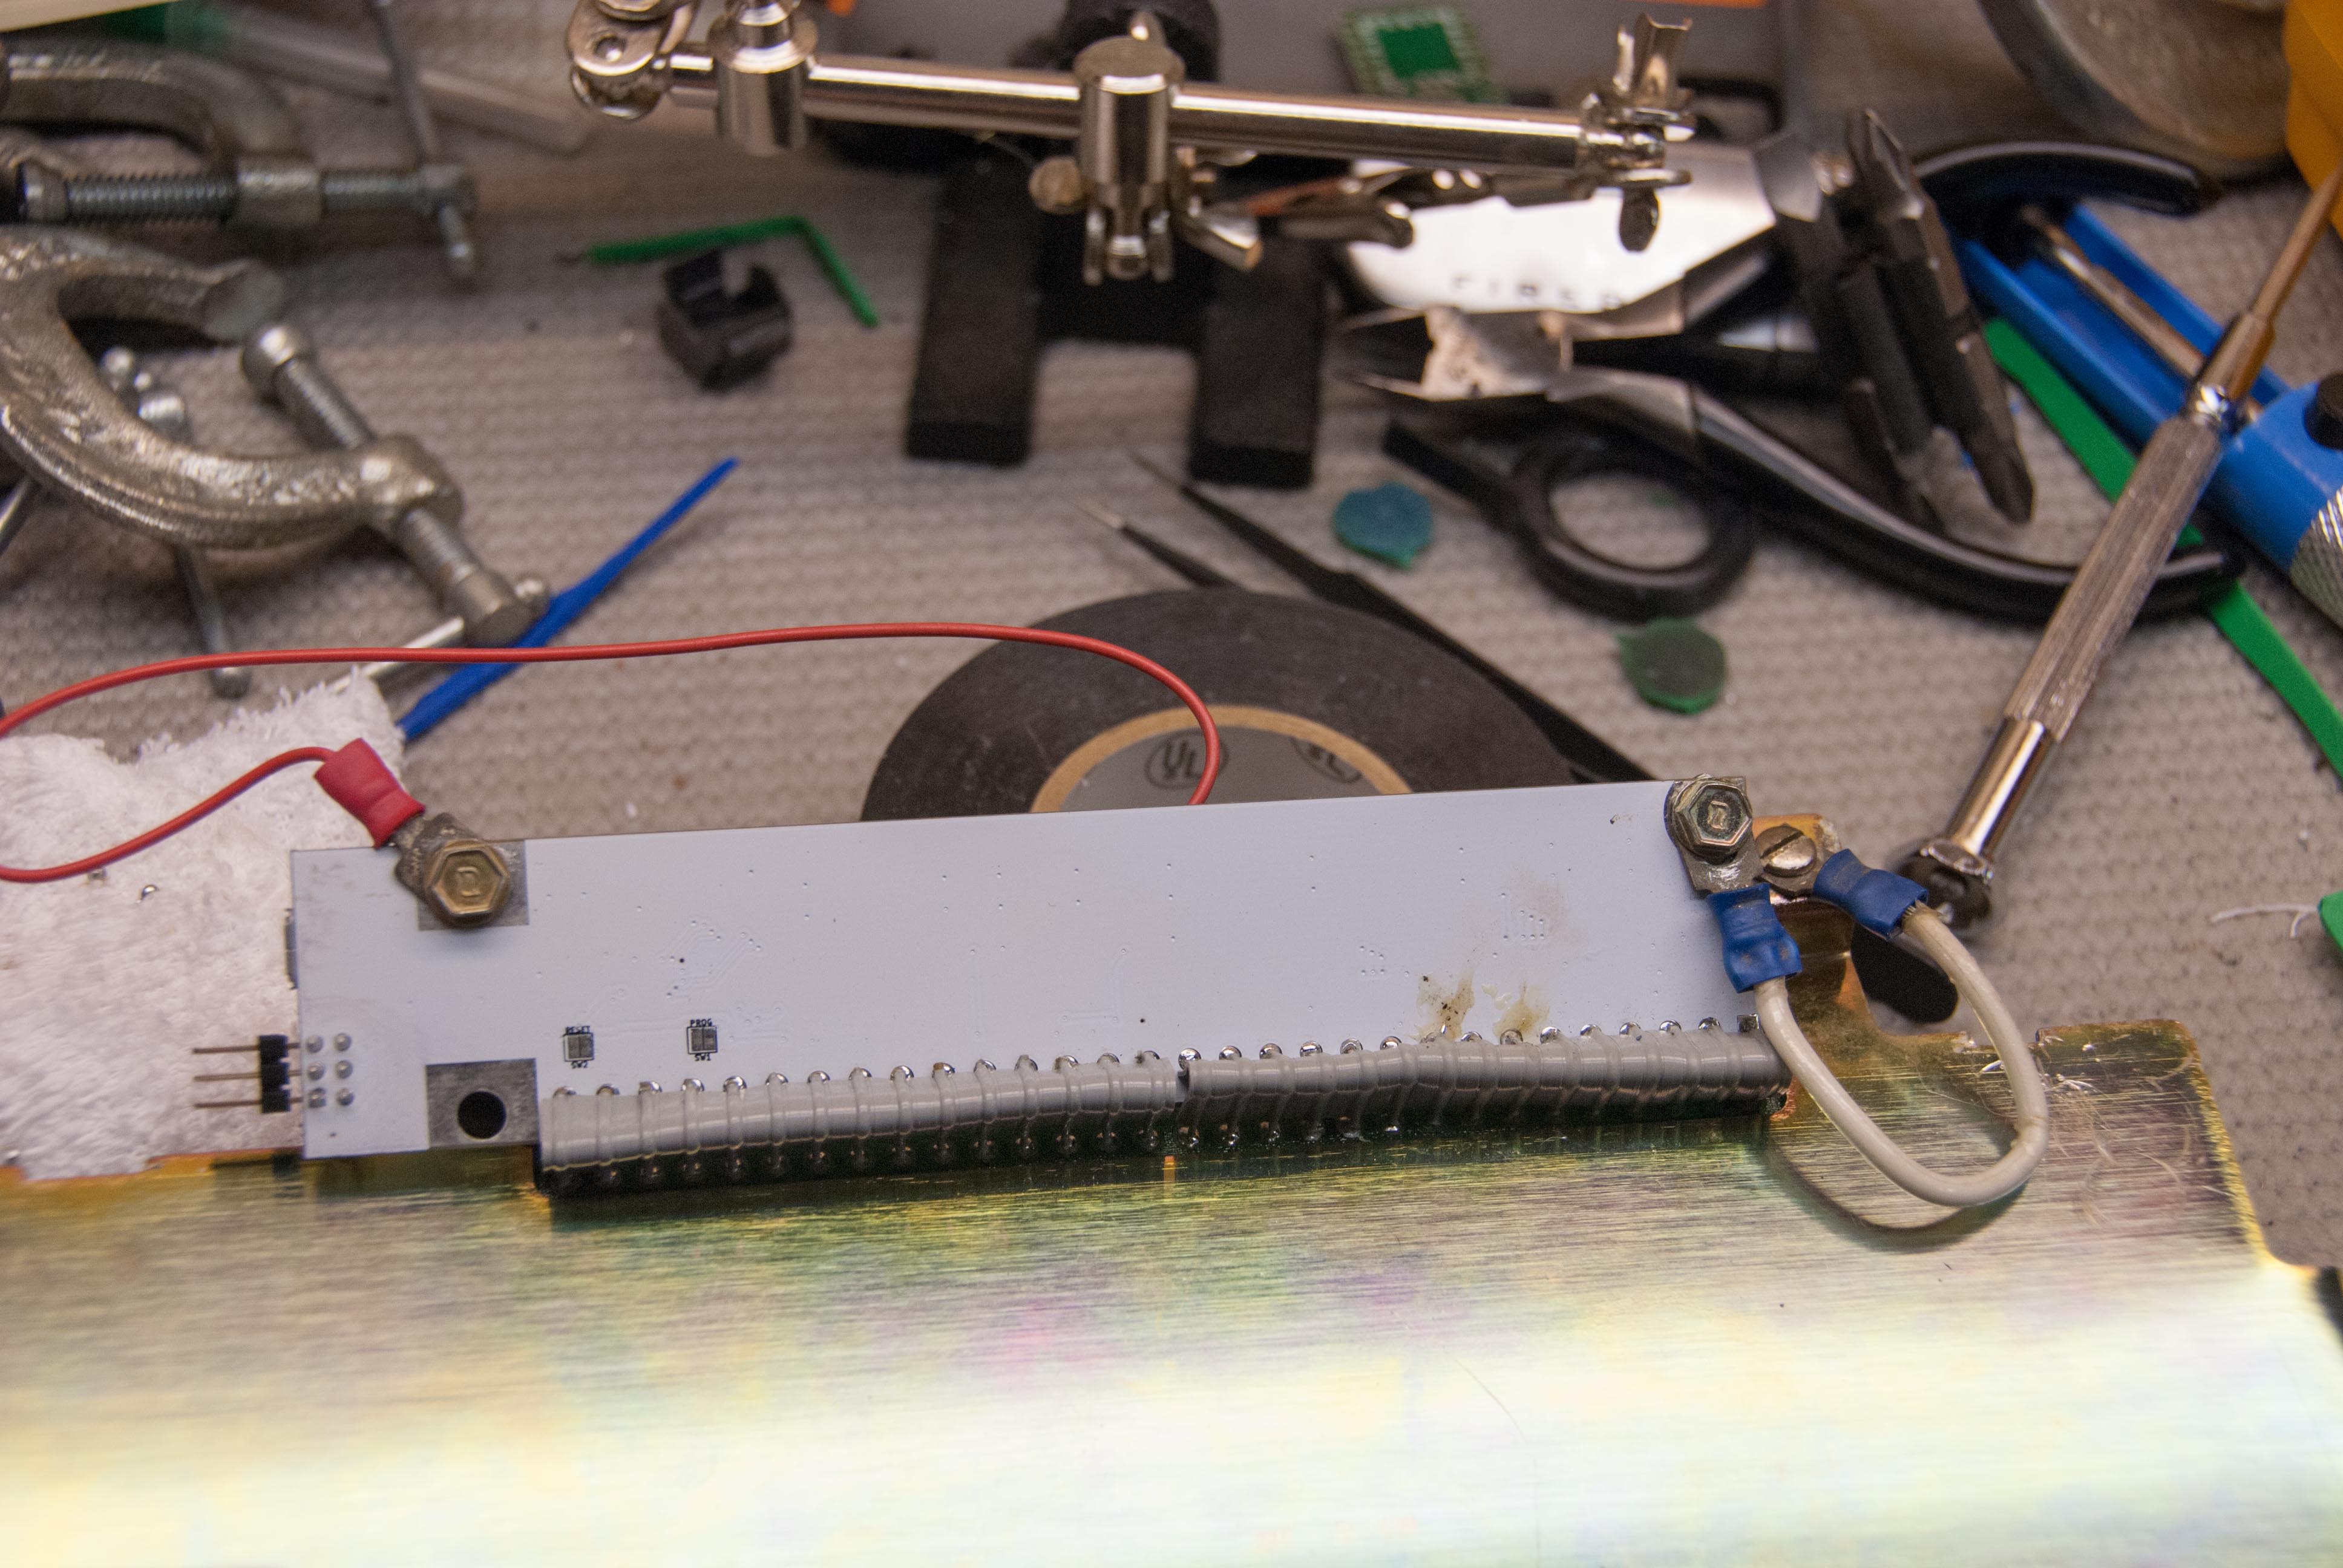
DSC_0422.jpg (851.84 KiB) Viewed 5669 times
I have since cleaned up the excess flux, clipped the ends, and replaced the red jumper with a shorter one. I had a pretty difficult time lining up the controller, and once I had finished soldering everything, I realized that it wasn't able to bolt into one of the tabs on the PCB - hence the jumpers on either side, to make sure it was grounded. It does fit into the case safely, with no strain, and everything functions properly. I may or may not try and make it look prettier, but it is a lesson for future boards. Make sure you get that ribbon cable safely de-soldered, and stripped, and ensure the controller bolts into a tab, before soldering.

Just some final comments on this update. I know the issue of foam has been beaten to death, but I will say that I have not had much of any luck using art foam. I believe it is just too stiff to work properly. I have tried art foam from both Michaels and A.C. Moore (a craft store on the East Coast) to minimal avail. 1 sheet of foam was just not enough. Middle barrels wiggled and pinged like crazy. 2 Sheets was way too much material, and using 1 sheet with a single strip of extra foam in the center row - worked, but still doesn't compare to how perfectly this 1/16" Super Soft Weather and Fire Resistant Neoprene Foam worked. That's the same foam that has been recommended plenty of times, by plenty of people.

I am going to be getting a Model M + an XT from Cindy soon. In addition to insert stabilizers from Unicomp. Next update will be final assembly. Long term update will be getting the case powder coated. :D

xwhatsit

06 Nov 2014, 05:34

Nice job!

Why was it that you couldn't bolt it into one of the tabs? Was the ribbon cable just bending too much? They usually go in OK... but the ribbon cable normally enters through the top of the controller, like the original controller. Well played on putting the grounding points in, I see you did your homework on that front :D

Post Reply

Return to “Workshop”