Page 1 of 7
IBM 107 FMK - IBM 107 472X-41-53951 - Lot of pictures
Posted: 28 Mar 2015, 00:47
by idollar
On popular demand the escape key has been replaced.
- DSC_2855.jpg (109.34 KiB) Viewed 9754 times
- DSC_2854.jpg (126.19 KiB) Viewed 9754 times
------
 -------- NAME THIS KEYBOARD ---------
The poll has ended. The keyboard is called IBM 107 FMK.
-------- NAME THIS KEYBOARD ---------
Here am I again with a new chapter of the lot of pictures series.
- Here there is a link to a similar post of my IBM AT that I posted before
- Here there is a link to a similar post on my IBM 1390120.
- Here you can find the link pointing to the IBM 122-F ES to US ANSI - Lot of pictures
This time I will do it somehow different. I will start this weekend with the restoration. I will post while progressing.
Index:
Posted: 28 Mar 2015, 00:47
by idollar
1.- Sticker and IBM demonstration that IBM repair included re-painting
I started today trying to understand what I had in my hands. The sticker existed but was hardly visible. It looked somehow dirty. I decided to remove it using heat. It worked perfectly. I heated the case from the back. As it is all metal, the heat when quickly to the other side of the case and soften the glue.
To my surprise, I realised that the sticker was not dirty but painted on the same color as the case. I used a cutter to scratch it and it went off. The letter and number were visible. I continued and I realised soon that it was actually consisting on two parts, a transparent plastic that was painted covering a metallic part.
The cutter scratches made minor holes in the plastic part, so I decided to be brave and try to separate both parts.
Again. I used the hairdryer of my wife

To make sure that the metallic bit was not bending, I used the same cutter blade to hold this part to the hard surface and pull from the plastic out. It worked.
I tried to clean the metallic part with alcohol.
DO NOT DO IT: the letter would dissolved. Fortunately, I realised soon that this was the case with minor damages.
Finally, I replaced the plastic with a new cover that I extracted from a roll that I have for these purposes.
My conclussion is that the IBM service centre, re-painted the keyboard during a service.
Some pictures of the process follow:
I will post additional pictures and information another day. I am tired now. I will continue latter with this project.
Posted: 28 Mar 2015, 00:48
by idollar
2a.- Paint-work - removing the paint and "BAD"
Hi,
This is posted in near-real time. The Molto Power Abbeizer is still operating in the keyboard.
But first things first:
Thanks to "snoopy" for the advices that he has been given me on how to do this. THIS POST IS YOUR POST !
This is the product that am using to remove the paint:
First I made a "bed" of plastic foil to keek the keyboard cover (top first) when removing the paint:
First round
I then applied a good cover of the Abbeizer
And then completely cover.
I waited 15/20 min and checked the result. Only the top part of the paint was removed. So I cleaned it with a putty knife and paper.
and surprise; another confirmation that the keyboard was repainted at a given point
Anyhow, as the Molto did not do the complete work, I have applied it again. this time I will wait more than 20min.
Second round
The paint does not dissolved after the second attempt. I scratched once more and applied Molto again (10:44 am)
It started to rain

Here is how it looked like after the second round:
Third and other rounds
At the end, I had to heat the case to remove it. It would not go at normal temperature.
I used the hair dryer of my wife, making sure that the air would not blow to me.
The result, after some work is impressive (to me).
You will notice that the right top part of the case is shiny. I wet-sanded.
Snoopy, I cannot apply any color to this metal beauty. It will be a transparent mat paint !
Wet sanding
I wet-sanded all the top but for the right part. I post a picture to show the effect.
Polish and final
And finally some polishing ...
To be continued with the bottom part of the case ...
Posted: 28 Mar 2015, 00:48
by idollar
2b.- Paint-work (no paint) - Final result
On Snoopy request (we say that this is his post
) there are some close ups of the result.
Thanks once more snoopy !
- DSC_9714.jpg (367.02 KiB) Viewed 10362 times
Posted: 28 Mar 2015, 00:48
by idollar
3.- Openinig the sandwitch
In the previous lot of pictures I focused in the final product. This time I have pictured the original status also.
The following pictures show how the sandwitch was put aside.
The first thing to do is to get some nice books to hold the set.
Then, after opening the metal bit that ensures that the sandwitch is not open by mistake during normal use, one can separate the parts.
Finally, we separate the barrels
This last picture shows how the old foam was "glued" to the top metal plate. Sanding will remove it.
Posted: 28 Mar 2015, 00:48
by idollar
4.- Sanding the top barrel
This process is simple: find a piece of nice sand paper (I always use wet-sanding) and clean the surface.
Some people removes the plastic parts. I don't. I am always afraid of them breaking.
Now it is time to take some close-up pictures
Posted: 28 Mar 2015, 00:48
by idollar
5.- The barrels
Once more, it is the moment to take some pictures of the barrels for future reference.
This time they are not cleaned
Posted: 28 Mar 2015, 00:48
by idollar
6.- The Flippers
Same process with the flippers
Posted: 28 Mar 2015, 00:48
by idollar
7.- The Original Controller
For future reference I took some pictures of the original controller
First when it was still attached to the PCB
Then after separation
The separation process will be documented latter ...
Posted: 28 Mar 2015, 00:48
by idollar
8.- The PCB
As stated before, this time I am taking pictures of the dirt in the PCB also
It was not that bad. So I guess that the PCB was cleaned when the keyboard was serviced.
You can compare the last picture above with the PCB after some alcohol cleaning:
Posted: 28 Mar 2015, 00:48
by idollar
9.- Back plate sticker
This is a single image for reference only
Posted: 28 Mar 2015, 00:49
by idollar
10.- New foam
This is the part that my neighbours hate: 107 holes with a pucher can be noisy !
Get the tools and the material:
Cut it with enough margin:
and using our friend the cut blade make some inserts to fix it into the barrels plate:
Go to the garden and using the same paint that we used to paint the barrel plate, spray it on top:
The result will look as follows:
And make the holes:
These little bastards will fly arround you:
I do not know why I took so many pictures form the final result. I post them all. This is a "lot of pictures" post, so do not complain
This is how the wooden piece will end up. Quite a torture !
Finally, cut the border that you do not need:
Posted: 28 Mar 2015, 00:49
by idollar
11.- Removing the original controller
I first tried to remove the old controller without cutting the ribbon cable.
I am not an expert soldering, but I have some experience. I COULDN'T
So I decided to cut it
To get access to the wire I made some vertical cuts. I then removed the in-between plastic. In the following picture you can see how one of these little parts is about to fall.
The final result after a long process follows.
Posted: 28 Mar 2015, 00:49
by idollar
12.- xwhatsit
The controler that I use is a xwhatsit. More information can be found
here
This piece of amaizing work will bring the keyboard back to live.
The following photos show how it was attached to the ribbon cable prepared in the chapter 10 above
Posted: 28 Mar 2015, 00:49
by idollar
13.- Plastic under the PCB
All the model F that I have restored had a plastic foil between the back plate and the PCB. To my surprise this keyboard did not have it.
So I decided to create mine.
First one should find something to do it:
We cut it to the right side. I used again my cutter blade to follow the edges. It is important to let space for the metal parts of the top plate. If not, the set will not come back together. I used tape to avoid displacement of the parts.
In the following pictures you can better see how it looks like:
Posted: 28 Mar 2015, 00:49
by idollar
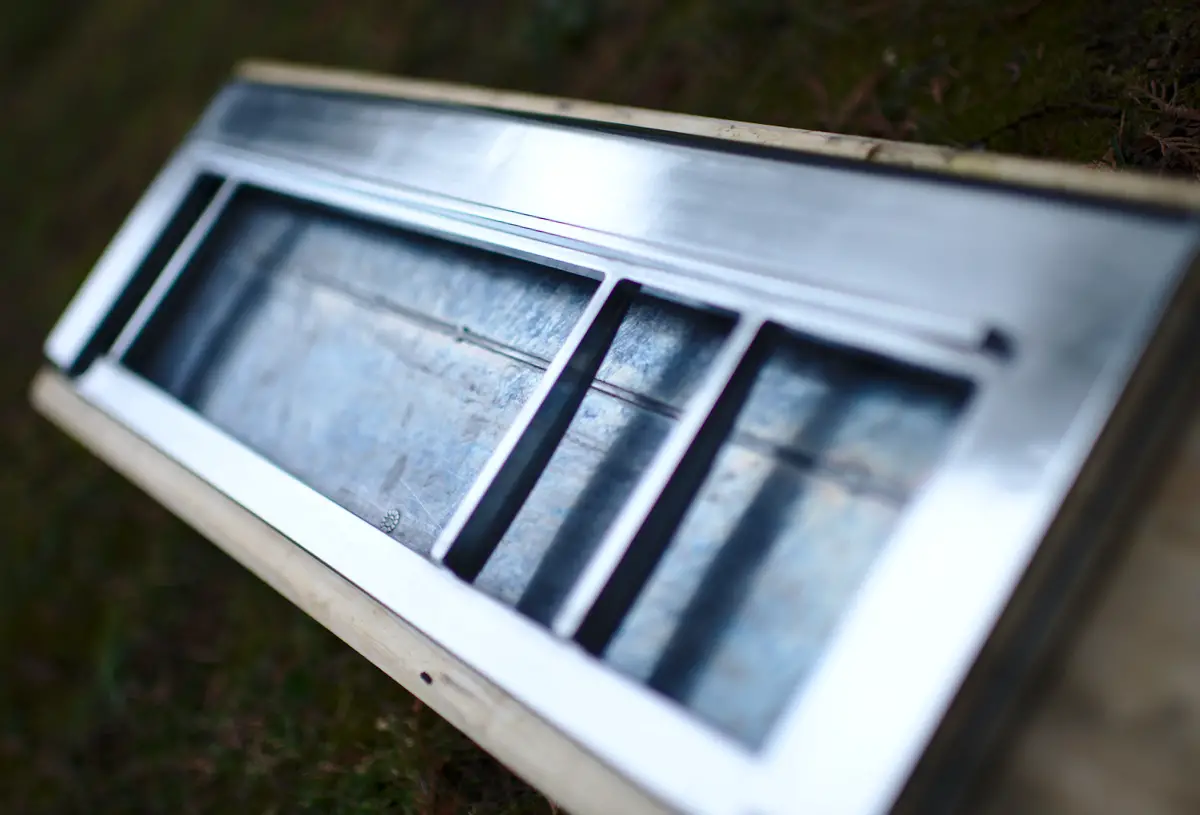
14.- Dimensions - PCB
I decided to check the size of a couple of parts for future reference:
Please, do not hesitate to ask for other details that you may need for your projects
Posted: 28 Mar 2015, 00:49
by idollar
15.- Dimensions - Barrel
Sorry, I should have choosen a better background:
Posted: 28 Mar 2015, 00:49
by idollar
16.- Dimensions - Flipper
Have you ever wondered how big are the flippers inside your F ?
Here is the answer
Posted: 28 Mar 2015, 00:49
by idollar
17.- Back together
Once the foam is ready, the top plate has been restored and repainted, the controller is installed and the barrels are clean, it is time to bring the swandwich back together
First one has to install the barrels in their place, and set the flippers and the inserts
Time to take some more pictures:
Next. take the PCB
And install = solder the beeper:
< I will post here the pinout >
Finally, put all parts in place, hold them with clamps:
And in vertical position, using a piece of good, hit the barrel plate down to make it fit with the bottom metal plate and the pcb.
Posted: 28 Mar 2015, 00:49
by idollar
18.- Grounding
The electic shocks that I was getting make me think seriously about the grounding
Fist I grounded the USB cable to the case:
Then I connected a wire between the controller, the back plate, and both parts of the case.
The following pictures show the resulting resistance.
I hope that this will be sufficient
Posted: 28 Mar 2015, 00:50
by idollar
19.- The PCB - Details
This is an overview of the front:
And the same overview from the back:
-----
Details from the front:
.... continues in the next post. I reached the maximum number of images per post

Posted: 28 Mar 2015, 00:50
by idollar
19b.- The PCB - Details
Details from the back:
Posted: 28 Mar 2015, 00:50
by idollar
20.- A mess, I broke the xwhatsit controller - 4h to repair it !
So, yes, I broke it.
It was not the controller of the metal keyboard but the controller from the other one that I had. The same one that temporarily donated the inners to this case to test it at work.
When I took it out, the cable broke the micro-usb connector:
You can see that the copper from the pcb went off with the connector, so there is no way to get it back,
The solution was either to get a new controller or to solder the cables directly to the components. That's what I did.
It took some 2 hours util I managed.
This image was fundamental to find where to solder the cables
This is where the cables go:
finally I put some plastic glue on top with a heat gun. It will maintain things in place:
Last, I added some glue to the other connector to avoid the same thing to happen
Posted: 28 Mar 2015, 00:50
by idollar
21.- Whatsit controller software
Hello again,
Today I post some pictures of the controller software. I found it easy to use and complete, very complete. THANK YOU whatsit !
The version that I am showing was compiled in a debian box. I run it as root (sudo).
I have also used the windows version without any problem.
Note that on the first picture, on the left top matrix in which the pressed keys are shown, I am pressing many simultaneously.
Posted: 28 Mar 2015, 00:50
by idollar
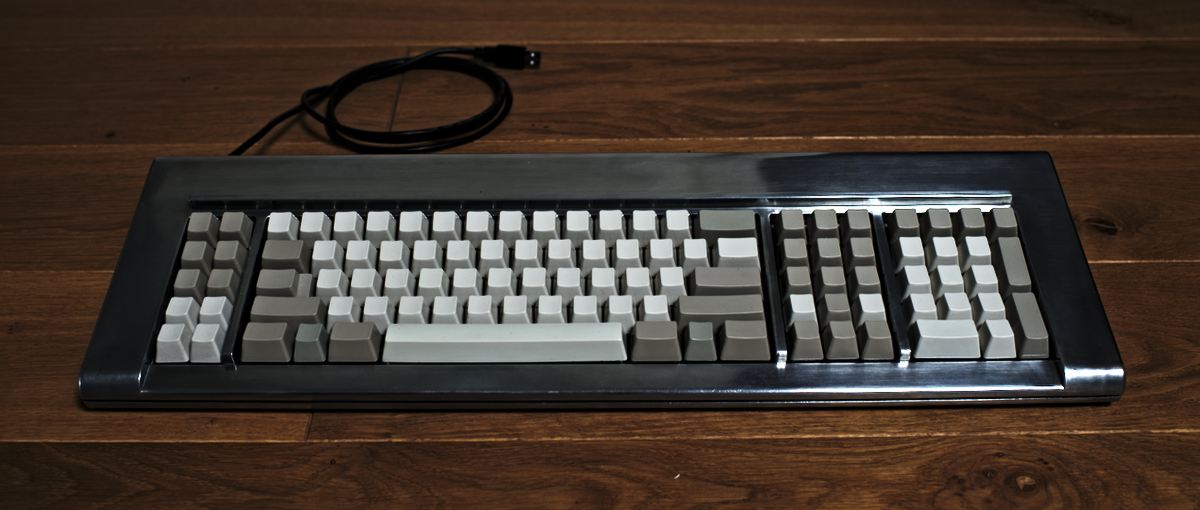
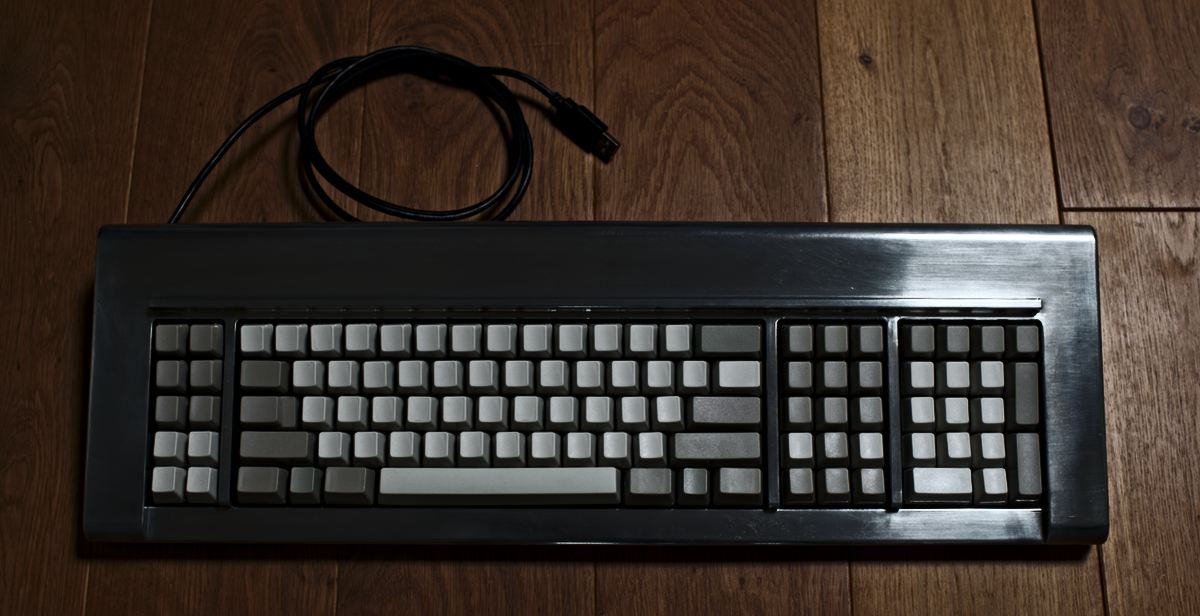
22.- Some pictures for the final result
And I still have 4 spare posts to fill if needed
I will post some pictures in some time with the final blank caps (I have to pass the USA to pick them up). Until then I "borrowed" the caps from a normal M.
Posted: 28 Mar 2015, 01:07
by idollar
(repetition of the last post for completeness)
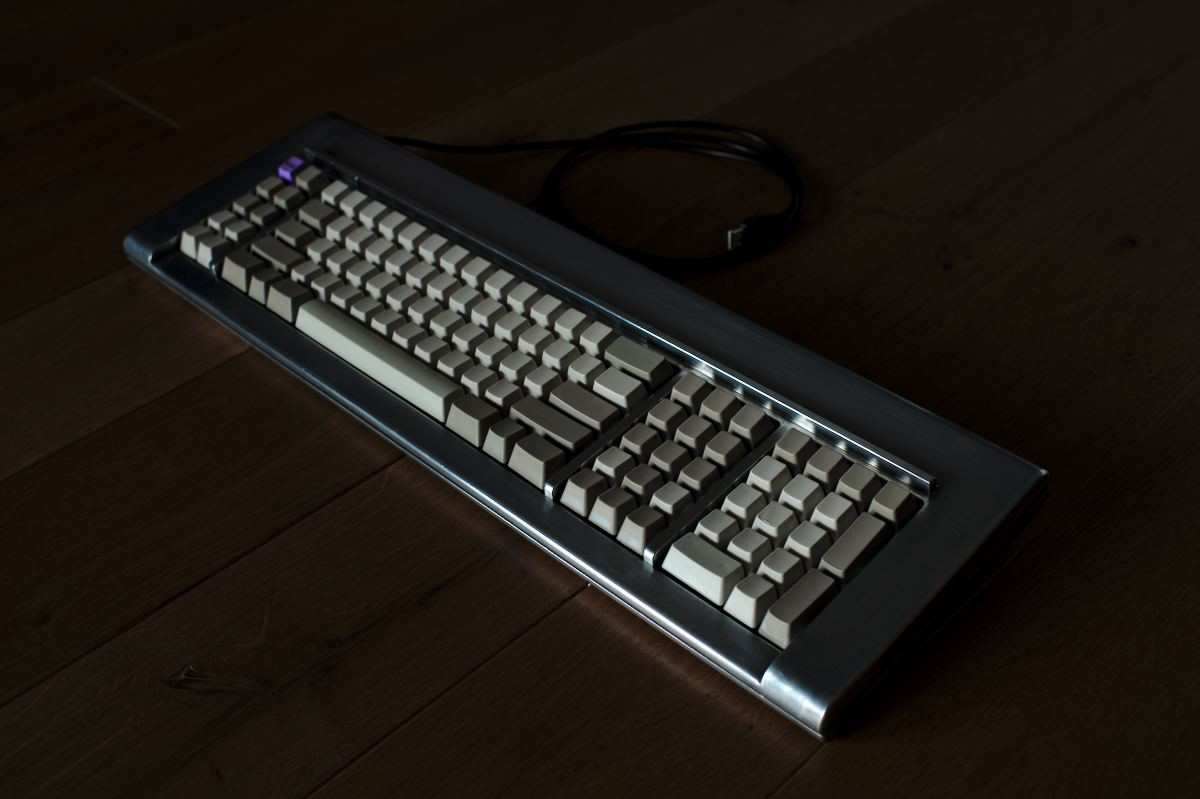
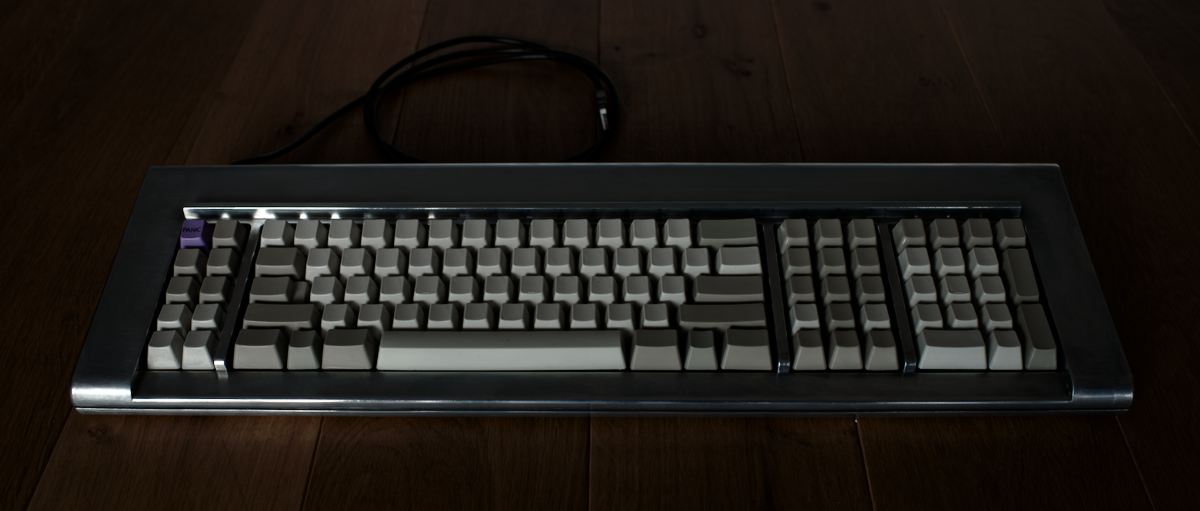
All,
I guess that we can close this thread with the attached pictures. I finally got hold of the blank keycaps from Unicomp !!
I have used some
steel wood 000 to create a mat effect that I like a lot. If you want to follow this process also, move the steel wool in circles.
We should also baptize officially name the keyboard the
"IBM 107 FMK" also. So we change the title of the tread.
I am using it in a daily basis at work.
Thanks a lot to all of you for your contributions !!!
i$
Posted: 28 Mar 2015, 01:07
by idollar
Place holder 27
Posted: 28 Mar 2015, 01:08
by idollar
Place holder 28
Posted: 28 Mar 2015, 01:08
by idollar
Place holder 29
Posted: 28 Mar 2015, 01:08
by idollar
Place holder 30 and last. Post your comments from here
