Page 1 of 2
How to open a non-mounted cherry MX switch?
Posted: 06 Mar 2012, 11:18
by Mrinterface
I'm working on my switch try boards and I know how to open a cherry MX switch which is mounted, but how do I properly open one that's not mounted?
The best thing technique I have a.t.m. is to hold it with a pincer and wriggle my way in with a tiny screwdriver but that is very very tedious. I already lost a spring that way since they tend to 'burst' open with this technique.
With the amount of work needed to open those non-mounted switches, I might as well start to desolder/solder them.
Any tips on techniques?
I posted this in Workshop since I guess the answers can benefit others as well.
Regards.
Posted: 06 Mar 2012, 11:55
by Ascaii
I have a small square piece of plastic foam that I stick the switch on, then I hold the switch between thumb and pointing finger, holding down the steam. click open with screwdrivers.
Posted: 06 Mar 2012, 11:57
by Mrinterface
Ascaii wrote:I have a small square piece of plastic foam that I stick the switch on, then I hold the switch between thumb and pointing finger, holding down the steam. click open with screwdrivers.
Thanx. Gonna try that.
Posted: 06 Mar 2012, 12:00
by Icarium
I'm not sure I understand the problem. I just use two toothpicks to open each side a little and then pull them apart. I've never had one burst open but maybe I'm just working a lot slower than you.

Posted: 06 Mar 2012, 12:16
by Mrinterface
Icarium wrote:I'm not sure I understand the problem. I just use two toothpicks to open each side a little and then pull them apart. I've never had one burst open but maybe I'm just working a lot slower than you.
Two toothpicks at the same time for every side? Gonna try that as well....
EDIT : the problem is that I don't want to damage the contact wires when opening them so I can't just push them on a table and open them since the wires will get damaged.
Posted: 06 Mar 2012, 20:21
by harrison
i'll see if i can take a quick vid tonight... i just got done with ~300 of them after desoldering two keyboards and breaking down the switches.
i hold the switch in my left hand (i'm right handed) between my index and thumb, with the stem pointed towards the palm of my hand. i use a small flat head screwdriver to press and twist on one of the top case legs until the spring tension pops the leg over the notch. i then use my fingernail in the separation between the housing, and use the screwdriver on the second leg. at this point, the top case is half off. i rotate the switch, and hold it using my middle finger and thumb, with my index just touching the stem. i then release both of the other case legs.
my index finger holds a small amount of tension on the stem, so that the stem/spring don't go flying.
alternatively, when you flip the switch over, you can hold it between your index and thumb, but on the sides of the housing so that the pressure from your fingers don't allow the housing to separate more than a few mm when the two legs are released.
How to open a non-mounted cherry MX switch?
Posted: 07 Mar 2012, 16:52
by Mrinterface
Thanx harrison, now I have four techniques I can try....
Posted: 17 Mar 2012, 06:20
by hasu
I'm not sure this solves your problem though.
I made limmy's cherry opener the other day and I found it is easier than precision driver.
 http://www.kbdmania.net/xe/index.php?mi ... rl=3520312
Posted: 17 Mar 2012, 08:59
by Maarten
Oh that looks alot like the tool i use, only mine is longer so i can press the ends of the 'handles' up against each other without over bending (and possibly breaking) the plastic housing top.
Posted: 28 Mar 2012, 00:49
by symphonic
Oh man I started typing a reply about using binder clips, and then saw the above post! I guess that no idea is a truly new idea.
I don't put my ends inside though, but rather lever up the plastic by rocking back from the outside of the switch case.
Posted: 31 Mar 2012, 09:06
by Julle
I don't if my method is any better than the ones mentioned here before, but this is what I like to do: I take two top halves of a Cherry MX switch housing and super/hot glue them upside down on a piece of board. I attach them to the board (a little less than switch width apart) so that when you lower an intact switch between them, the clips pointing upward will enter between the clips of the intact switch, opening all four sides at the same time.
This method opens the switches very effortlessly and is very gentle to the switch housing as well.
Posted: 31 Mar 2012, 09:15
by Tarkoon
Could you make a photo of this construction?
Posted: 31 Mar 2012, 09:44
by Julle
It's not pretty, but it darn well works! My arrows are a bit misleading, the 8 millimetres is the distance between the inner surfaces of the switch clips.
With this you can only open plate mounted switches:

But if you want to open both plate and PCB mounted switches, you have to do a little surgery:


Works like a charm! the top half of the switch won't be flying anywhere, since it's being held by the clips on my opening jig.

Posted: 31 Mar 2012, 10:17
by Julle
One thing I forgot to mention: it's a good thing to reinforce the clips on the jig with some hot glue as well so they won't bend in use.
Posted: 31 Mar 2012, 10:19
by Mrinterface
Great stuff there Julle..... How did you get to this idea? Trial and error I guess
Posted: 03 Apr 2012, 17:16
by Maarten
WOHOO!!! An excuse to try out my new close-up video rig! unfortunatly my PC didnt wanna eat the camera drivers so its still pretty crappy quality-wise but at least the lighting and stuff is ok;
As you can see i did all the dis-assembly with GLOVES for two quite simple reasons; First is that if i can do this kind of fiddly thing with gloves then everybody should be able to do this job... And second, well, my hands are a crappy bloody mess and i dont wanna ruin anyones appetite here

! Hope you guys like!
Posted: 03 Apr 2012, 17:41
by Mrinterface
Great vid!
Your hands are a bloody mess? Do you have a cat with a temper?
Where did you get those two pincers from? Self-made?
Posted: 03 Apr 2012, 17:57
by Maarten
Mrinterface wrote:Great vid!
Your hands are a bloody mess? Do you have a cat with a temper?
Where did you get those two pincers from? Self-made?
Bloody mess.. well yeah, cat did help that much but main causes are working on the car.... i use gloves till i have to some something under an absurd angle or tight spot i have to work on and when i go on with the regular work i kinda forget to put em back on again.... And ive also been working in the garden alot last couple of days with the basic same problem

Also cut my finger a little while ago quite deep with an x-acto blade, wound wouldn't close so i had to tie my finger with rubber bands and spuer-glue it all back together. Works like a charm just isnt very pretty.
And yeah, 'tools' were made from good ol regular paperclips bent into the rouigh shape you see in the vid and filed to a sharp-ish point. Here's pics cuz i know yall love those;


I also added some shrinkrap so they are a bit easier to handle and so i dont accidentally mistake em for 'regular' pieces of left over paperclip and toss em when cleaning up
Posted: 13 May 2012, 20:58
by Kurk
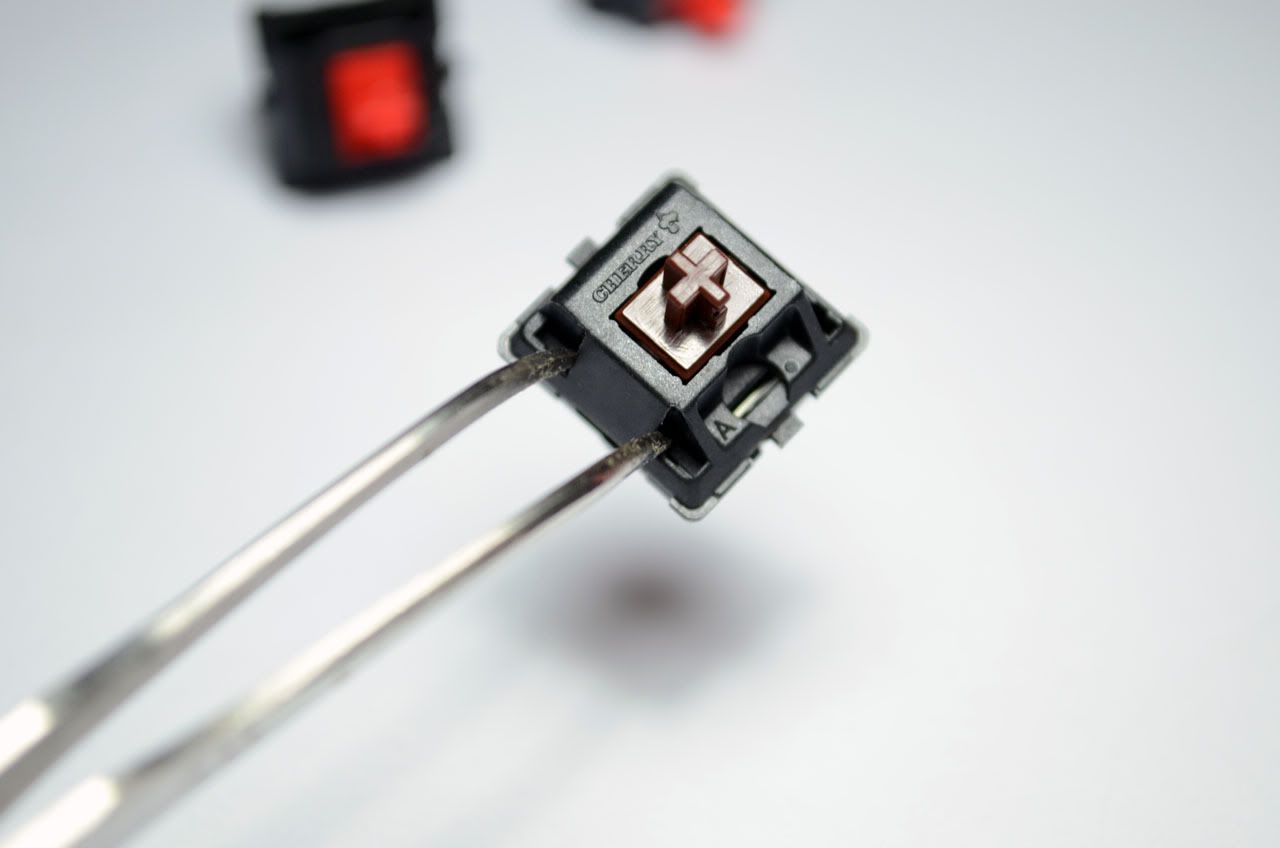
Here's my technique: it involves a pair of modified angled tweezers (tips bent by 90°) and a small screw driver. I've tried it with two tweezers but the tweezer-screw driver combination works better.
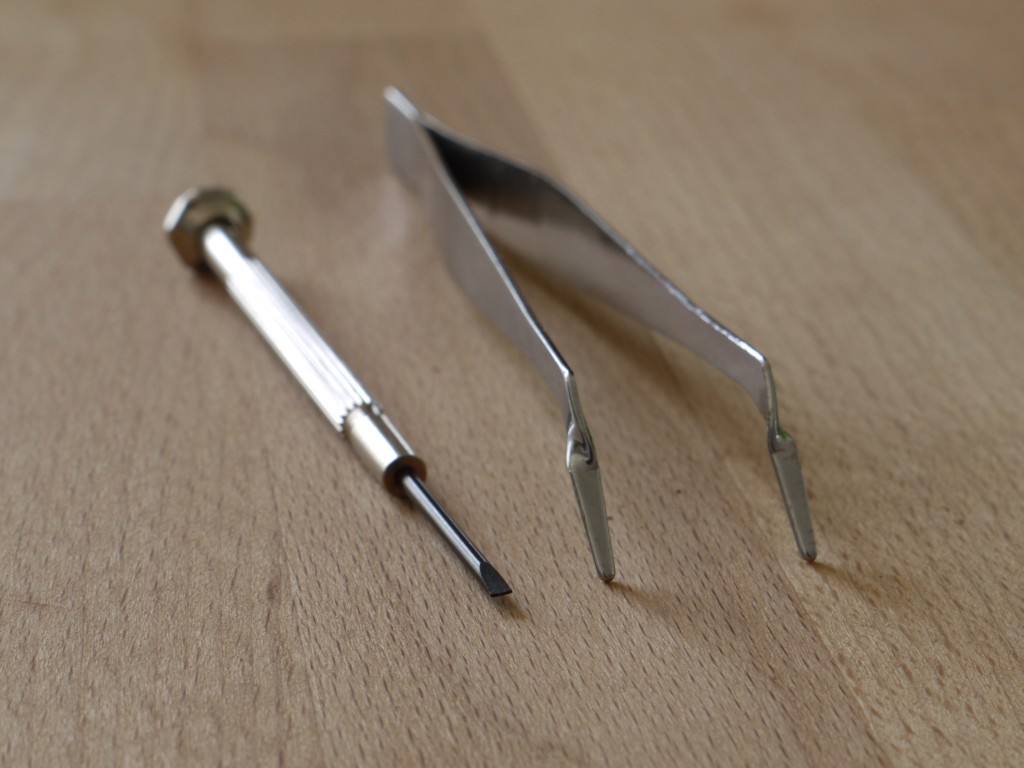
- The tools.
- opencherrytools_resized.jpg (137.07 KiB) Viewed 14129 times
Posted: 23 May 2012, 00:30
by off
Hey Kurrk, did you heat it before/while twisting the tweezer ends, or just plain vanilla twisted them?
'Cause that does look like an even nicer tool than the paperbinder I was planning to sacrifice (copying someone else)..
Posted: 23 May 2012, 10:04
by Kurk
off wrote:Hey Kurrk, did you heat it before/while twisting the tweezer ends, or just plain vanilla twisted them?
'Cause that does look like an even nicer tool than the paperbinder I was planning to sacrifice (copying someone else)..
I've just bent the ends using two pliers. This may only be that easy with *cheap* tweezers. The ones I used were 1 EUR for a set of four different shapes (at a local "Karwei" DIY store, or was it the "Gamma"?).
Posted: 23 May 2012, 15:35
by ripster
Fondue forkOdeath!
http: //geekhack.org/attachment.php?attachmentid=5054&d=1255001310
Posted: 03 Jun 2012, 18:35
by squarebox
Here's my method...
Make sure you inside of the slots.
Posted: 08 Jun 2012, 09:54
by bpiphany
This is how I usually do it. It makes my thumb hurt after a while though, so I probably should replace my method with something better. I really like Maarten's paper clips. It would be great if they were one piece, longer, and tweezer like. Adjusting the spread squeezing them together while inserting both sides at the same time. And after that squeezing further to do the popping.
http://flickr.com/gp/67486915@N03/48q8ie sorry for the quality...
Posted: 14 Jul 2012, 19:13
by tubby
I made this "tool" from a tin plate =)

Not sightly, but it really helps in popping off a switch, whether it's mounted or not.
Posted: 05 Oct 2012, 17:27
by maxrunner
Maarten wrote:WOHOO!!! An excuse to try out my new close-up video rig! unfortunatly my PC didnt wanna eat the camera drivers so its still pretty crappy quality-wise but at least the lighting and stuff is ok;
As you can see i did all the dis-assembly with GLOVES for two quite simple reasons; First is that if i can do this kind of fiddly thing with gloves then everybody should be able to do this job... And second, well, my hands are a crappy bloody mess and i dont wanna ruin anyones appetite here
! Hope you guys like!
Hi there! Where can i get two of these??That looks way easy to open the switch
Posted: 05 Oct 2012, 17:39
by kbdfr
maxrunner wrote:Maarten wrote:[…]
Hi there! Where can i get two of these??That looks way easy to open the switch
Please do
read first what Maarten wrote just a few posts ago on this very same page:
http://deskthority.net/workshop-f7/how- ... tml#p40927
Posted: 05 Oct 2012, 18:15
by maxrunner
Yep, interesting, i need to find a good tool for this.I'm going to mod my G80-3000 with other switch type. I dont really like blacks. But i do like browns and blues, any advise on wich one i might consider changing, i'm interested in testing others. People seem to like the ergo clears....i need the clears stem plus what kind of spring, a blue/brown one?
Posted: 05 Oct 2012, 20:31
by Vierax
max > I have to repeat myself : I beg you to RTFM please. With the wiki and this forum you really can find easily those infos you ask.
Posted: 05 Oct 2012, 20:41
by RC-1140
To be honest, you're getting really annoying. Read before you post.
All the information you're asking for can be found in the wiki. If you read the posts above, you would have known that Maarten made this tool by himself out of paperclips. Also if you read the wiki you would have known that Ergoclears are made from Clear stems with Blue/Red/Brown springs.
RTFM. Really.