My 4704 Restoration thread

User avatar
Touch_It

17 Nov 2014, 03:41

Image
My beauty untouched.

Image

Back side. If I'm reading the date correctly of April 4th, 1986 its 4 days short of my birthday + 2 years. My bday is 4/11/1988. Thought that was pretty cool.

Image
Back plate with some corosion. Not sure what the sticker was. Maybe this was refurbished in 1996?

Image
Controller board.

Image
Top plate stripped (not clear coated yet).

No pics of the bottom plate as the paint is crazy on it. Used a whole can of paint remover and its still mostly covered in paint. It most definitely would have survived a direct nuclear blast.
Spoiler:
Image
Couldn't resist looking. If you didn't notice my Xwhatsit controller is phtobombing. Haven't opened the package yet.

Planning on putting a solenoid in it. Also planning on doing an ANSI layout with black blank modifiers and white Alpha-numeric keys. Haven't decided what color scheme I want yet for the left and two right columns. To many decisions!

quantalume

17 Nov 2014, 17:28

Did you polish the case, or was that what it looked like when you removed the paint?

User avatar
Touch_It

17 Nov 2014, 17:33

It looked like aluminum starting to oxidize. I took sandpaper (not sure on grit) to it sanding evenly back and forth in straight lines to somewhat mimic brushed aluminum.

User avatar
Muirium
µ

17 Nov 2014, 17:33

Hot damn. My Kishy is like that underneath!?!

User avatar
Touch_It

17 Nov 2014, 17:34

Yep!

User avatar
Muirium
µ

17 Nov 2014, 17:37

All right, this is now officially a Thread of Interest to me!

User avatar
Touch_It

17 Nov 2014, 17:40

Look forward to sharing. Giving a fair warning though. Progress has been slow and will likely continue to be due to time (and somewhat money).

Edit, over on DT there is a thread I believe dedicated to restored kishsavers. There are a couple that have this finish if you want a sneak peek.

User avatar
fohat
Elder Messenger

17 Nov 2014, 20:20

Muirium wrote: Hot damn. My Kishy is like that underneath!?!
I don't have a metal Model F, but I never understood why anybody would paint one after they got it naked.

User avatar
pyrelink

18 Nov 2014, 13:04

Damn. That bare metal just looks awesome! It would also be a hell of a lot cheaper then paying $250 or so to get it powdercoated, and I could do everything myself... I might just have to copy you!

User avatar
Muirium
µ

18 Nov 2014, 13:10

And this is why I shouldn't have greedily kept a nice looking one. Paint stripping is so much easier when it's already grubby!

@Touch_It: feel free to spell out precisely what you did (and will do for preservation) in pedantic, excessive detail. Some of us in the audience want to play along at home!

User avatar
Touch_It

18 Nov 2014, 17:07

I sure will. Busy at work right now but I'll write up a more detailed report on what I did and how, as well as what not to do later today or tonight.

Edit. Was too busy/tired last night. I will try to elaborate on my process so far this evening.

User avatar
Touch_It

20 Nov 2014, 04:16

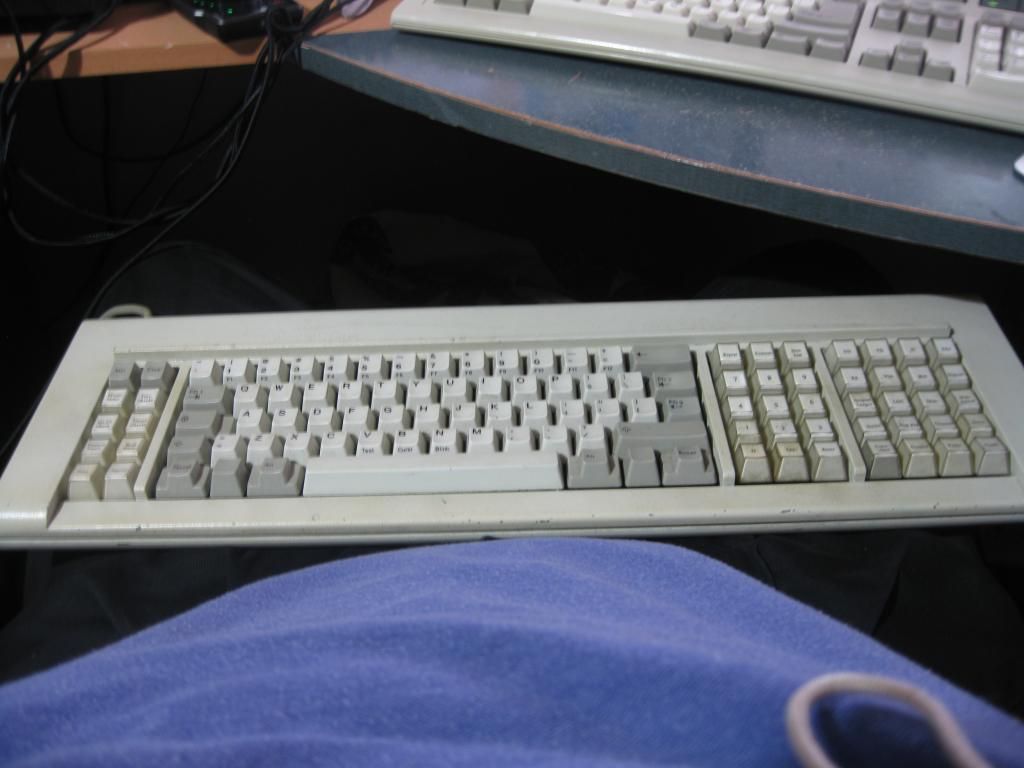
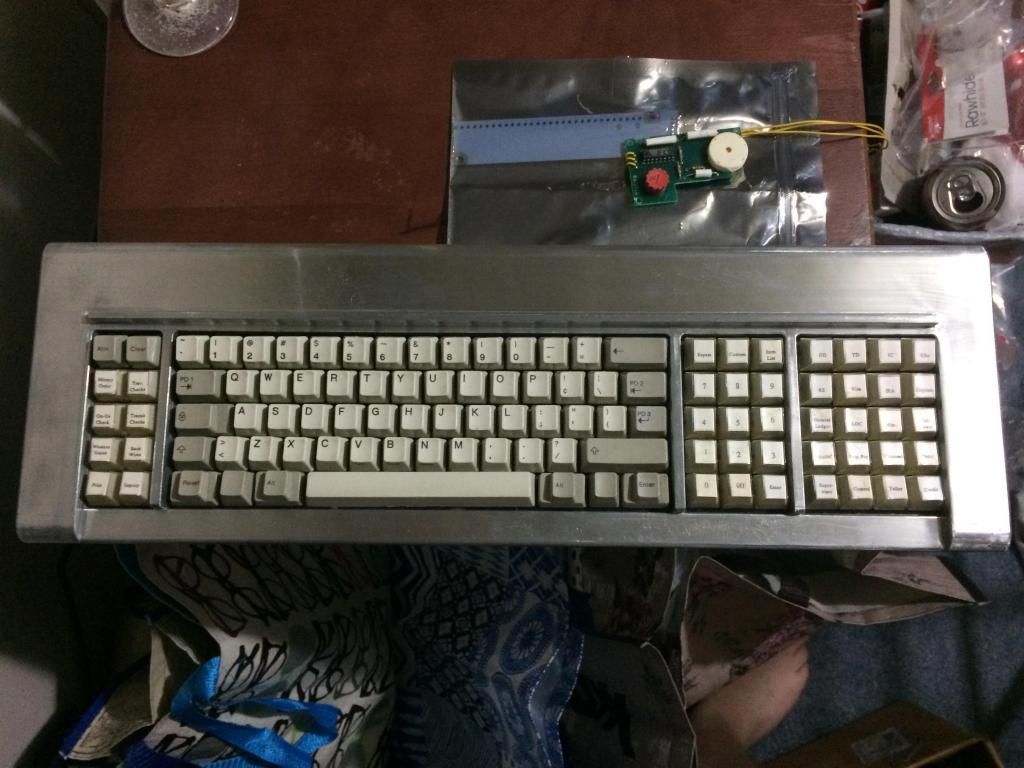
Alright, I'll shed some more light on what I've done so far. So far as you can see I've taken the outer shell off. I decided to strip it of paint and go for a brushed aluminum type look. I needed to go to Menards for some bathroom remodeling supplies so I thought it would be a good time to pick out some paint stripper and a clear coat product. In the end I decided to go with Zinsser StripFast Power Stripper Spray. (Link below)

[spoiler][url]http://www.menards.com/main/paint/clean ... c-8157.htm[/url][/spoiler]

For the clear coat I will be going to put on I decided to go with Rust-Oleum Painter's Touch Ultra Cover 2X Clear Satin Spray Paint - 12 oz. I chose Satin as I didn't want to much gloss on the shell but figured it would be easier to clean than semi-gloss. Hopefully I made the right choice. I'll find out this weekend when I do some painting. (Link for product below)

[spoiler][url]http://www.menards.com/main/home-decor/ ... c-8050.htm[/url][/spoiler]

On to the actual work. I would 200% stress following the directions on the paint remover very closely (I didn't and I regret it).

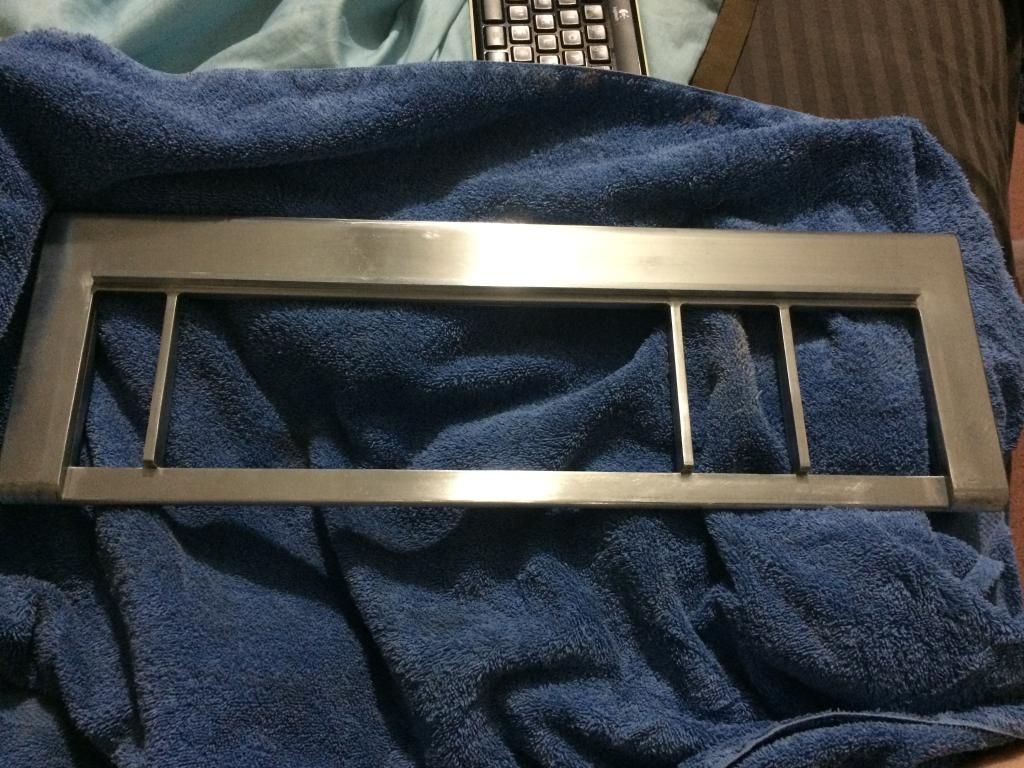
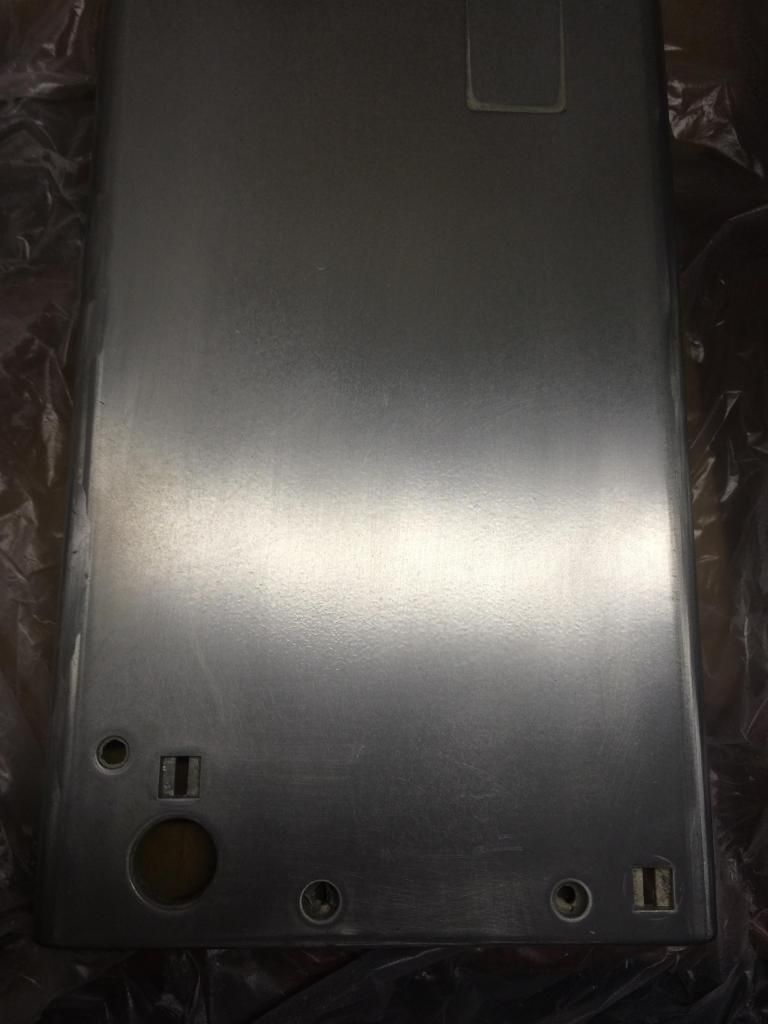
I decided, even though it was only 20-30 degrees out to strip the case in my 1 car unheated garage. If I had to do it again I would wear gloves, a mask and eye protection. (not sure what I would do about the heat). At any rate I sat the case on top of cardboard covered in newspaper. I sprayed a first thick coat on both halves and waited the minimum 10 minutes. The top was starting to noticeably peel but the bottom half didn't show very much peeling. I applied a second coat and the top half was peeling pretty good but the bottom half was still not near as far along as the top half. At this point I decided to introduce a hair dryer to try to get better results. I applied a heavy 3rd coat to the bottom and a light 3rd coat on the top half. At this point after waiting 10 minutes, I scraped off the gunk off the top and bottom halves. Pretty much all the paint came of the top half but the bottom half still was more or less covered. I put one more coat on the bottom but my can was about out and the paint remover was starting to really irritate my eyes, nose and skin. I cleaned off the top shell and hands with water the best I could and brought the top half inside. There I washed it and my hands off in my kitchen sink. Almost all the paint on the case was gone on top and most was on the inside (witch I'm not to concerned about). After letting the top half dry I took 400 grit sandpaper to it. I used a hand block to attach the paper to. I used the lines of the case to get straight sand lines on it as best as I could. It's not perfect but I think that will add to the "charm" of it. I plan on clear coating it this weekend and figuring out howto cheaply finish removing the paint from the bottom half (thinking sanding).

Final thoughts on the process so far. The paint stripper was super harsh. It irritated the crap out of my skin where it touched (felt like it was burning me). It also really irritated my eyes and my nose. My hands became super dry as my nose. Also felt like I had a bad cold the next couple days. I cannot stress enough to take the proper safety measures when using this. In fact I would probably try to find something less harsh but still effective.

Feel free to ask me questions here or through PM. I'm more than happy to share my experience in this learning experience. I've never done a project this big before. The most I've done to a keyboard before is take off the case and keys for cleaning.

edit, no idea why spoilers aren't working.

Arakula

20 Nov 2014, 07:56

Methylene Chloride isn't something you should get on your hands or into your lungs (amongst other niceties, it's suspected to be a cause for cancer). That's quite heavy stuff. Banned for consumers in Europe since 2010...

User avatar
pyrelink

20 Nov 2014, 13:41

Don't kill yourself for the board man, think how the obituary would have read!

Yeah paint remover is nasty stuff. That's the only issue I was thinking about in my case. It's been in the 30s and low 40s (F, of course) for a good couple of weeks now and while we do get sunlight here, I wonder how well the paint remover would work. If I do it at all though it will be done out side, with gloves and face protection :lol:

Also just some advice if it might help, before applying clear coat, I recommend grabbing some 600, 1500, and if you can find it, 2000 grit sand paper. Go over the board with the 600 and then the 1500 in the same grain, before you clear coat. Get the metal feeling glass smooth, and it will apply better and look nicer. Then if you also get some type of car polish (I can tell you the exact type I use later), do a light sanding of the clear coat (after a full 3 days of curing) with the 2000 grit, and then polish it, you will have a beautiful looking clear coat.

I still have yet to decide if I want to do this to my board or not.

User avatar
pyrelink

21 Nov 2014, 04:00

Oh and one other question, any clue why the paint remover did not work very well at all on the bottom of the case?

User avatar
Touch_It

21 Nov 2014, 04:04

Had a few ideas but I'm not sure. Thought it coulda been powdercoated but I doubt it. Thought maybe it Just has a ton of coats of paint on it or the paint on the bottom half was just in better shape on the bottom.

User avatar
Touch_It

24 Nov 2014, 00:03

Minor update. Apparently I now lead a even more busy life than I thought. Ended up going to a Nebraska Husker game (we lost :oops: ) so I didn't get as much done as I had hoped I would. I bought sandpaper today plus an emery brush (I think). I bought some 400 grit + some 1000 grit. I re-sanded my top case and I think it looks better, sorry no pics. I also started sanding the bottom case as I didn't want to mess with more paint remover. I used a mask and rubber gloves. I managed to sand the paint off of 3/4 of it. Rather labor intensive due to not having the proper tools. Due to Thanksgiving unless I work on it Monday or Tuesday, I probably wont do anything else until the weekend after next. On the keycap side of things I opened a support ticket with Unicomp in hopes they can work with me and make it super simple to order the keycaps and stabilizers I need. I want to ask for them for Christmas but I'm pretty sure no one in my family would have any idea what I was talking about lol.

PaiCrai

24 Nov 2014, 02:21

Neato!!!

User avatar
Touch_It

25 Nov 2014, 00:48

Ok, so I can't quite decide, so I would like some help on deciding on the color scheme for keycaps. I am wanting do do brilliant white alphanumeric keycaps printed, and black blank keycaps. I'm using an ansi layout like 0100010 except my left cluster will be escape (blank black) and white f1-9 keys. Other than that where he has grey keycaps I will have un-printed black. The only other difference is I currently have a black spacebar. I'm thinking I should go white but wanted help deciding. (note I haven't ordered the keycaps from Unicomp yet.) the link below is to 0100010's keyboard thread.

https://geekhack.org/index.php?topic=64843.0

User avatar
Hypersphere

25 Nov 2014, 01:52

Touch_It wrote: Ok, so I can't quite decide, so I would like some help on deciding on the color scheme for keycaps. I am wanting do do brilliant white alphanumeric keycaps printed, and black blank keycaps. I'm using an ansi layout like 0100010 except my left cluster will be escape (blank black) and white f1-9 keys. Other than that where he has grey keycaps I will have un-printed black. The only other difference is I currently have a black spacebar. I'm thinking I should go white but wanted help deciding. (note I haven't ordered the keycaps from Unicomp yet.) the link below is to 0100010's keyboard thread.

https://geekhack.org/index.php?topic=64843.0
Currently, I am partial to the following color scheme:

Alphanumerics (except for Backquote/Tilde, Backslash/Pipe, and Spacebar): White or blue

Modifiers plus Backquote/Tilde, Backslash/Pipe, and Spacebar: Black

Arrow keys: White or blue

Some exceptions might include a Red Escape and perhaps another contrasting color for such things as Fn keys.

User avatar
Touch_It

25 Nov 2014, 19:12

Also sounds good. I'm a very visual person. I need to see things in picture or person to really know for sure, so It makes this process really hard. I think I need to switch my spacebar to white. Also the red esc key sounds very tempting. Also switching my color scheme for the arrow key section seems very tempting. ERMaggad. Customer service at Unicomp has been nothing short of great. I don't want to keep bothering them lol.

quantalume

26 Nov 2014, 03:42

Touch_It wrote: Also sounds good. I'm a very visual person. I need to see things in picture or person to really know for sure, so It makes this process really hard. I think I need to switch my spacebar to white. Also the red esc key sounds very tempting. Also switching my color scheme for the arrow key section seems very tempting. ERMaggad. Customer service at Unicomp has been nothing short of great. I don't want to keep bothering them lol.
I often use the WASD keyboard designer to see what different color combinations would look like. http://www.wasdkeyboards.com/index.php/ ... p-set.html

User avatar
Touch_It

26 Nov 2014, 04:57

Oh, thanks. That actually helps quite a bit. I think this is the layout I want to go with. But maybe a red esc key.

Image
I think Unicomp customer service is going to hate me.

User avatar
Touch_It

14 Dec 2014, 04:42

Small update. Finally got to finish stripping my case and I am clear coating it. I think it is going to turn out ok but I'll know tomorrow for sure. I snapped some pics right after I put on the 3rd coat.

[img width=640 height=853]http://i195.photobucket.com/albums/z274 ... 2623ef.jpg[/img]

[img width=640 height=853]http://i195.photobucket.com/albums/z274 ... f05b4f.jpg[/img]

In both pics the top case is wet, bottom case is dry.

On another note Unicomp confirmed my not so secret Christmas present from my parents shipped from unicomp. (My key cap set and inserts as described in the post above). I'm inching towards completion!

User avatar
Touch_It

28 Dec 2014, 02:08

Tiny update. First took all the old keys off to look at the barrel plate. Pretty good shape. The white spots on it are from keys bottoming out. Secondly I just couldn't resist so I put the new keycaps I could on. Pretty happy. Unicomp gave me a black vs white space bar so a bit sad they messed that up but I guess I'll order a white one at some point. Also I would like to order a black backslash key. A red printed esc key. The alignment on the insert, home, and delete keys is pretty bad so I want to replace them at some point.


Potato pics
ImageUploadedByTapatalk1419728897.840673.jpg
ImageUploadedByTapatalk1419728897.840673.jpg (221.36 KiB) Viewed 5507 times
ImageUploadedByTapatalk1419728885.457786.jpg
ImageUploadedByTapatalk1419728885.457786.jpg (422.17 KiB) Viewed 5507 times
ImageUploadedByTapatalk1419728872.491153.jpg
ImageUploadedByTapatalk1419728872.491153.jpg (374.44 KiB) Viewed 5507 times

User avatar
fohat
Elder Messenger

28 Dec 2014, 02:19

Come on, man!

You can't leave that nasty repulsive barrel plate like that inside such an exquisite artifact!

Bring it up to the standards it deserves. Even if you aren't actually going to fix it, a coat of Rustoleum "hammered" paint would do wonders.

https://geekhack.org/index.php?topic=48 ... msg1338079

User avatar
Touch_It

28 Dec 2014, 02:22

Oh, guess I didn't say what my plans were. I fully plan on disassembling and restoring the barrel plate to glory. Open to suggestions on color and tips on prepping it. I have a lot of work to do, just wanted a taste of the finished product.

andrewjoy

28 Dec 2014, 13:55

i wonder if a barrel plate could be totally stripped and polished to a mirror shine, that would be amazing !

User avatar
chzel

28 Dec 2014, 14:43

It sure could, but I guess corrosion might be a problem! A clear coat might be enough to protect it though!

User avatar
Hypersphere

28 Dec 2014, 15:19

I don't like using chemical paint removers. For the barrel plate in my XT, I used wet sanding.

Post Reply

Return to “Workshop”