Gateron Blackwidow Pt 2: Adventures in Gateronland

User avatar
shreebles
Finally 60%

08 Sep 2015, 23:32

EDIT: My Gateron story continues...
http://deskthority.net/workshop-f7/on-b ... ml#p258209


I've looked at the Blackwidow Tournament from Razer various times in the past and thought, "hm, the shape doesn't look terrible, too bad it's a Razer product". Actually the shape of the bottom row seemed far from terrible, but rather positively agreeable! 1.5, 1, 1.5, 6, 1.5, 1, 1, 1.5 units. This meant that with some simple filler keys I could fit my Cherry dye-subs on there, except for the capslock and space, of course.

Then I discovered customs and the Phantom keyboard and decided that it would probably be the better way to go. So I have a 1.5u Phantom plate now, but never got around to ordering the rest of the parts.

Meanwhile, my black Gateron switches had arrived and were sitting unused for some weeks. When usopia then offered his Blackwidow tournament for sale, I thought, why not give it a spin and fit my Gaterons in there. Or even give the "Razer switches" a spin, since a lot of people seem fine with Razer keyboards they shouldn't even be so bad? A friend of mine is pretty happy with his Blackwidow after all, however he has the model with real Cherry blues. But I've even heard that Kailh isn't that much inferior to Cherry.

Long story short, I should've built a Phantom instead but went for the easier and cheaper option.

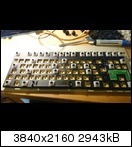
This is what I ended up with. Seems OK, no?
Spoiler:
DSC_0140.JPG
DSC_0140.JPG (450.72 KiB) Viewed 3932 times
No. :(

I actually have a bunch of observations to throw at you guys but since it's late and it turned out so badly, I'll try to sum up the main issues with this board, so you can see that it's really not much worth for either using or modding it.

- The absolute main problem is that Razer put their switches in upside down. While this makes it feel bad for their own switches it feels really bad with other MX-compatible switches, and my Cherry keycaps. The cherry profile caps are rather flat, and the Gaterons have this bulge at the back that makes the keycap hit on the top part of the switch, which is now on the bottom. This results in a very uneven feel, with short travel and weird bottom out. What's even worse, the switches feel like they get stuck occasionally, and do not react very well at all to off-center key presses.
Turning a keycap upside down, or testing with the few (2 or 3) switches that have the right orientation, improves this. However, the typing experience would still be lackluster. Why? Because
Spoiler:
DSC_0129.JPG
DSC_0129.JPG (418.58 KiB) Viewed 3932 times
- The overall construction is dumb. There is a ton of unused space below the plate which makes everything resonate more than it should. I could of course put some dampening material in there but why bother with a keyboard that is barely acceptable to type on?
Spoiler:
DSC_0130.JPG
DSC_0130.JPG (491.58 KiB) Viewed 3932 times
- The overall construction quality is cheap. While the case is fine on the outside, it goes to crap when you see the innards. The stabilizer clips aren't attached to the plate well, so they rattle around, causing the stabilized keys to sound and feel less than perfect (with the exception of the spacebar, but more on that later). Stabilizer wires are of course too thin. The plate is also too thin. It all pings pretty badly, but then again so do many MX based keyboards, and most Model Ms too. The stock Razer switches feel spectacularly bad, but they could probably be OK on a different keyboard. Very heterogenous, no two felt or sounded the same. Rumours of these being lubed are true, but that doesn't improve their smoothness or feel at all. The Gaterons are of course pretty nice but suffer badly from being put on such a terrible platform.

- It is not fun to desolder this thing. While easy to open up and take apart, the solder used is of the cheapest kind, as is common for these products, and did not come off very well. Granted, I have bad equipment, but that equipment is good enough to desolder and solder a board very quickly when I have put my own solder on it. It's very basic stuff, cheap from Amazon but it just flows so well. The solder on this board was even worse than on the QFR. It kept sticking to the PCB, or flowing through the holes so I couldn't suck it out anymore. It's dirty and heterogenous and creates a fine dust that sticks in my desoldering pump.
Just look at all that flux. That is before my mod.
Spoiler:
DSC_0132.JPG
DSC_0132.JPG (507.98 KiB) Viewed 3932 times
- The big through-holes on the PCB are a mixed bag. On the one hand, they were a lot more solid than on the QFR. None of the silver rings came off while desoldering so I didn't have to do any Ghetto fixes like I did on my QFR. I should be fine to desolder and resolder the switches on this a few times without breaking anything. However, the huge holes made it more difficult to suck out all the solder at once, and resulted in having to use a lot more solder than usually to cover them properly.
Spoiler:
DSC_0134.JPG
DSC_0134.JPG (540.5 KiB) Viewed 3932 times
^ These look pretty aight. But it was tough to clear them all!
Spoiler:
DSC_0133.JPG
DSC_0133.JPG (535.81 KiB) Viewed 3932 times
+ The spacebar stabilizer is actually the only nice surprise of this board. Yes it looks stupid and cheap. But it works. Because it is bent around the switch housing it is held under pressure. That means it never rattles! Yay :lol:
Unfortunately, after flipping the spacebar it scratches on the outer case sometimes. Oh well.
Spoiler:
DSC_0135.JPG
DSC_0135.JPG (522.83 KiB) Viewed 3932 times
Still works? Yep. Nice.
Spoiler:
DSC_0136.JPG
DSC_0136.JPG (522.26 KiB) Viewed 3932 times
- They glued a lot of stuff in. From a customer service perspective, I can see why they glued in the stabilizer clips. No one who buys a Razer product is going to use an aftermarket keyset, and they don't want people to lose the little clips just because they took off the caps for cleaning. I didn't bother with trying to take them out because I had some already and didn't want to break the thin plastic.
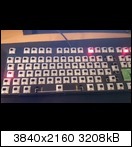
But why the hell did they glue the LEDs to the switch??? So annoying.One LED came out just through force. The other two were stubborn. I tried to use a hairdryer to loosen the glue. It didn't help. I accidentally tore off one of the legs of the diode and decided to leave the third one alone.

RIP, brother.
Spoiler:
DSC_0137.JPG
DSC_0137.JPG (427.75 KiB) Viewed 3932 times
One leg is not enough, dammit!


Wish you were (MX) greens....
Spoiler:
DSC_0138.JPG
DSC_0138.JPG (410.69 KiB) Viewed 3932 times
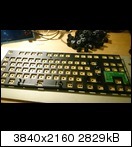
So yeah. It looks like I will either have to man up and buy the rest of the Phantom parts, or actually take apart my other QFR, which has MX blacks. I can see the Gaterons replacing them for life, so why not???

My ergo-clear board actually has a Razer replacement switch in its bottom right corner, and the difference is noticable, but not bad. Just opened a Razer keychain and put the clear stem and spring in there, sat it next to its MX brethren, all fine. So basically, it must have something to do with the construction of this board, plus the fact that the switches are all upside down. It sounds and feels plasticky despite the metal plate. 4/10 not worth it, except if you enjoy soldering (which I do).

This story once again proves that the good things don't come easy, or cheap.
Last edited by shreebles on 11 Oct 2015, 16:59, edited 3 times in total.

User avatar
Muirium
µ

08 Sep 2015, 23:46

4 out of 10? You're generous! This sounds like a true, ignoble turd in every respect. There are lower numbers especially for that.

Great review, though. I really enjoyed it. You had me laughing out loud at the No? No. Joke. Those of us who've spent longer desoldering and futzing around with something than the good we ever actually got out of it, we applaud you! The disappointment is palpable and true.

Can we have more reviews like this please!

User avatar
scottc

08 Sep 2015, 23:54

The switches are upside-down?! No wonder mine feels like crap with Cherry caps too! Thanks for the review shreebles, if for nothing else but a cautionary tale about how I should give mine away ASAP...

User avatar
jou

09 Sep 2015, 00:18

Having converted an ISO QFR to ANSI, I can confirm that the QFR's solder pads are easily lifted. I did manage to damage two pads to the point where I needed to patch it.

I also considered grabbing a Razer to replace the switches with some MX' I have lying around, but after reading this, I think I'll pass on that :)

Would a phantom PCB fit in the case? If so, you'd at least have a case for it

User avatar
shreebles
Finally 60%

09 Sep 2015, 15:10

jou wrote: Having converted an ISO QFR to ANSI, I can confirm that the QFR's solder pads are easily lifted. I did manage to damage two pads to the point where I needed to patch it.
So it's not just me then.
If it's generally a weakness with the QFR I should reconsider my idea of modding my MX Black version to Gaterons.
I would have to patch again, just like I did on the red one.
jou wrote: I also considered grabbing a Razer to replace the switches with some MX' I have lying around, but after reading this, I think I'll pass on that :)

Would a phantom PCB fit in the case? If so, you'd at least have a case for it
Well, I don't have it in front of me right now but it's different from a regular TKL in shape - the F row is off by a bit.
But it seems a bad platform either way. I don't think there's much to gain from this unless you get it for free. I wonder if an older version with Cherries exists, and whether it's as bad as this one.
Muirium wrote: 4 out of 10? You're generous!
4 out of 10 because I had fun doing this mod, and it was something I wanted to try for a long time.
This is silly reasoning of course. I am obviously not happy with the end result but I enjoyed the experience.
I will have to try other keycaps with this to see if it is really useless.
Muirium wrote: Great review, though. I really enjoyed it. You had me laughing out loud at the No? No. Joke. Those of us who've spent longer desoldering and futzing around with something than the good we ever actually got out of it, we applaud you! The disappointment is palpable and true.

Can we have more reviews like this please!
Oh sure! I really enjoy soldering at the moment so there will be more projects to come.
Thank you for the kind words. I did not expect such a positive response from posting a rather simple, and, ultimately pointless mod :lol:

User avatar
shreebles
Finally 60%

21 Sep 2015, 12:50

I need to retract my statement about the lead being "the cheaper kind" in China. It is simply a different kind. Having only picked up soldering this year, I don't have a ton of knowledge yet.
I talked to a friend of mine who builds speakers and amps in his spare time and has a lot of soldering experience.
He explained that they have to use lead-free solder in industrial applications. That stuff doesn't flow as nicely, and they use hotter irons which makes it easier to work with.
This explains why it seems bad with my standard soldering iron. The solder I use is from Amazon, and it contains a mixture of different metals:

60% tin
38% lead
2% copper

There is also 2% of flux in it, which allows you to solder stuff without staining the whole PCB (flux isn't in the list above as its not part of the metal alloy).
And it melts at 230°C. That's not very hot and could be done with any cheap iron really! No wonder it's so easy to use.

In other news, I put it all back together with the razer switches, as expected the solder came off really easy this time, and it was a quick repair. Everything works again, sans the LED with one leg that came off. It's still not so nice to type on so it will have to find a new home.

User avatar
chzel

21 Sep 2015, 13:39

Lead free solder is generally crap. Flows awfully and needs higher temps. When reworking lead free always add a bit leaded solder!

User avatar
shreebles
Finally 60%

22 Sep 2015, 12:15

chzel wrote: Lead free solder is generally crap. Flows awfully and needs higher temps.
Well, there you go! I've read it many times now. But it explains why the factory solder feels so different.
Funny thing, despite containing lead I heard that working with PB40 is actually less harmful than with lead-free solder. Why? At the temperatures that we are working on, the only thing that evaporates (smokes) is the flux. Lead-free solder is said to have more harmful fumes because the flux used is different to that in regular flux. Can anyone confirm or deny this?

There is no lead vapor when soldering at normal temperatures with PB40. You still shouldn't breathe the smoke, of course, and wash your hands thoroughly because eating lead IS in fact very harmful! But it seems it is less harmful than I thought, and more durable, too. Lead-free is more brittle and can develop tin-whiskers which can break solder joints or even short them with others. They had this problem on satellites in space and had to replace the solder with leaded!
Some say that lead-free solder is in part responsible for planned obsolence of consumer electronics because the joints are less durable. For this reason, leaded is still used in network equipment, server components etc...
Pretty funny how the list of exceptions just grows and grows as soon as a stupid rule is forced on businesses.
chzel wrote: When reworking lead free always add a bit leaded solder!
I do that, too, when the old solder is too stubborn or flows away from my tip. I add a bit of leaded solder which makes it easier to suck it out in one go. But adding solder to every joint I desolder? That seems a bit of a waste of good solder.

User avatar
chzel

22 Sep 2015, 15:07

Solder is cheaper than sanity!
When I desolder a whole board, I start with a row, add a generous blob of solder to every joint all along the row, then return to the start and reflow the joints (iron at ~320C) and suck the solder with a 3.5€ chinese copy of the EDSYN Soldapullt. Its huge volume and powerful spring are great and if there is enough solder in the joint it makes the cleanest sucking ever.
Then I turn the board right-side up and unclip one side of the switches, and then the other, and voila! Empty board!

User avatar
Muirium
µ

22 Sep 2015, 15:10

Well, I killed the spacebar on the MX Board 6.0, the *only* switch I managed to pull in two sessions trying! I should send that board to you guys for resuscitation! Think I destroyed one or both of the PCB contacts for it. Also smashed some LEDs.

Seriously, I absolutely despise desoldering. Truly, truly hate it. I always leave a furious trail of destruction.

Upside: now the spacebar is heavier. And I know for a fact it would take me 200 hours to get the plate off to access those stabs I'd like to clip. Not that it'd be worthwhile as the whole keyboard would be inoperable by then!

User avatar
shreebles
Finally 60%

22 Sep 2015, 16:06

You are right, chzel, buying more solder should be worth it if it saves me my time and sanity. That sounds like a great method, I shall try it! My solder pump is this cheap POS. It works fine, though!

µ, I think we will need to patch something up, maybe run a cable from the switch to one of the others to bypass the PCB connections you destroyed. I could try it, though! What exactly did you do?

PS: Clipping Cherry stabilizers was a relevation of unreasonable proportions for me, considering how insignificant the change seemed beforehand!
Last edited by shreebles on 23 Sep 2015, 14:36, edited 1 time in total.

User avatar
Muirium
µ

22 Sep 2015, 17:45

The board should be quite easy to restore… so long as it's in good hands. And not my own!

I'll take some pictures (and post them on a separate thread instead of confusing things here) so you can see. Only the spacebar is unresponsive. I stopped before more harm was done in anger! The LEDs I pulled were mostly intentional. I have one set aside for the spacebar's switch once it's working again.

No way am I ever going to get all the switches off that board so I can clip the stabs, mind. Not without a master class and hands on tutoring. I've seen people desolder in videos, yet whatever I'm doing wrong is invisible to me. Tools, experience, I don't know what.

User avatar
shreebles
Finally 60%

26 Sep 2015, 12:21

I wouldn't dig down to the stabs, either - taking all the switches off seems too much hassle due to their LEDs. I plan on getting better soldering equipment by the end of the year though, which could change my view on the small finicky work.

If you only tried desoldering, you were perhaps experiencing the same trouble I had due to the lead-free solder. You should try soldering switches on for a change. If you have a PCB, it is so easy. You simply have to join the tip with the solder on top of the pin. The solder should flow down and stick to the pin, while filling the through-hole on the PCB. It doesn't flow anywhere else because of the solder mask.

Anyway, I noticed another thing with Cherry keycaps and I wonder if anyone else made the same observation.
Since they are so low-profile, especially on the home row, they seem to only work well on regular switches without LEDs.

If you turn them upside down, the stem doesn't reach the bottom of the switch because the keycaps hits on the switch housing first. Quod erat demonstrandum, this results in the bottom-out feeling bad.
The same thing happens when the switches have LEDs - the caps hit the top of the LED before the stem reaches the bottom.
For me, this makes Cherry profile keycaps essentially incompatible with regular LEDs.
Being a sucker for Cherry keycaps, a fully backlit Cherry keyboard is now worth nothing to me. Anyone else feel the same?

User avatar
shreebles
Finally 60%

11 Oct 2015, 16:54

chzel wrote: Solder is cheaper than sanity!
When I desolder a whole board, I start with a row, add a generous blob of solder to every joint all along the row, then return to the start and reflow the joints (iron at ~320C) and suck the solder[...]
Then I turn the board right-side up and unclip one side of the switches, and then the other, and voila! Empty board!
Chzel, you are 100% correct and I thank you. This piece of advice saved me countless hours these last few days.
I desoldered a whole Lioncast LK20 much faster than usual, but still took kinda long because so many of the pins had been bent back at the factory to hold the PCB in place, which made desoldering them a real PITA.

HOWEVER, yesterday, I did a Quickfire Rapid and it was like magic. With your method I could do an entire row in just over 10 minutes, which meant that I was able to cut down the time needed to desolder a QFR to well under 2 hours. I took over 10 hours on my first try, destroyed a couple of solder pads in the process and as a result needed to bridge 3 or 4 connections. This time, no solder pads were lifted and everything went smoothly. I popped the Gaterons in and INSTANT SUCCESS - everything worked. Everything? Well....

Image

Image

Image

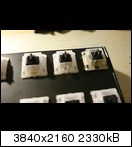
Thick Cherry keycaps catch on the Gateron switch tops :evil:
This is such a massive letdown. I expected these to be clones, refined, yes, but clones, meaning same shape and size.
They must be just fractions of millimeters bigger on the top than regular Cherries. I described this problem with the Gateron Blackwidow and it was much worse there because the switches were upside down. Now, they are in the right orientation but the problem still occurs regularly. Perhaps 2 or 3 times per minute while continuously typing. This doesn't seem like a lot but it can drive you up the walls very quickly.

This happens with Cherry Doubleshots, I'm not 100% sure but expect it to be the same with Dye-subs. The worst are the arrow keys, these have the highest profile of the Cherry keycaps and they scratch the switch tops all the time.
After I put Duckys thin PBTs in OEM profile on there the problem disappeared. But they are of course not as nice to type on as I really prefer the Cherry profile.

I guess a potential fix could be to change all the switch tops to original Cherry, not out of the question as I have a lot of those, but would be annoying nonetheless to do it all over.

PS: Put a Nixie in there, for funzies. I got it from HzFaq I believe, some time ago. Thanks!
It is just as smooth, but heavier, firmer, and with the resistance increasing more sharply towards the bottom. I prefer the feel of the Gaterons, as they seem less tiring. It pings like crazy! :)

Image

User avatar
chzel

11 Oct 2015, 17:38

Glad I was of assistance!
Pity 'bout the switches though..

PS: When I encounter bent pins on switches I curse a lot. I mean a lot. Doesn't help a bit with the desoldering, but at least I vent my frustration!

Post Reply

Return to “Workshop”