Page 3 of 4
Re: Beamspring Factory process - How to
Posted: 22 May 2020, 01:57
by SneakyRobb
Also I hate that I have to say this but several users have asked about my commercial beamspring operations. Oh yes I have several! Nope.
These do not exist. Any advertisement or solicitation you see about sneakyrobb beamsprings does not exist.
Any advertisement using images from this thread is a scam. That's it.
Re: Beamspring Factory process - How to
Posted: 22 May 2020, 02:31
by ddrfraser1
I’d like to place an order please
Re: Beamspring Factory process - How to
Posted: 22 May 2020, 02:31
by PlacaFromHell
ddrfraser1 wrote: ↑22 May 2020, 02:31
I’d like to place an order please
Me too

Re: Beamspring Factory process - How to
Posted: 25 May 2020, 02:10
by SneakyRobb
SneakyRobb wrote: ↑22 May 2020, 01:56
Hi sorry about this question. I have just received this new pcb so I will update this tomorrow.
Will finish this project soon.
Beamspring model m is soon.
IMG_20200521_194034.jpg
Hi,
So I tried to make this coherent.
Its basically just following the DMA instructions here.
https://github.com/dmaone/CommonSense/b ... /README.md
Will hopefully receive my teflon tubing soon so I can begin mass production of stems. I should update more
Re: Beamspring Factory process - How to
Posted: 25 May 2020, 03:26
by PlacaFromHell
If you don't mind, where did you got the PCB and how much it cost?
Re: Beamspring Factory process - How to
Posted: 25 May 2020, 03:59
by kelvinhall05
PlacaFromHell wrote: ↑25 May 2020, 03:26
If you don't mind, where did you got the PCB and how much it cost?
I am obviously not Robb but JLCPCB has the cheapest PCBs by far, just send them some gerber files and they can usually do 5 for under $30 before shipping (and they sponsor a fair amount of people so you can easily save a decent amount of money on already cheap PCBs).
Re: Beamspring Factory process - How to
Posted: 25 May 2020, 11:12
by PlacaFromHell
kelvinhall05 wrote: ↑25 May 2020, 03:59
PlacaFromHell wrote: ↑25 May 2020, 03:26
If you don't mind, where did you got the PCB and how much it cost?
I am obviously not Robb but JLCPCB has the cheapest PCBs by far, just send them some gerber files and they can usually do 5 for under $30 before shipping (and they sponsor a fair amount of people so you can easily save a decent amount of money on already cheap PCBs).
I already saw this site, dirt cheap but I just wanted to be sure is the best option. Thanks.
Re: Beamspring Factory process - How to
Posted: 25 May 2020, 15:43
by SneakyRobb
Hi,
These PCBs have been from JLCPCB. They are pretty expensive because of how big they are. With the shipping and import fees it still comes out around $80 CAD
Re: Beamspring Factory process - How to
Posted: 25 May 2020, 22:12
by tentator
Holy moly.. this projects smells like eclipse's new model.. beamspring!

Great and interesting job man!!
tent:wq
Re: Beamspring Factory process - How to
Posted: 28 Aug 2020, 22:18
by ZedTheMan
Hey, I wanted to bump this thread to see if any progress has been made since, I used to watch it with much anticipation.
Re: Beamspring Factory process - How to
Posted: 30 Aug 2020, 01:30
by SneakyRobb
ZedTheMan wrote: ↑28 Aug 2020, 22:18
Hey, I wanted to bump this thread to see if any progress has been made since, I used to watch it with much anticipation.
Hi,
Fair statement and you are right. I am print some parts now.
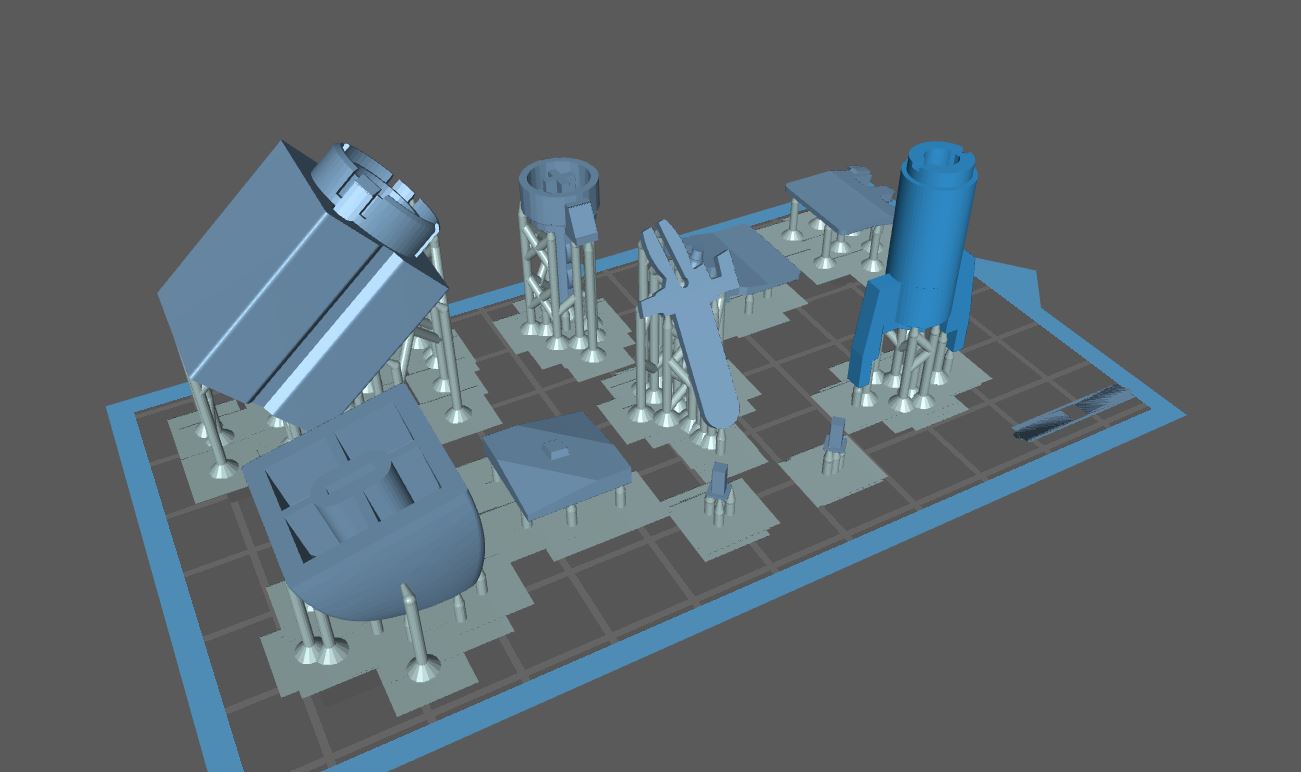
- too many item.JPG (70.81 KiB) Viewed 7097 times
Re: Beamspring Factory process - How to
Posted: 30 Aug 2020, 06:11
by SneakyRobb
Hi,
Okay. Must process but went well!
Very well
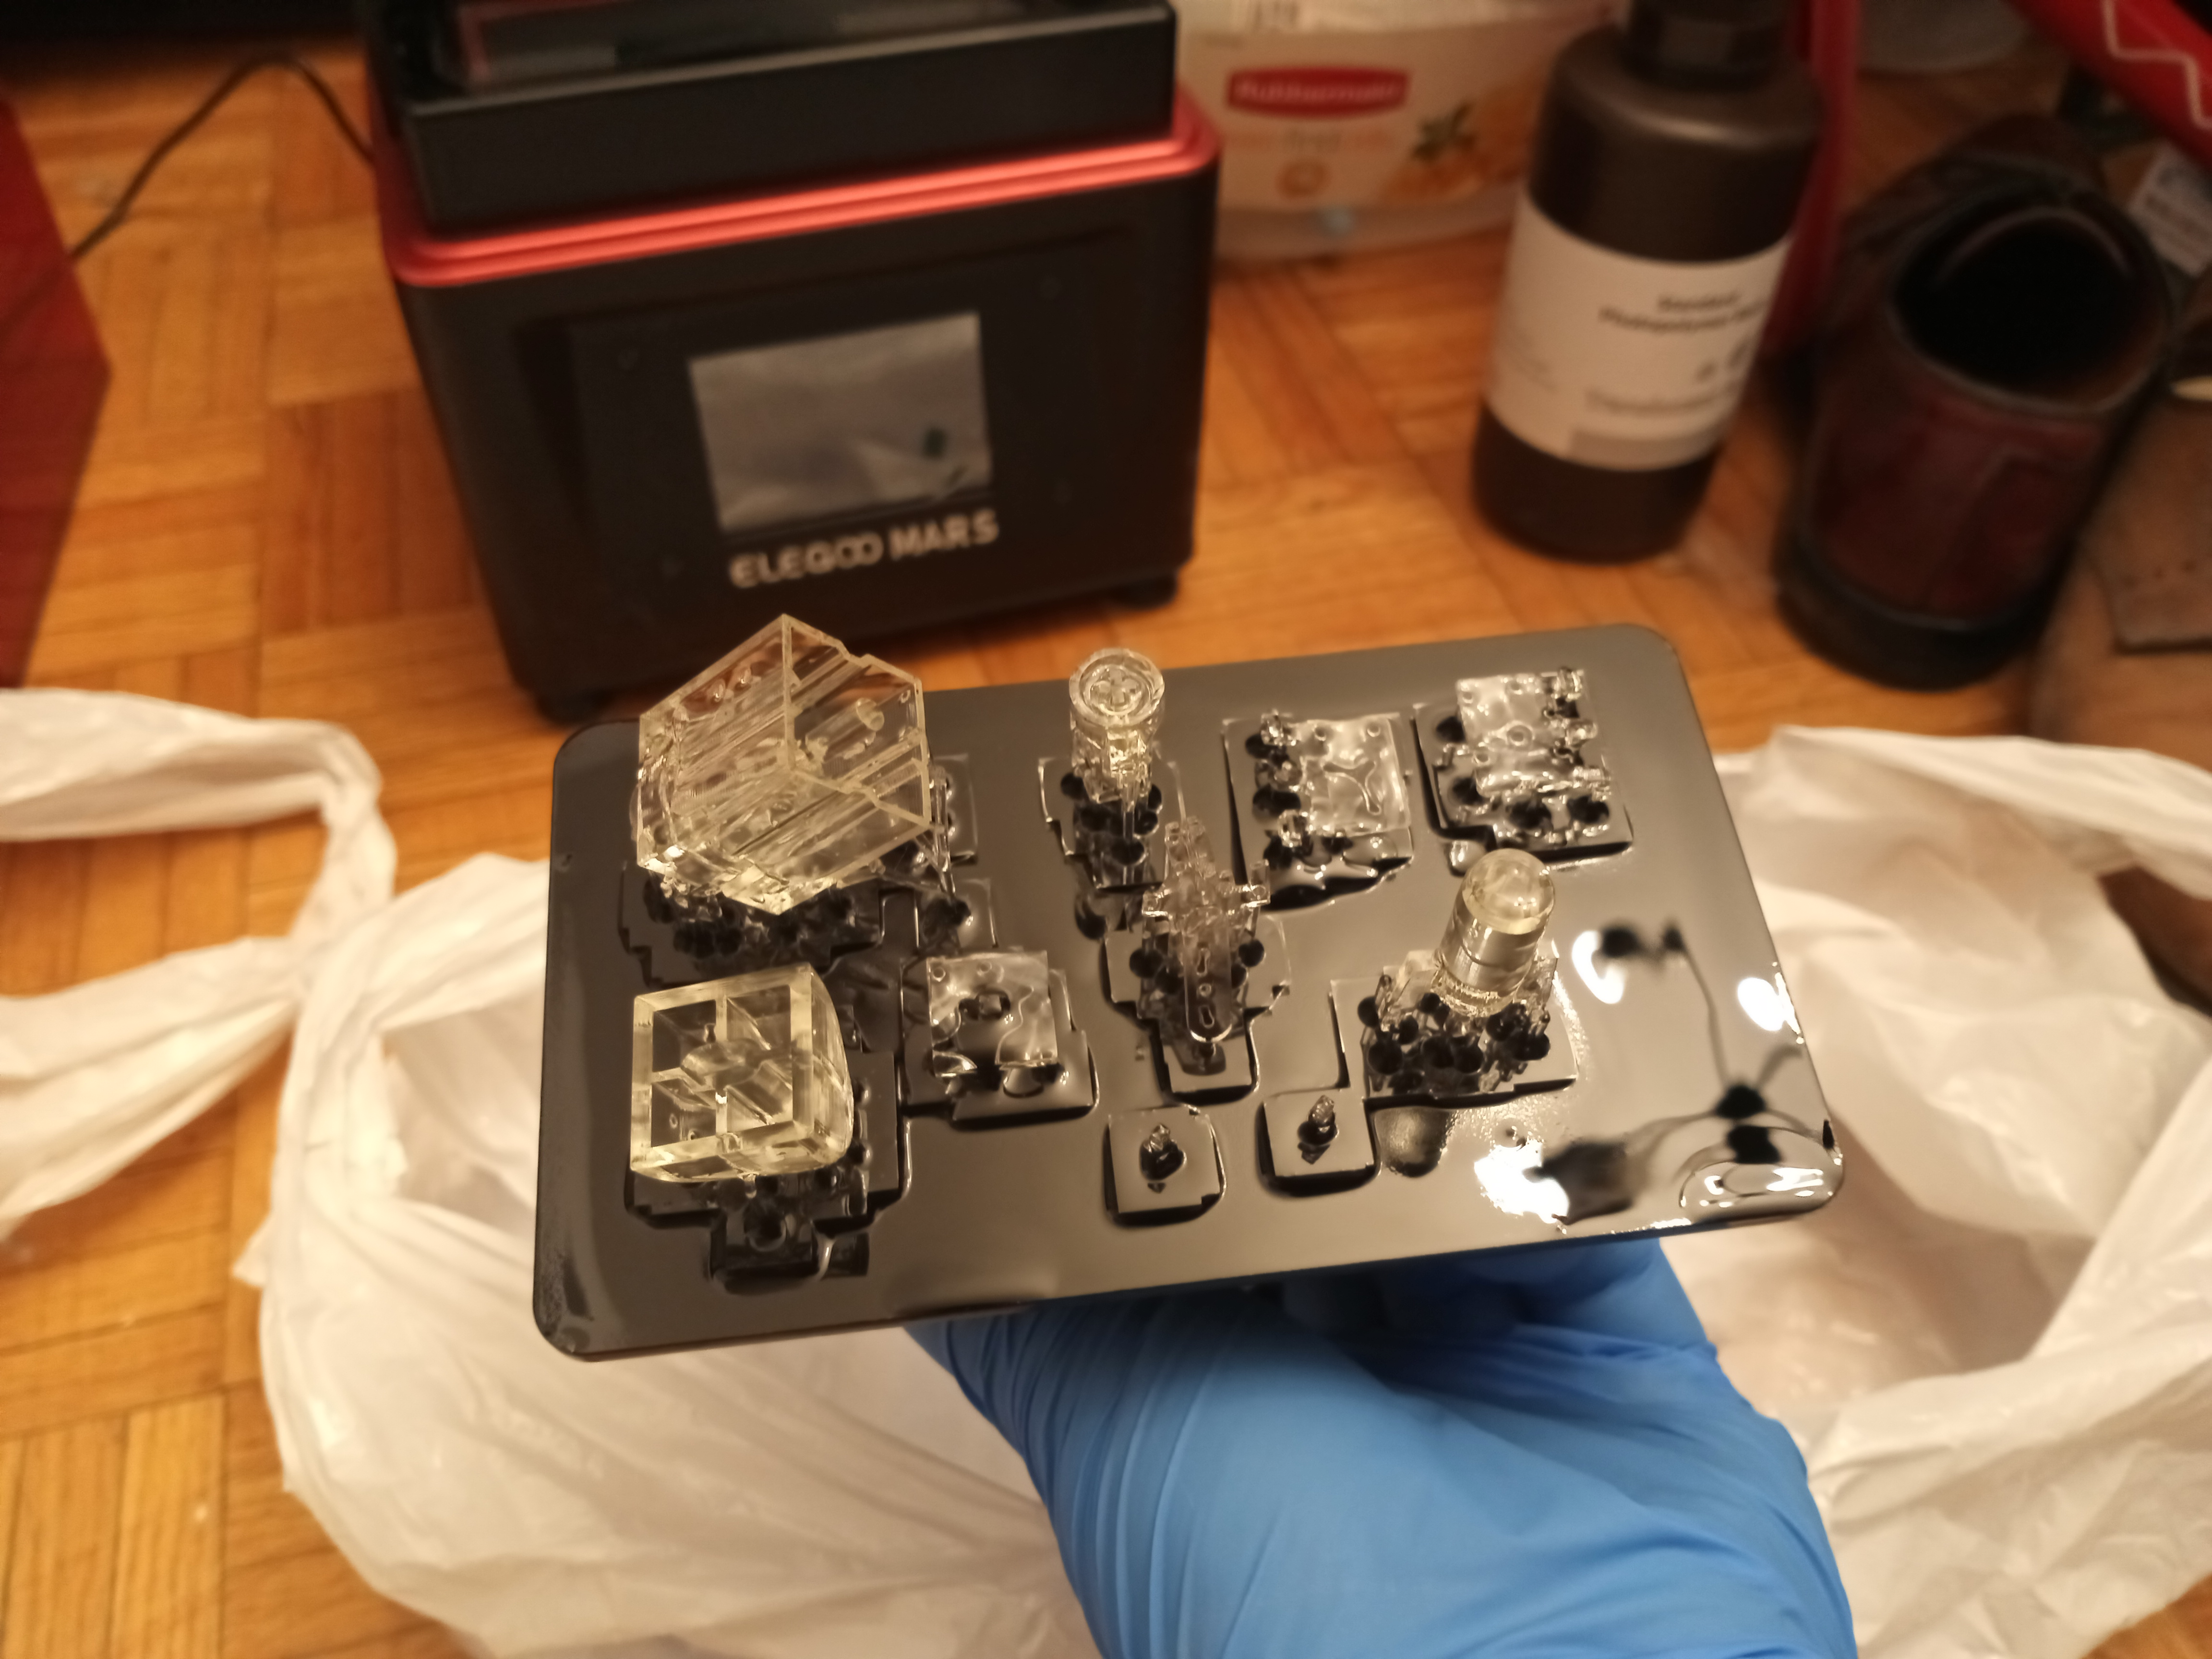
- IMG_20200829_215549.jpg (2.59 MiB) Viewed 7065 times
Re: Beamspring Factory process - How to
Posted: 30 Aug 2020, 21:56
by ZedTheMan
The results Resin-ate with hope of success

Re: Beamspring Factory process - How to
Posted: 30 Aug 2020, 23:30
by SneakyRobb
ZedTheMan wrote: ↑30 Aug 2020, 21:56
The results Resin-ate with hope of success
Yes, agree.
I am printing 1 more set but here is the current production.
I wanted to make keycap so that I can make the board with 100% new pieces.
Happy with how the keycap looks. I think its unrealistic to make the keycap stem in resin as it broke. Will use cnc to make metal ones.
Credit where it's due. I totally used manisteinn's keycap model.
The Cherry mx Slider adaptor works perfectly and is very durable. Very impress.

- resin.jpg (2.53 MiB) Viewed 6961 times
Re: Beamspring Factory process - How to
Posted: 31 Aug 2020, 00:25
by Redmaus
Impressive! The keycap looks very smooth. Very interested in seeing that Cherry adapter in action.
Re: Beamspring Factory process - How to
Posted: 31 Aug 2020, 10:06
by gianni
Your results look so polished and brilliant that you make it seem like an easy task!
Re: Beamspring Factory process - How to
Posted: 06 Sep 2020, 02:41
by SneakyRobb
gianni wrote: ↑31 Aug 2020, 10:06
Your results look so polished and brilliant that you make it seem like an easy task!
Hi thanks.
I am hope to have some good things soon.
Re: Beamspring Factory process - How to
Posted: 08 Sep 2020, 00:27
by SneakyRobb
ZedTheMan wrote: ↑28 Aug 2020, 22:18
Hey, I wanted to bump this thread to see if any progress has been made since, I used to watch it with much anticipation.
Hi,
I should do more for this project yes. I will correct this.
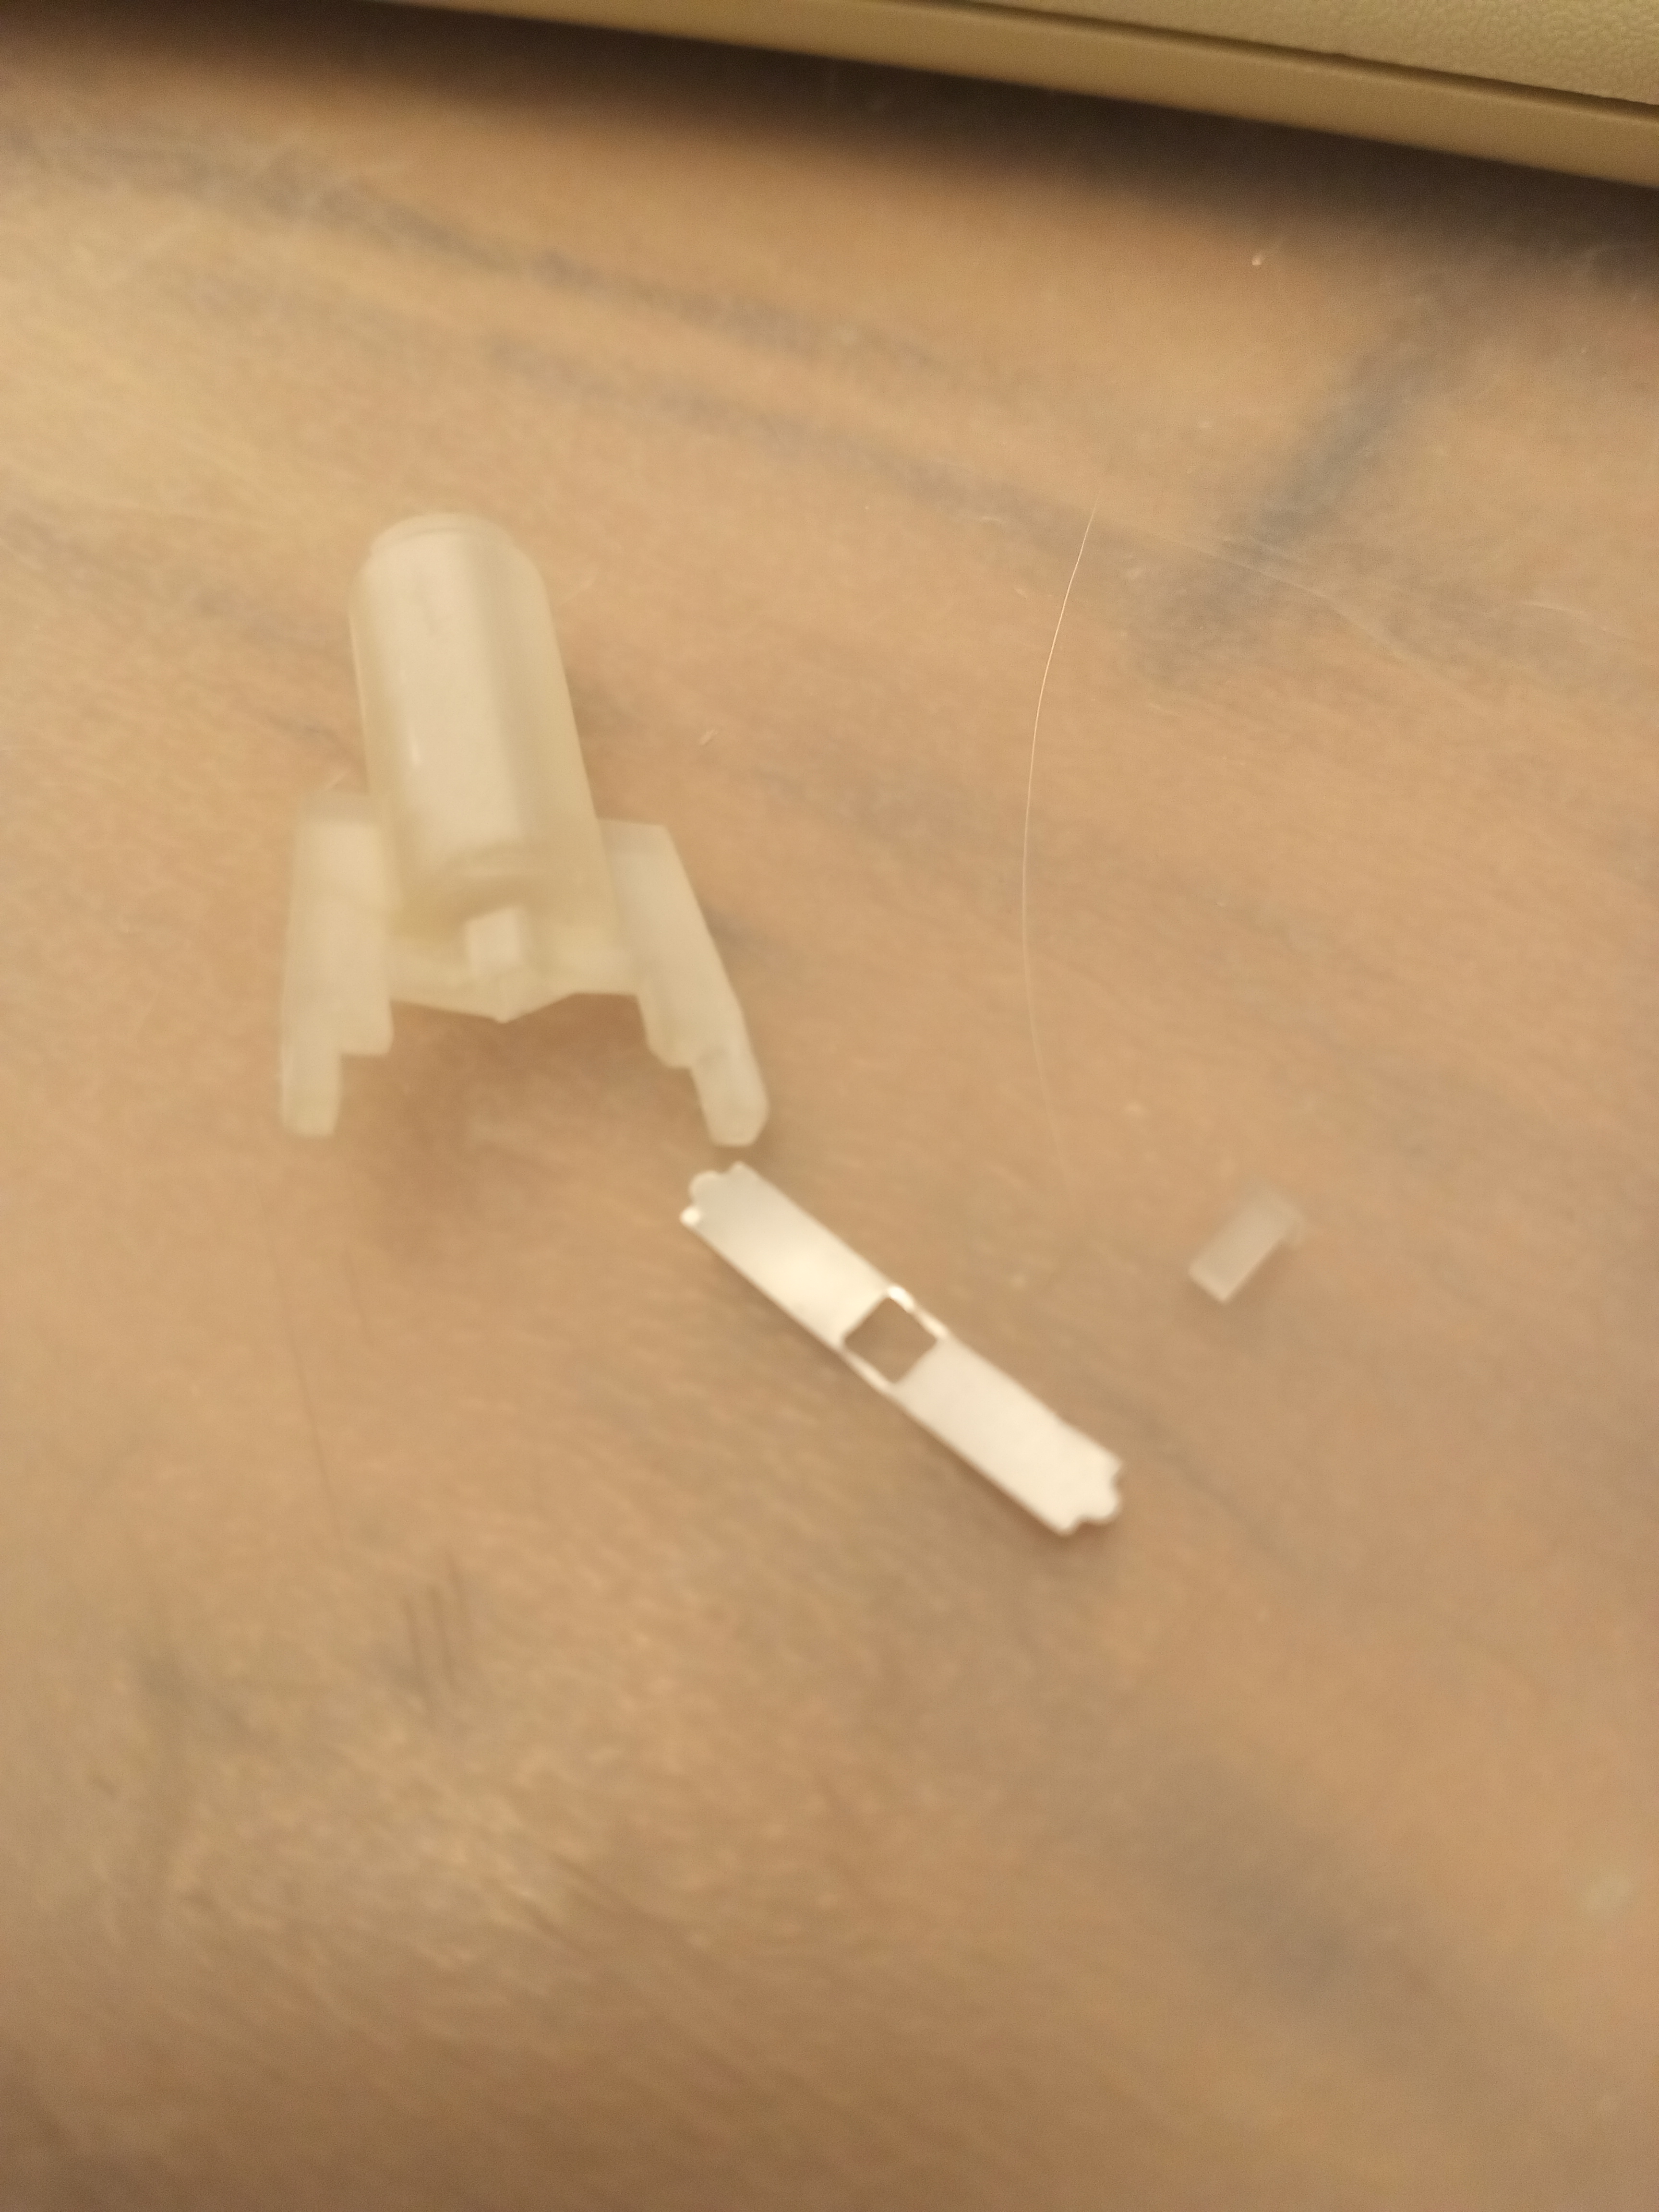
Just to update this is my current beamspring attachment method. A square peg with some glue. I am heavily considering doubling the thickness of my beamsprings. I just cannot seem to get them as hard as the original ones at the original thickness. I need to make the peg part bigger for alignment. The place I got them cut at, metaltronics in Mississauga used the hardest metal they could get and it is still not as hard as the original. So I will likely just go thicker.
I have added some models to my grabcad account.
https://grabcad.com/sneaky.robb-2
I made a new cherry mx slider for the beamspring. The old model was not very good. This one is better.
- mx slider.jpg (3.29 MiB) Viewed 6792 times
I got this parallel square hole tool to make the holes if need be by hand in the beamsprings. I also use it for 4x alps project. The cutting method used for the beamsprings has little artefacts.
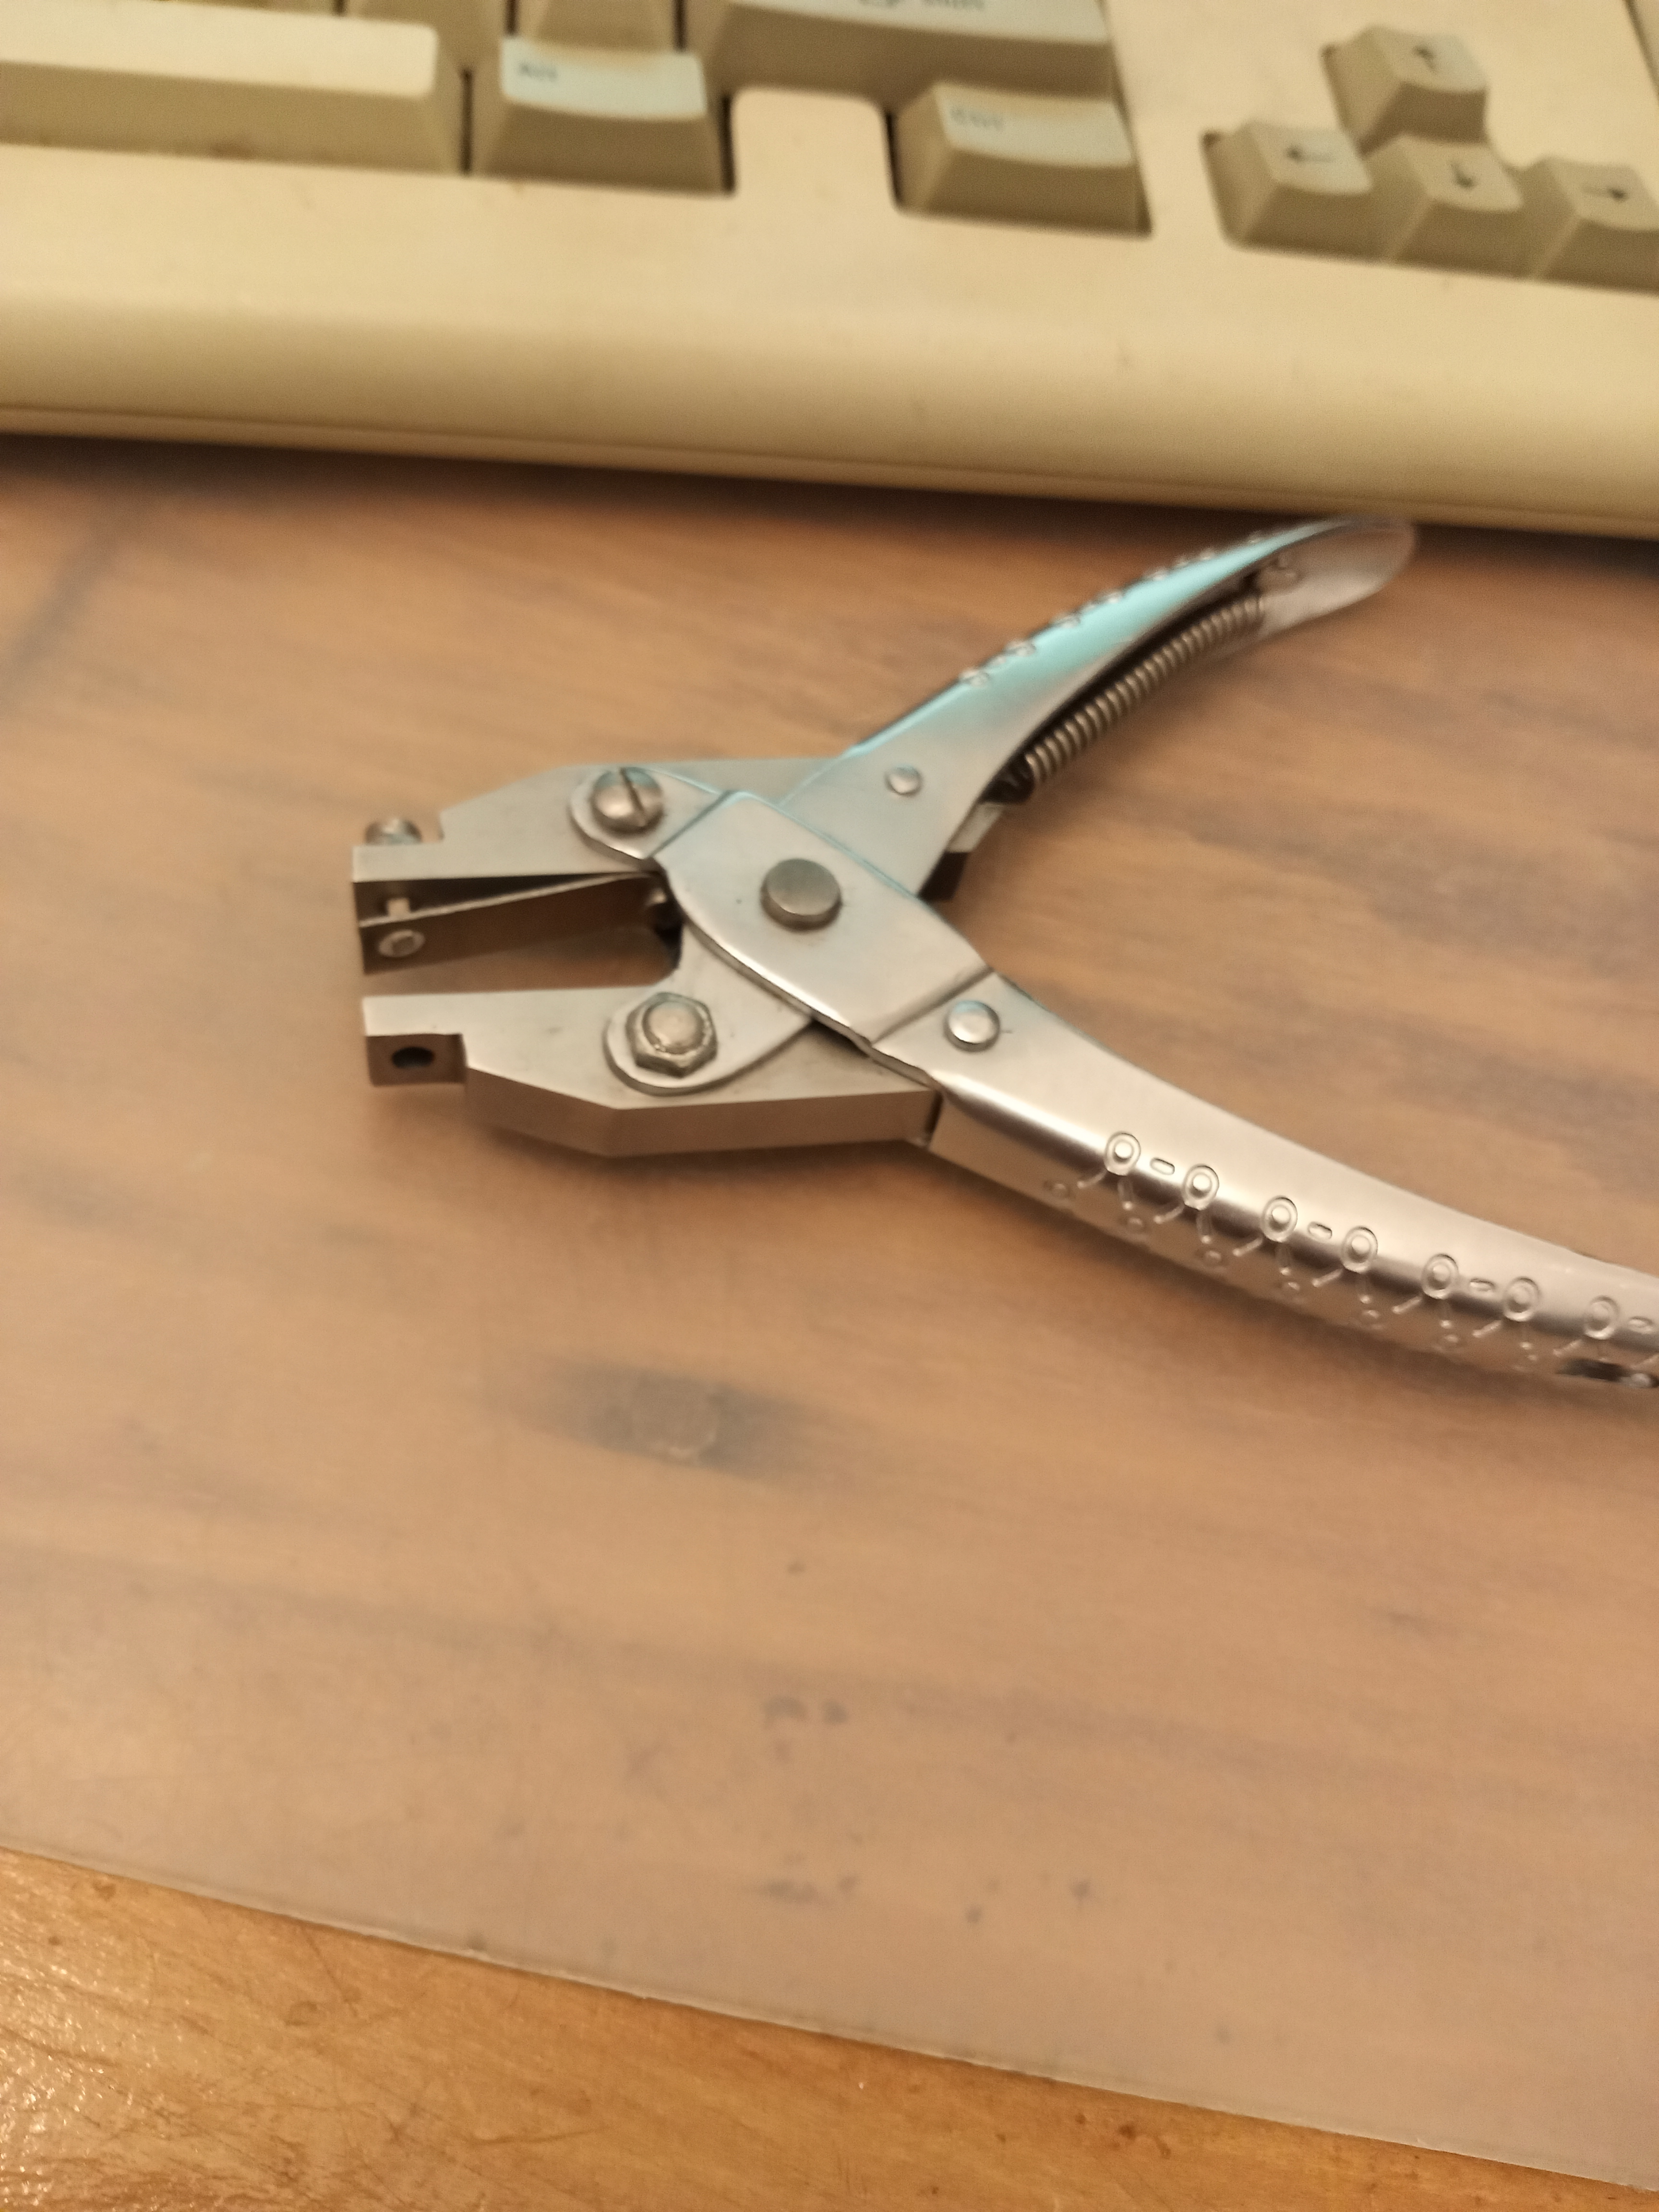
- square hole pliers.jpg (3.35 MiB) Viewed 6792 times
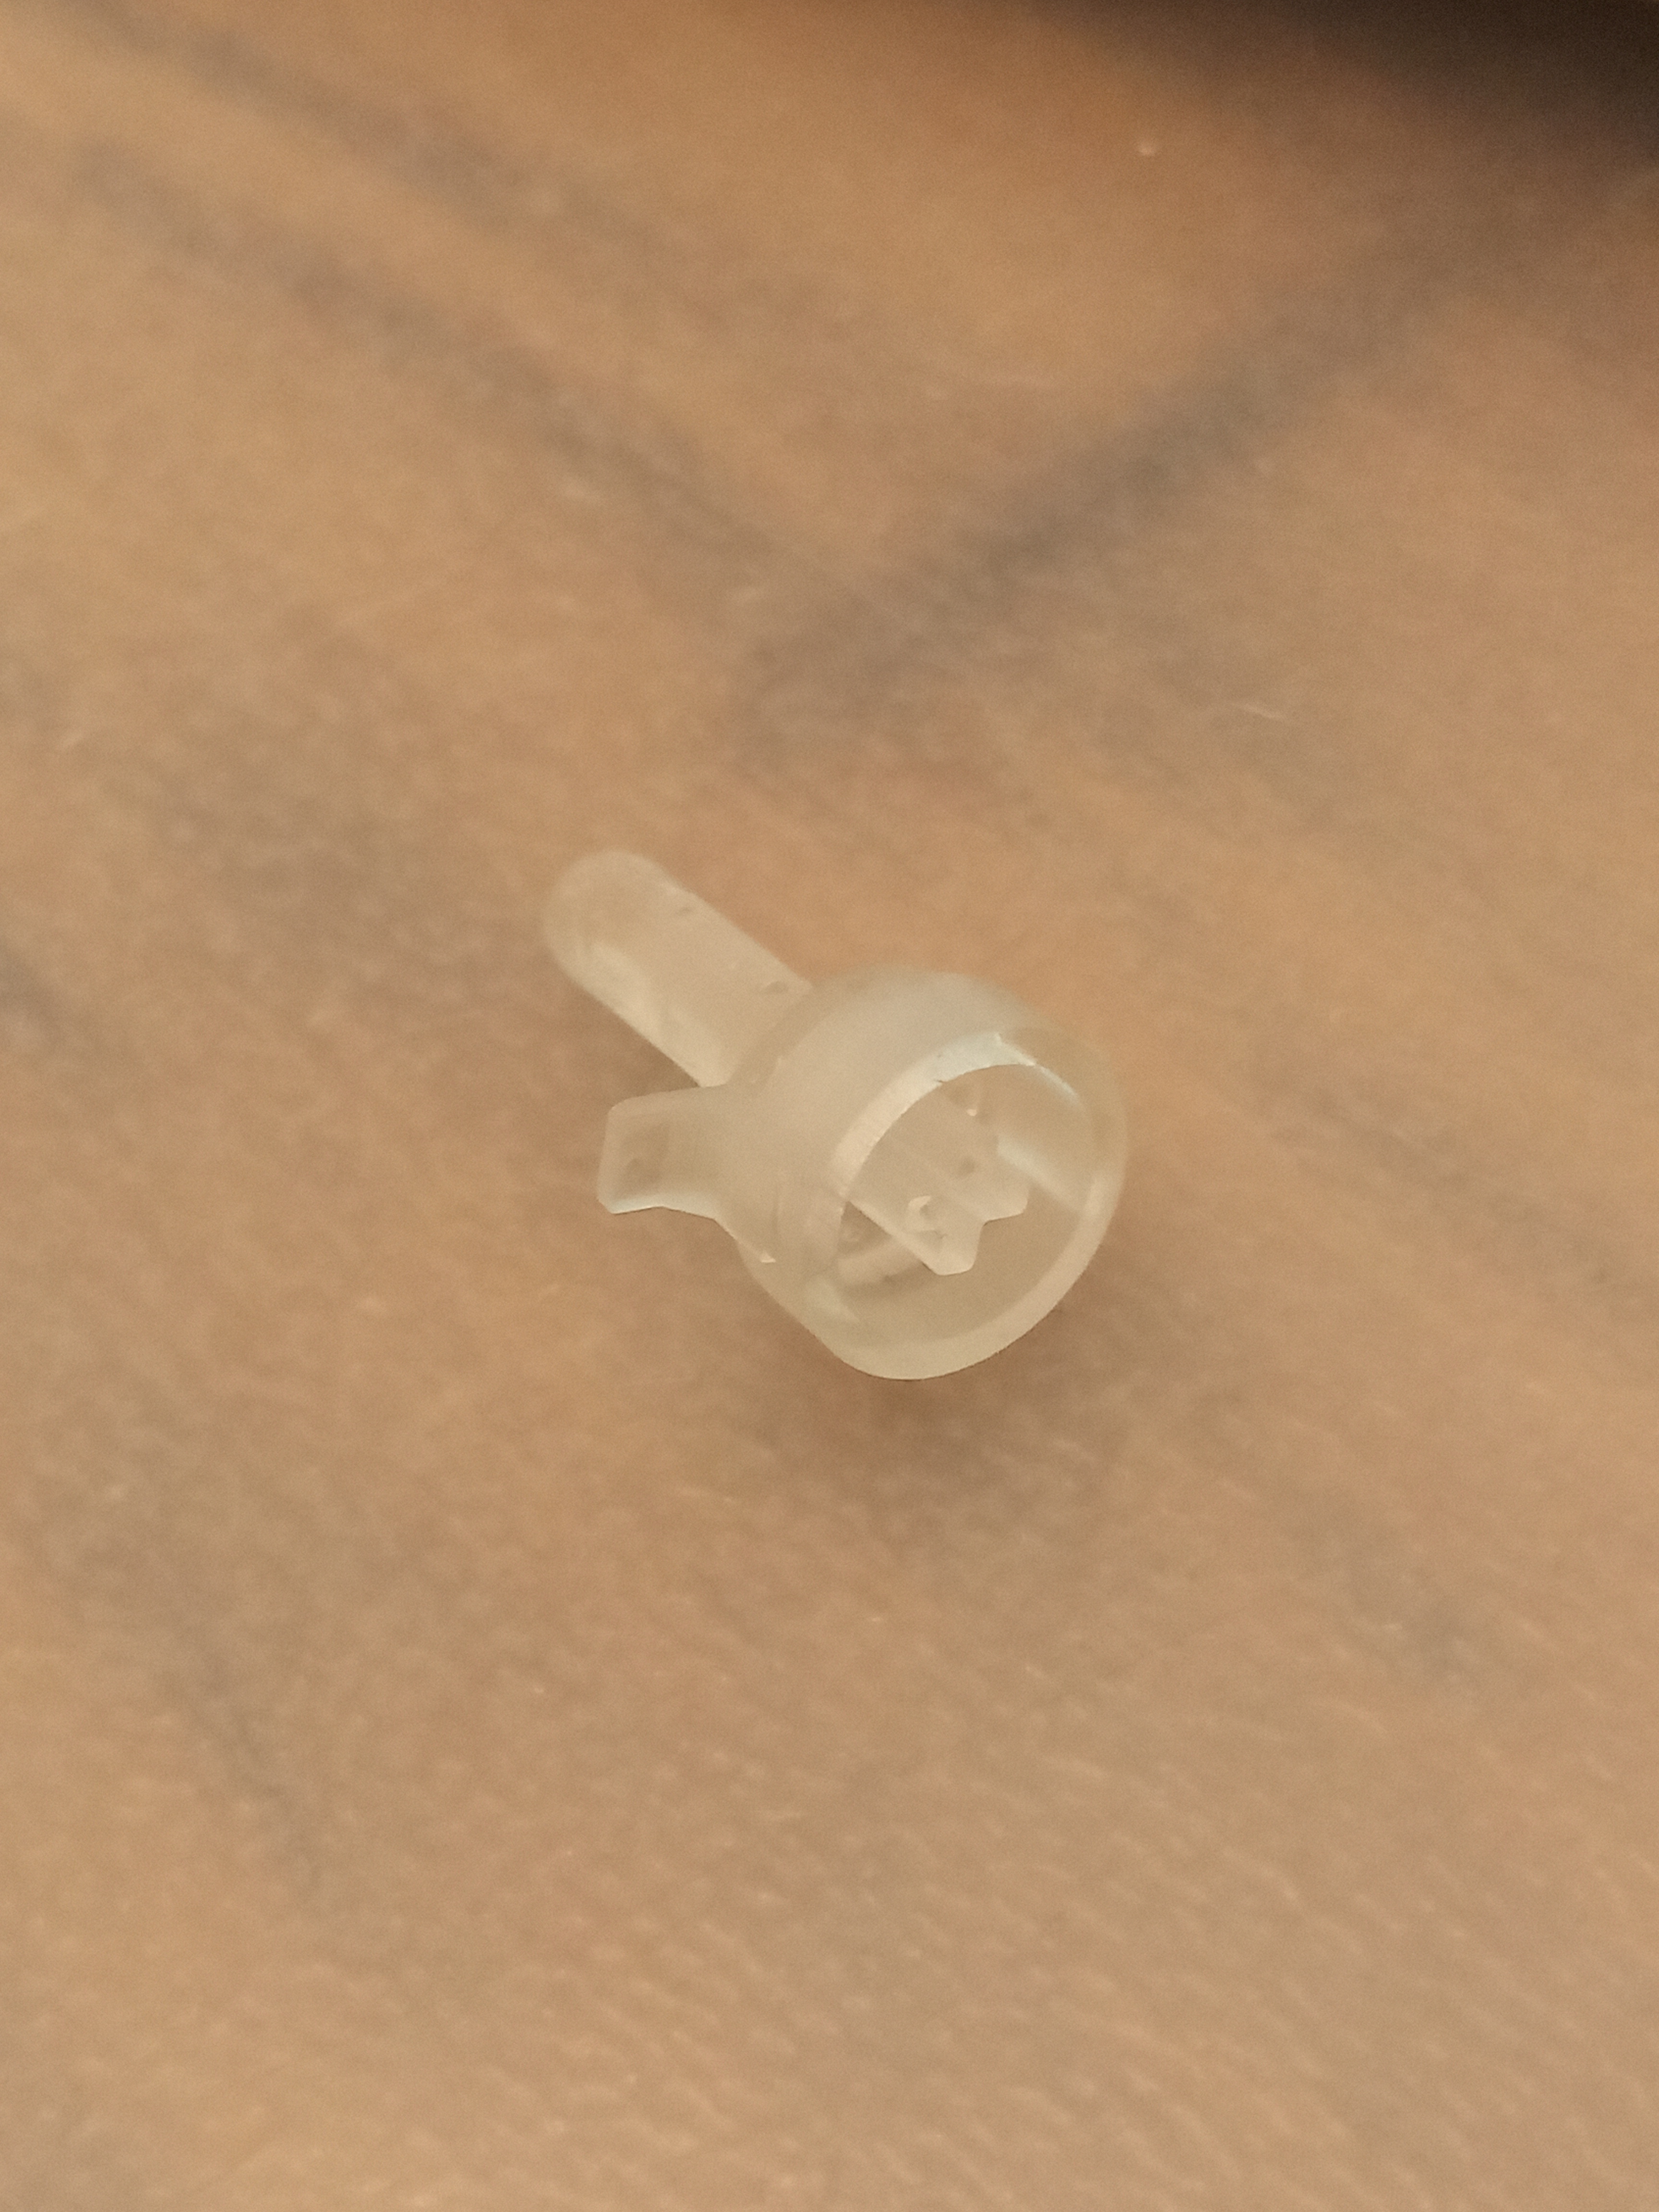
Here are the stems.
- 1.jpg (3.1 MiB) Viewed 6792 times
- 2.jpg (3.2 MiB) Viewed 6792 times
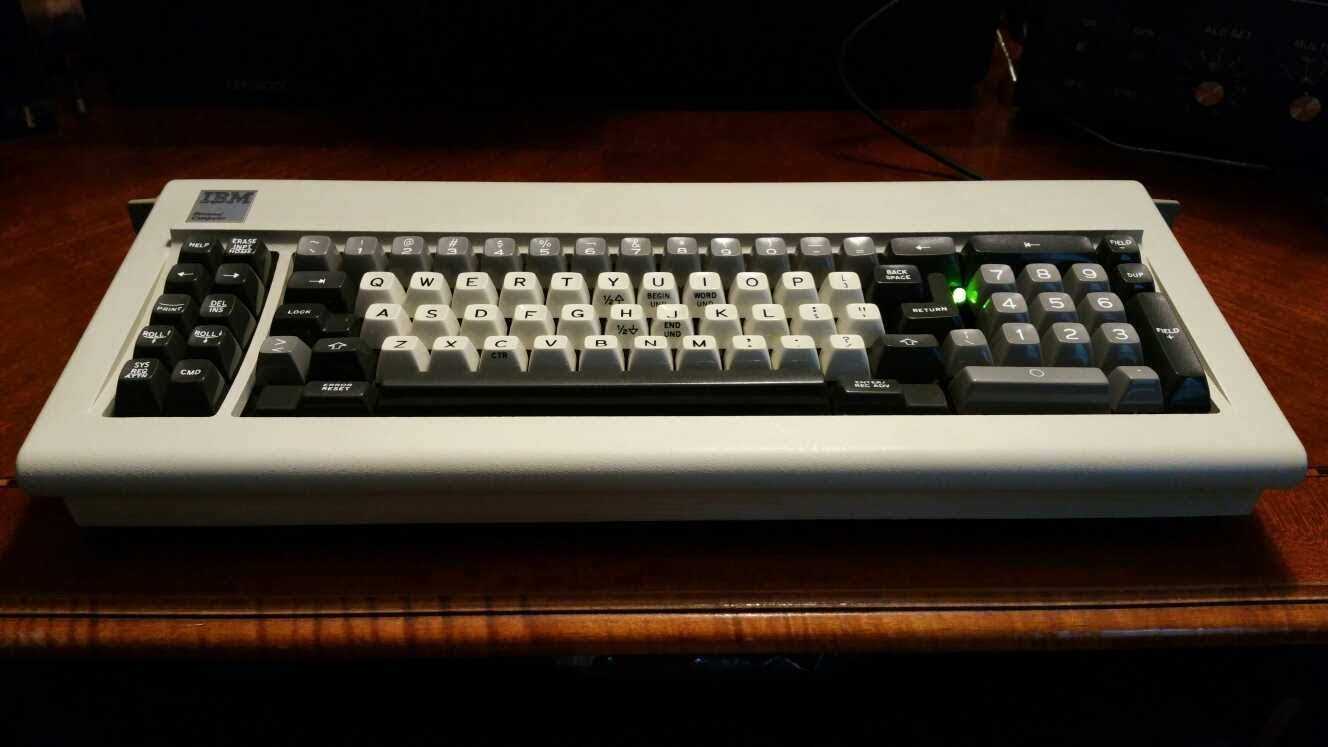
For a case I have ordered a model M "silver badge" case. Sort of like this image. When it arrives I will examine how to best integrate the top and bottom. I thought this would be the most amusing way to do that. It doesn't have the badge so I will make a pcb one with some kind of ibm logo.

I would be going for something like this post
viewtopic.php?t=17339
As seen above I have started to make resin keycaps. They are pretty decent so far. Still learning. Printing a black one now.
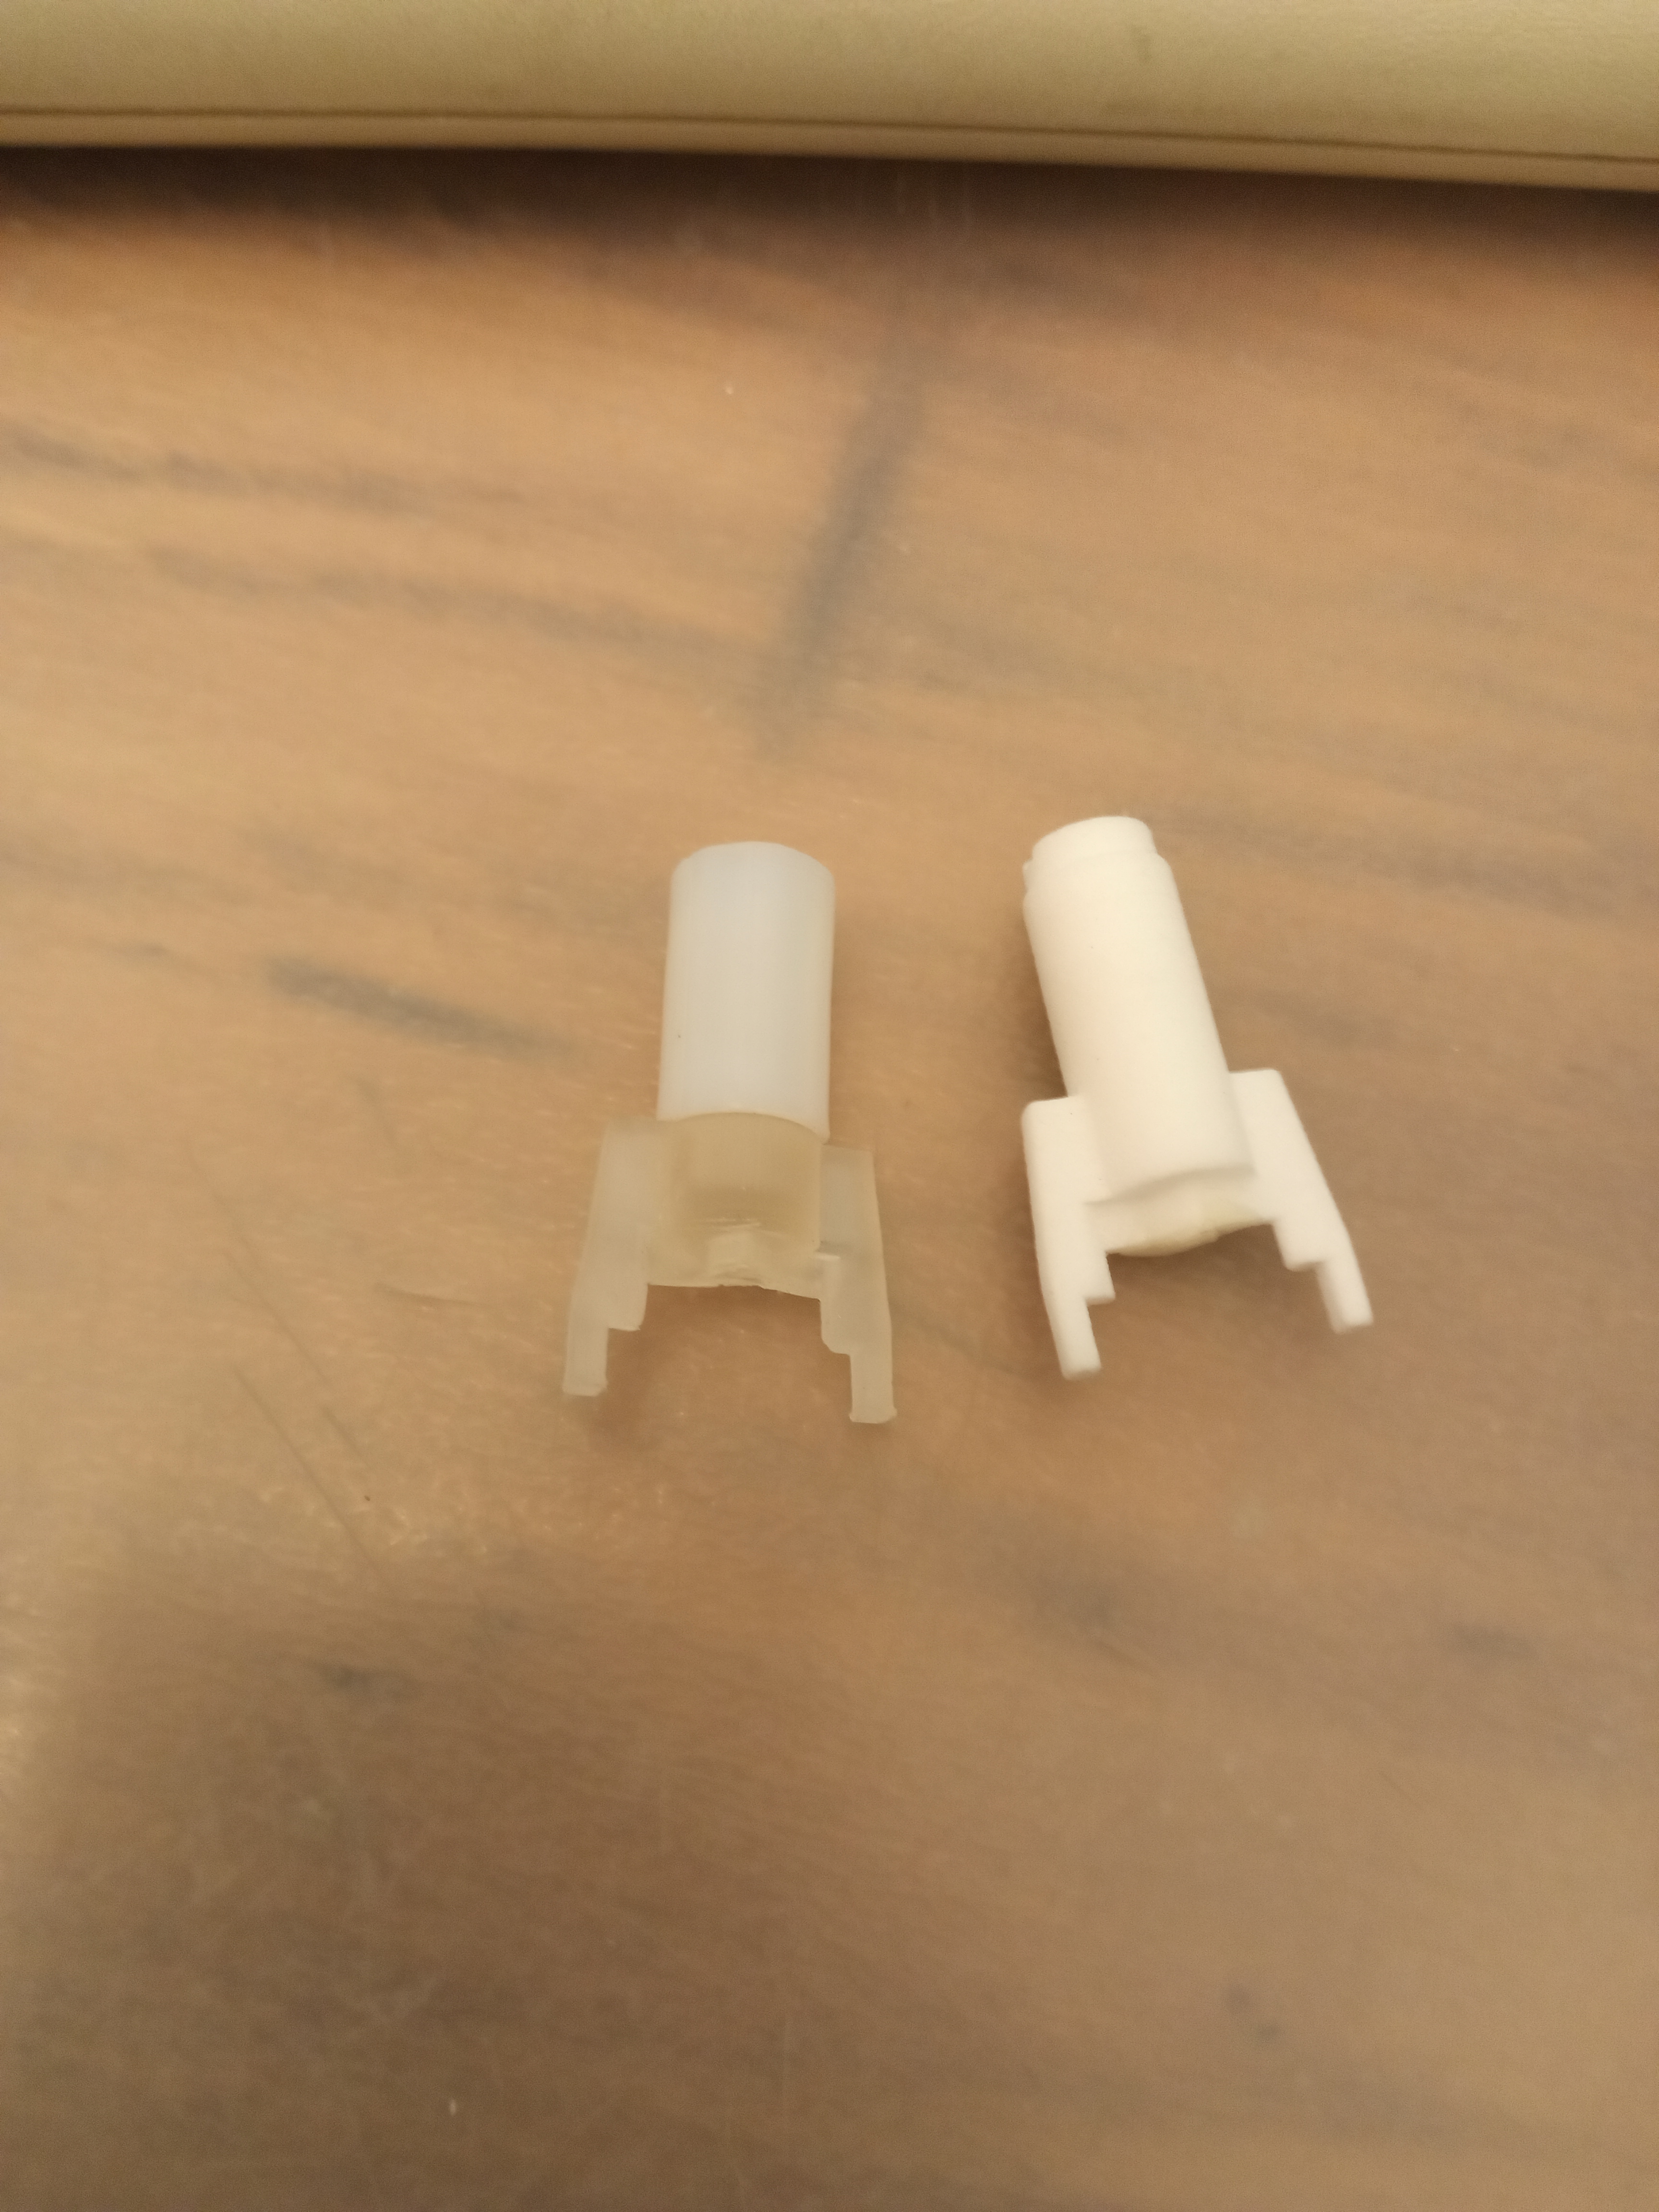
For the barrels I am almost done with them. They are starting to look extremely close and am very pleased with them. This is mostly a printing issue not a model issue.

- compare 1.jpg (2.82 MiB) Viewed 6792 times
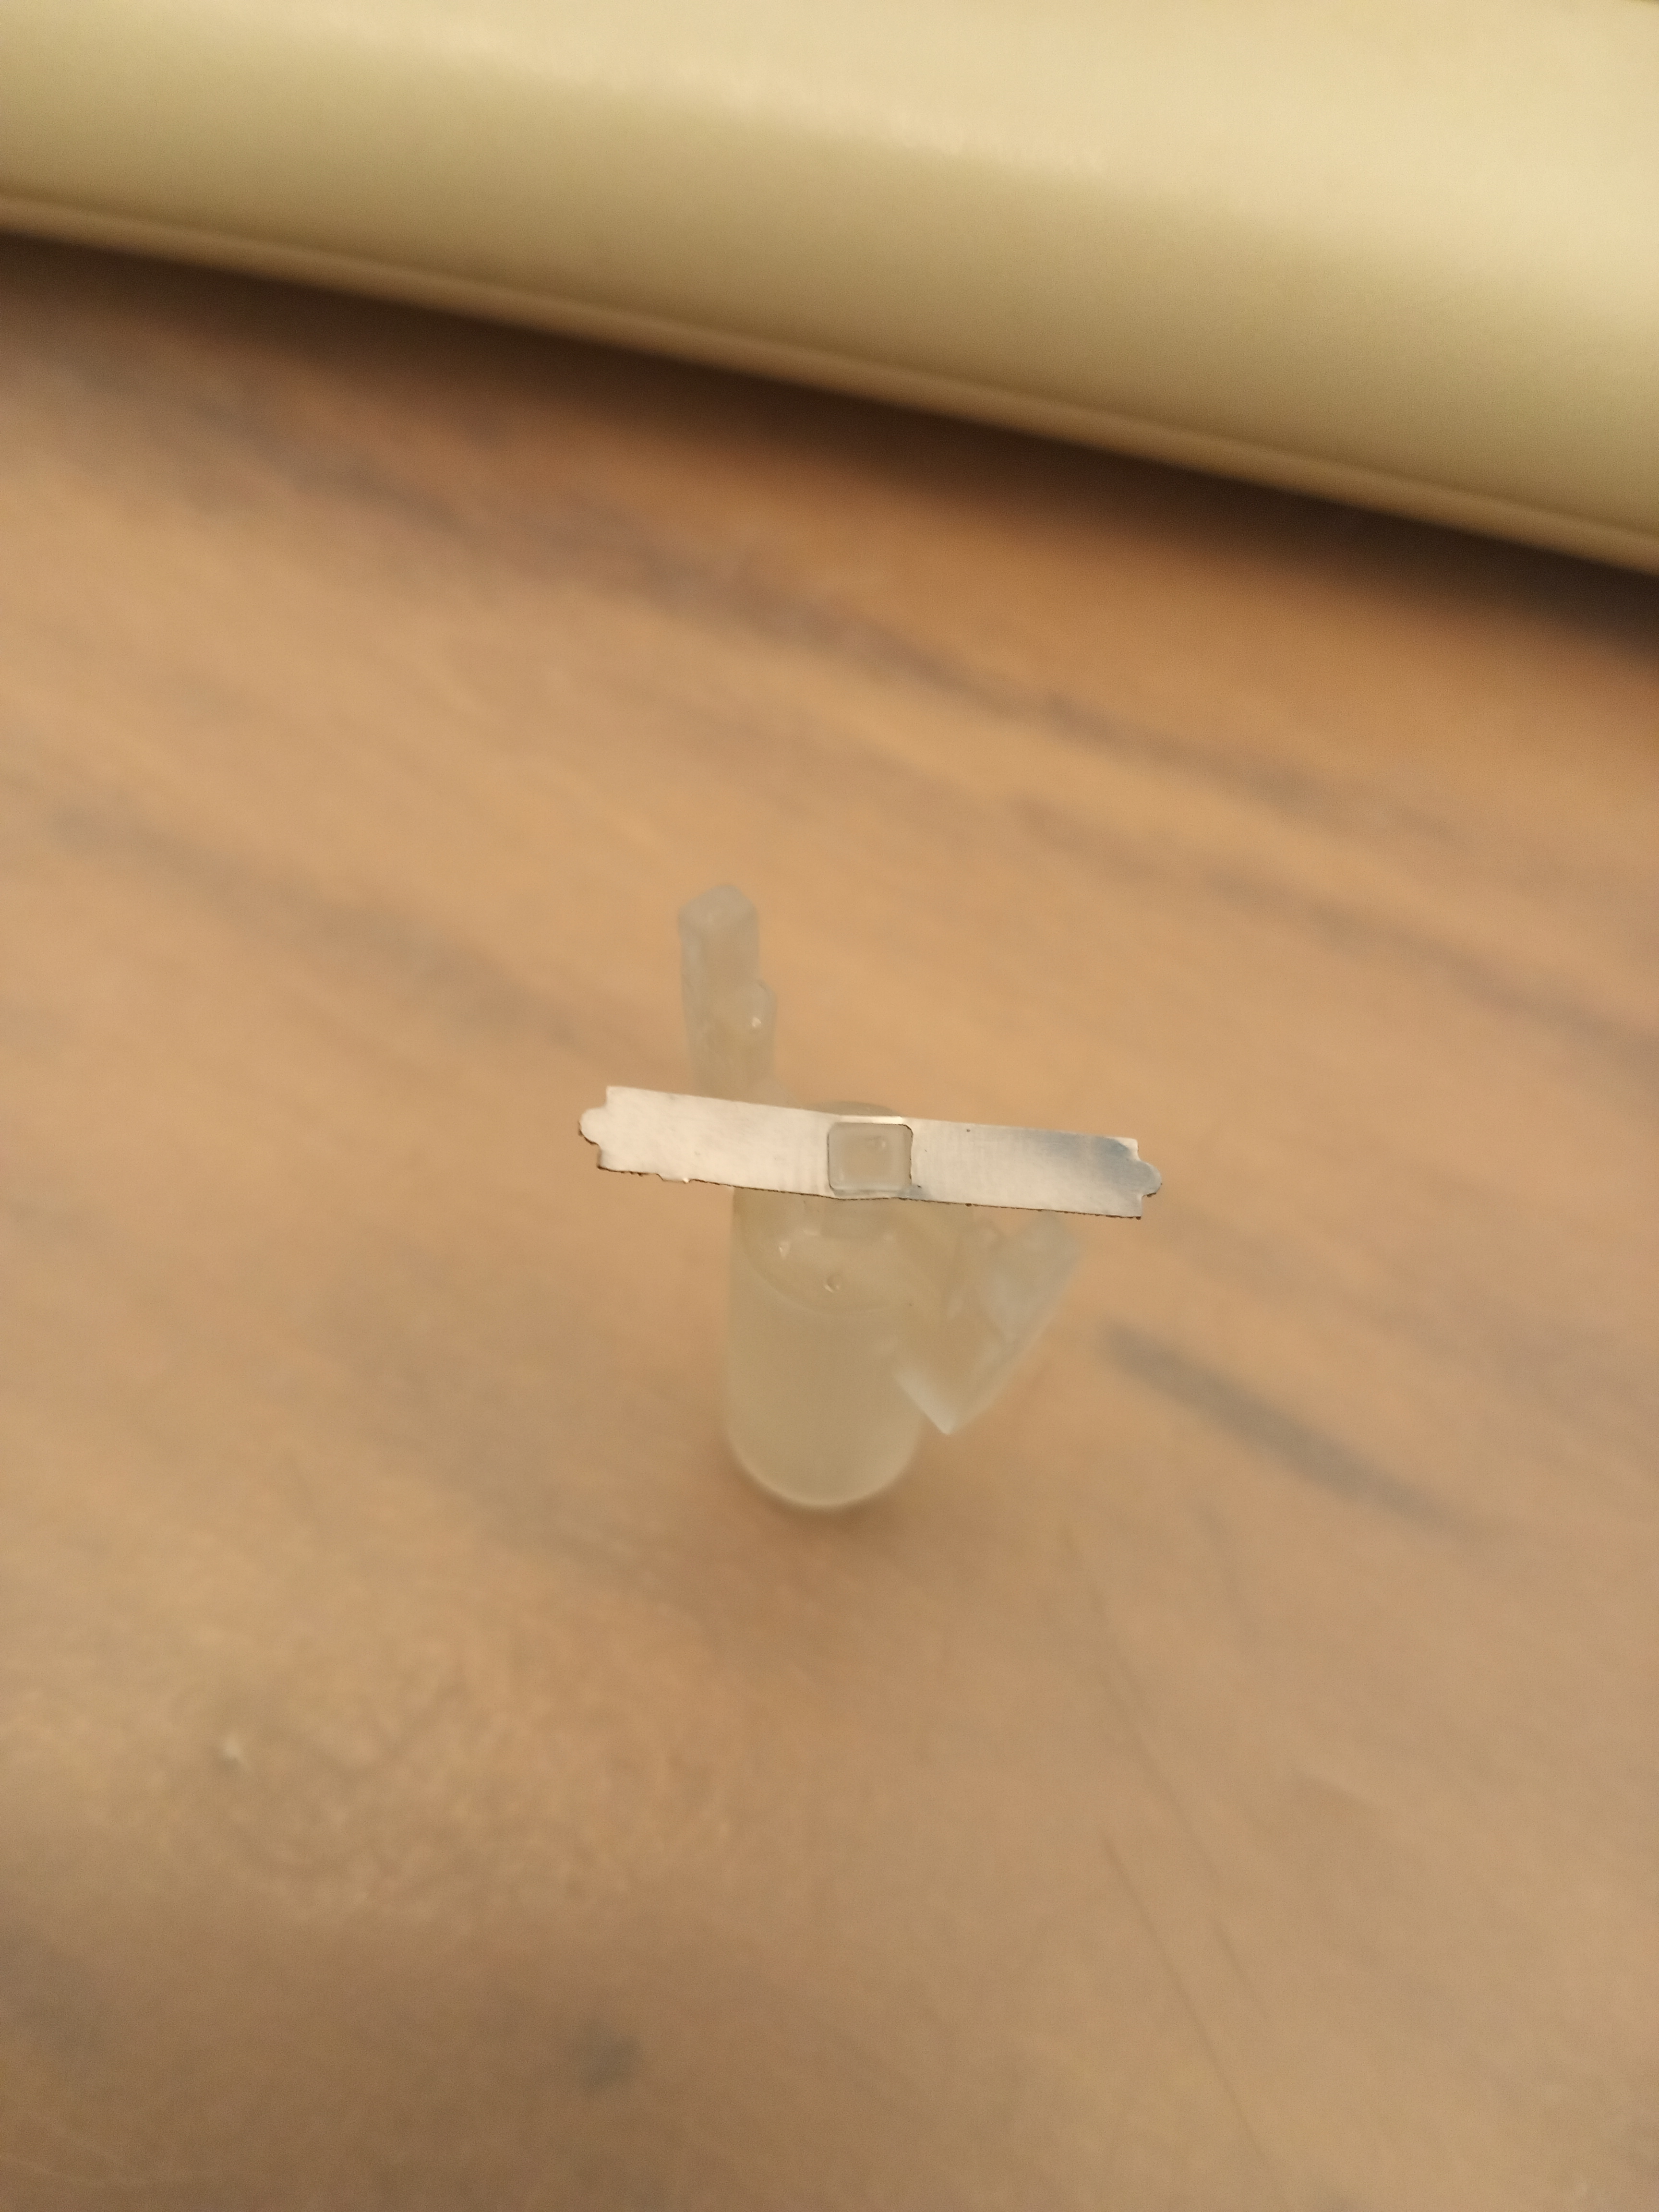
I mentioned before that I would get some teflon tube. This never arrived. Randomly after 5 months it did in fact arrive but the supplier sent the wrong size anyway!
This was what I wanted to do. TBH it actually is ultra smooth and I still want to buy some teflon tube for this purpose.
The idea being the tube forms the surface where the slider and barrel interact. It is just slightly too wide.
- teflon tube applied.jpg (3.39 MiB) Viewed 6792 times
I know I have many projects in various states but I want to focus on actually finishing this one now. I should have done it sooner.
Re: Beamspring Factory process - How to
Posted: 18 Sep 2020, 23:27
by SneakyRobb
Hi,
One thing I should have done was the stabilizers. I thought I might have to make a insert to link them but I think it should work. The only thing is the cherry ones somewhat overlap on the top plate and part of the barrel housing. I will just make new barrel housings for those switches.
I wont do this permanently but when the Model M case gets here I will temp. borrow the 5110 switches to fully assemble the keyboard just because.
Robb
Re: Beamspring Factory process - How to
Posted: 10 Oct 2020, 18:11
by SneakyRobb
Hi,
So that model m case never arrived. No problem though. I am doing some test fitting right now and need to adjust the foam as it's causing keys to bind.
Otherwise I should have this fully working by the end of the weekend. Using just Beamspring keycaps for now before I get the stabs working right.
- 20201010_112348.jpg (3.29 MiB) Viewed 6541 times
Re: Beamspring Factory process - How to
Posted: 10 Oct 2020, 19:05
by SneakyRobb
For the stabs I found they do in fact sit too low. This is only really a large issue for the space bar. What im going to do is either make a new stab vertical, or shave off an existing one and glue a hat ontop of it. I think the hat method will be easier.
Left side has a taller cross which I am not sure I could make easily.
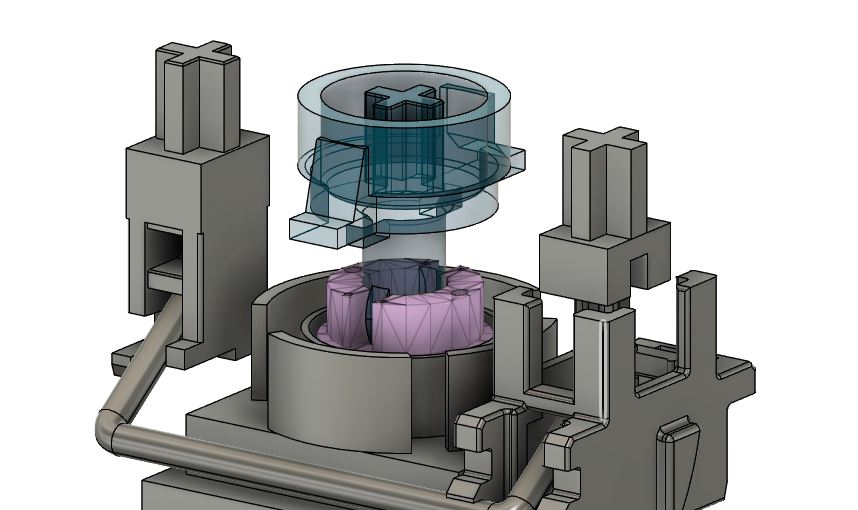
- stabs 1.jpg (53.21 KiB) Viewed 6530 times
Right side I would shave down the existing cross, make an extension piece that glues on top. This seems easier so that's what Ill try
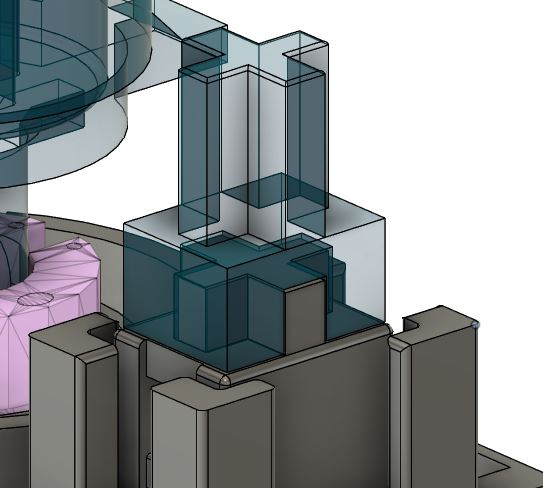
- stab hat.jpg (35.93 KiB) Viewed 6530 times
Re: Beamspring Factory process - How to
Posted: 11 Oct 2020, 16:33
by cakeanalytics
This is coming along nicely. Congrats!
Any chance you'll be selling kits when you're done?
Re: Beamspring Factory process - How to
Posted: 11 Oct 2020, 18:35
by ZedTheMan
Oh wow, so much progress! I love this project, and seconding question of kits.
Re: Beamspring Factory process - How to
Posted: 11 Oct 2020, 23:45
by SneakyRobb
Hi
Thanks. I am unsure about kits. My goal really was just to make a keyboard for fun. I wanted to create and share the process and not necessarily sell any product. Regardless I want to share the design. Also currently we can only reconfigure existing beamspring switches into new layouts. Still have not perfected creating new beams/stems.
That said, people with beamsprings could reconfigure them to any layout they want which is cool. Of course based on the previous design work from wcass and help from DMA.
As well I must also thank purdeaandrei for his help with the xwhatsit as well as kmnov and listofoptions.
As well I just hit 2 problems of my own making! Should be able to fix!
First I foolishly used the 1/2 foam cutter for model f. The beamspring foam is sliiiightly wider. Meaning the foam is compressing sideways the tops of the housings, causing the keys to bind.
Here is the x key binding

- x key bind.jpg (3.85 MiB) Viewed 6392 times
I took out the foam and it works!... but 2nd problem.
I forgot to include a jumper wire relief area. This is causing the entire board to short.
Here is where you can see the flex
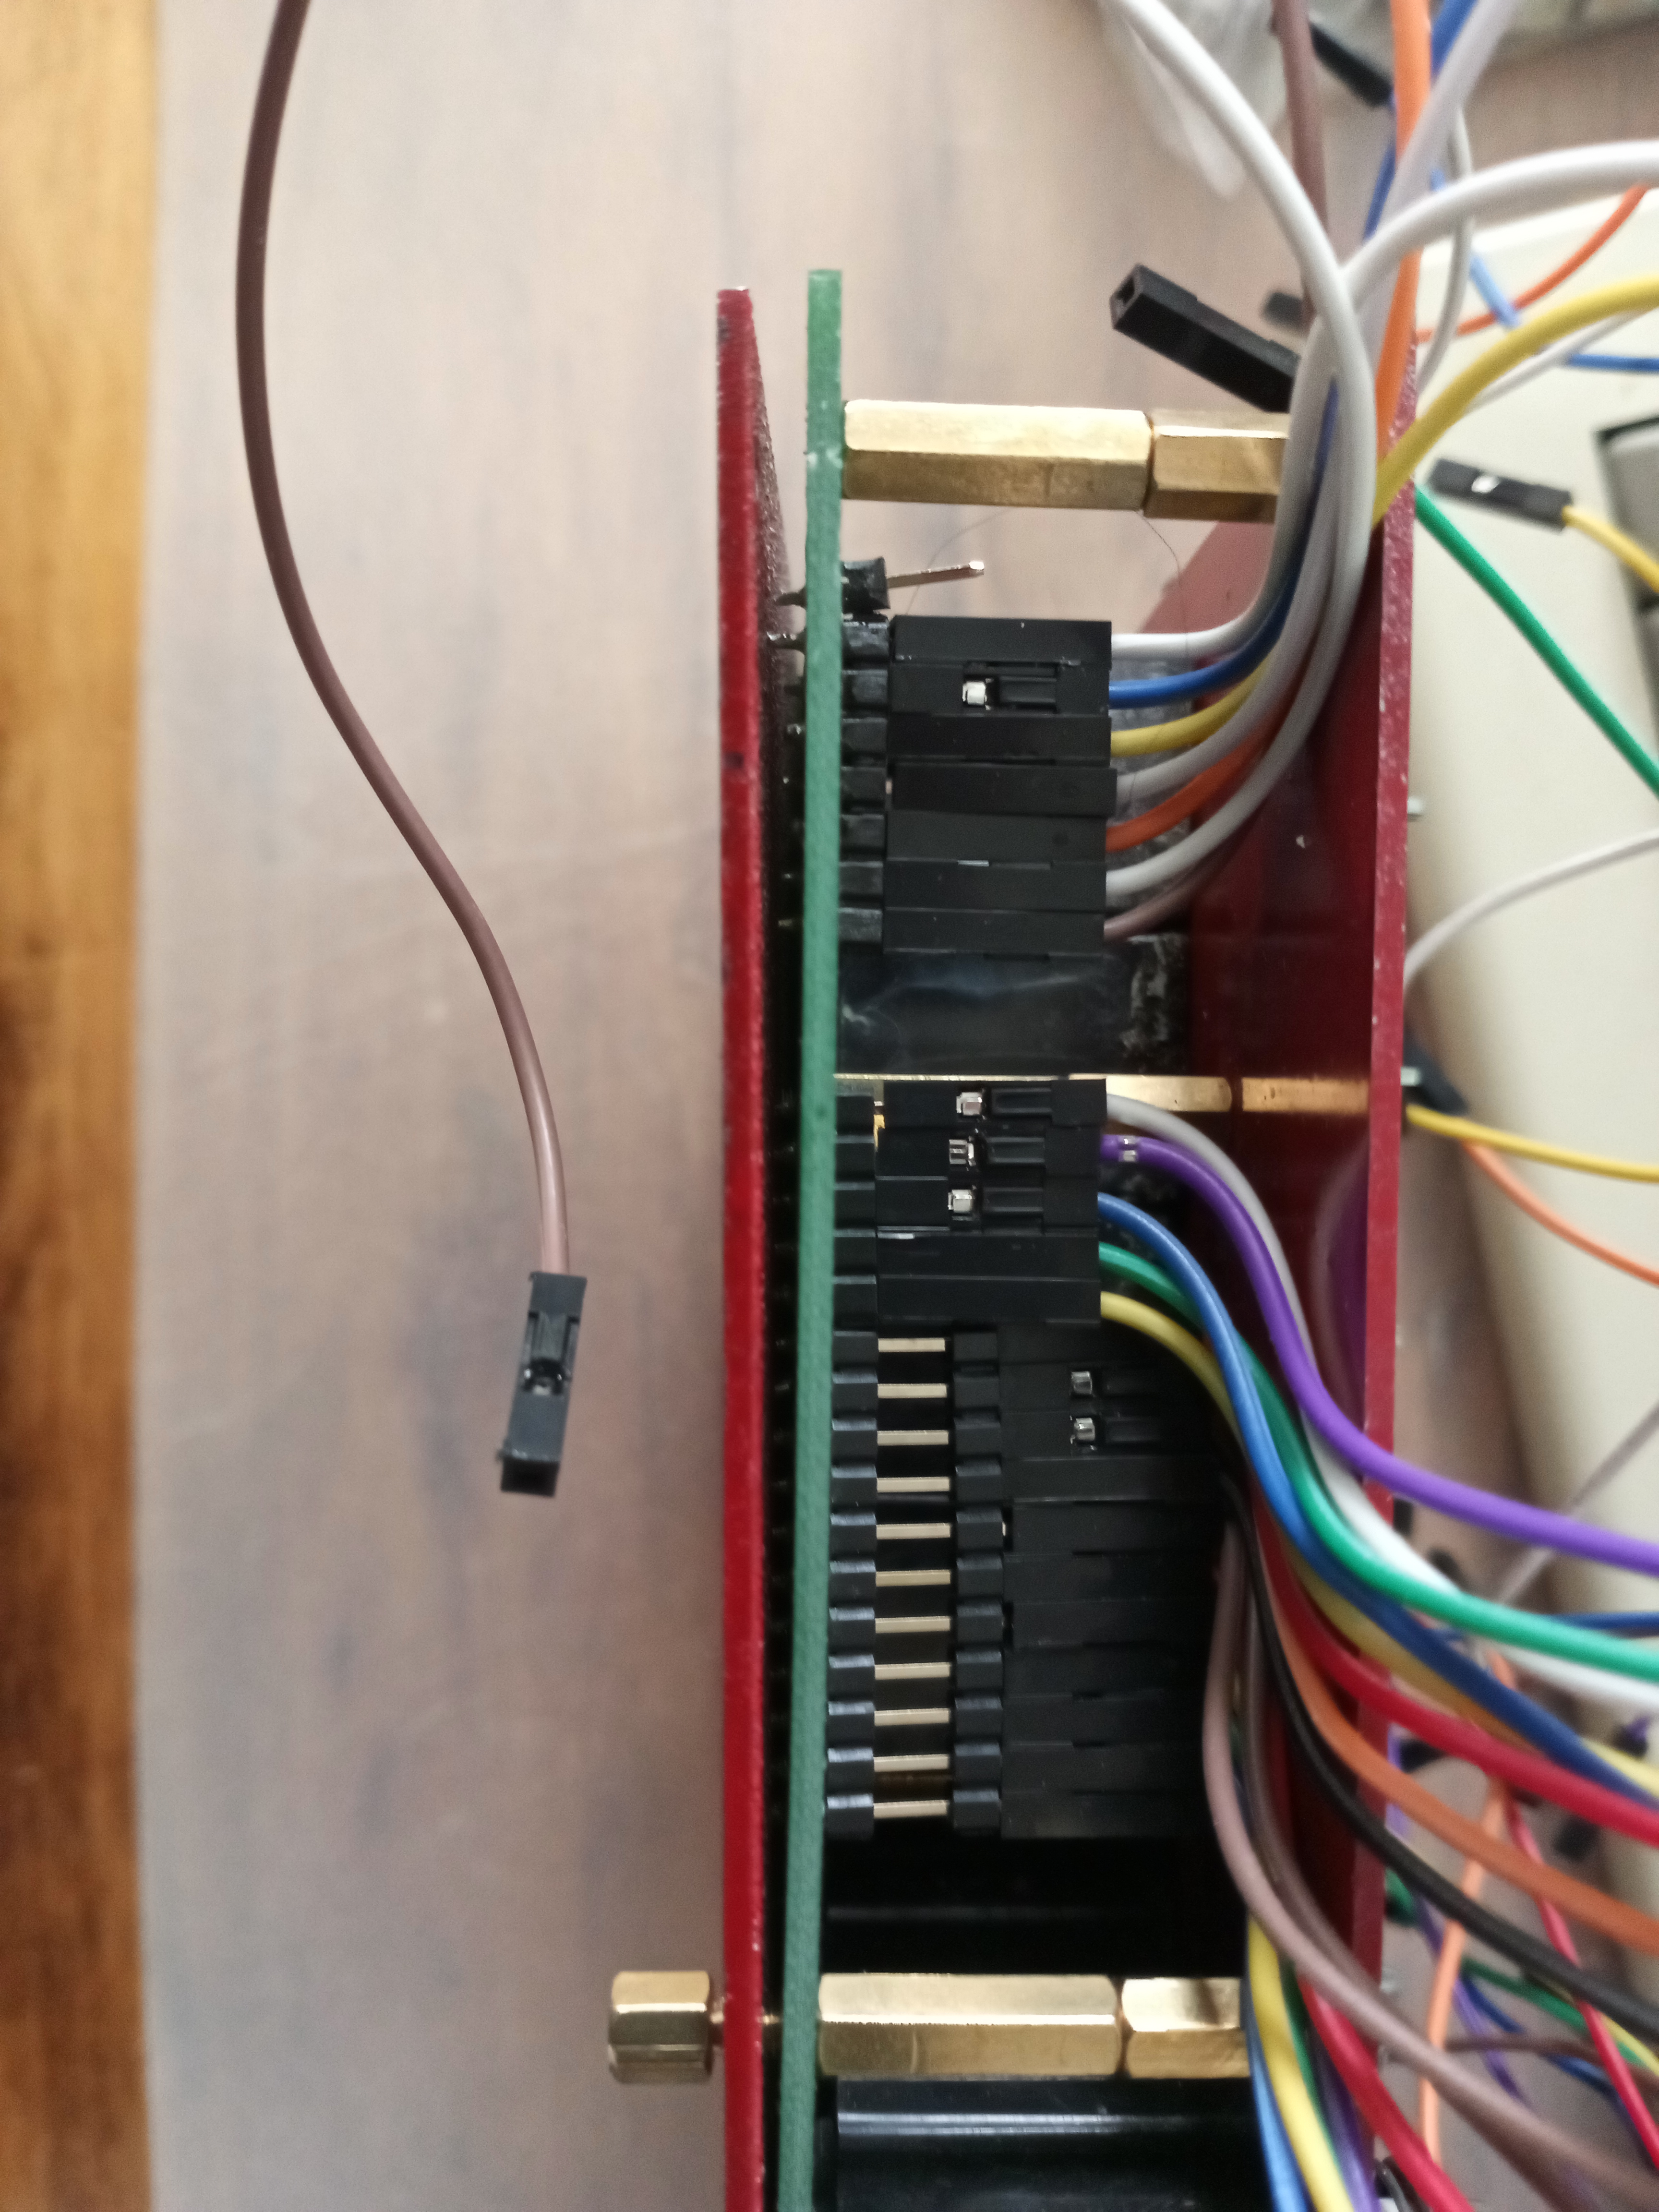
- durr.jpg (3.43 MiB) Viewed 6392 times
and here is where I should have added a cutout.
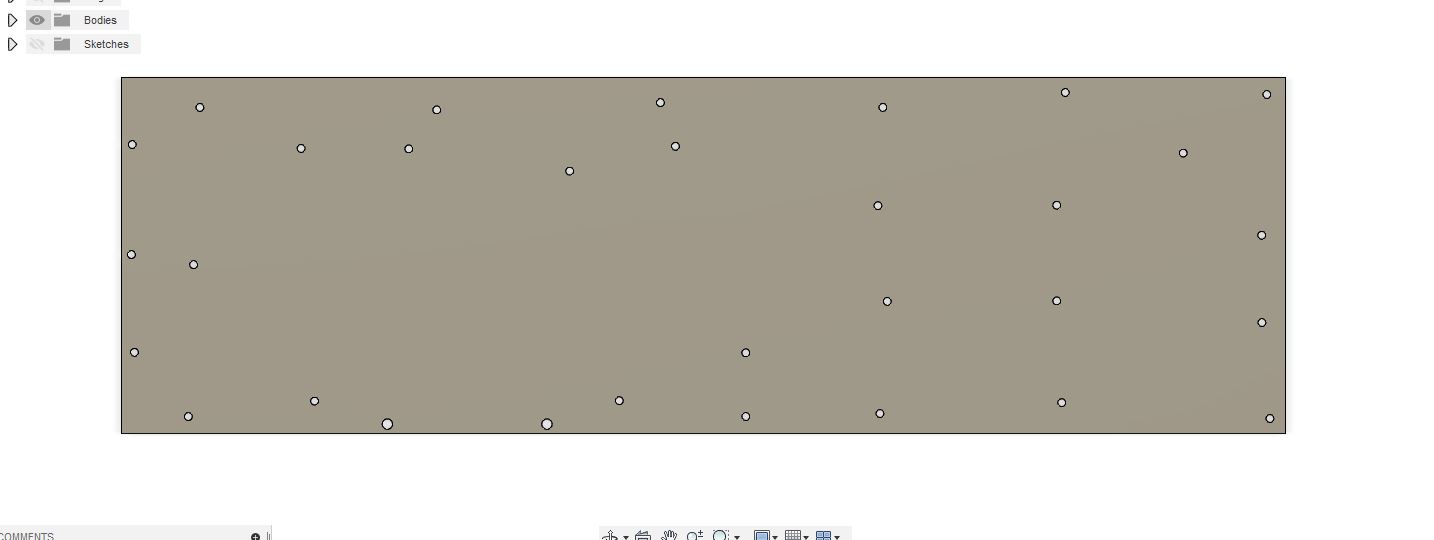
- bottom plate og.JPG (33.8 KiB) Viewed 6392 times
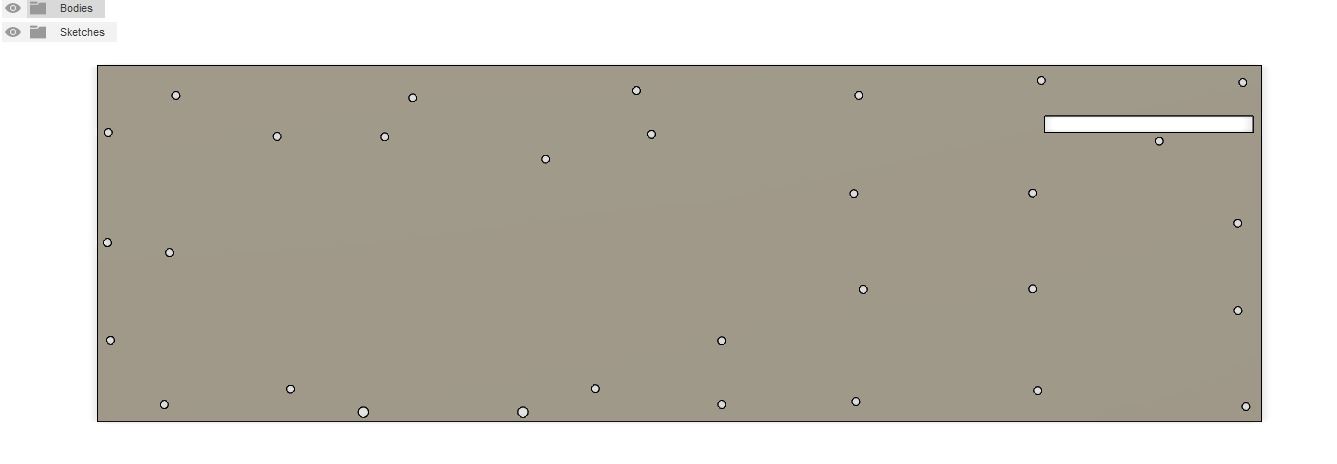
- bottom plate.JPG (29.88 KiB) Viewed 6392 times
Basically right now the leads from the jumpers are pressing onto the bottom steel plate causing shorts. I will need to saw or dremel a channel for them to go without interference. STILL. I want to finish this very very soon.
Robb
Re: Beamspring Factory process - How to
Posted: 12 Oct 2020, 00:06
by Redmaus
Amazing progress, I would love to see this go further! I also have a case if you are interested, PM'ing now
Re: Beamspring Factory process - How to
Posted: 25 Oct 2020, 01:25
by SneakyRobb
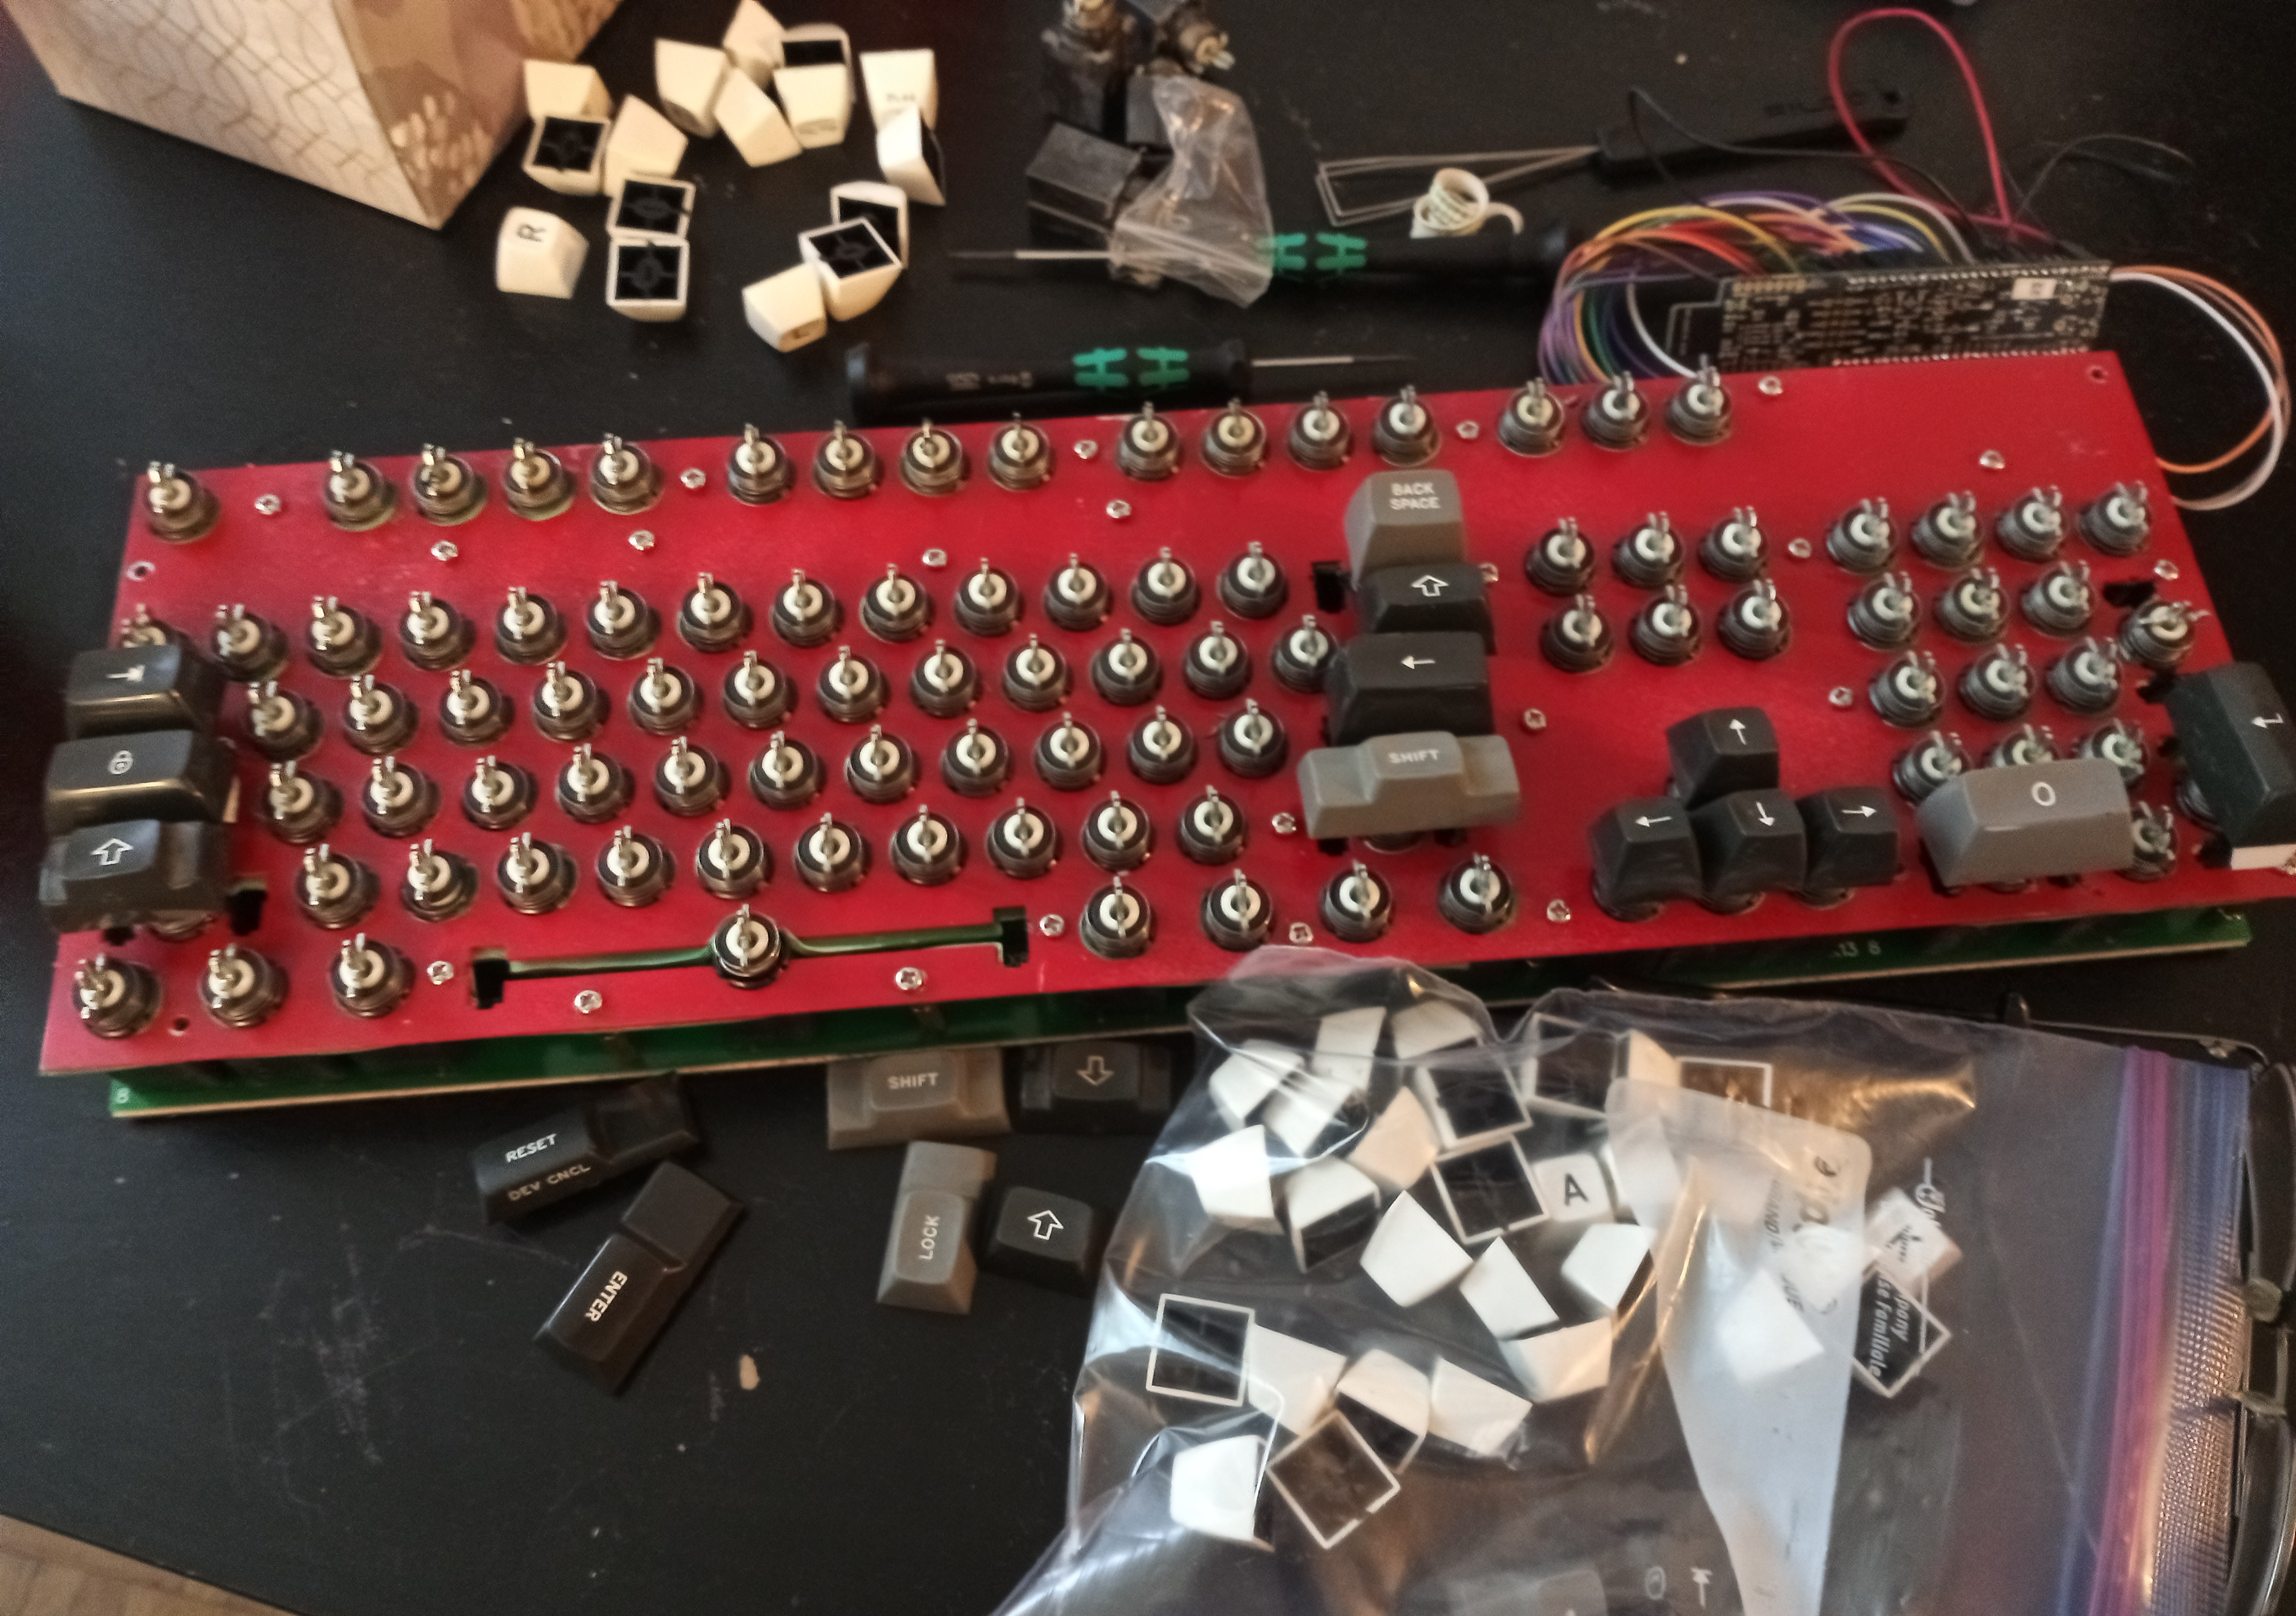
Hi, So I will soon have the model m silver badge from Redmaus for a top case. Will decide how to mod. Maybe use some wood for wrist wrest. Keyboard module works for about 35-65 mins before error. Maybe due to no ground plane or also unclean flyplates. Basically works good though. Currently using $10 through hole xwhatsit. I have also decided I like original caps for now. So for this specific keyboard I will try to make SA style keycaps for the modifiers.
Current 2u backspace keycap model
https://grabcad.com/library/2u-beammx-keycap-1
Using random keycaps for now. I thought I would try to use MX keycaps with custom stems. This works but the originals are so nice. For now I want to try to resin make mx stab compatibles. I will make these with the angle stems. I will also add just the side bluff areas as well. I might fort the legend make slightly sunken legends with white paint then use clear coat to fill them in.
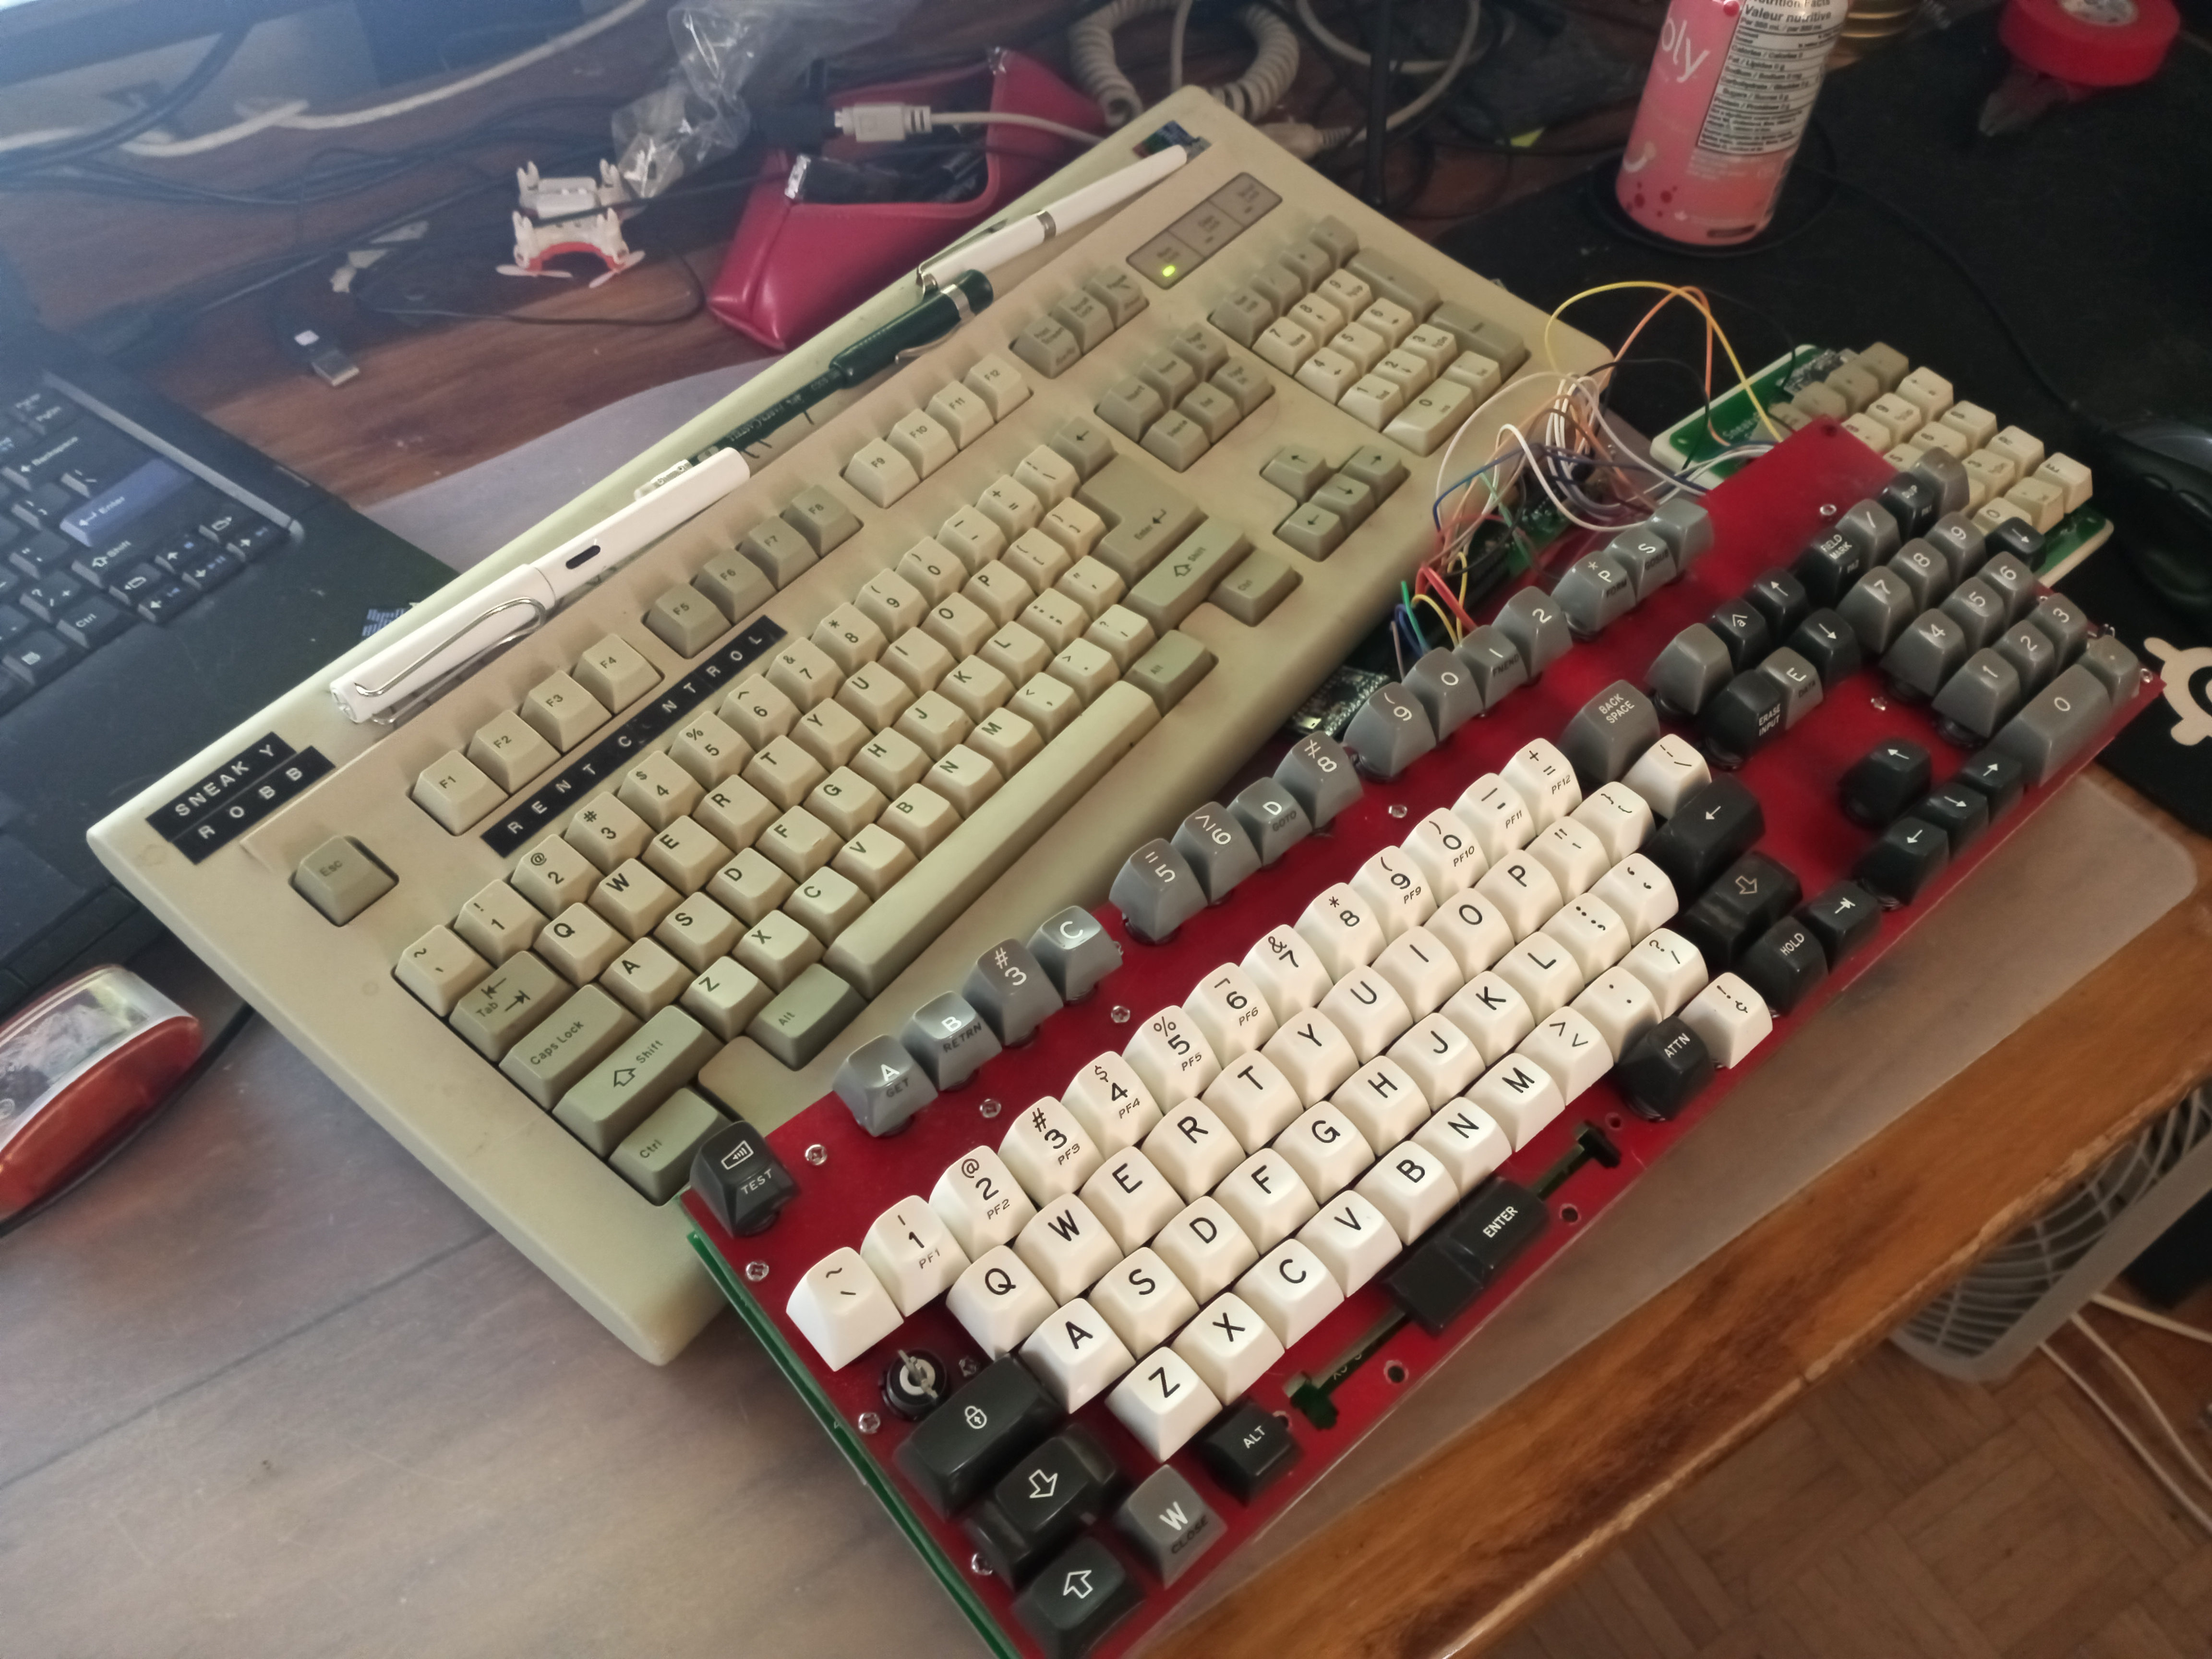
- keyboards.jpg (2.97 MiB) Viewed 6164 times
This side bluff is obvs too big
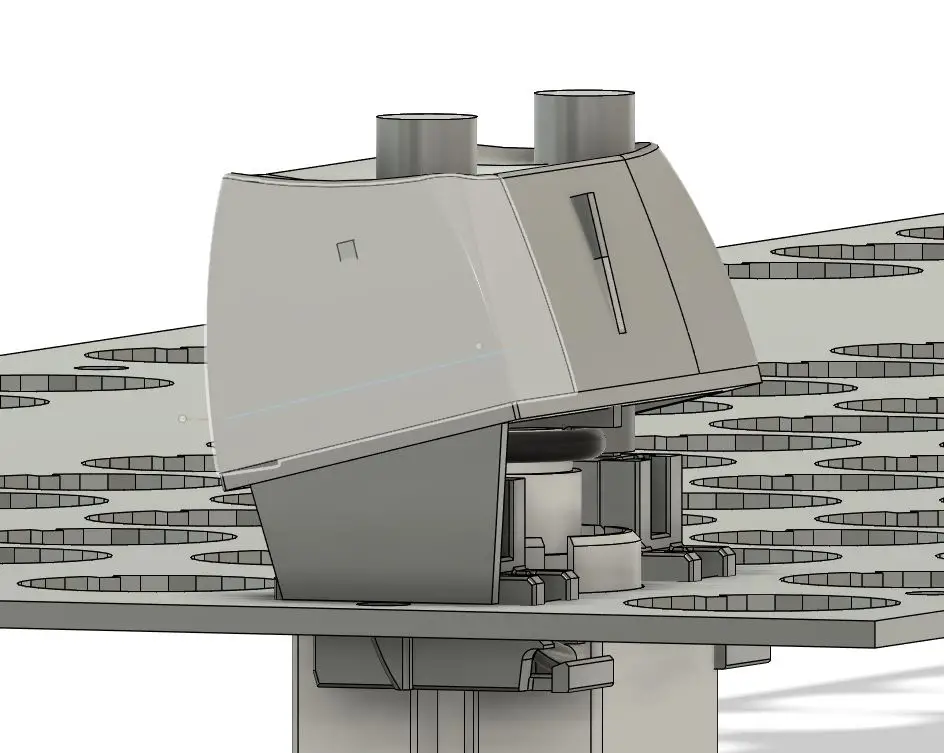
- side view.JPG (77.3 KiB) Viewed 6164 times
Because they are rotated I had to rotate the cherry mx stabilizer tube with angle and length.
Re: Beamspring Factory process - How to
Posted: 04 Nov 2020, 23:38
by ZyBeR
Very impressive work

Re: Beamspring Factory process - How to
Posted: 20 Mar 2021, 20:23
by darkcruix
Can't wait to hear / see any updates

Re: Beamspring Factory process - How to
Posted: 20 Mar 2021, 21:06
by SneakyRobb
darkcruix wrote: ↑20 Mar 2021, 20:23
Can't wait to hear / see any updates
Hi, this is a good reminder. Sometimes I need to remind myself to do projects. So I do actually appreciate this. Will try to get something out to share soon.
Re: Beamspring Factory process - How to
Posted: 20 Mar 2021, 21:08
by Bjerrk
SneakyRobb wrote: ↑20 Mar 2021, 21:06
darkcruix wrote: ↑20 Mar 2021, 20:23
Can't wait to hear / see any updates
Hi, this is a good reminder. Sometimes I need to remind myself to do projects. So I do actually appreciate this. Will try to get something out to share soon.
That's what I call a cliffhanger!
