Guide for Rebuilding an IBM Model F XT ?

Waxwood

10 Nov 2018, 03:24

Hi!
I'm quite new to all of this, so please do excuse my "noob-ness". :D

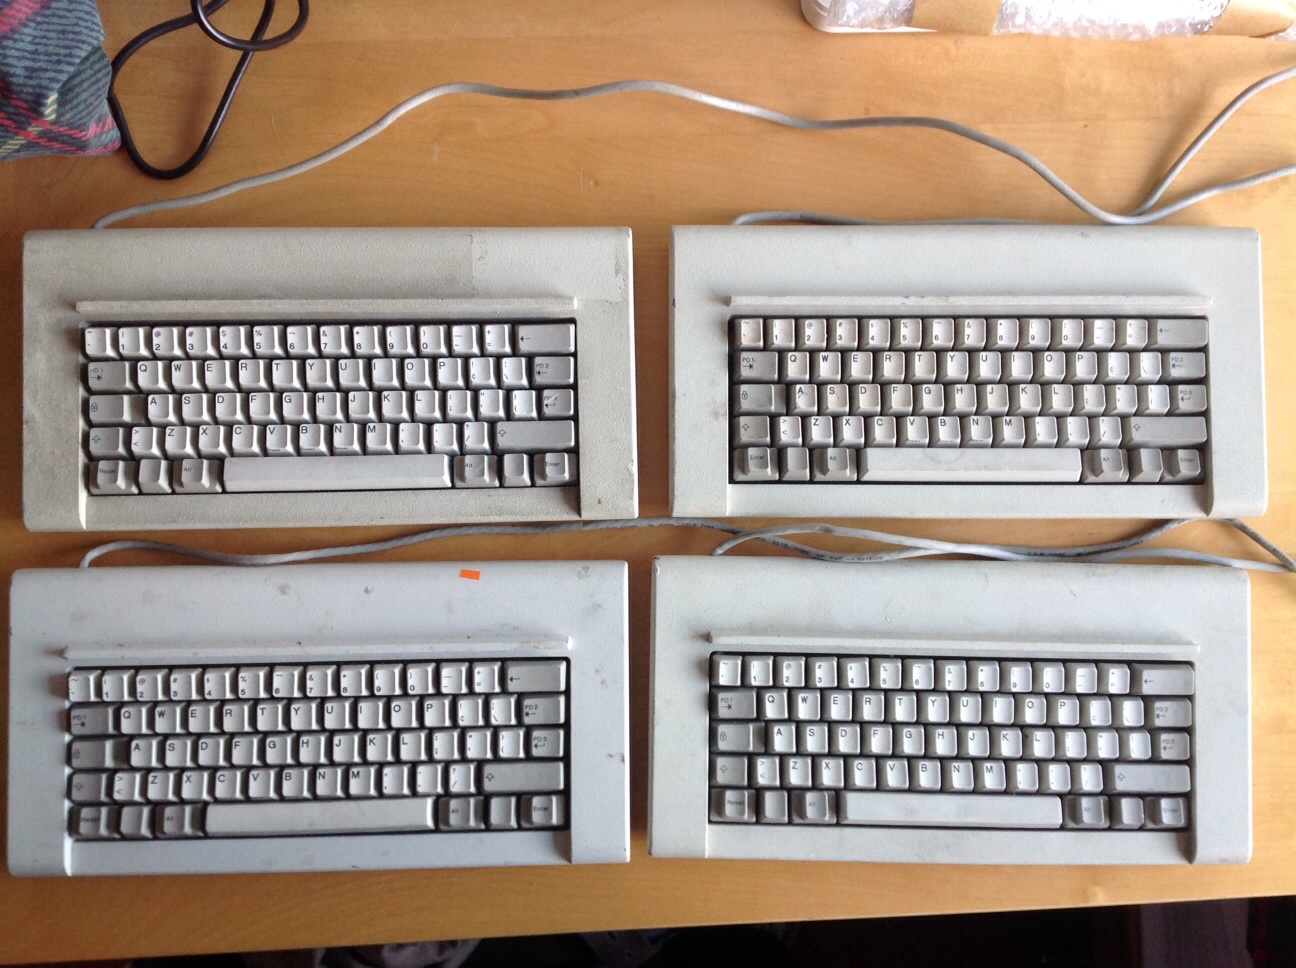
I recently received an IBM Model F XT keyboard.
It appears to be in very good condition. I've attached a photo.

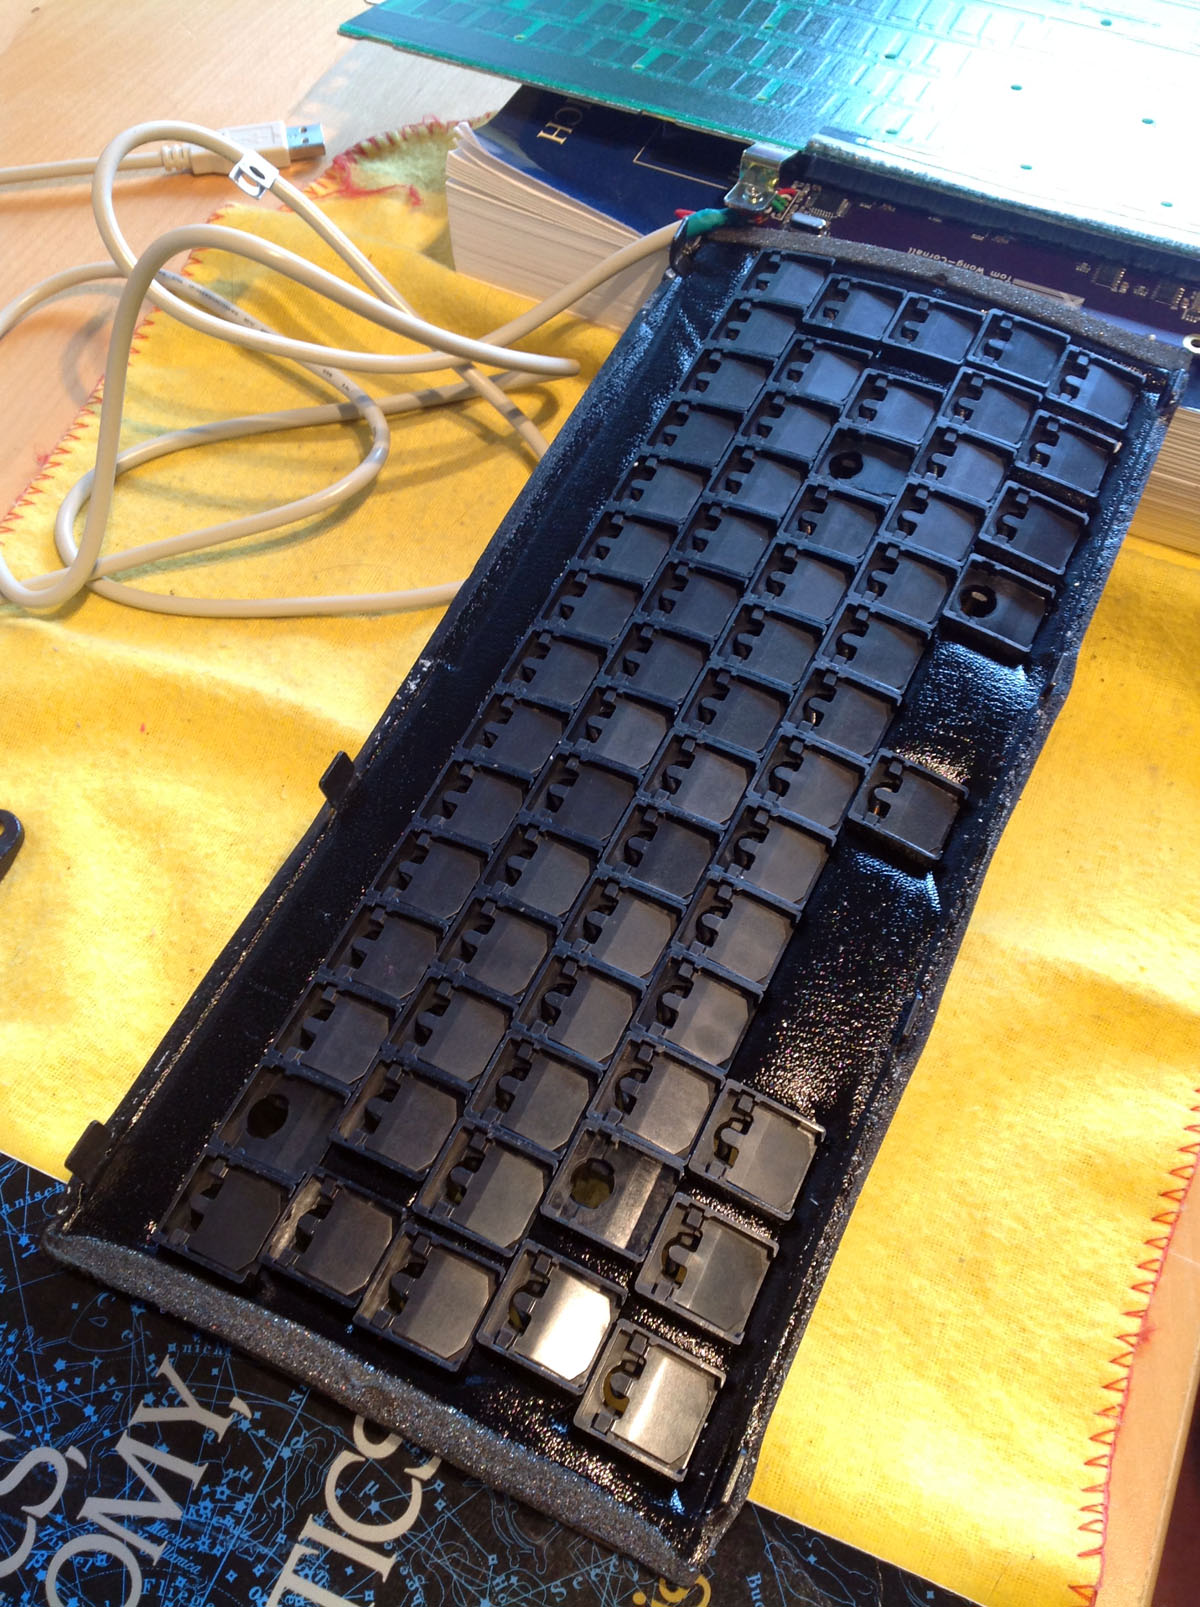
However, it is quite dirty, and I want to take it apart, clean it, possibly dissemble it completely, replace the foam.
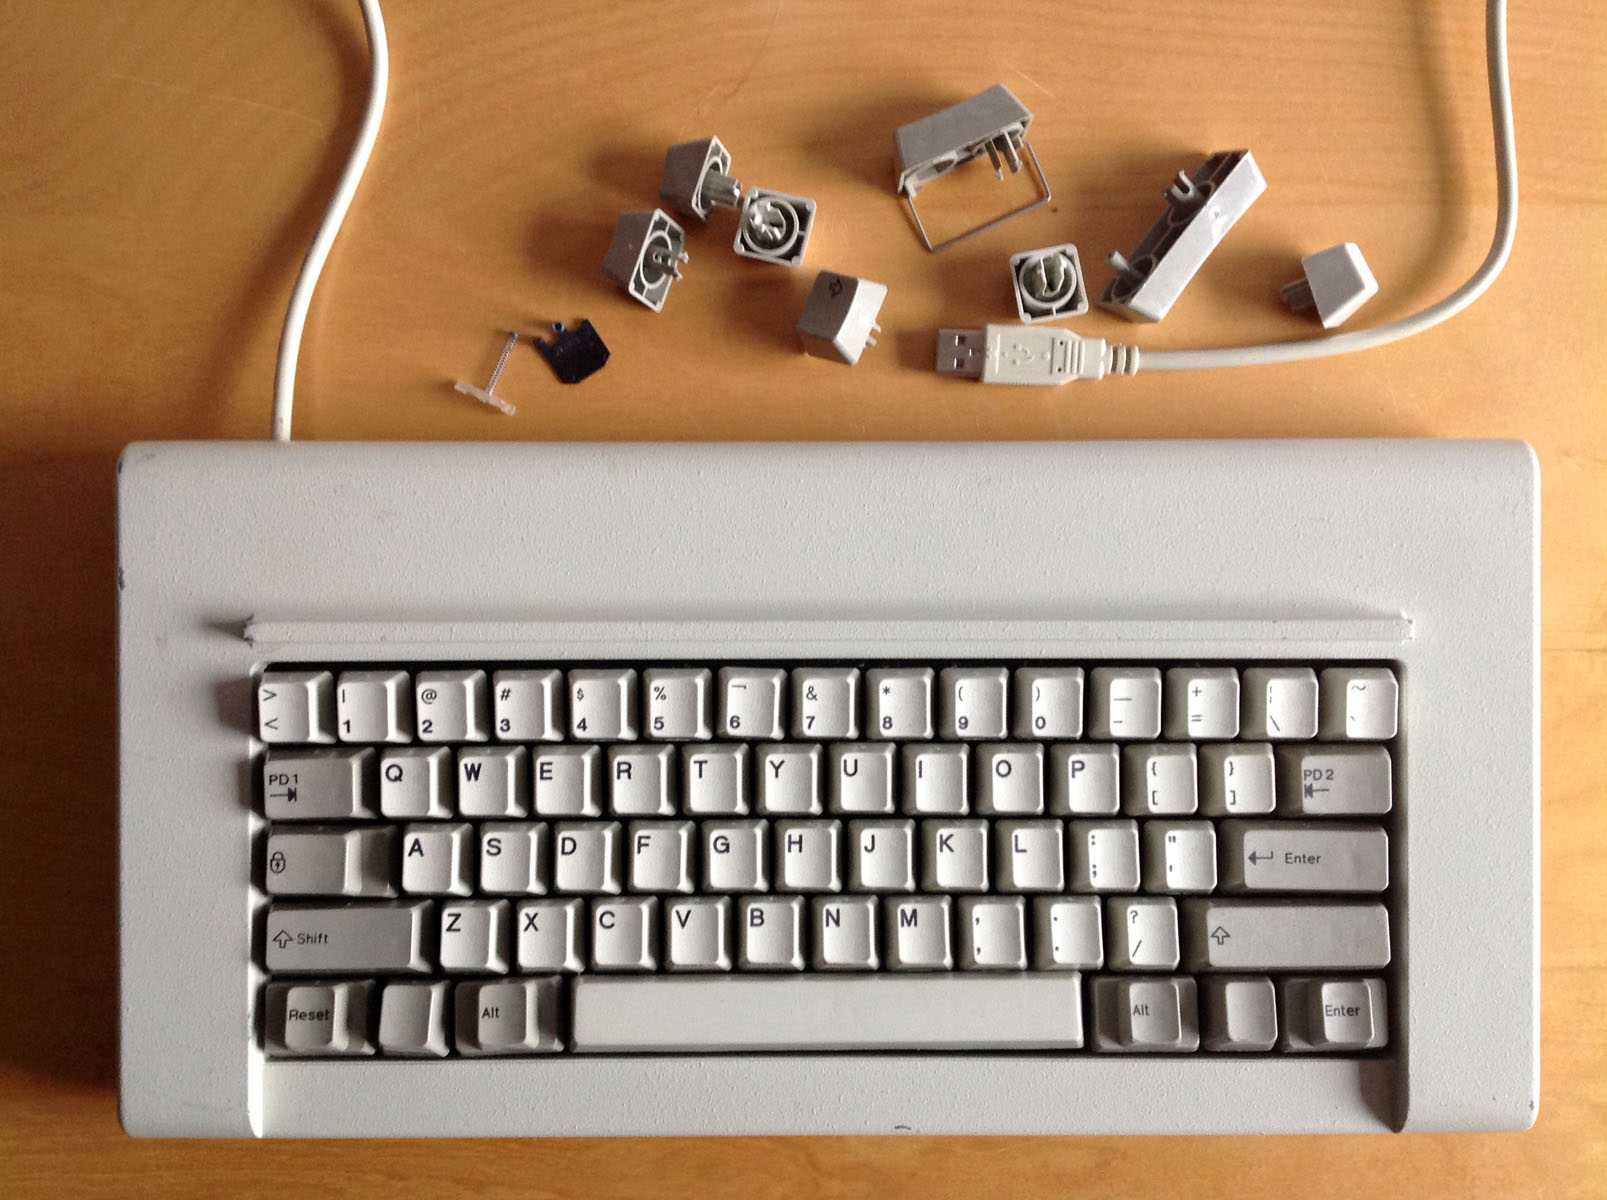
I'm not sure where to begin or even how to remove the keycaps properly.
I have watched Lucar's video (https://youtu.be/wPOe0Pmd3gs) several times, but am wondering if there is a set of systematic instructions on how to do this. Some of processes in the video are not quite clear, but it is indeed an outstanding video.

I'm guessing that a number of rebuild guides exist.

I also have a couple of other question, the ALT key does not make any 'click' noise at all. It depresses and springs up quite nicely, but it does not click. Is that normal? What might be wrong?

Also, in my typing test, the space key is indeed much too stiff. I just found these step-by-step instructions/video on how to do the key-mod: workshop-f7/model-f-improvement-dis-ass ... t6982.html

Any other advice on modifying the space key?
Attachments
20181109_194929_HDR.jpg
20181109_194929_HDR.jpg (7.04 MiB) Viewed 5970 times

User avatar
OldIsNew

10 Nov 2018, 04:08

unxmaal posted a nice description of his rebuild here:

workshop-f7/ibm-model-f-xt-83-restoration-t17231.html

For replacement foam this one from McMaster-Carr has worked well for me:

https://www.mcmaster.com/8647K108

User avatar
AJM

10 Nov 2018, 20:35

Congratulations on your new keyboard. It looks quite tidy, indeed.

I get the impression, that replacing the foam has become a "must", through all the nice tutorials floating around.
Apart from a NOS keyboard, I have opened and cleaned 4 dirty XTs so far and none of them needed the foam to be replaced (although they were quite degraded - meaning you could sometimes brush off the upper layer of the foam, where it's visible).
The key feel and sound were the same (or even better actually), compared with the NOS board with intact foam.

If the keys work fine and the barrels sit tightly, I wouldn't open the two metal plates. If it's not broken, don't fix it.
Unless you really want to do something about the space bar. Then you have no other choice, I guess.

Concerning barrels: It's normal, that the barrels in the top left corner (F1, F2 etc.) are a bit loose, but that's because the one bracket of the barrel plate, that's bend differently than the others, is usually not tight enough. You can press the two plates together with your fingers and will see that the top left barrels are then tight as well. So you can correct that with pliers easily.

Concerning the Alt key: That's probably just, that the spring doesn't sit correctly in the keycap.
- Take the keycap off
- Tilt the keyboard up, so that the cable out of the case points directly downwards
- While holding it in this position, put the keycap back in
Last edited by AJM on 10 Nov 2018, 21:57, edited 1 time in total.

User avatar
Muirium
µ

10 Nov 2018, 20:56

+1 on the leave the foam alone. I have 4 model Fs, all used, and never needed a foam replacement on any of them. If the foam needs replaced, sure go do it. But often it’s just fine.

I have been inside most of my Fs, though. Just not for foam. I like to explore their layouts.

Image

My Kishsaver went from this:

Image

To this:

Image

All just by opening it up and moving hammers and stabilisers between barrels. Well worth it!

User avatar
AJM

10 Nov 2018, 21:27

@Muirium
Although the more ISOish layout of the original would be far more suitable for my language, I really admire the symmetry of your layout. Although I'm a friend of stepped keys - in this case it makes me wish for a CapsLock key without step, though. :D

User avatar
Muirium
µ

10 Nov 2018, 21:34

The off-centre stem makes that one key difficult. The caps alter with the seasons, but the layout is evergreen. You’re right about its symmetry. I took my lead from the HHKB, of course, but with a better, fully symmetric bottom row thanks to IBM. Got to give it to them for allowing all this, way back then.

Waxwood

11 Nov 2018, 23:41

Hi, Thanks for the link. I will begin my rebuild over the coming weeks. I'll see if I can document the clamping process using C-clamps. I have a few dozen of them and am curious to see if it might make the dreaded reassembly easier.

How much of the foam should I buy? If I make a few extra foams for an XT, I wonder if anyone would be interested in purchasing them? Its probably not a lot of work to make 4 compared to making one once I have the template printed out and my punches and tools assembled.

JBert

12 Nov 2018, 15:19

Waxwood wrote: I have watched Lucar's video (https://youtu.be/wPOe0Pmd3gs) several times, but am wondering if there is a set of systematic instructions on how to do this. Some of processes in the video are not quite clear, but it is indeed an outstanding video.
Do not follow the part where he's pulling off the spacebar! You should not remove it that way or you risk breaking off little tabs on the bottom side! Since you found my "spacebar mod" thread the real order is removing all keycaps except the spacebar and unhook it later from below when you have managed to get the plates separated.

User avatar
fohat
Elder Messenger

12 Nov 2018, 16:04

Waxwood wrote:
I'll see if I can document the clamping process using C-clamps.
If you have gone to the trouble to repaint your plate, the sliding is likely to scrape under the clamp feet unless you pad them with fabric or cardboard. My guess is that you are looking at 3mm-4mm sideways.

The spring clamps that I show in my 122 ANSI guide have the advantage of spring pressure rather than absolute clamping.

User avatar
Hypersphere

12 Nov 2018, 21:47

Waxwood wrote: Hi, Thanks for the link. I will begin my rebuild over the coming weeks. I'll see if I can document the clamping process using C-clamps. I have a few dozen of them and am curious to see if it might make the dreaded reassembly easier.

How much of the foam should I buy? If I make a few extra foams for an XT, I wonder if anyone would be interested in purchasing them? Its probably not a lot of work to make 4 compared to making one once I have the template printed out and my punches and tools assembled.
Neoprene foam or "art foam" varieties are very inexpensive and the art foam in particular is very easy to cut and punch. Rather than using a hammer and leather punches, I use a laboratory cork borer -- you press and twist rather than pound.

On my first XT refurbishing project, I used rather expensive silicone foam, which was not really necessary. In addition, I used 1/8-inch thick foam, which was thicker than required and made it very difficult to realign the plates.

Waxwood

15 Nov 2018, 04:04

Thanks for the replies everyone.

I'm quite impressed with unxmaal's rebuild in which he painted red the top plate. It provides a nice contrast for the ivory keys. I guess there's no advantage to using red foam (https://www.amazon.com/gp/product/B00TX ... merReviews) for aesthetics as I assume it will be entirely hidden in a metal sandwich. Will this type of foam last for decades?

I want to be sure to use a foam that will not degrade. I'm going to have to adjust the spacebar spring- its insanely stiff. While I'm doing that, I might as well paint the plates and replace the foam and go through that struggle.

So far, I'm of the opinion that painting the upper plate red or yellow would provide nice contrast with the ivory keys and be less boring that black or white. Any opinions?

User avatar
OldIsNew

15 Nov 2018, 05:06

I would think almost any of the modern synthetic based foams would last for quite a long time - though I'm not a polymer chemist. What color for the for the face plate? I prefer the original, but go for whatever you like!

As far as board reassembly - I did my first XT board "by hand" with hand pressure and a rubber mallet to align the plates - it was a major pain in the butt! Then I wised up and read more on DT and GH about rebuilding these boards and learned about clamps - as others have mentioned on this thread. My subsequent reassembles have been WAY easier! I've been using spring clamps and a bar clamp, like these:
clamps.jpg
clamps.jpg (177.92 KiB) Viewed 5716 times
I can't remember whose post I read about this on , and can't seem to find it right now, but with the spring clamps holding the plates together, I've found the bar clamp pops them back in position very easily!

User avatar
zrrion

15 Nov 2018, 05:11

Personally I'd paint it industrial grey, but if you feel like that's too tame then I'd suggest using the same colours as the Selectric used. It would look very nice while maintaining a retro feel.

Waxwood

16 Nov 2018, 23:43

Thanks for the advice!
I'll get a few more hand clamps. I only have 4 right now.
The one member advised using C-Clamps, but fohat recommended against it for reasons that seem quite sensible to someone who's never done it yet.

Once my Soarer's converter and keycap puller arrives, I'll begin the process. I expect its going to take a while. In the meantime, I need to find some suitable foam. The nice red stuff on Amazon is cheap, but I want to use something that won't degrade. I've seen a lot of foamy things degrade over time.

The reassembly looks to be quite difficult and I wonder if I'll be able to adjust the tension on the spacebar spring properly the first time. I'm guessing that I will never want to take the model F apart again.

Looking forward to using it thanks to the advice of users here.

User avatar
fohat
Elder Messenger

16 Nov 2018, 23:48

Waxwood wrote:
I've seen a lot of foamy things degrade over time.
I like the art foam because it is made for scrapbooking and is supposedly acid-free for long life.

Waxwood

18 Nov 2018, 06:08

OldIsNew wrote: I would think almost any of the modern synthetic based foams would last for quite a long time - though I'm not a polymer chemist. What color for the for the face plate? I prefer the original, but go for whatever you like!

.... with the spring clamps holding the plates together, I've found the bar clamp pops them back in position very easily!
Thanks for this advice! I've started to prepare my tool kit. I'll proceed carefully to be sure I don't break anything.

mxgian99

04 Dec 2018, 03:23

hi all i hope the OP does not mind me jumping in with a related question rebuilding a Model F XT. i recently acquired this board and it was in great shape, built the soarers converter from a pro-micro and was able to reprogram/remap the board.

the issue i'm having is that i'm getting phantom key presses from a few keys in the lower left of the board, randomly the keyboard will spit out a few or a lot of these keys and it will take over the computer. it also happens that these keys were the same ones that were damaged when the board was shipped to me. the keyboard was loose in the box and those caps came off, etc. phyically the board looked ok, electronically it's doing these key press storms.

and it's not consistent, it may be fine for an hour, and then it goes crazy. a good example is that i typed this entire message with one 1-2 phantom presses, then it went crazy and closed chrome and i lost my message.

i'm a little loss at what to try next, the barrels seem fine, i could try replacing the springs, but i've tried taking 1-2 springs from the other side of the board and swapping them and the problem remains (and also does not seem to follow the spring), should i still try replacement springs anyway? should i go ahead and take it apart to examine the plates? any other possible issues that it may be if i do have to take it apart?

thanks for any tips or suggestions, would love to get this board going reliably. i switched from the model f back to a modern clicky switch keyboard to retype this message (that is considered loud by modern standards) and it's not even close in terms of clickiness and feel!

and free advice if others are looking at buying one of these boards, make sure your seller is familiar with packing/shipping these keyboards. they are bloody heavy, and need to be secured/packed tightly to avoid bumps pr they will get damaged!

Anakey

04 Dec 2018, 11:15

i would say the problem could be contamination on the capacitive plates possibly due to disintegrating foam especially if the barrels have been subjected to movement during shipping. I would say the best thing to do is to remove all caps except the space bar, open it up, replace the foam if necessary, clean the pcb, caps and plate then put it back together again.

mxgian99

04 Dec 2018, 17:10

thanks, i'm leaning towards that direction. from peaking at the edges i think the foam is ok, so maybe it's just debris that needs to be vacuumed up--fingers crossed.

since i don't want to remove the space bar, and the easiest way to make a foam template is using the plate (with the space bar removed), does anyone have a printable template that could be used to make a new foam pad?

Anakey

04 Dec 2018, 18:50

mxgian99 wrote: thanks, i'm leaning towards that direction. from peaking at the edges i think the foam is ok, so maybe it's just debris that needs to be vacuumed up--fingers crossed.

since i don't want to remove the space bar, and the easiest way to make a foam template is using the plate (with the space bar removed), does anyone have a printable template that could be used to make a new foam pad?
post213140.html#p213140

There is also a lot of information in that thread itself about the foam needed etc.

mxgian99

02 Jan 2019, 06:26

just a follow-up to my own post asking for help. i tried a few different things after i took my model f apart, nothing really helped. the last thing i tried which i think i helped was that i added a solder jump on my J1 pin of my pro-micro. my converter was reading around 4.5v when plugged in (did not measure with KB attached), when i jumped it, it went up to 4.8. that seemed to solve my ghosthing key press issue.

its not conclusive as i had to take it apart like 10 more times during all the debugging so its possible that i just got lucky and sandiwched it together tighter, etc. but if anyone runs into similiar issues restoring their model f, give that a try too.

Post Reply

Return to “Workshop”