Page 1 of 2
G80-18xx controller replacement
Posted: 06 Dec 2012, 14:48
by imp
Heyho,
I've got some G80-18xx with PS/2 waiting for modification (USB and custom controller, like
).
The previous design, it works fine, but it's really time-consuming to wire the shift registers by hand on protoboard and I was far to lazy to and the USB hub I wanted (and it would have been another hot-glue job

)...
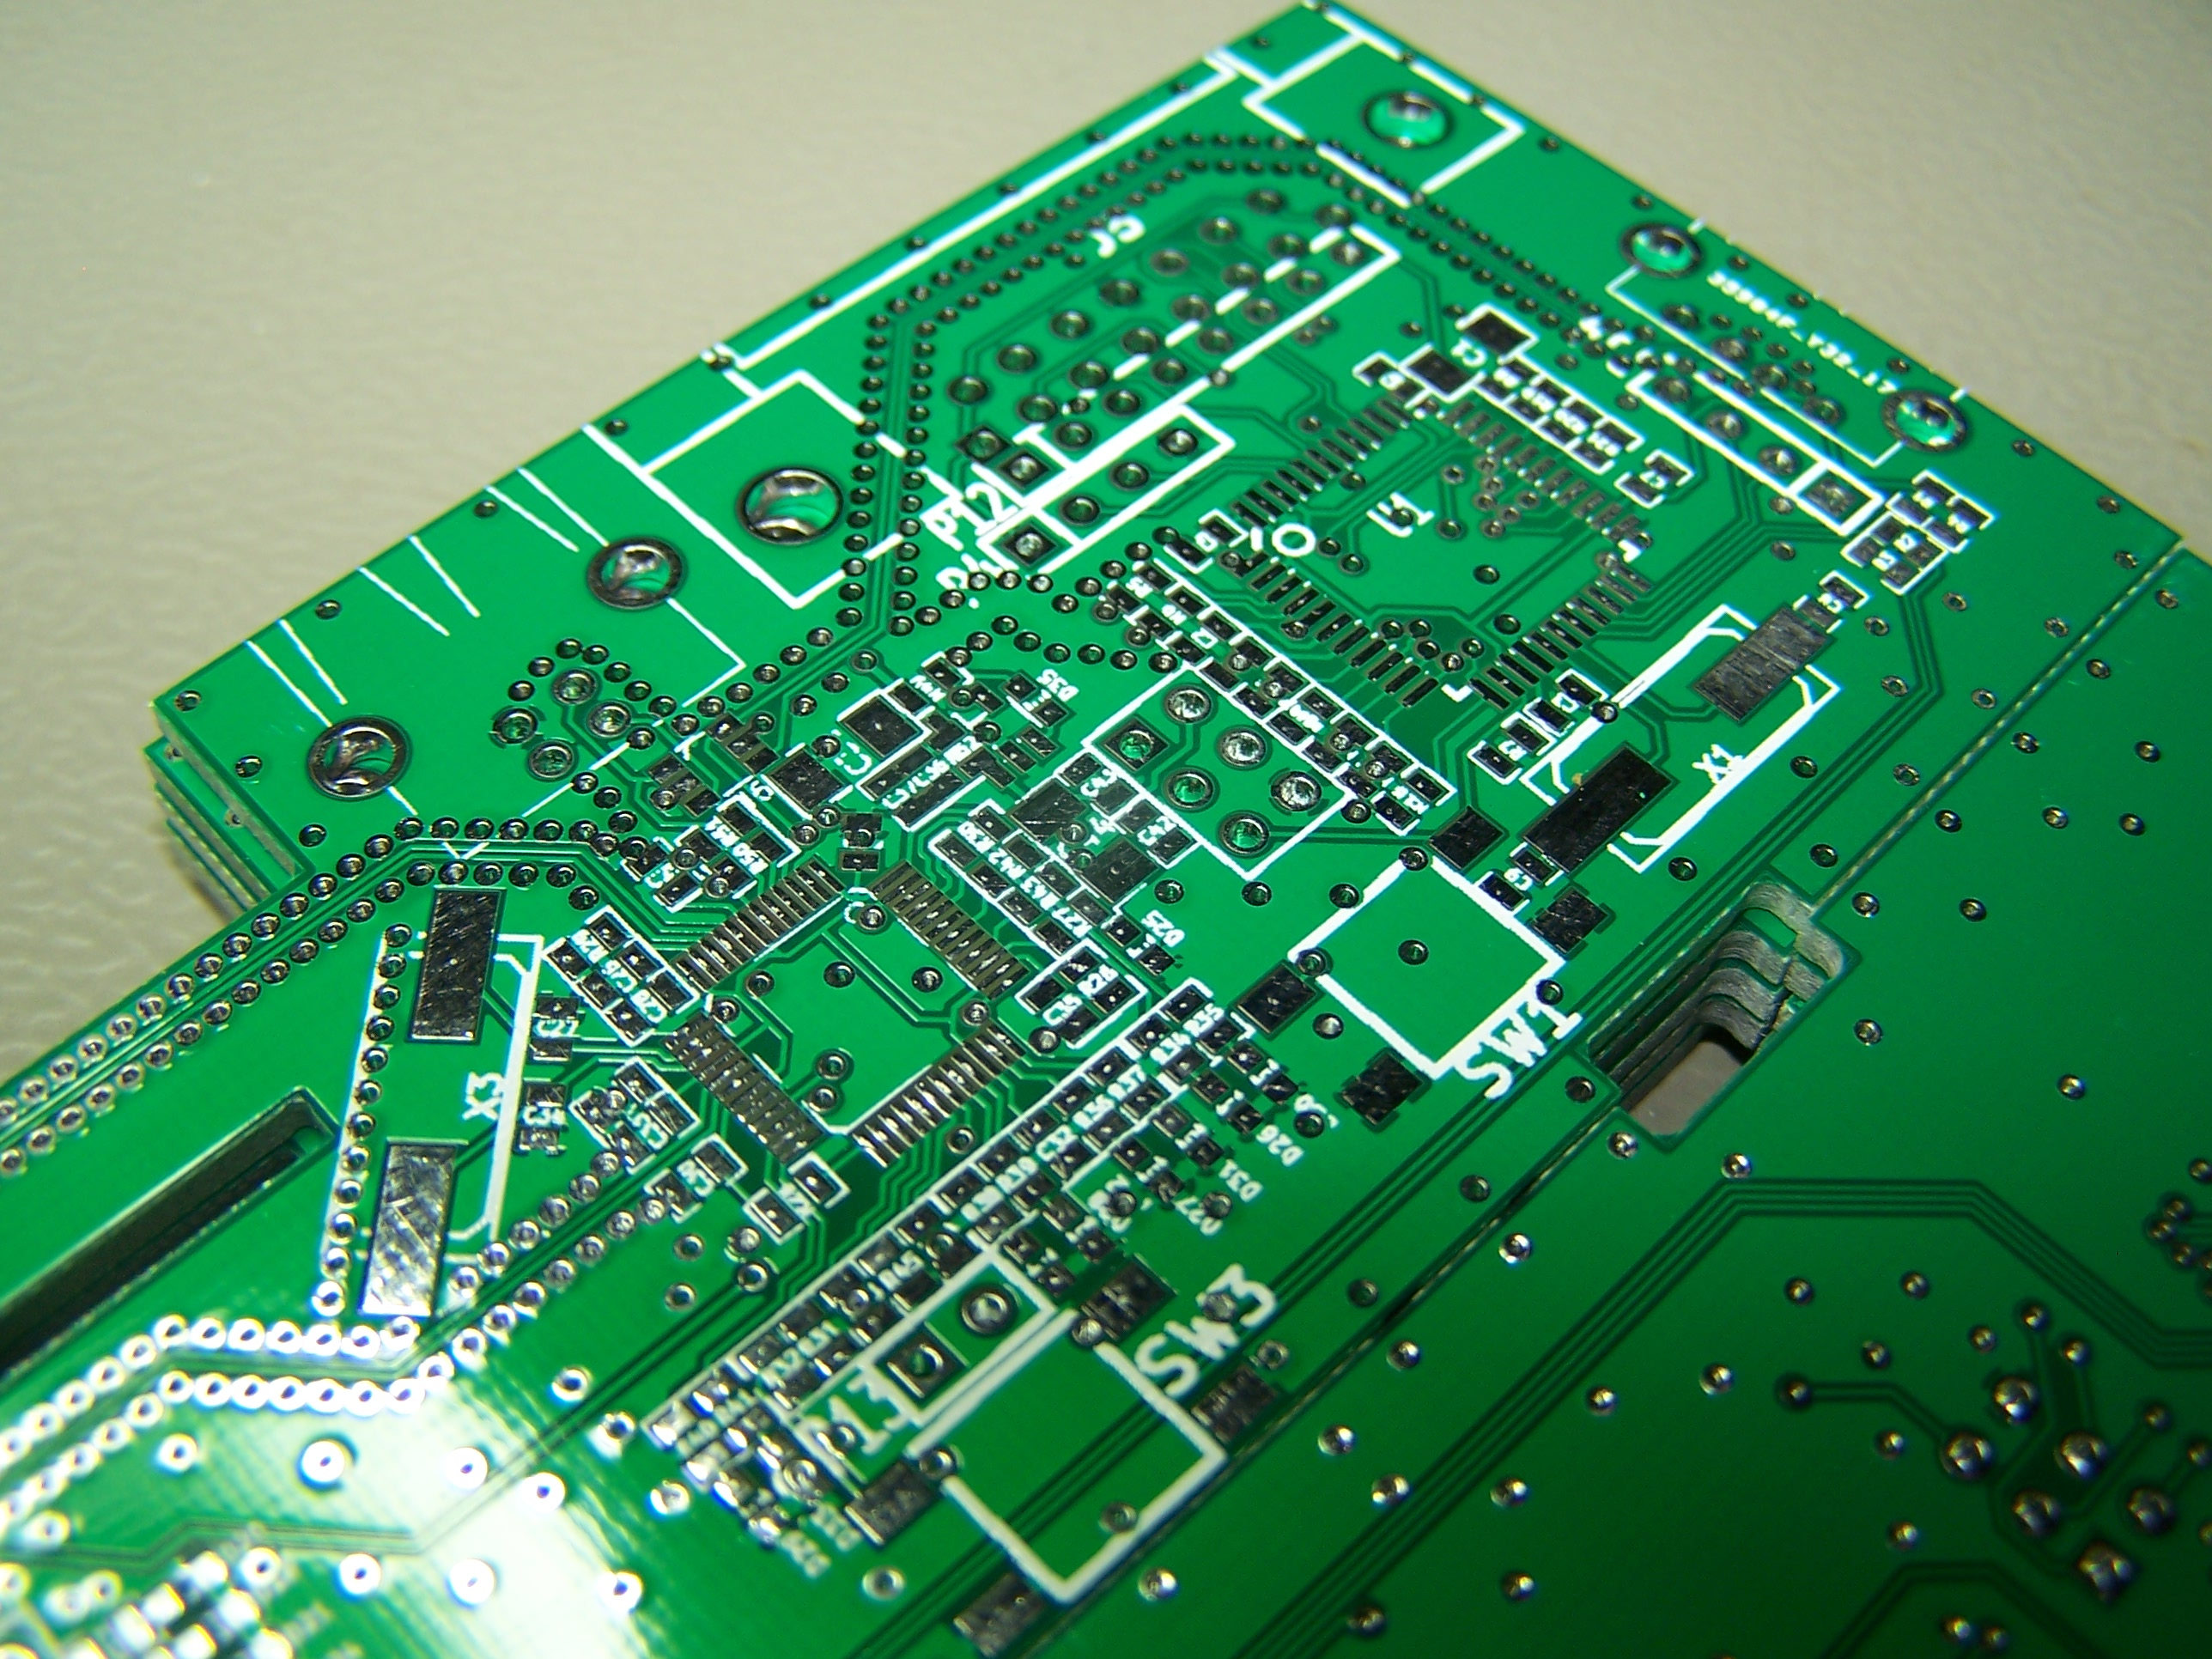
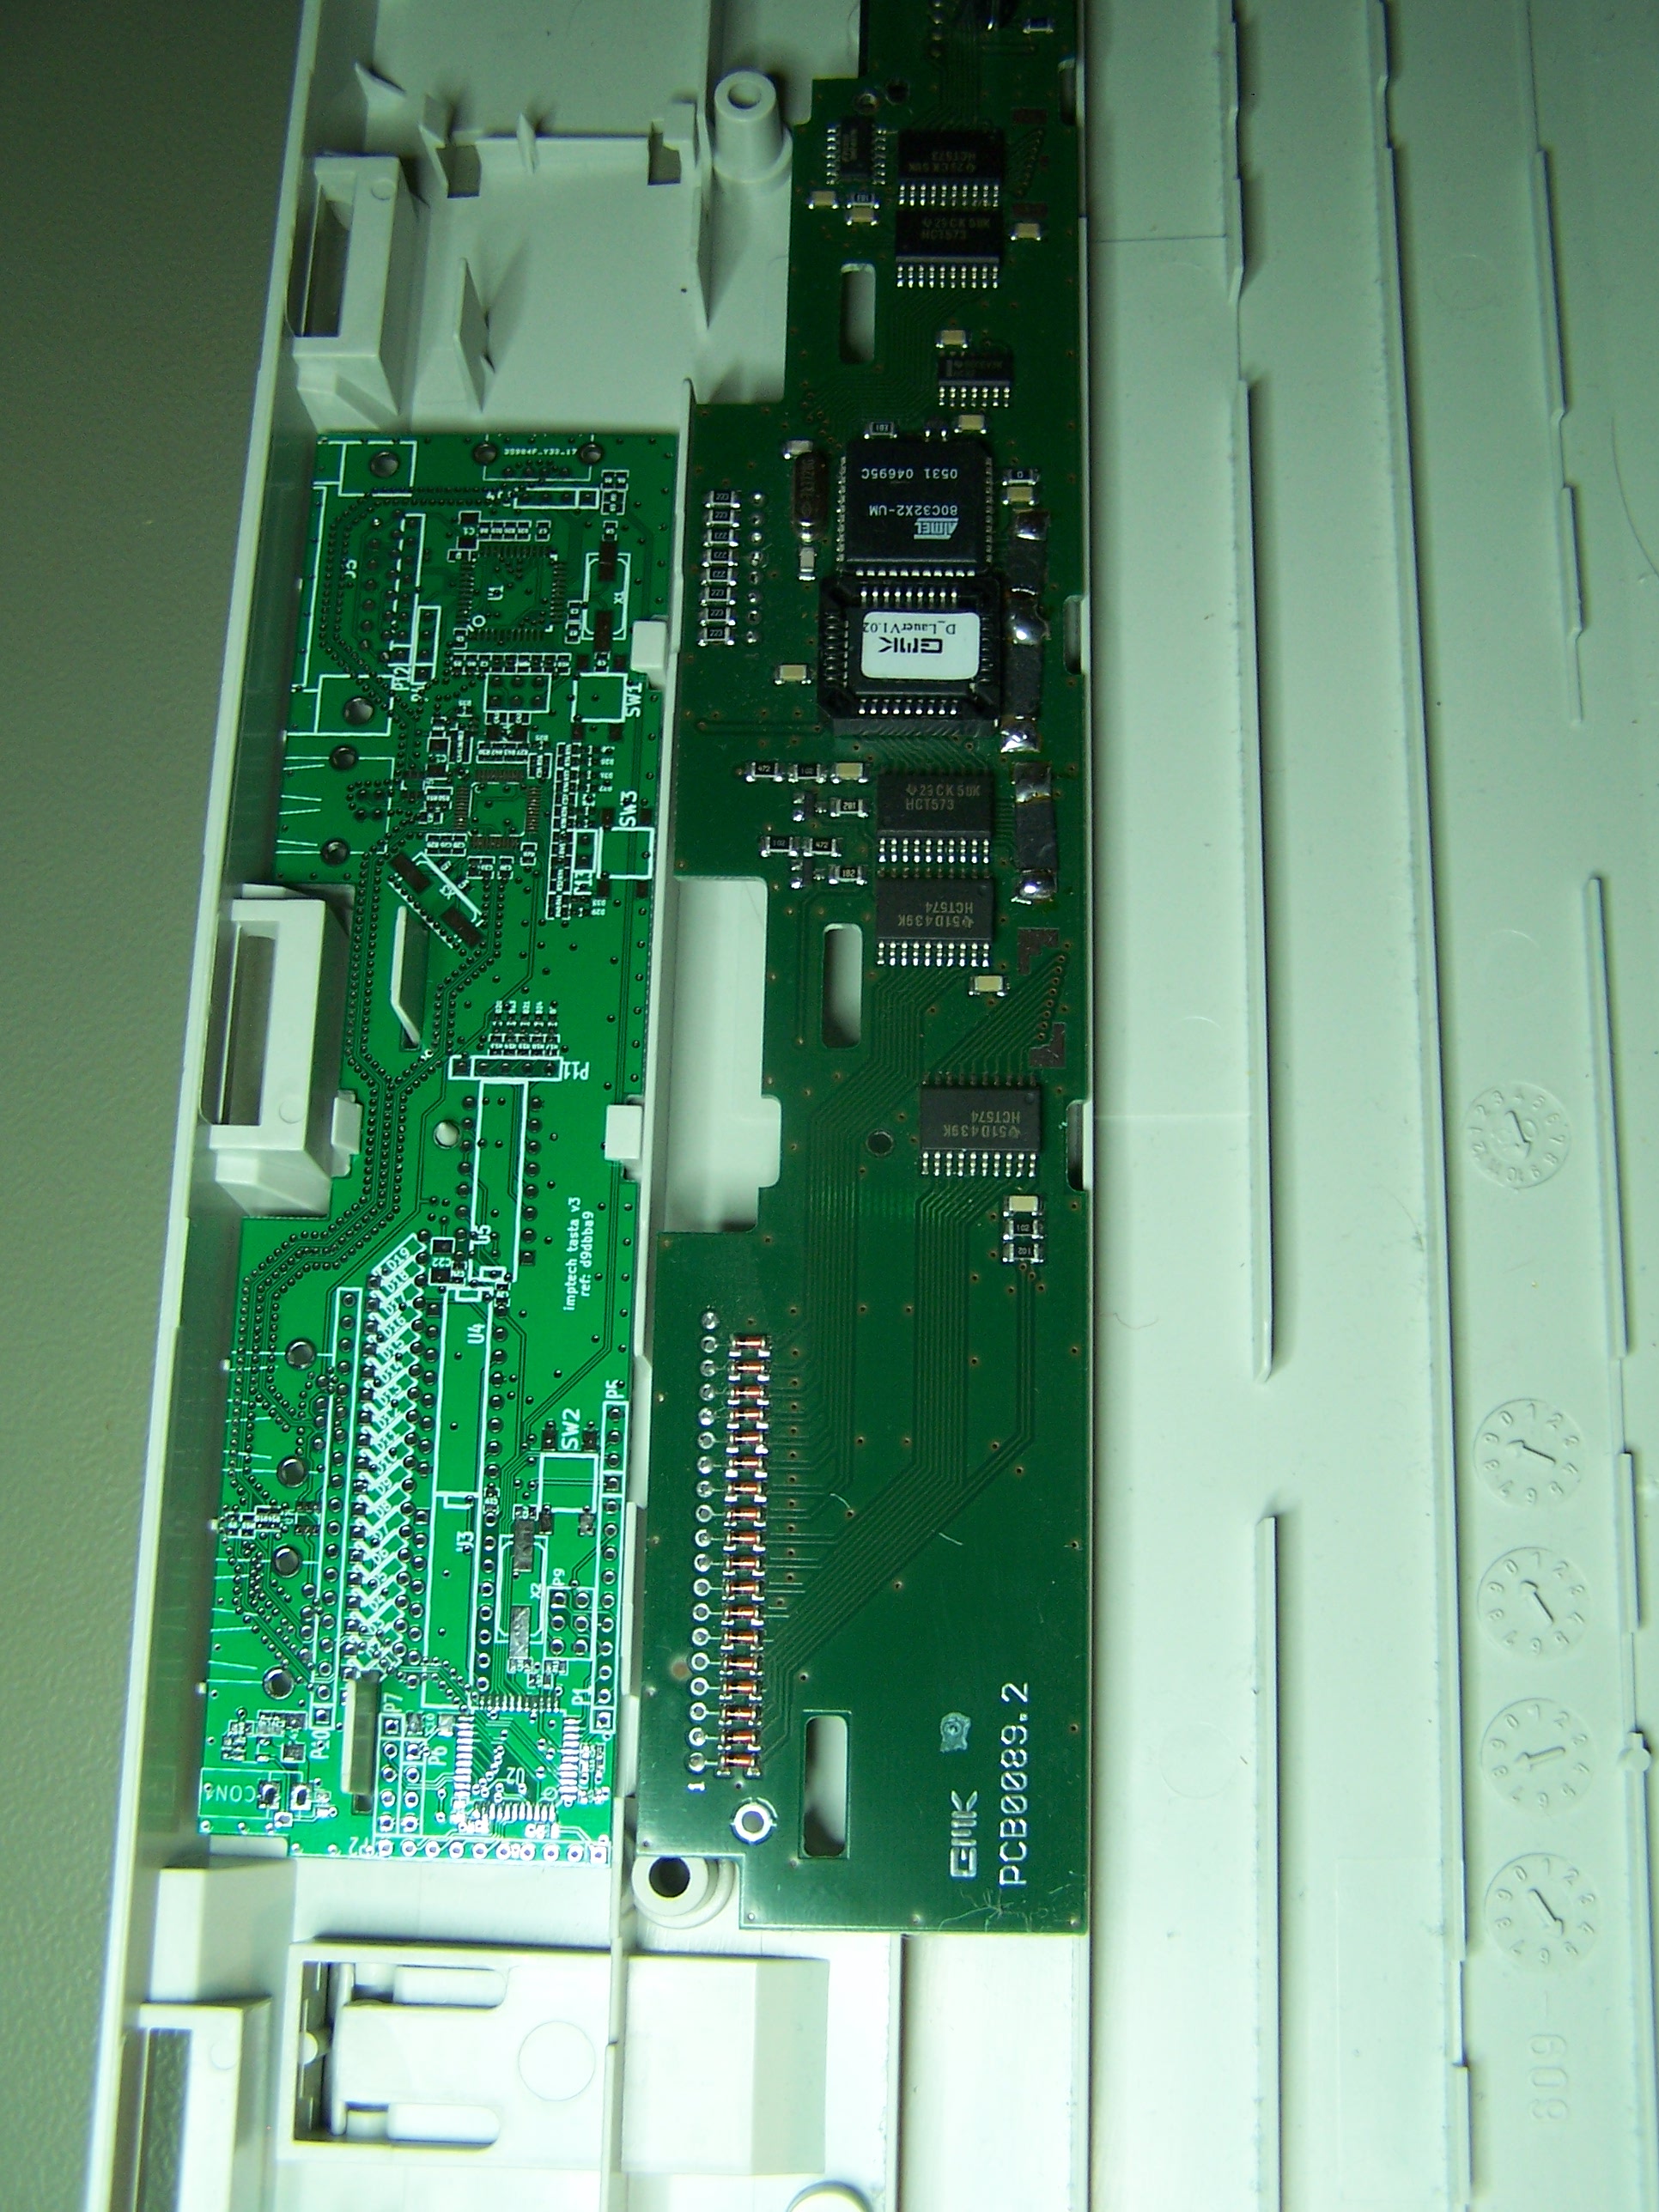
Let's talk about the future - the layout for new controller board is done \o/.
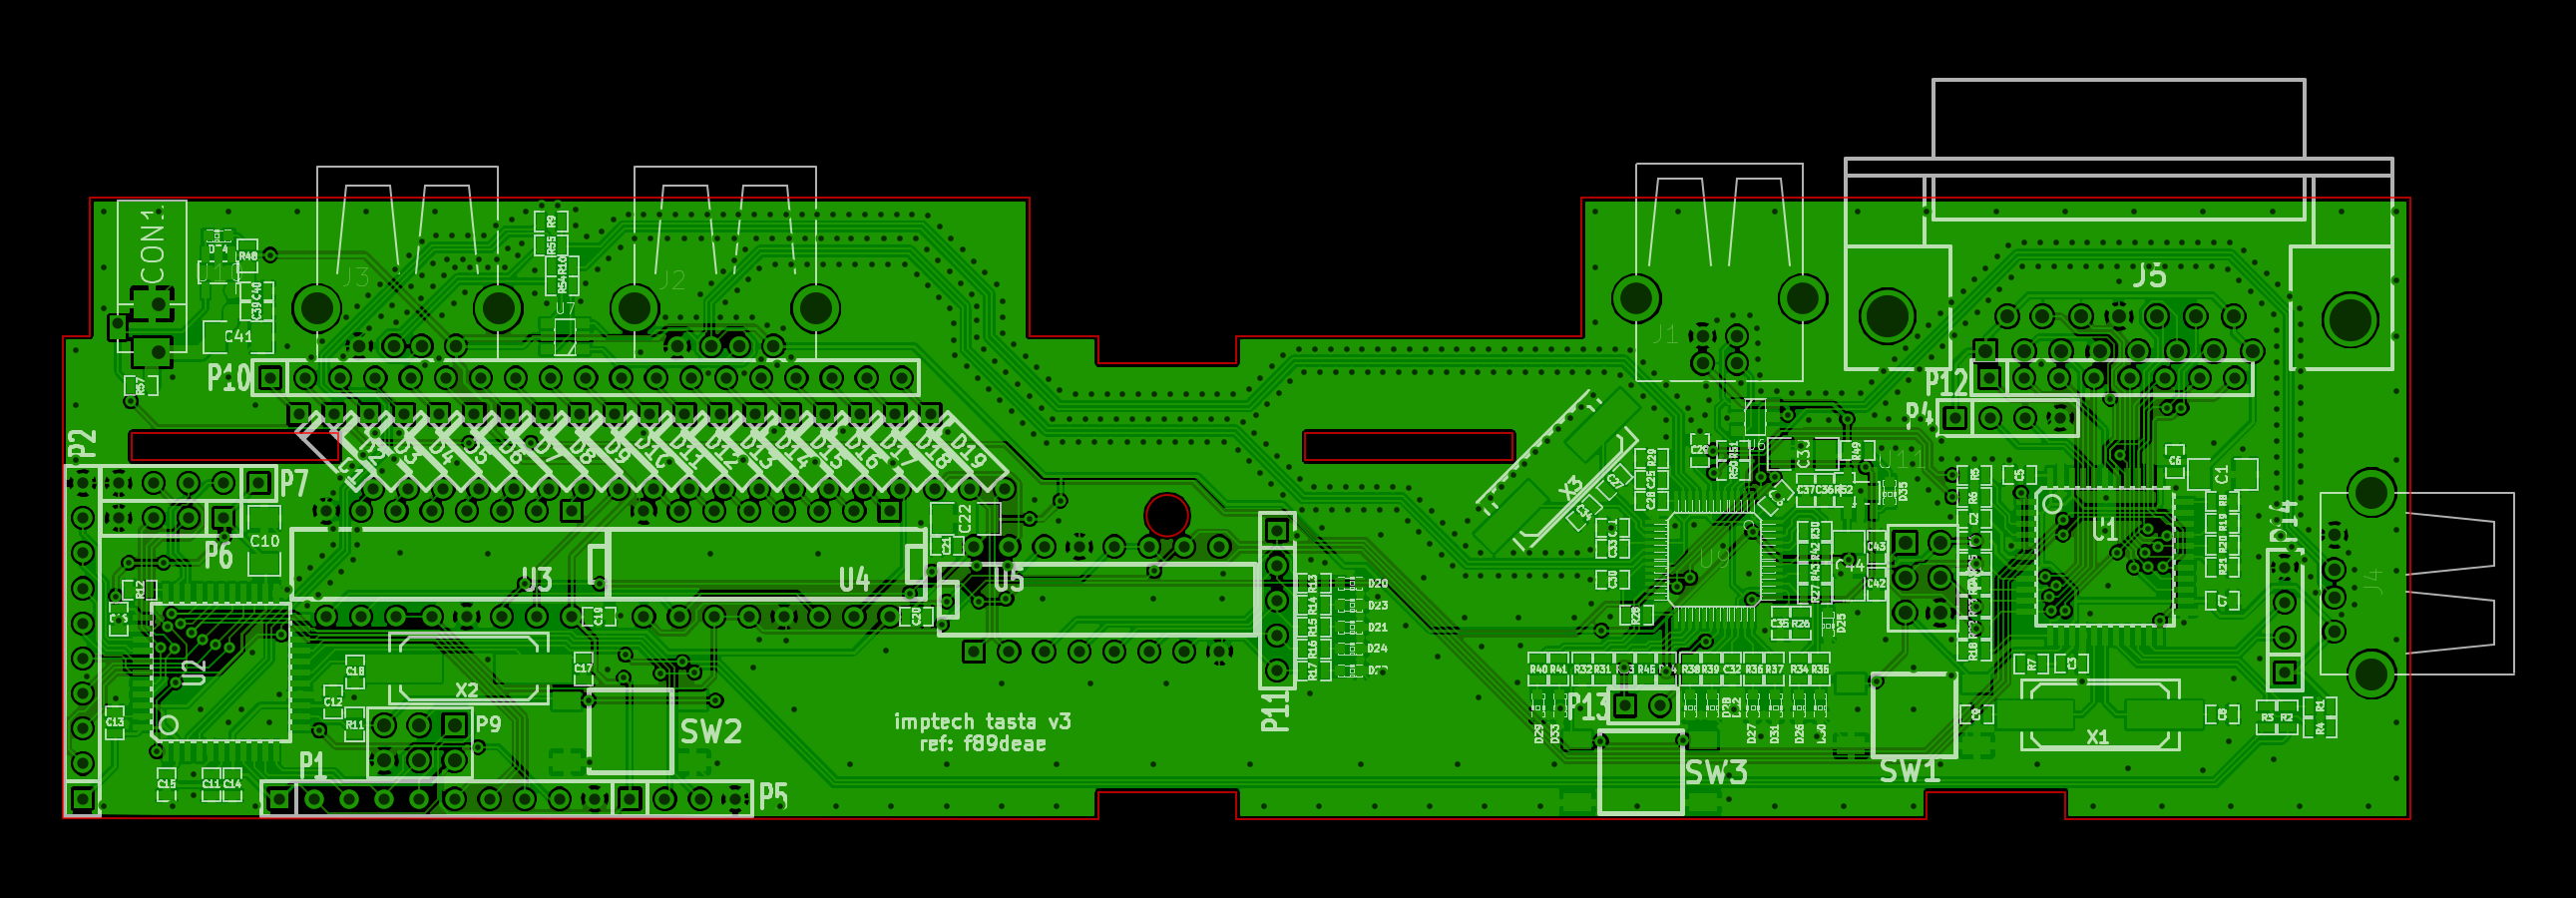
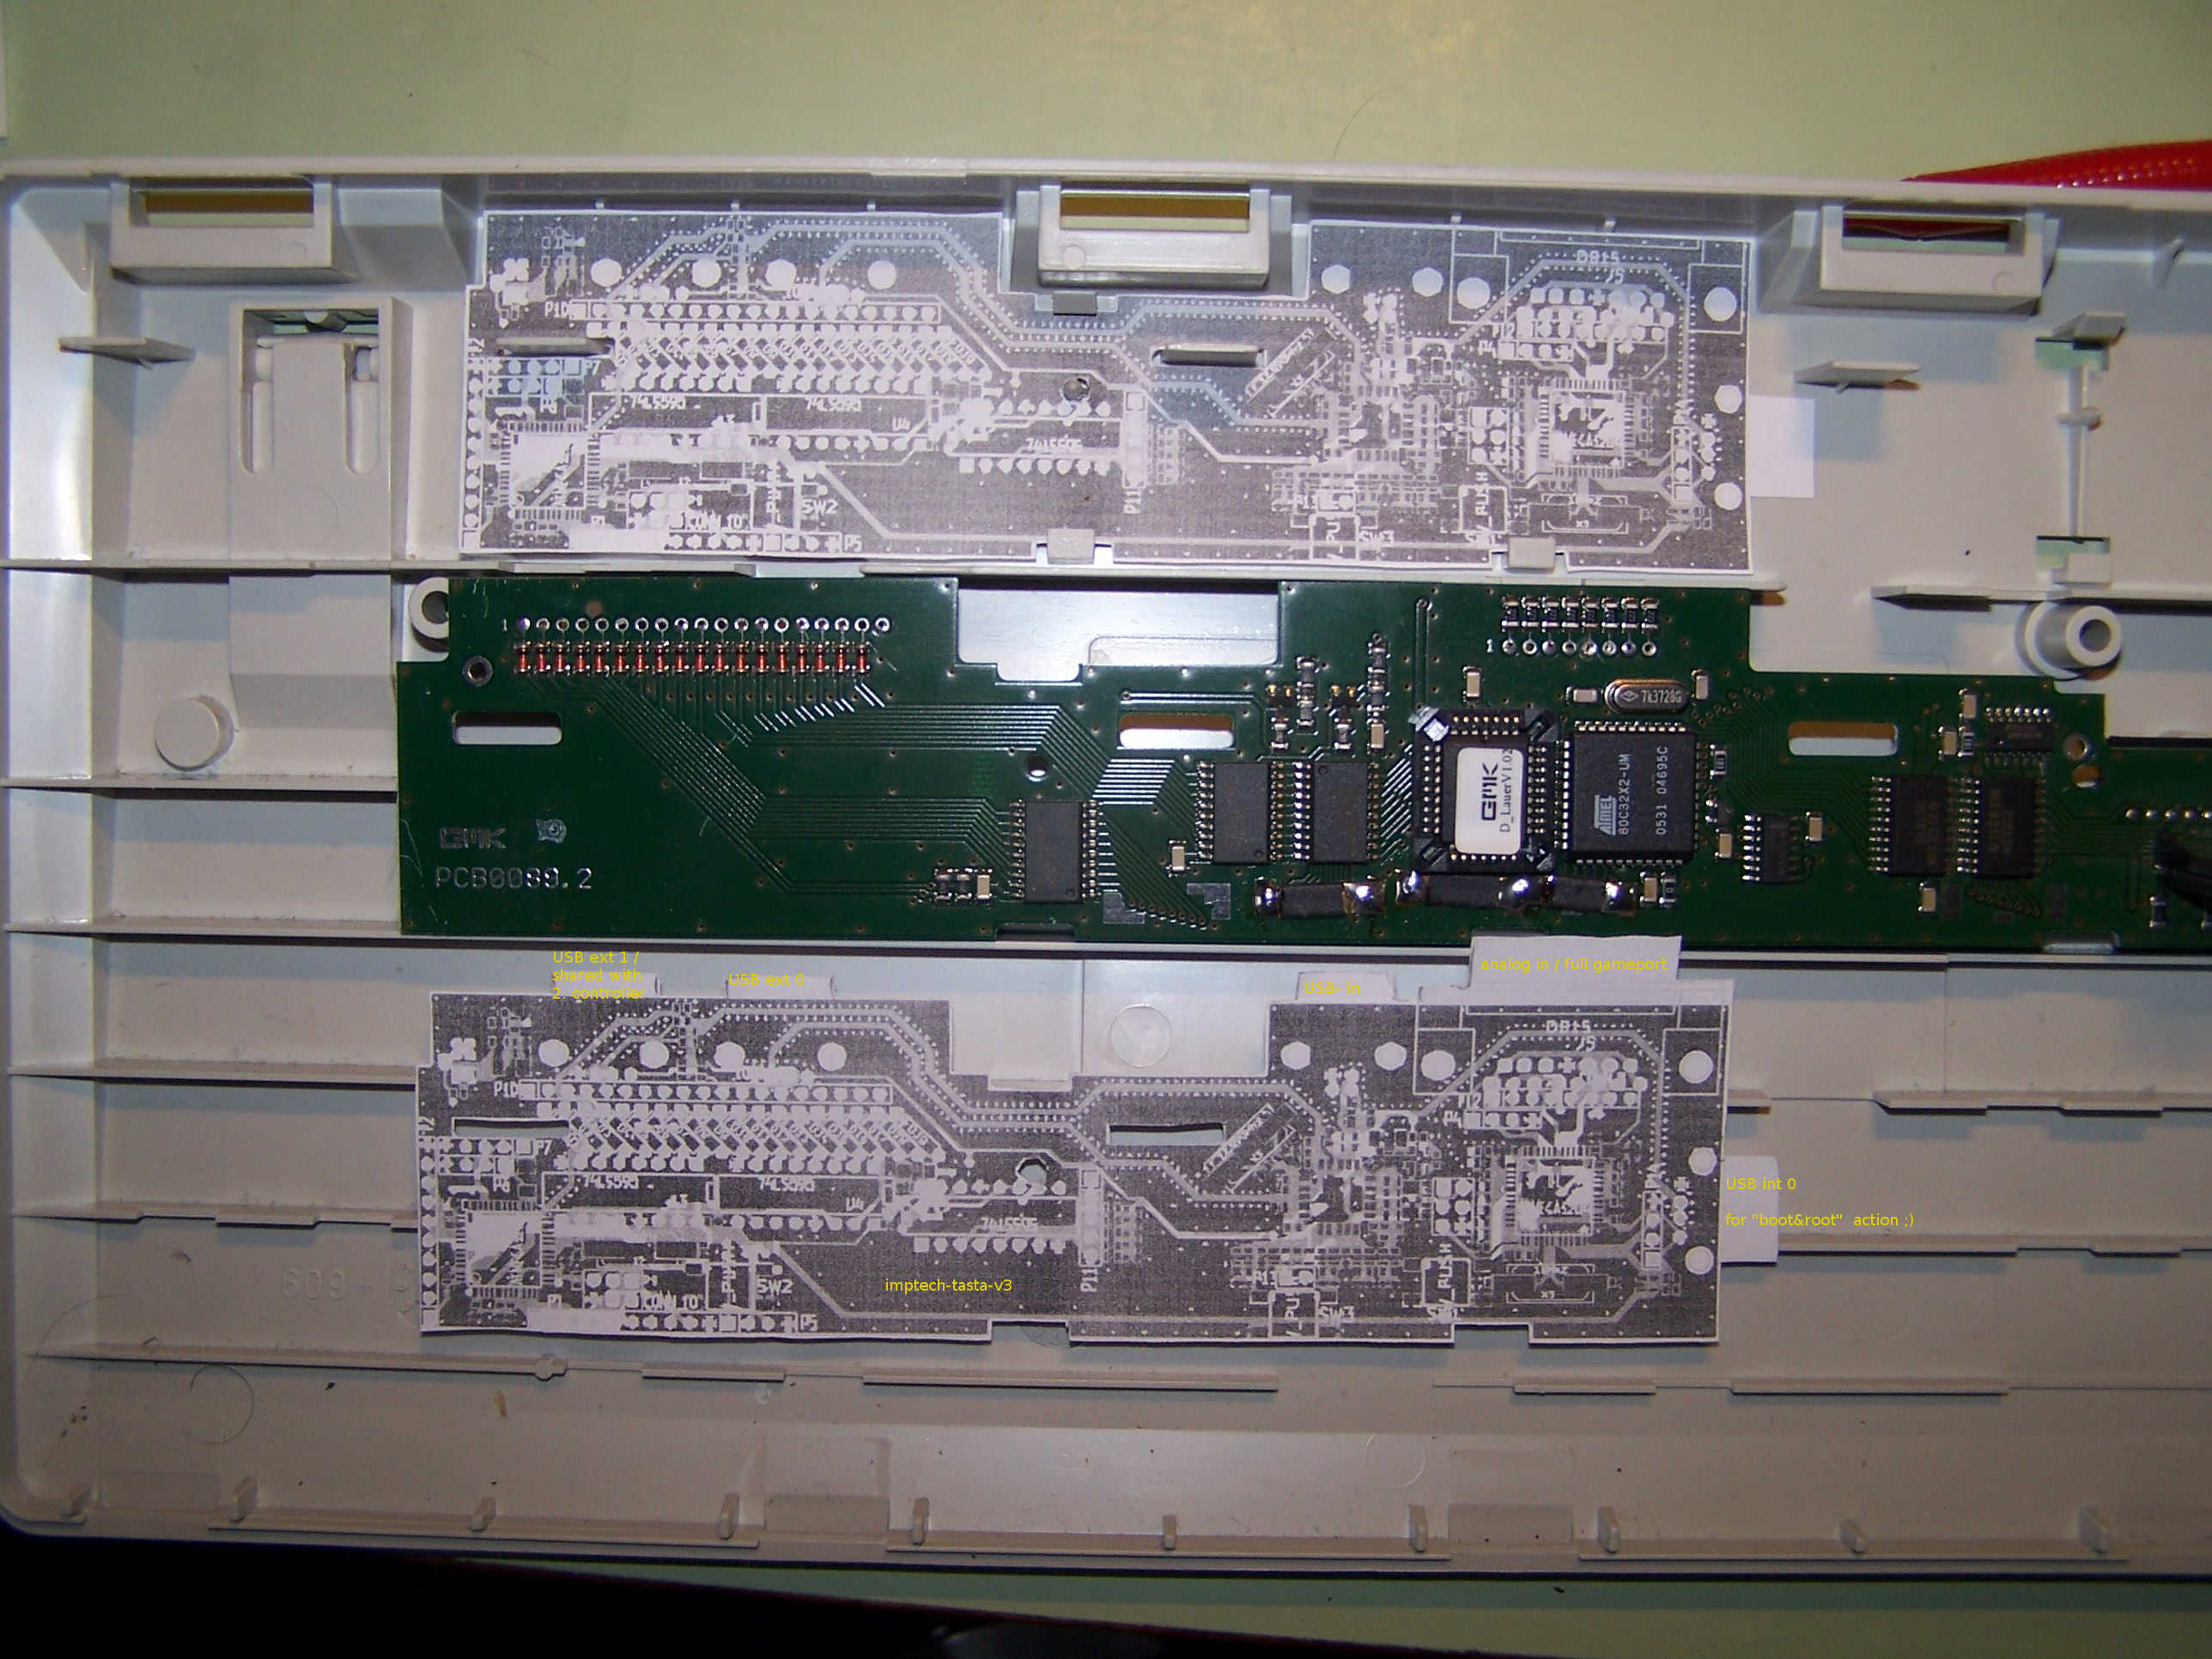
Compared with an original controller board for the case:
The "imptech-tasta-v3" features are:
* Atmega32u4.
* 2.0 USB hub onboard (if you like, it's also possible to make a bare board without the hub and only the controller).
*
SMP - there's a second controller on the board if you like, with all pins on headers (besides the USB lines). It's connected via I2c, but you can use the UART too). If the controller is connected to USB, the second external USB port has to hand over it's data lines.
* Gameport / external analog/digital-in - so you can connect your old hardware or add some fancy pointing device.
* Internal USB port - place your boot USB stick in there (for "boot&root" action
).
* Fits in the original case without great modifications (ranging from one hole for the minimal version up to 4).
* Plenty leds for the USB hub and 5 more connected to the shift registers.
* Will fit in TKL mods.
imp
Posted: 06 Dec 2012, 14:55
by CeeSA
very nice, are you gonna offer some controllers?
Posted: 06 Dec 2012, 15:00
by damorgue
That is one impressive set of features you managed to cram into that thing.
Posted: 06 Dec 2012, 15:11
by inlikeflynn
wow, great job! this is a really awesome replacement controller with some great features. hopefully you plan to sell a couple, as i'm totally interested in a few
Posted: 06 Dec 2012, 15:35
by imp
First I want to test the thing before we can talk about selling

.
Posted: 06 Dec 2012, 15:50
by MissMurd3r84
Looks great, not to mention nice features ^_^
Posted: 15 Dec 2012, 23:44
by imp
Short update - parts and pcbs ordered, half of the parts is already there.
Couldn't resist to play with the laser-cutter of my friends

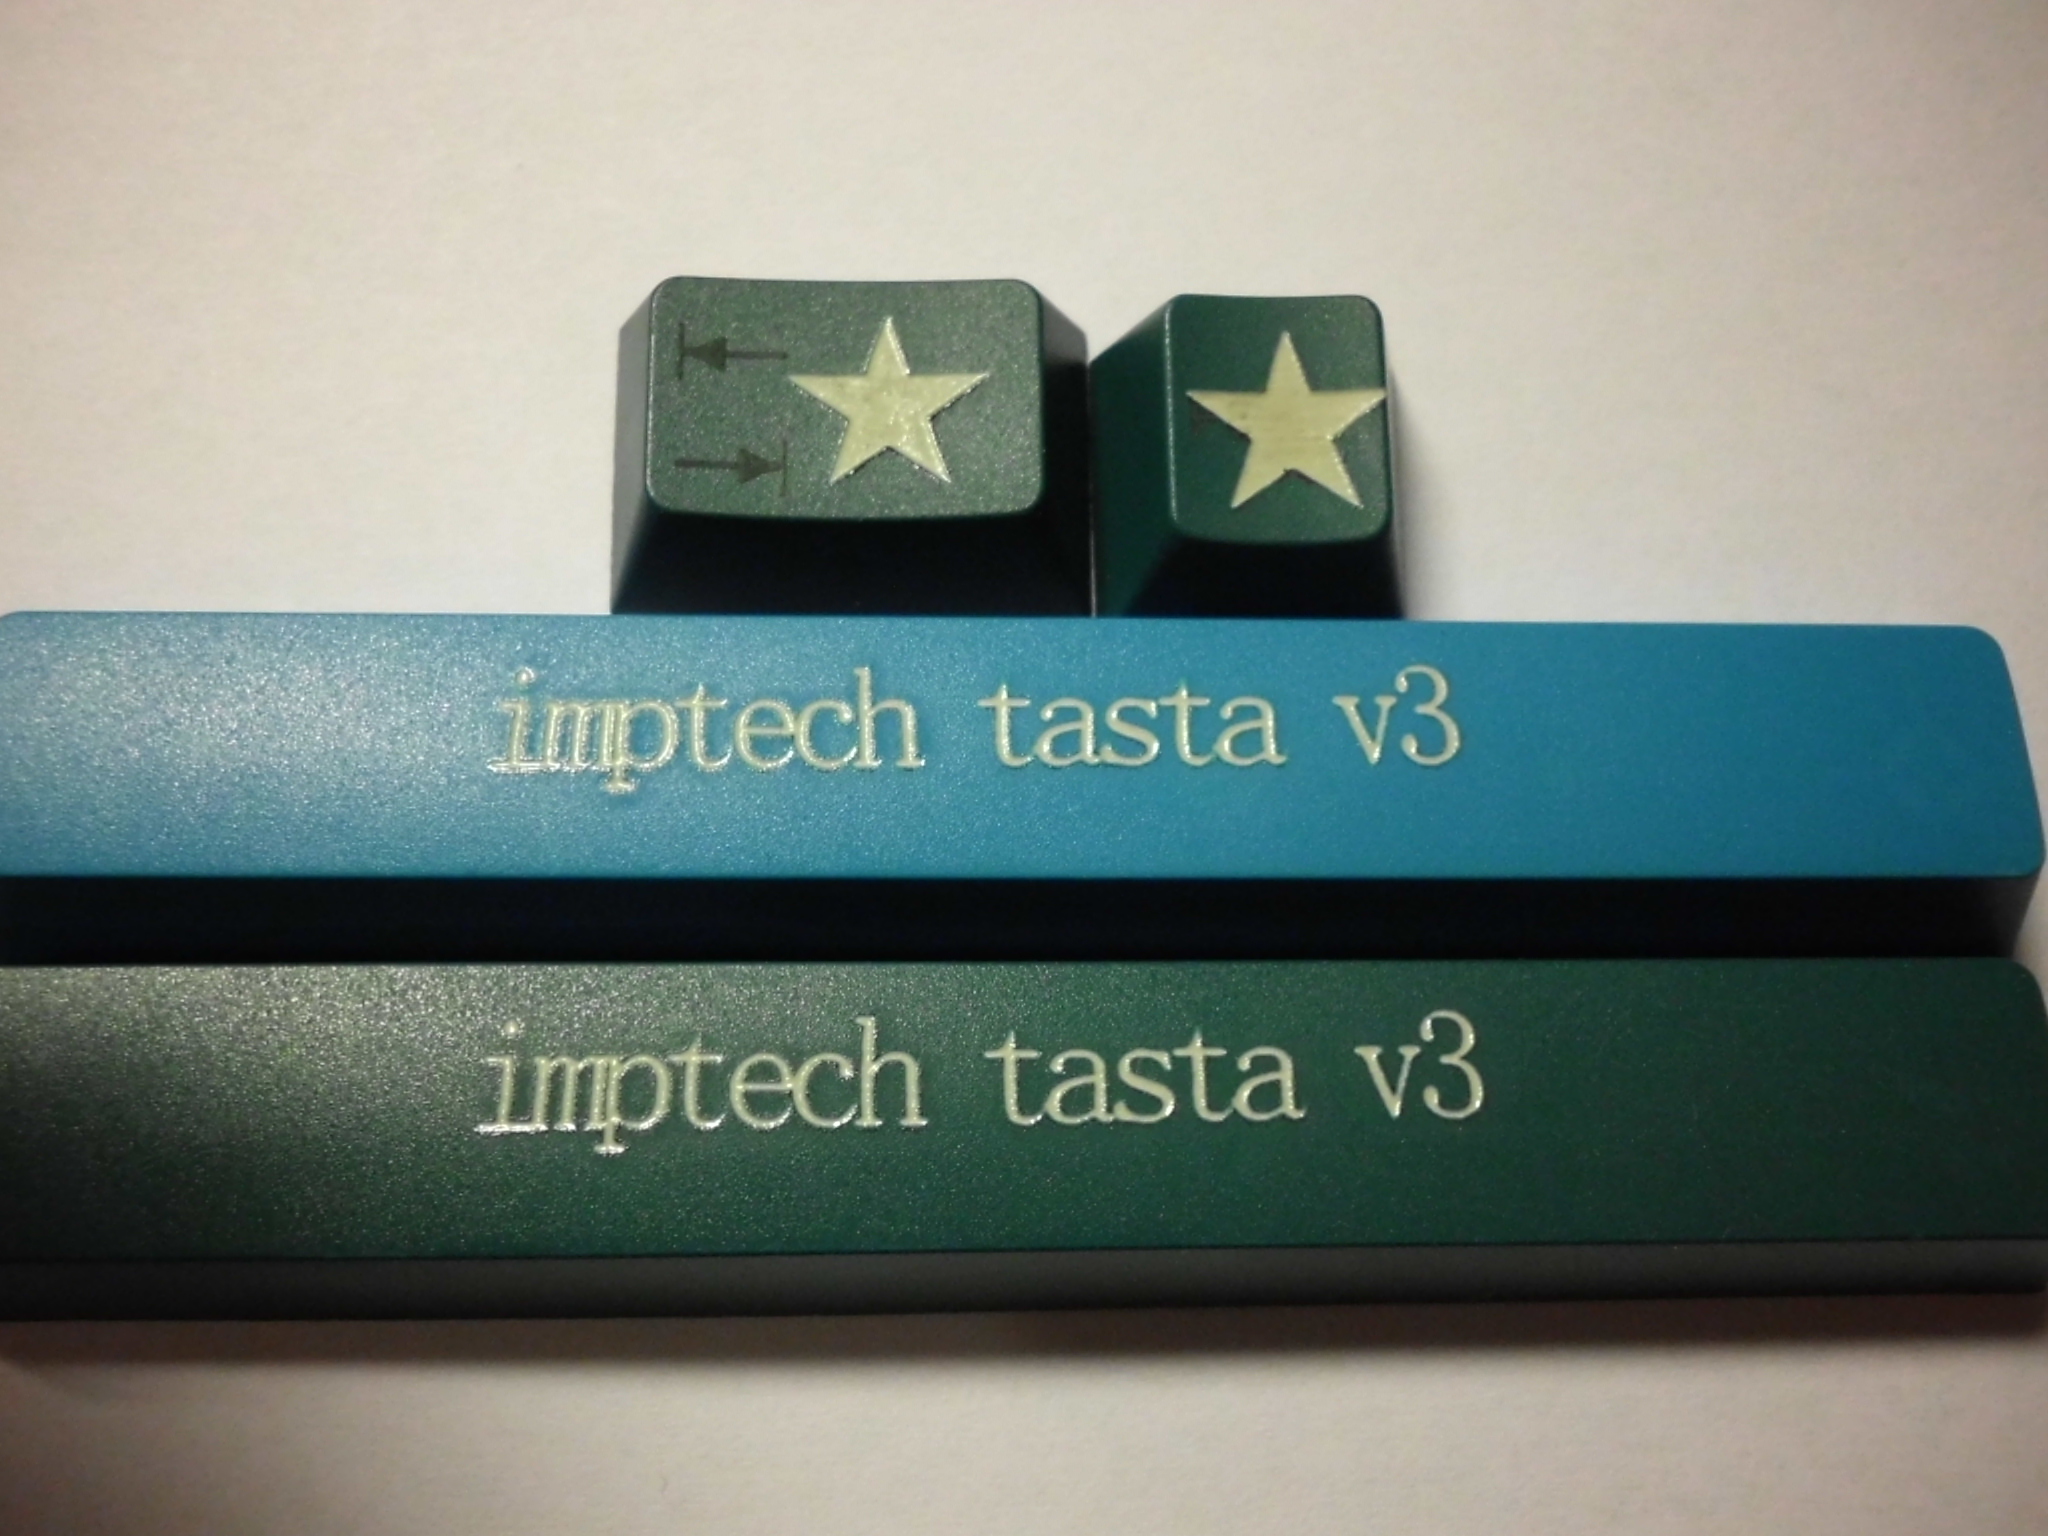
- self-dyed keycaps with test laser engraving \o/
- DSCI0500-small.JPG (880.46 KiB) Viewed 12959 times
Posted: 16 Dec 2012, 00:40
by IvanIvanovich
Will be keeping an eye out for your progress. Also hoping it can turn into a groupbuy or something once testing is a success. I also have few 1800 I wouldn't mind updating.
Posted: 17 Dec 2012, 09:28
by imp
Last parts arrived, only the pcbs are missing - hope they'll be here this week.
Posted: 18 Dec 2012, 13:53
by imp
Tuesday, December 18, 2012 Location Time
1 Shipment picked up SHENZHEN - CHINA, PEOPLES REPUBLIC 19:47
Gogogogogo DHL!
Re: G80-18xx controller replacement
Posted: 18 Dec 2012, 15:40
by SmallFry
Looks cool!
Posted: 18 Dec 2012, 16:15
by mbodrov
imp wrote:* 2.0 USB hub onboard (if you like, it's also possible to make a bare board without the hub and only the controller).
Why USB 2.0, not 3.0?
Posted: 18 Dec 2012, 17:16
by imp
mbodrov wrote:
Why USB 2.0, not 3.0?
Because kicad doesn't make it easy at the moment to make impedance controlled tracks :/. So it would cost lots of time to make it right, or to screw it up in the end - that's why I went with 2.0 for this iteration. Oh, and I don't have any 3.0 devices around, so it doesn't bother me right now
.
Re: G80-18xx controller replacement
Posted: 18 Dec 2012, 17:27
by SmallFry
I'm sure that is take at least one also. Could we get the PCB files?
Posted: 18 Dec 2012, 17:44
by imp
Wait until the testing has been done
.
Re: G80-18xx controller replacement
Posted: 18 Dec 2012, 17:56
by SmallFry
Very cool! Thanks!
Posted: 19 Dec 2012, 07:17
by tlt
Nice looking PCB and flexible design!
Posted: 20 Dec 2012, 18:04
by imp
Finally - boards!!1!elf Had to wait all the day for my "express" shipment from DHL and they took twice the amount of taxes if've expected... But here we go:
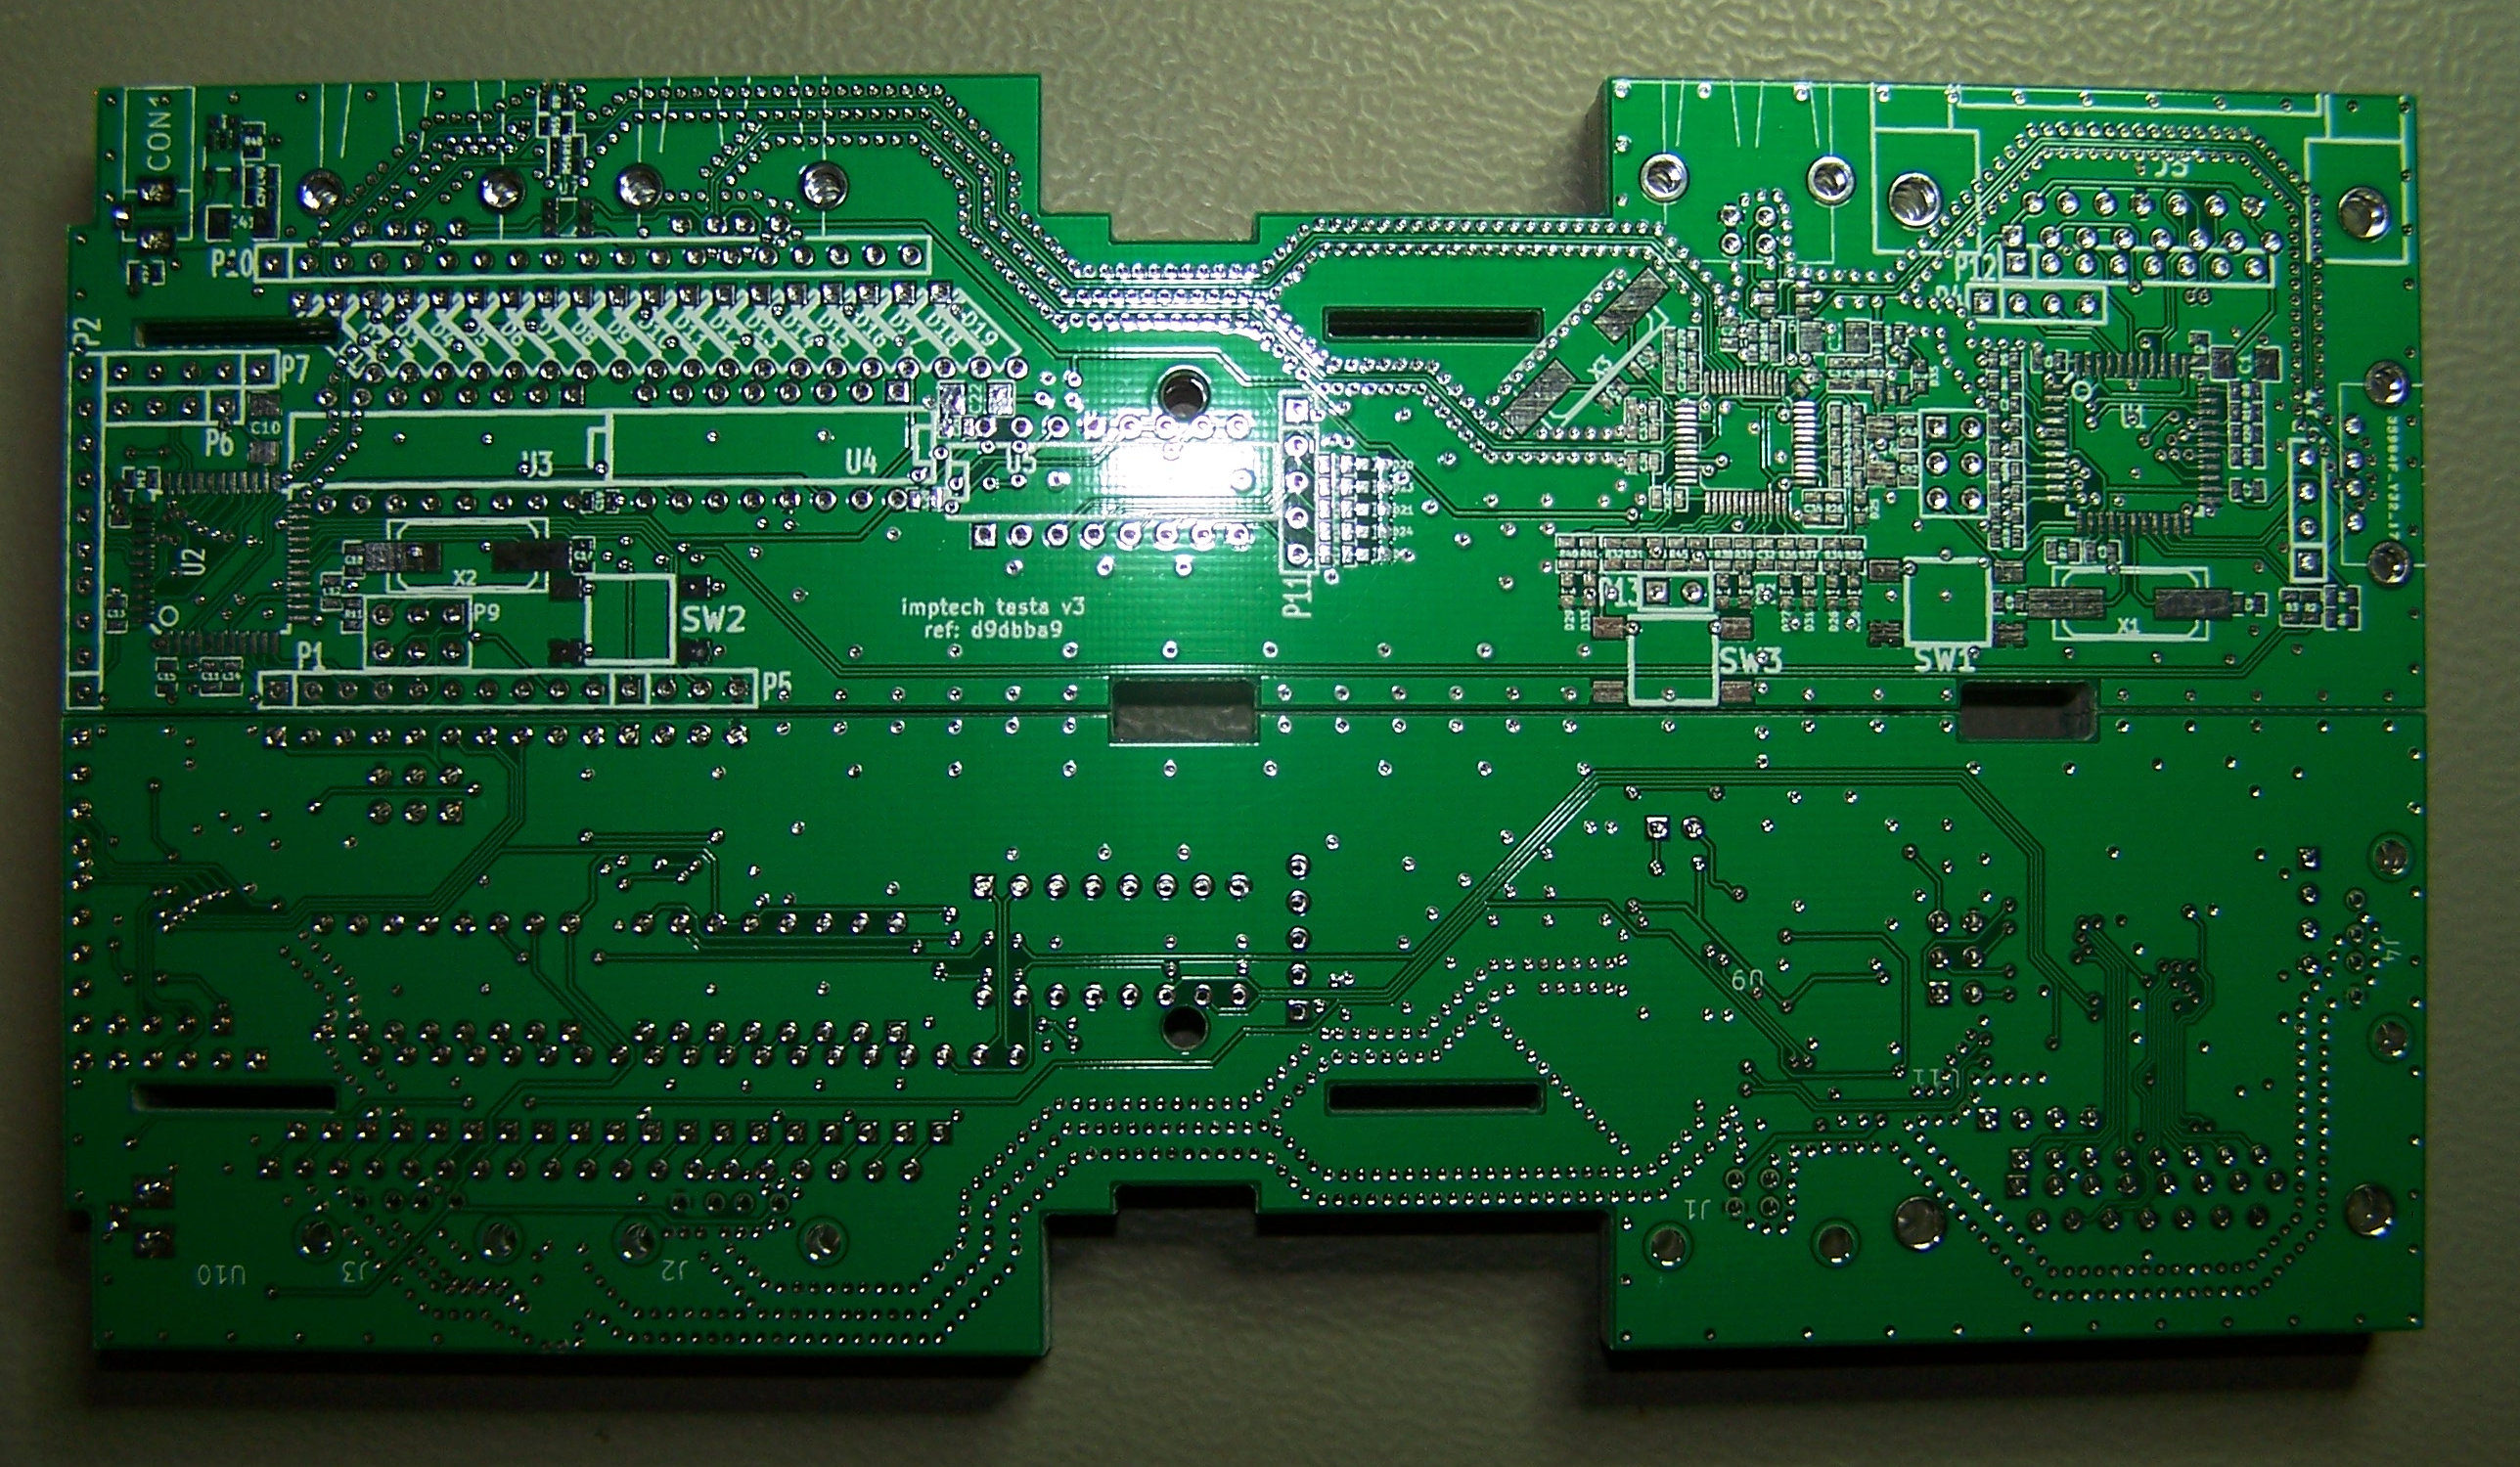
- stack of boards
- 100_8111.JPG (967.97 KiB) Viewed 12705 times
- hub and controller close-up (note the e-check marks :)
- 100_8115.JPG (953.89 KiB) Viewed 12705 times
- it fits in the case \o/
- 100_8117.JPG (968.85 KiB) Viewed 12705 times
Time to get some food (was too busy lurking all day) and warm up the soldering iron \o/.
Posted: 20 Dec 2012, 18:19
by damorgue
Looking nice there imp. I see you bought several. Might I inquire as to what they cost? It doesn't seem to be the same manufacturer as many of the other PCBs which are bought around here.
Posted: 20 Dec 2012, 23:01
by imp
damorgue wrote:Looking nice there imp. I see you bought several. Might I inquire as to what they cost? It doesn't seem to be the same manufacturer as many of the other PCBs which are bought around here.
About 11$ each (PCB+shipping+tax). What gave you the impersion of a different manufacturer? Solderstopmask color? I've asked the guy who managed my order, if he's ready to handle the impact of you guys
(no answer yet, I don't want to destroy his christmas
).
First board is working, populated the minimal version (no ESD protection, nor external power or USB-hub - but shiny LEDs
):
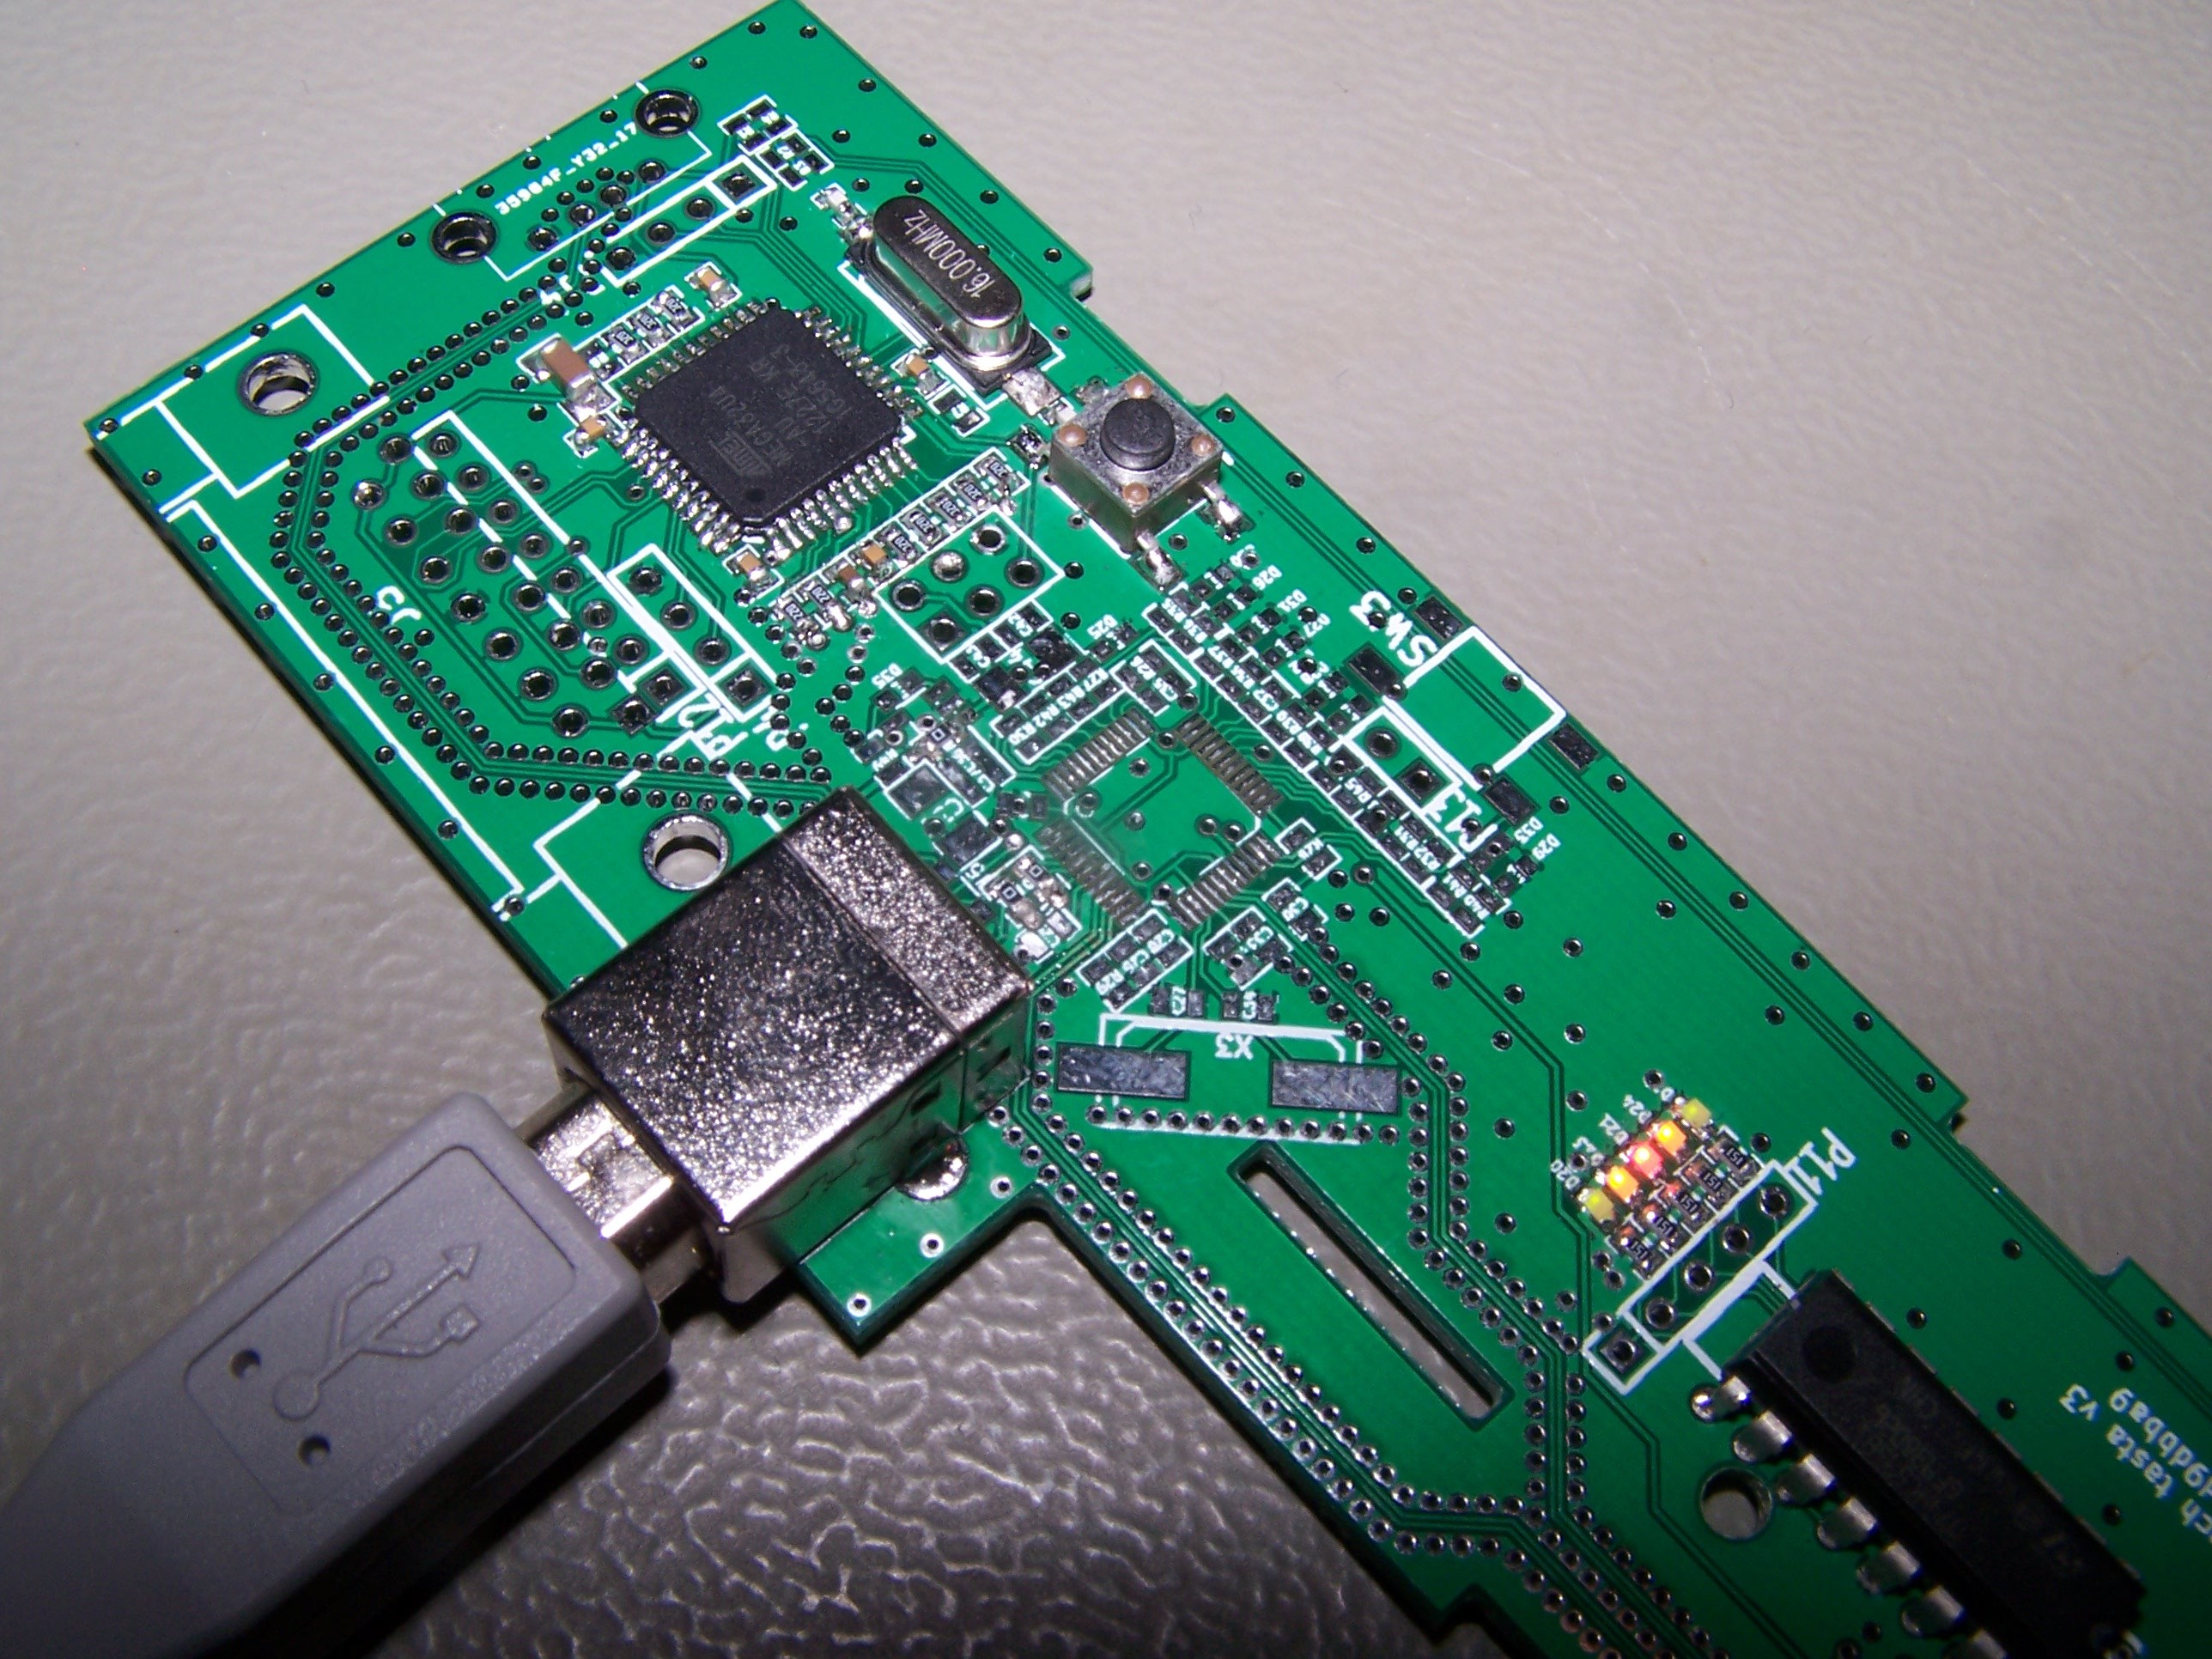
- First working board, minimal version.
- 100_8128.JPG (986.24 KiB) Viewed 12663 times
The 3 0 Ohm resistors: 1 to skip the power switch (which would normally between host-power and external power) and 2 to go directly from the USB-port onto 32u4s datalines, bypassing the missing hub.
Guess I'm going to use sockets for now (so I can detach the matrix) - don't want to end up with 3 additional keyboards on my desk only because I've soldered the matrix directly to the controller.
One minor bug from the footprint's I've used for the USB connectors: all the pads are covered on the bottom with solderstopmask, don't know why...
Re: G80-18xx controller replacement
Posted: 21 Dec 2012, 01:25
by SmallFry
Very cool! I'm looking forward to more progress!
Posted: 21 Dec 2012, 13:55
by imp
Here we go, finished debugging the hub (looked like some bad solder joints or flux residue).
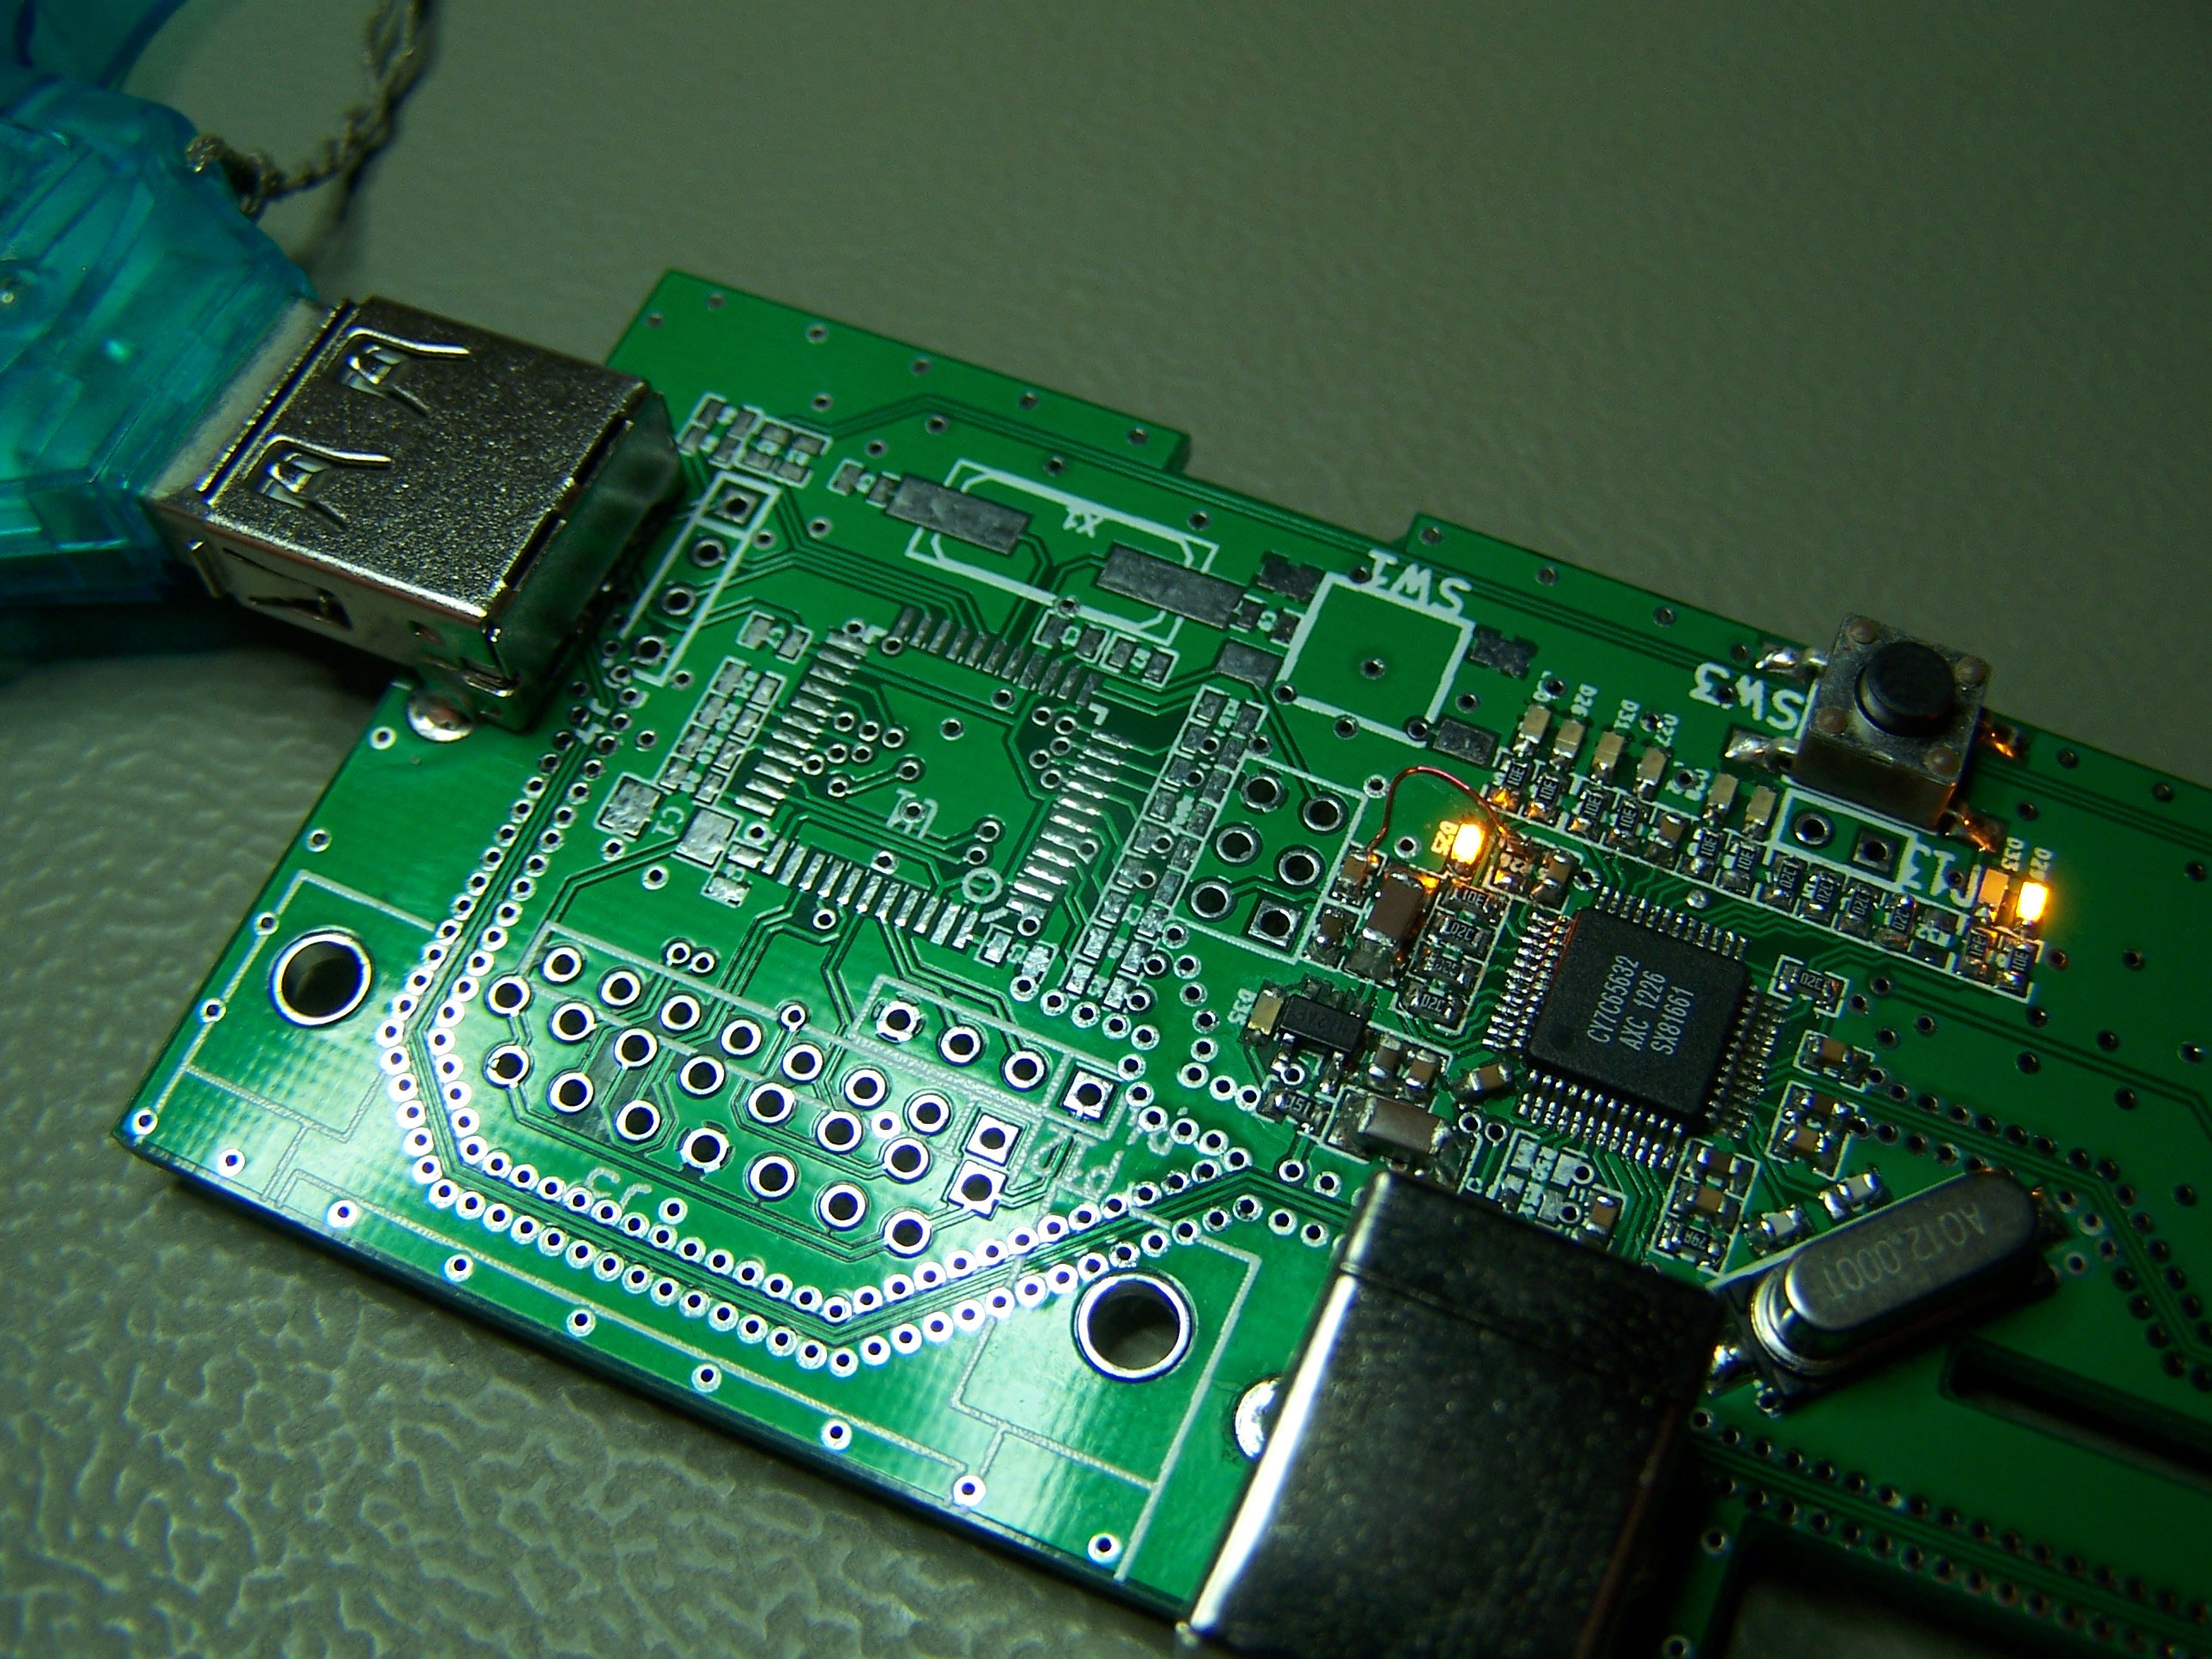
- hub soldered and running
- 100_8136.JPG (951.86 KiB) Viewed 12615 times
The small red wire is only for changing the "gang" mode of the hub to individual power and overcurrent protection (doesn't really matter, since it got the currentlimit on the incoming power line and not existant on the downstream ports).
Would have used the board with my SD cardreader, but "rejected 1 configuration due to insufficient available bus power".... still have to find a fitting plug for the external power input
(so I can test the selfpowered configuration too).
lsusb output with a connected usbstick:
Posted: 21 Dec 2012, 14:03
by imp
Oh, and my PCBs are bought through hackvana, his website is
http://www.hackvana.com/store/ or you can catch him in freenode in #hackvana (hackvana is his nick there too).
Re: G80-18xx controller replacement
Posted: 21 Dec 2012, 17:36
by SmallFry
Can we buy PCB's or are you waiting till you have all the bugs ironed out?
Posted: 22 Dec 2012, 14:57
by imp
Guess you must wait, a bunch of friends are also waiting to be beta testers
.
Device Status: 0x0001
Self Powered
Posted: 23 Dec 2012, 00:00
by Half-Saint
Great!
I wish there was an integrated SD card reader tho.. I know, you can't please everybody
Posted: 23 Dec 2012, 01:35
by imp
Half-Saint wrote:I wish there was an integrated SD card reader tho.. I know, you can't please everybody
For storing/loading layouts and macros or only connected to the pc and not the controller(s)?
You can use the internal USB port to connect it (if you got already one).
The second atmega32u4 got all pins on headers, so it should be easy to connect one
.
I still got the wish to generate statistics (
not dumping complete strings like a keylogger, just something up to tri-grams and their frequency) about the keyboard usage directly inside the keyboard - this should give some real personalized input for layout optimizer. This would be my use-case for an internal SD card.
Got one complete board now, need to make some holes inside the case now
.
Things to optimize:
- - placement for reset switches (maybe on the bottom side, just drill a hole),
- maybe a dip switch to select layouts,
- more constant current allowed from external input (right now it's 1A) - so you can put your raspberry pi into your keyboard instead of the numpad (shadowrun like deck  ),
),
- switch to select connection of the whole hub to the pi / pc,
- some more crazy ideas
Posted: 12 Jan 2013, 00:53
by imp
Heyho,
the USB hubs caused some trouble... The example schematic from Cypress had all the status leds I've connected too. After reporting random numbers of ports each time I called lsusb... The datasheet mentioned "pin strapping pin foo and bar might enable proprietary firmware functions" - removing all the status leds fixed the problem
.
Speed testing the hub with an usbstick ended by 32Mbyte/s on my laptop (34 while connecting the stick directly). Still want to take a look at the eye diagram.
For the USB port placement, I'm not very happy with it for laptop use (i.e. putting the board on the laptop keyboard). The upstream port is right in the middle of my screen and the two external ports face the same problem. Any suggestions on this for a second iteration?
One fix would be skipping the USB-B jack and to solder the cable direct into it's place and fixating it with a zip-tie (and then using the original exit in the case). Also the same can be done with the two external ones, placing them on the side of the keyboard using the same way. But this causes the same problem that some Das Keyboard users got, cable / usbstick over the mousepad. Vertical ports are might be an option, but then again, you'll get cables / sticks infront of your screen (if this option is possible at all due the internal connection to the matrix - guess I have to make an cutout to get a closer look at it in the assembled state)...
Got my grabbags from ne0phyte today and replaced nearly all my caps, typing on a flat profile now
.
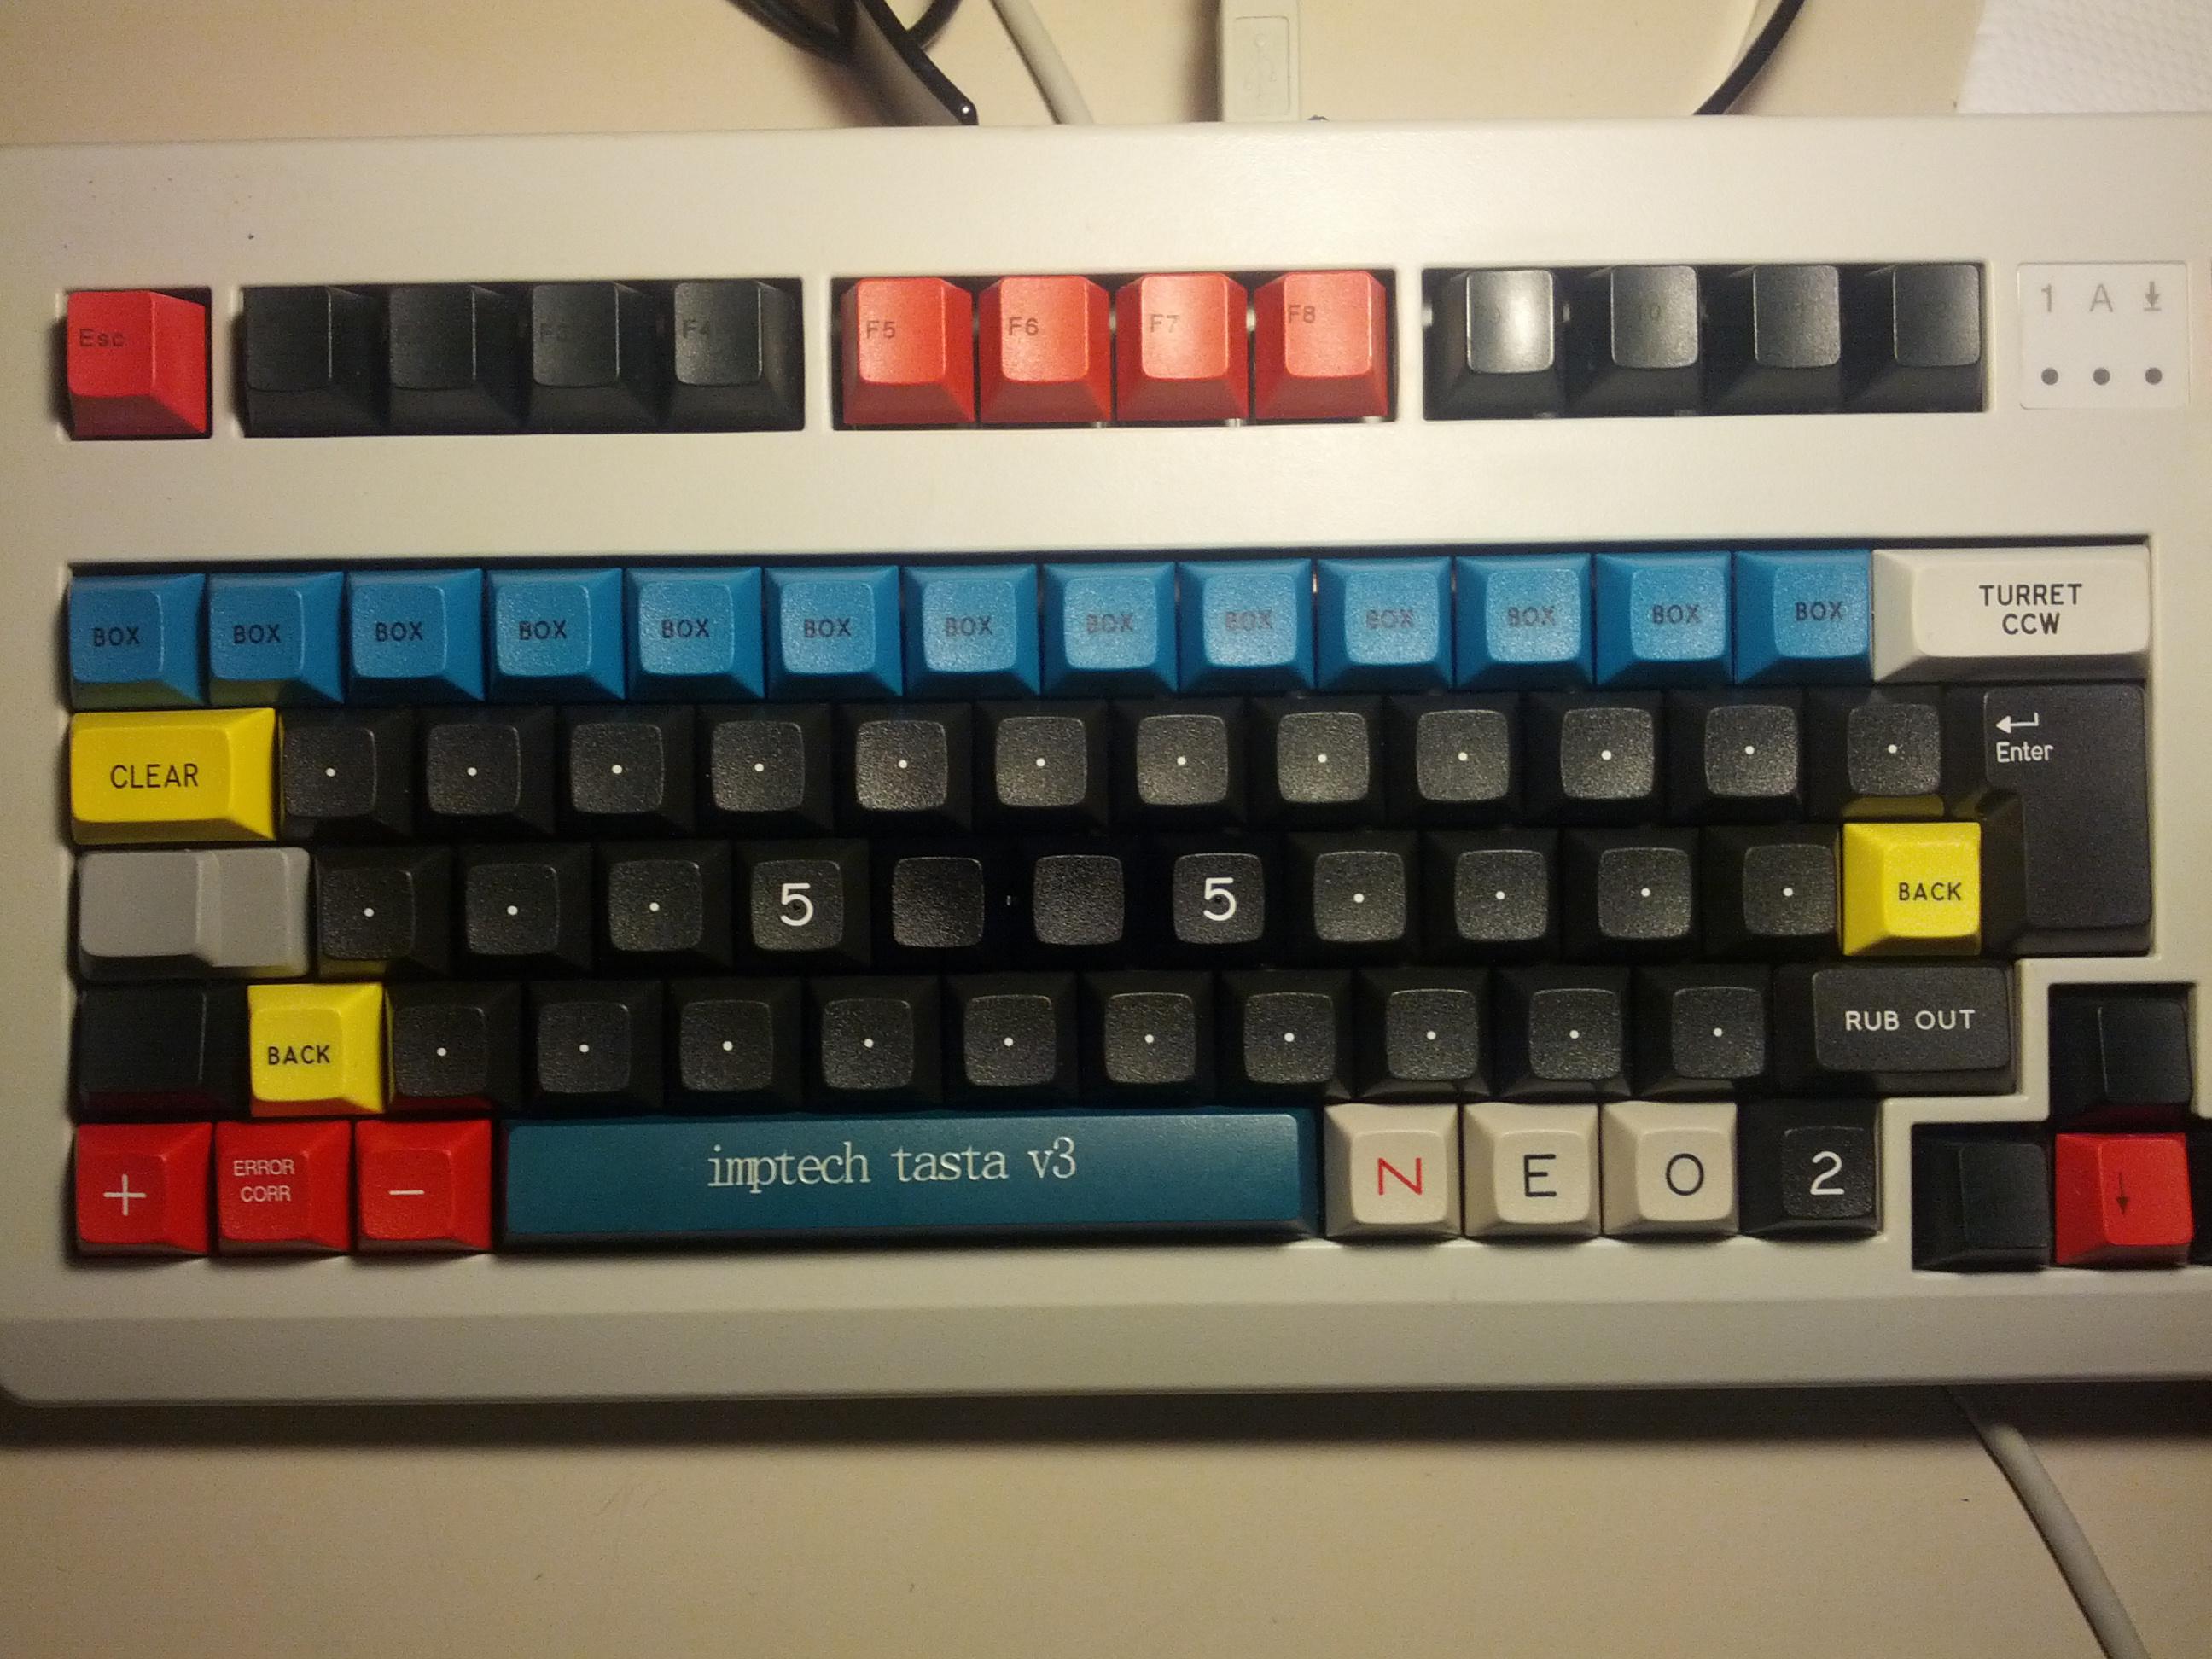
- new keycaps \o/
- flat-caps-small.jpg (456.45 KiB) Viewed 12278 times
Sadly I've got no 1.75x keys in that profile nor 1.25x

.
Posted: 18 Feb 2013, 21:37
by Jmneuv
Since i own a freshly cleaned 1800 i'm very excited about your controller project.
About the placement of the usb-ports:
Hmm the 1800 has some very nice flat surfaces at the rear face, perfect for openings. You just shouldn't place the keyboard onto your laptop

How about still at the rear, but vertical and pointed away in a 45° angle?
Would make it somewhat harder to hit the ports but could be a compromise.
Posted: 26 Feb 2013, 22:27
by imp
Jmneuv wrote:Since i own a freshly cleaned 1800 i'm very excited about your controller project.
About the placement of the usb-ports:
Hmm the 1800 has some very nice flat surfaces at the rear face, perfect for openings. You just shouldn't place the keyboard onto your laptop
That's where there all the openings are right now
.
Here is the long promised image from the openings:
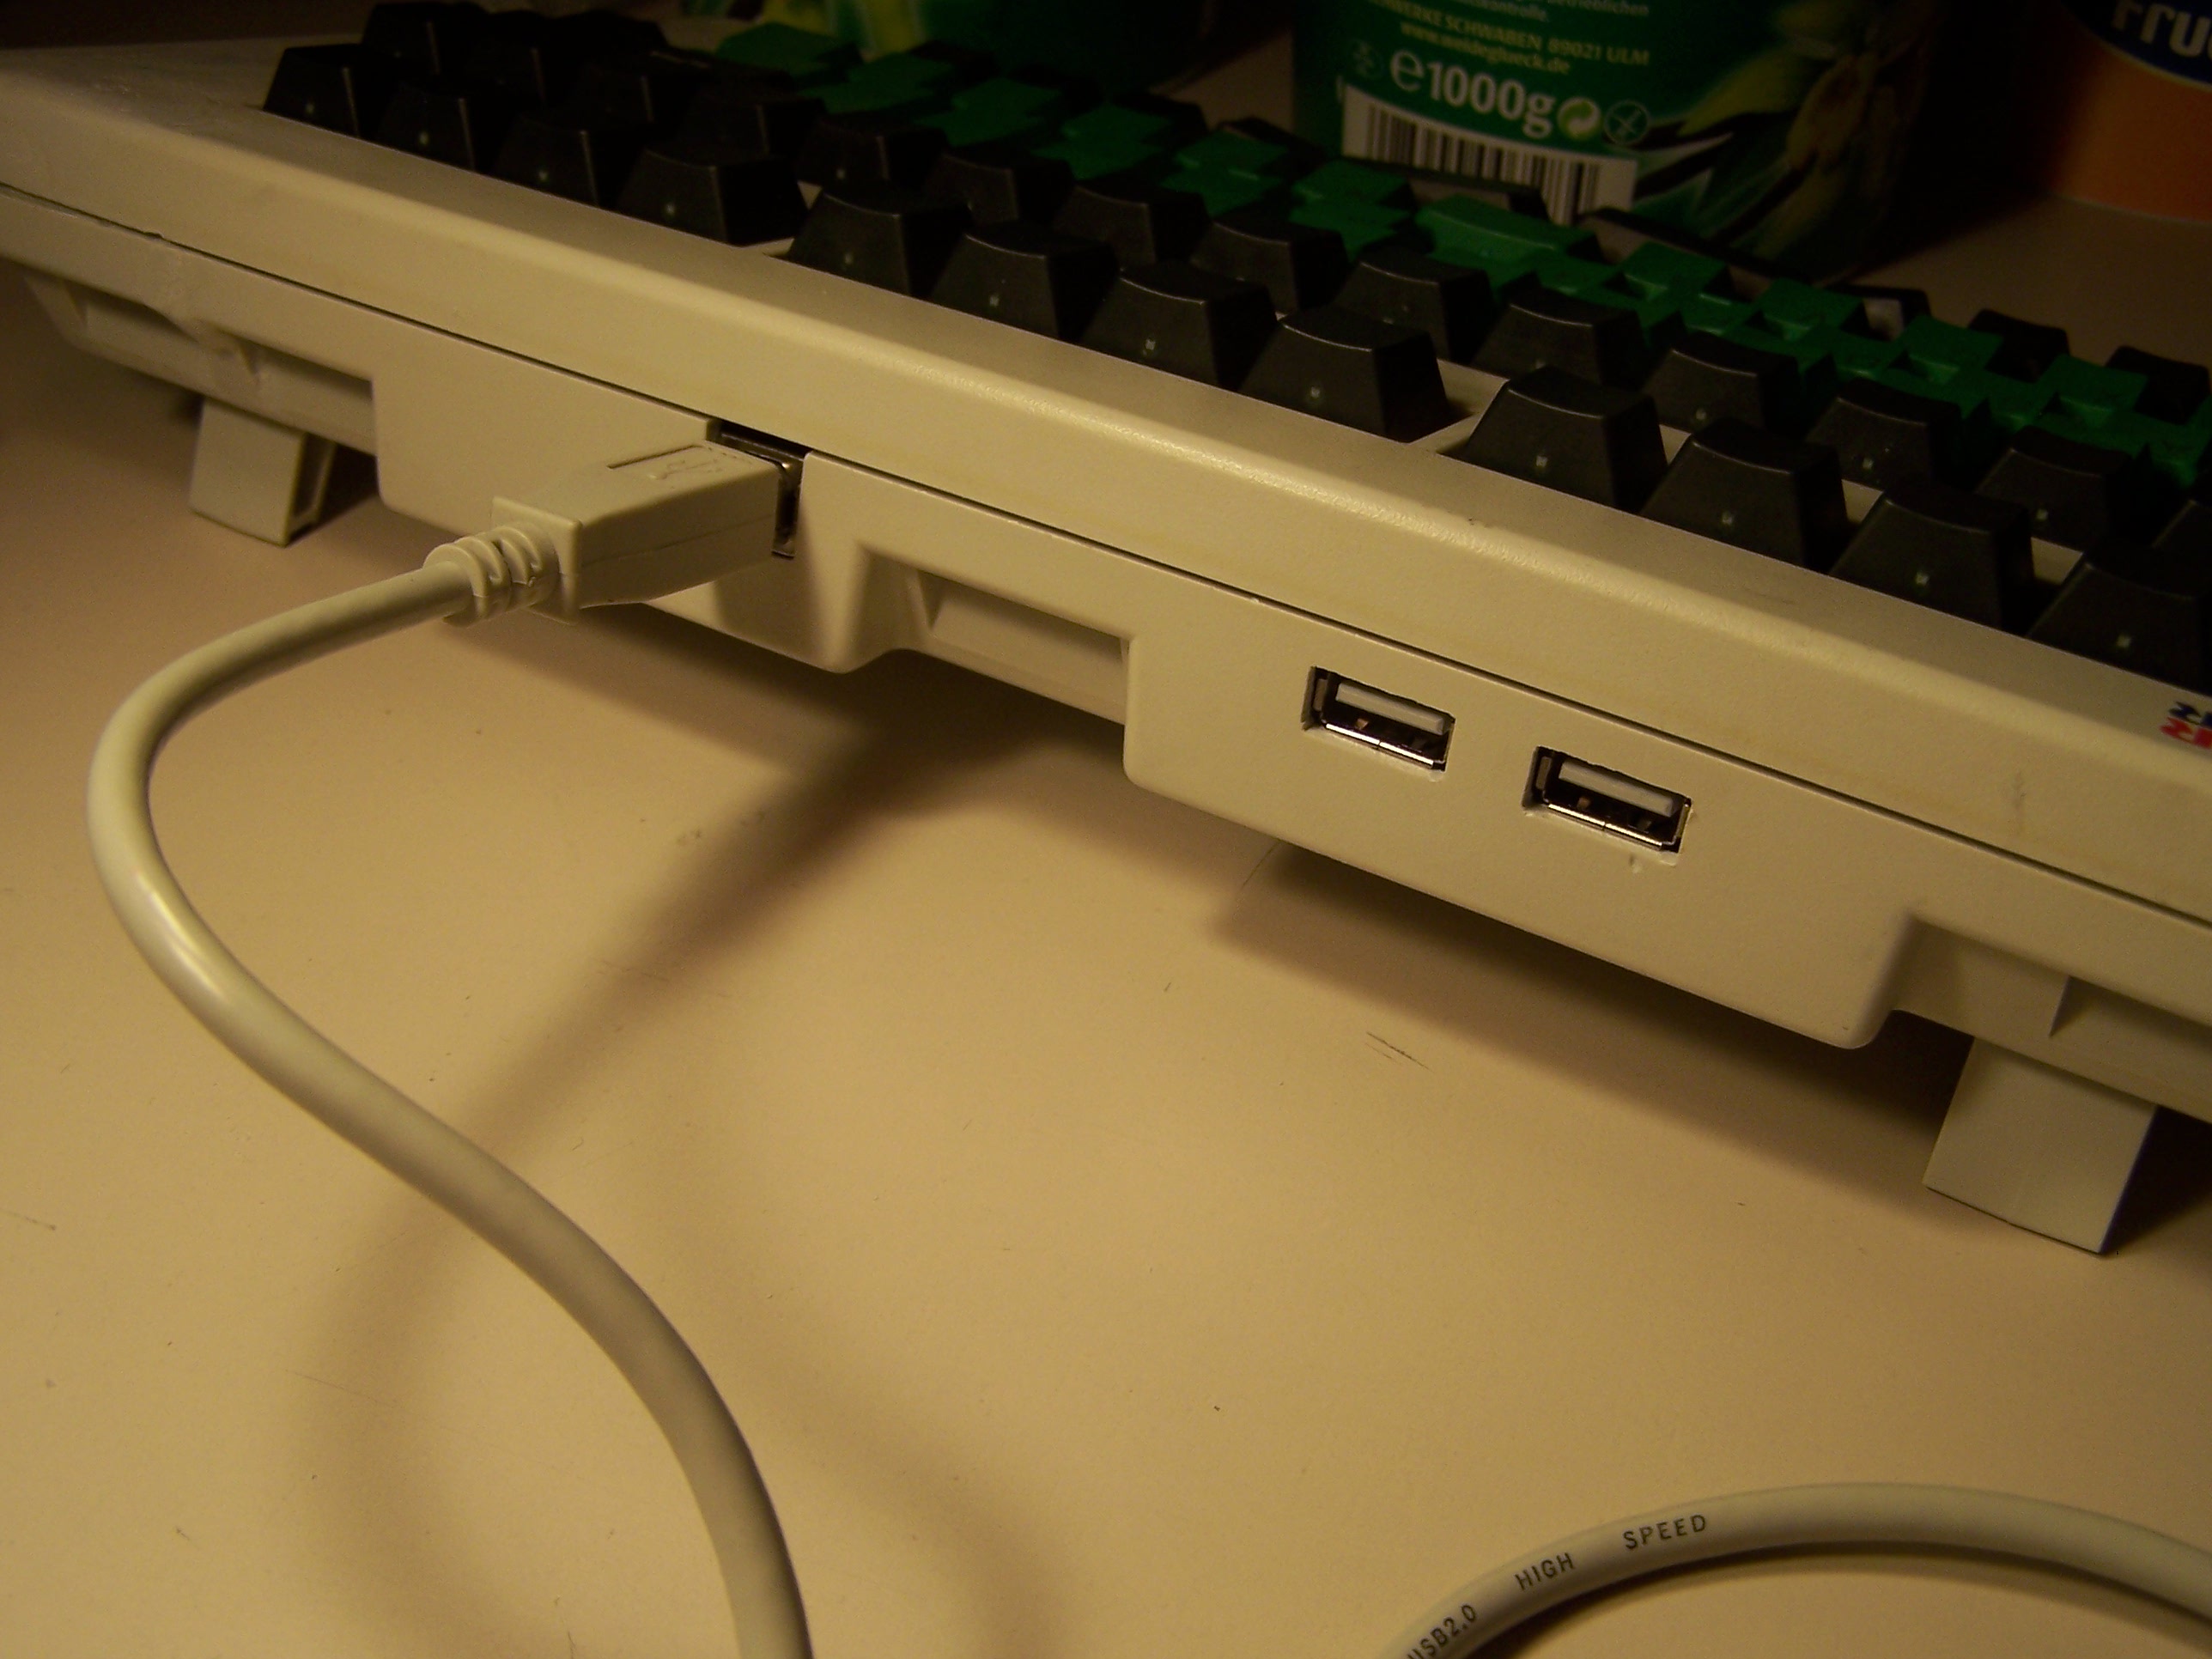
- USB-ports\power socket
- 100_8181.JPG (501.88 KiB) Viewed 12002 times
Jmneuv wrote:How about still at the rear, but vertical and pointed away in a 45° angle?
Would make it somewhat harder to hit the ports but could be a compromise.
Still not better for my laptop usage
. Guess I'll have to accept this for now (anyway, the option to move the ports around and solder wires onto the pcb still exists).
For some closeups on the modded case, visit the ABS Sludge thread:
http://deskthority.net/workshop-f7/abs- ... ml#p101366 (even if the case material is SB and not ABS, works the same way
).
