[Project] The XYNV Keyboard

User avatar
Minskleip

01 Feb 2011, 19:06

MASSIVE UPDATE!!!!

I redesigned it and made it even more minimal! Now the PCB is just a grid. The Teensy will be soldered to a perfboard which will be bolted to the PCB. The rows and columns will be connected to the perfboard with wires. This makes it possible to cut up a PCB to add additional rows or columns! (trick/hack for keeping the cost low and increasing the hackability).

And I've bought PCBs
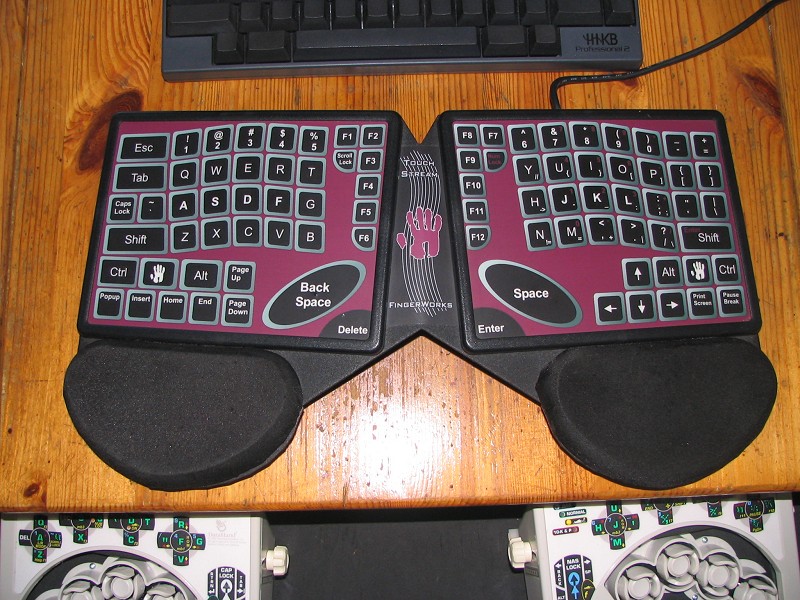
 :D Got 10 in the mail this morning!

Top:
IMG_20111004_125836.jpg
IMG_20111004_125836.jpg (119.83 KiB) Viewed 10271 times
Bottom:
IMG_20111004_125732.jpg
IMG_20111004_125732.jpg (252.78 KiB) Viewed 10271 times
They got bumped in the mail and has a slight impurity in one of the corners, but otherwise perfect. The switches fit perfectly!

=====================================================================================================


My xynv's not dead lol

Made some progress with the PCB, and I've got the Teensy. Will do some cleanup and order a few copies of the PCB.

I simplified the layout so that the same PCB can be used for both hands. To do this the Teensy will be connected with wires, and the cable ports have to be connected to the PCB with wires too.
xynv-pcb.png
xynv-pcb.png (123.54 KiB) Viewed 10521 times
Recently I've been inspired by the likes of dwm, lowpoly and chimera15 etc at Geekhack, and when sixty sold a bunch of switches and is preparing a custom cherry spring, it was too great an opportunity to not try and make a board myself. Presenting a project thread for the XYNV board!

Switches
IMAG0104-2.jpg
IMAG0104-2.jpg (247.29 KiB) Viewed 11195 times
Image
Image
I'll be using Cherry Clear switches with custom springs. Thanks sixty!

Keycaps
Image
Round Three caps from the order at Geekhack. Those double spaced key caps are really swell.

Layout
The physical layout will be something like the following. It's highly inspired by dwm's Humble Hacker Keyboard, but will only have single and double spaced keys. I'll try to use some of the top row double spaced keys in vertical position for enter etc, but I won't know if that works before I get the them or create key keyboard.

Some points:
  • Grid layout.
  • Split/hand separation.
  • PCB mounted switches.
  • Easily accessible function keys for selecting different layers.
  • Number row is the other way around ("shifted" by default)
  • Would be cool to have a Num key for easy numbering.
  • Backspace/del under right thumb.
  • Compose key (as far as it's possible under Windows).
  • COMPOSE is Alt Gr. Use http://allchars.zwolnet.com/ to make compose work.
  • COMPLETE is TAB or a shortcut for a "complete" task in Emacs or something
  • SELECT enables shift lock and virtual arrows and makes ENTER copy. ESC or SELECT terminates. (This is like entering Copy Mode in Tmux)
  • FUN + SHIFT is shift lock or caps lock?
  • Suggestions for the two bottom most keys? Macros perhaps.
Layout made in Excel:
layout.png
layout.png (18.72 KiB) Viewed 11195 times
Dark grey keys indicate that the profile is wrong the the row.

I'll have enough spare switches to make a numpad too:
layout_numpad.png
layout_numpad.png (4.67 KiB) Viewed 11195 times
Layers
I'm thinking of having a mirrored HHKB layer, so that I can do PGUP/PGDOWN and arrows etc with my left hand while mousing with my right.

Controller
I'm thinking of using the Teensy USB Development Board and take advantage of dwm's firmware.

PCB
Next step is to design the PCB.

First revision!
xynv.png
xynv.png (52.23 KiB) Viewed 11092 times
Construction
It will have to be something simple, like dark wood. Floating like lowpoly's keyboard?


Comments or suggestions appreciated.
Last edited by Minskleip on 04 Oct 2011, 14:52, edited 4 times in total.

User avatar
sixty
Gasbag Guru

01 Feb 2011, 19:16

Interesting layout. The space would not work out for me, since I use both hands to hit space, depending on the words. Did you verify that you indeed only use your left hand for space? Or will you just try to learn to just use your left hand? I'm curious.

User avatar
Minskleip

01 Feb 2011, 19:24

Yes, I've never used right thumb for space. It'll be a bit strange to use it for backspace in the beginning, but since it's already there in the position, I might as well use it.

I do use right shift depending on the words, but I've never used the right ctrl or windows keys.

User avatar
sixty
Gasbag Guru

02 Feb 2011, 16:57

Also forgot entirely.. I still have a bunch of stabilizers left. How many do you need? If you keep your current design I think you will need 8.

User avatar
42.tar.gz

02 Feb 2011, 17:22

If Minskleip wants to use the keys from the POS kit he does not need any stabilizers at all since these have 2-key mounts. (see "IMPORTANT" note on the diagram)
Minskleip, you should keep in mind that this makes the double spaced keys very hard to press. I have one of those Access-IS 'boards hoggy once sold over at geekhack and it uses a double spaced 2-key mount cap for backspace – makes it far too stiff IMO.

User avatar
sixty
Gasbag Guru

02 Feb 2011, 17:33

You are right. I think that will be very uncomfortable for daily work though... double switches are nasty business.

User avatar
Minskleip

02 Feb 2011, 18:02

I haven't used double switches before, but can't I remove the spring or something from one of the switches if it's too hard to press?

dwm uses double switches with something removed for some keys in his Huble Hacker, and this was quite successful I understood.

User avatar
sixty
Gasbag Guru

02 Feb 2011, 18:11

Problem is that if you remove a spring from a switch, that switch will count as always on. So if you wanted to use it, you would either have the firmware ignore it entirely, or do not solder it in.

User avatar
Minskleip

02 Feb 2011, 18:39

I see, but why would the switch count as always on?

User avatar
sixty
Gasbag Guru

02 Feb 2011, 21:51

I'm not sure - and it may not be the case on all boards. This was the case when Soarer at geekhack modded his G80-1800 to remove the arrow keys. He reported that once he removed spring and stem the switch was always on. It could of course be that with the stem inside it would work (but I think not, since the stem would slide down)

User avatar
Minskleip

02 Feb 2011, 22:53

Ah, but it wouldn't slide down when it's hold in place inside the keycap which also is mounted to a switch with a spring, no? I will have to program the controller to ignore one of the switches in the doubles in anycase, because I want to solder all so I can experiment.

According to the animated gifs of Cherry switches made by this guy at Geekhack, the stem has a little nub which opens the circuit when it's in the upper most position, so my guess is that it'll work.

User avatar
sixty
Gasbag Guru

03 Feb 2011, 19:34

Right. Actually the ANSI version of the Cherry G80-2100 does use a dead key for the stabilizer of the Enter key, to save costs on the PCB. It does not have any leafs inside, though.

User avatar
Minskleip

15 Feb 2011, 00:29

I've learned enough of Kicad that I've started designing the PCB.
Image

Any suggestions or pointers? Are the diods the wrong way, traces too long, silly use of the Teensy for instance?

I'm thinking of putting leds under the fn keys, and have them light up when the keys are hold down.

One final question: is the large centre mounting pin on the cherries dead centre?

User avatar
webwit
Wild Duck

15 Feb 2011, 00:32

Wow, looks very elegant!

User avatar
Minskleip

15 Feb 2011, 00:38

Thank you! I got inspired by μTRON too. Hopefully I don't have to include extra components to compensate for the length of the ribbon cable connecting the hands.

intealls

15 Feb 2011, 00:50

Looks great. I had some trouble getting D6 to work, it just made the LED on the Teensy act up. I don't know if the code is to blame or if I misconfigured something. In the end I just used a different pin. This was with dmw's HH firmware when hacking up an AEK II. Compiles beautifully (on Linux) and does pretty much everything one could want. Stable too, can't recommend it enough.

User avatar
webwit
Wild Duck

15 Feb 2011, 00:55

I'd convert that ribbon to a data cable when it comes out of the case. Ribbons break.

User avatar
Minskleip

15 Feb 2011, 00:57

Cool, good to know. Have you tried with a different Teensy? Maybe it was just the one..

I'm planning to use dwm's firmware or hasu's. Hasu has this cool mouse mode. I could use the bottom most buttons as mouse buttons :)

Webwit: do you mean to make it round?

User avatar
webwit
Wild Duck

15 Feb 2011, 01:12

Yeah, like the DataHand keyboard as seen here goes to DB15. I actually had to buy an extension cable for in between when I chair mounted it, so I could lead the cable underneath the chair. Ideally it would have a DB15 connector here on the outside, it has that on the other hand (which connects to this hand with a detachable DB15 cable).
cabling1.jpg
cabling1.jpg (109.54 KiB) Viewed 11075 times
cabling2.jpg
cabling2.jpg (89.75 KiB) Viewed 11075 times
cabling3.jpg
cabling3.jpg (94.15 KiB) Viewed 11075 times
Ribbon cable reminds me of the Fingerworks Touchstream. There are two versions. The only below is fixed in its frame. The newer version you could take out of the metal frame, so you could place it over your laptop for example. Those had a lot of problems with broken ribbon cables.

Image

User avatar
Minskleip

15 Feb 2011, 10:04

Thanks for the tip, I'll look into DB15! That looks very good and sturdy too.

User avatar
noctua

15 Feb 2011, 21:46

Minskleip: you have to revise your pcb-layout, the connection in series of diodes is wrong!
Take a look at Keyboard Matrix Help, i'm sure you find quickly the solution how to fix this..

User avatar
Minskleip

15 Feb 2011, 23:44

noctua wrote:Minskleip: you have to revise your pcb-layout, the connection in series of diodes is wrong!
Take a look at Keyboard Matrix Help, i'm sure you find quickly the solution how to fix this..
Oh, yes, I can see that they're parallell now. I'll see if I can figure out the right way and update. I even looked at the webpage you link too before connecting them in series :oops:

Thanks for pointing it out!

Edit: I found a solution!
fixeddiodes.png
fixeddiodes.png (9.36 KiB) Viewed 11023 times
Now I have something to do tomorrow he he.

User avatar
noctua

16 Feb 2011, 08:32

Yes, looks much better, this snippet will work (rows are low-driven, very well)!
Some suggestions from me related to your layout, print it on an paper then
let dry your finger the moves you have designated.. remove strictly awkward
moves, the thumbs are good - but they need always a little more space -..

Take a look at my private album at GH.. ;)

User avatar
Minskleip

16 Feb 2011, 15:00

You're the one who made that cool keyboard! Put up larger and more pictures of it!

The only keys I'm not that sure about are the bottom most thumbs. Maybe I can mount the switches on cardboard and try my fingering? (lol)

I got a great idea: it looks like the left hand would function without the right being connected; I could have a layer with one-handed layout!

User avatar
Minskleip

17 Feb 2011, 15:47

Good thing you got me to draw the layout; I just realised that the bottom most thumb buttons whould get in the way of space, forcing you to push them just on top of the left switch.

User avatar
kidchunks

17 Feb 2011, 17:57

Nice diagram Minskleip, I too had issues with were the diode should go despite reading the matrix documentation a few times. All solved now!

Question which diodes you plan on using? I figure the 1N4148, but I've seen a few with different current ratings and voltage ratings.

User avatar
Minskleip

17 Feb 2011, 18:13

Thanks! I'm thinking 1N4148 too, but I haven't looked into that aspect yet. If the different diodes we could use have the same footprint, it's one of the last decisions to make :)

User avatar
noctua

17 Feb 2011, 18:58

The 1N4148 diodes are quiet fast and cheap - overkill for an simple matrix - i use these
currently too.. don't forget to activate the internal pullup's

Minskleip: if you plan to involve your thumbs more, how about an separate thumb-field
like the kinesis on paper of course. do your thumbs cross the index fingers on some
stroke path's?

User avatar
kidchunks

17 Feb 2011, 19:03

noctua wrote:don't forget to activate the internal pullup's
internal pullup?

User avatar
Minskleip

17 Feb 2011, 19:06

Yes, on the bottom row. I prefer to use my thumb there. Using the pinky is not very comfortable to use there. I'll draw up some keys for the thumb and try. Having a separate thumb area sounds much better (and harder to make he he).

Post Reply

Return to “Workshop”