Hello all! I am on more than a year long quest to revive old keyboard from Gavilan SC laptop/desktop computer from 1984 (I only have the keyboard) https://en.wikipedia.org/wiki/Gavilan_SC. Firstly please look at the photos and tell me what switch is this? I was looking throught whole internet searching exact match but no luck so far. It's Key Tronic and it's looking like foam and foil switch, but.. It has more moving parts than typical foam and foil + it was lacking pads on all switches.
Please help me find out if this is foam and foil? Or something else? I also want to connect it to microcontroler, but I can't really make-out the matrix of the keyboard with pins (Screen Contact as KeyTronic labeled it is laminated on both sides with plastic, so i can't check the resistance on pads or voltage with multimeter, so I'm guessing blindly inputting diffrent matrixes in KMK software and connecting it :X) If someone also will be able to help me with connecting it to Raspberry Pico and running I will be grateful! Let me know what you think.
2 videos showing how piston and whole key is moving:
https://streamable.com/z0ymrr
https://streamable.com/3scaae
Probably new/unknown switch design from KeyTronic? - help
-
averagetypist
- Location: Poland
- Main keyboard: Custom, Glorious Panda, SA
- Main mouse: G Pro Superlight
- Favorite switch: Tactile ;)
- Attachments
-
- IMG_0770.JPEG (858.5 KiB) Viewed 1876 times
-
- IMG_0765.JPEG (1.31 MiB) Viewed 1876 times
-
- IMG_0692.JPEG (1.05 MiB) Viewed 1876 times
-
- IMG_0686.JPEG (947.2 KiB) Viewed 1876 times
-
- IMG_0684.JPEG (913.97 KiB) Viewed 1876 times
-
- IMG_0685.JPEG (697.23 KiB) Viewed 1876 times
-
jsheradin

- Location: USA
It's prong over membrane with a plunger for overtravel. The switch is indeed documented but barely: http://telcontar.net/KBK/Key_Tronic/#screened_contact
Is it conductive or capacitive? You should be able to tell using a multimeter connected to a row and column and pressing the corresponding switch.
If conductive then you should be able to run it directly via vanilla QMK. You'll need to figure out the matrix but trial and error works too.
If it's capacitive then getting it going is a fair bit more tricky.
-
Muirium

- µ
- Location: Edinburgh, Scotland
- Main keyboard: HHKB Type-S with Bluetooth by Hasu
- Main mouse: Apple Magic Mouse
- Favorite switch: Gotta Try 'Em All
- DT Pro Member: µ
Definitely a conductive membrane. Looks very easy to convert. A simple, bare matrix conveniently exposed on a ribbon cable. Can't get any simpler! A nice project for a newb! 
This picture here even shows the whole matrix. All that's hidden is the exact pins each row and column connects to:
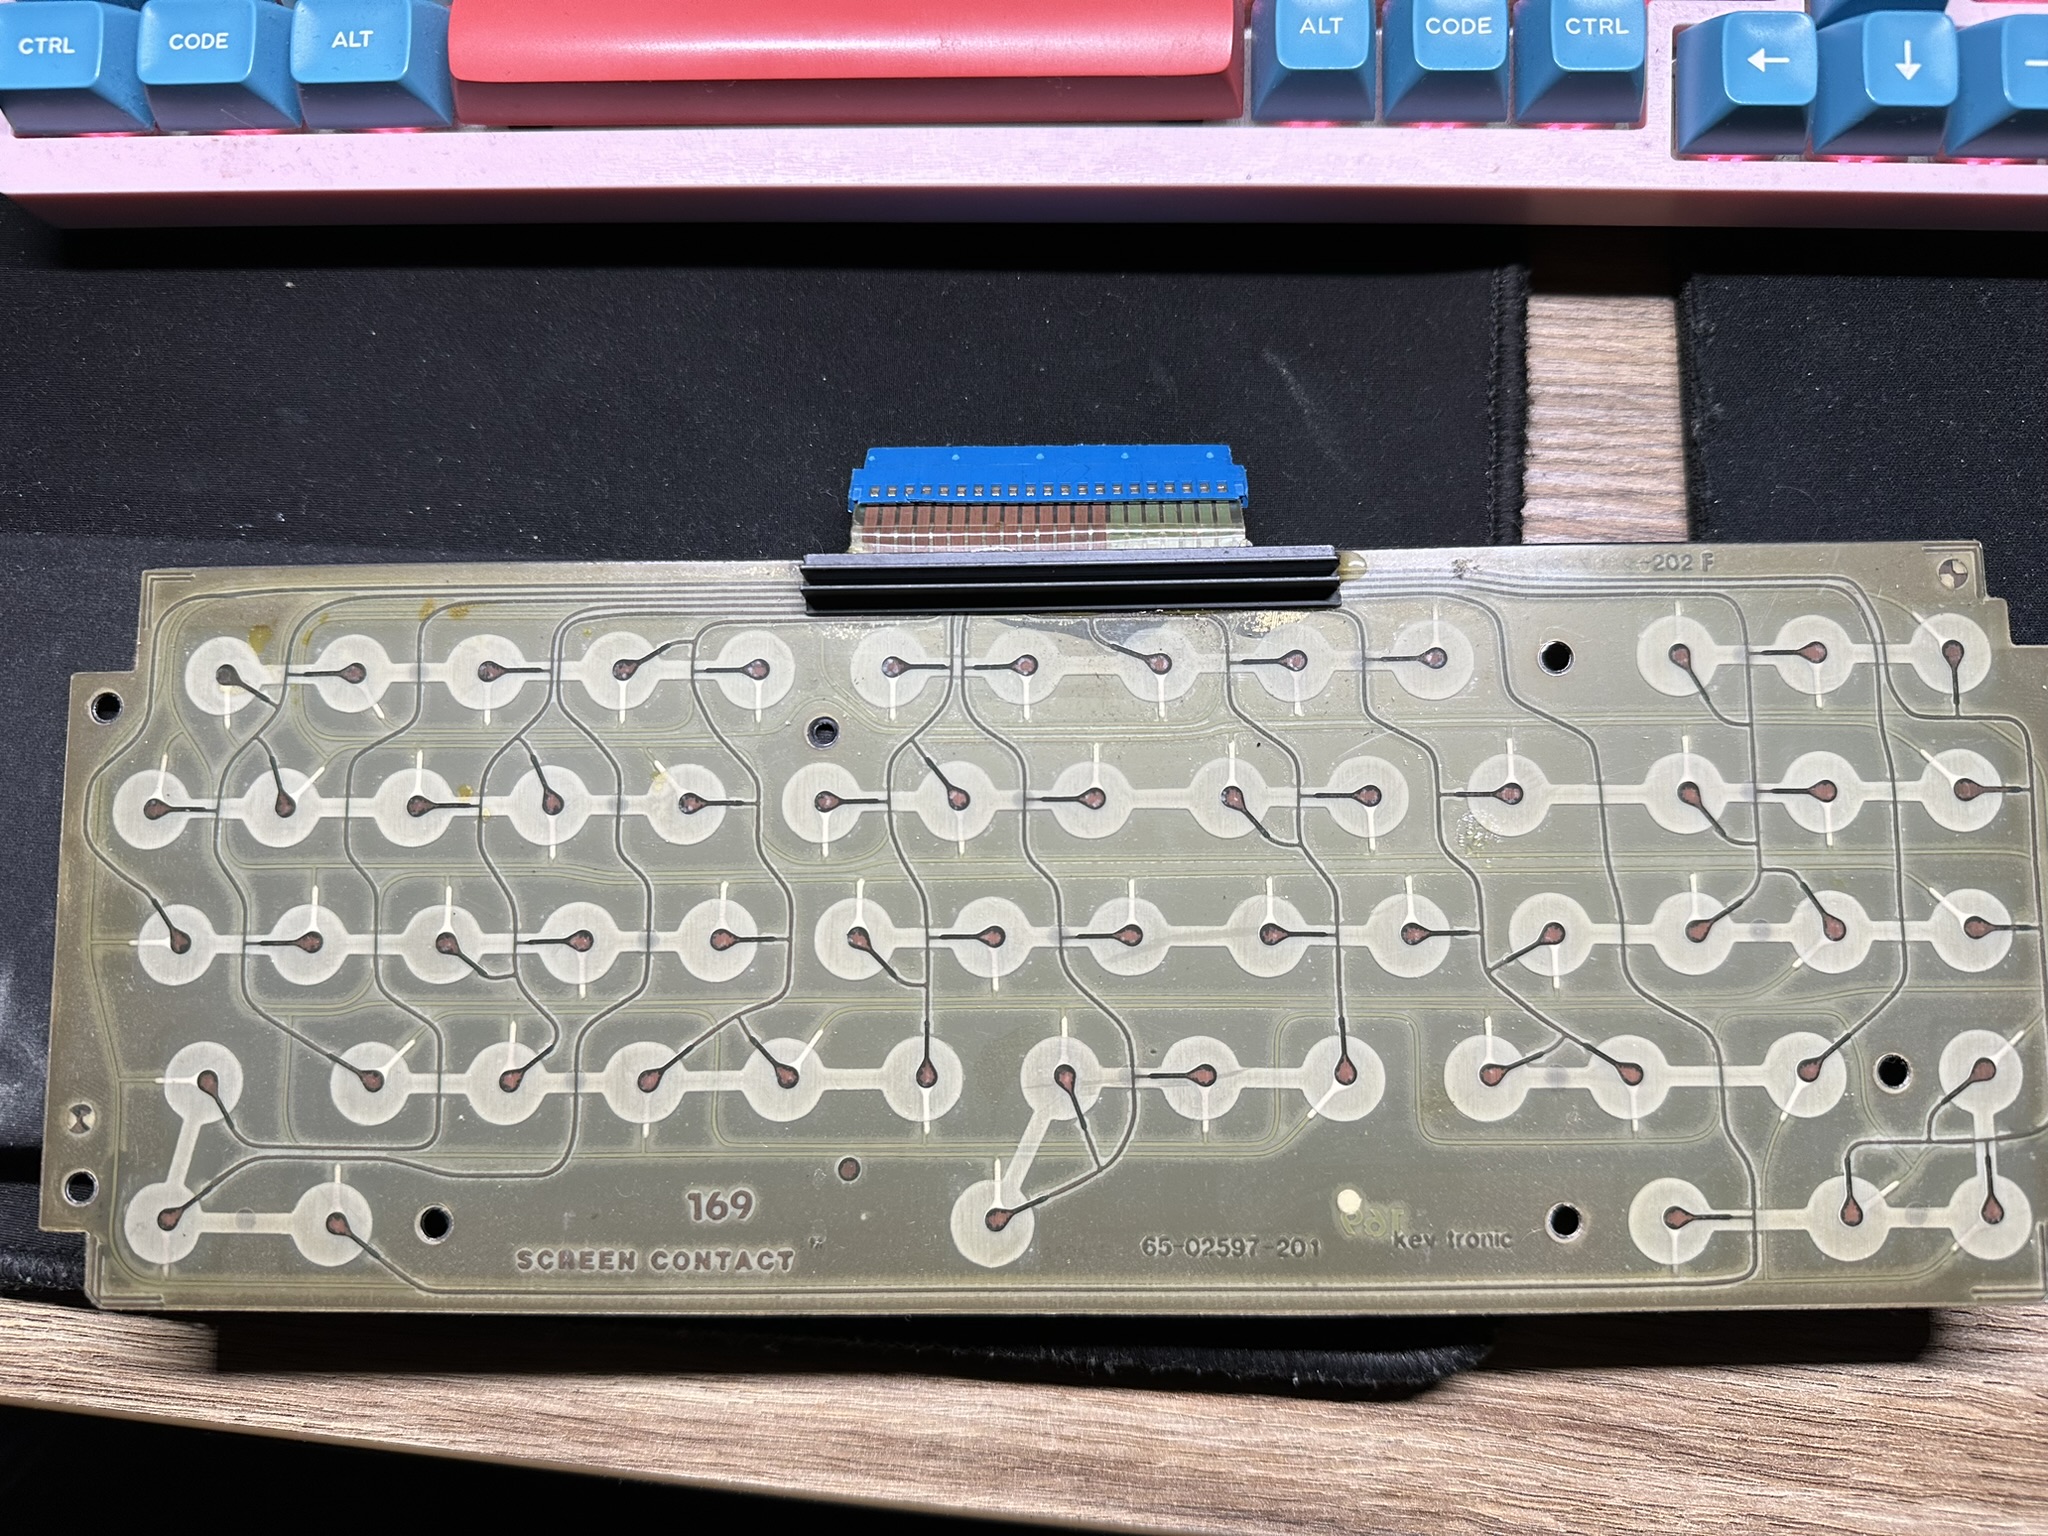
Your very first job, in fact, is to flip that image around, name/colour the rows and columns, then choose what keys you want to assign.
Your job is to make a controller for this keyboard to hook up to. I advise looking at a few "how to build a custom keyboard" guides—presuming there's more of them out there than vintage conversions—and skip to the bit about setting up the controller. Find a guide you like and follow along for your own controller. Report back to us with any problems.Beardsmore wrote:These units have no electronics and simply expose the key matrix on a flexible tail.
This picture here even shows the whole matrix. All that's hidden is the exact pins each row and column connects to:
Your very first job, in fact, is to flip that image around, name/colour the rows and columns, then choose what keys you want to assign.
-
averagetypist
- Location: Poland
- Main keyboard: Custom, Glorious Panda, SA
- Main mouse: G Pro Superlight
- Favorite switch: Tactile ;)
Thank you both guys! To my findings i can also add this patent: https://worldwide.espacenet.com/patent/ ... S59209225A
This is almost the same thing Unfortunately the traces on the flexible "pcb" must be broken somewhere, or pads are not connecting to each other anymore. I was checking with multimeter and then i connected it to Raspberry pico to be sure, but no luck.
Right now I put it on the hot plate and soften the old glue that was holding it to metal plate. I will try to spot the damage and repair it - in worst case separating this 3-pieces of foil and then checking with multimeter. This design encases all the traces in plastic so i can't check where is the problem in other way If I will not succed in repair then I will probably design and diy similar thing to make it work again.
This is almost the same thing
Right now I put it on the hot plate and soften the old glue that was holding it to metal plate. I will try to spot the damage and repair it - in worst case separating this 3-pieces of foil and then checking with multimeter. This design encases all the traces in plastic so i can't check where is the problem in other way
-
Muirium
- µ
- Location: Edinburgh, Scotland
- Main keyboard: HHKB Type-S with Bluetooth by Hasu
- Main mouse: Apple Magic Mouse
- Favorite switch: Gotta Try 'Em All
- DT Pro Member: µ
As the whole membrane is behind an insulating layer, what you're looking for is continuity (multimeter says "beep!") between pairs of pins.
Note: they will only conduct when the corresponding "key" is "pressed". No keys held down—or rather no membrane landing spots squeezed—and no pairs will show up. Continuity means "this key is pressed right now."
So what you'll need to do is check each likely pair of pins with each key's membrane spot individually squeezed. Not the easiest task for just two hands!
Fortunately, the membranes are so transparent you can almost see what goes where. You don't need to exhaustively search, just make guesses and confirm what works.