actually similar korean kb,though i've seen from chinese as well in imsto taobao
- r_DSCF0059qq.jpg (79.2 KiB) Viewed 5005 times


Thanks! My motivation is to get the home row horizontally centred on the board. I forever shuffle my IBMs around with the numpads hanging over at the right, and even my SSK and TKLs wind up asymmetric: because my hands want to line up with the centre of my screen. Just seems to come naturally to me. My 60% is almost perfect, but I want to bring the same goal to something bigger.BimboBB wrote:thats not true....i love them all.pasph wrote:i would love "the full MU" but i don't think there's love for big kbs"the full MU" remembers me a bit of this WYSE terminal board, which layout i always found to be quite nice (okay....the spacebar/mod sizes are maybe a bit over the top

I was talking about the lack of a Fn key in the muTKL when talking about F1-F12, it's not there! I assume it's meant to be in the usual HHKB-like spot?Muirium wrote:As for F1-F12, do not fear: they are right across the top of the keyboard (Fn+5 = F5, Fn+MINUS = F11 etc. just like an HHKB or my 60%) or indeed on the numpad if you prefer.


very nice but your hole section is conic. I can't do that on stainless steel. I might be able to do that on aluminum, but not steelmohitgarg wrote:Have you looked at the method I use for my acrylic cases for a clean top and bottom?
I use hexagonal standoffs and then use two small flat head screws, one on top and one on bottom. Check the GHPad thread on GH, it has some information on this.
http://geekhack.org/index.php?action=dl ... 8684;image
http://geekhack.org/index.php?topic=389 ... msg1093656
I've done quite a bit of research for the acrylic cases, finding the right post-screws/sex-bolts can be very hard, and also requires a thicker bevel.
Well spotted. I'd say you're paying too much attention to the legends, but the fault is mine: that little Fn key shouldn't go missing.scottc wrote:I was talking about the lack of a Fn key in the muTKL when talking about F1-F12, it's not there! I assume it's meant to be in the usual HHKB-like spot?Muirium wrote:As for F1-F12, do not fear: they are right across the top of the keyboard (Fn+5 = F5, Fn+MINUS = F11 etc. just like an HHKB or my 60%) or indeed on the numpad if you prefer.
if you can find them of the right height...pasph wrote:I like them!it seems they are called "chicago screws" or "sex bolts"
Says who? The holes are not counter-sunk, instead they are a shade smaller than the flat-heads, this allows for the flat-heads to just sit in flat. Making counter-sunk holes in acrylic is quite hard.matt3o wrote:very nice but your hole section is conic. I can't do that on stainless steel. I might be able to do that on aluminum, but not steelmohitgarg wrote:Have you looked at the method I use for my acrylic cases for a clean top and bottom?
I use hexagonal standoffs and then use two small flat head screws, one on top and one on bottom. Check the GHPad thread on GH, it has some information on this.
http://geekhack.org/index.php?action=dl ... 8684;image
http://geekhack.org/index.php?topic=389 ... msg1093656
I've done quite a bit of research for the acrylic cases, finding the right post-screws/sex-bolts can be very hard, and also requires a thicker bevel.
I'm sorry, I'm not sure I understand.mohitgarg wrote:Says who? The holes are not counter-sunk, instead they are a shade smaller than the flat-heads, this allows for the flat-heads to just sit in flat. Making counter-sunk holes in acrylic is quite hard.matt3o wrote:very nice but your hole section is conic. I can't do that on stainless steel. I might be able to do that on aluminum, but not steelmohitgarg wrote:Have you looked at the method I use for my acrylic cases for a clean top and bottom?
I use hexagonal standoffs and then use two small flat head screws, one on top and one on bottom. Check the GHPad thread on GH, it has some information on this.
http://geekhack.org/index.php?action=dl ... 8684;image
http://geekhack.org/index.php?topic=389 ... msg1093656
I've done quite a bit of research for the acrylic cases, finding the right post-screws/sex-bolts can be very hard, and also requires a thicker bevel.
Muirium wrote:The HyperPasph?
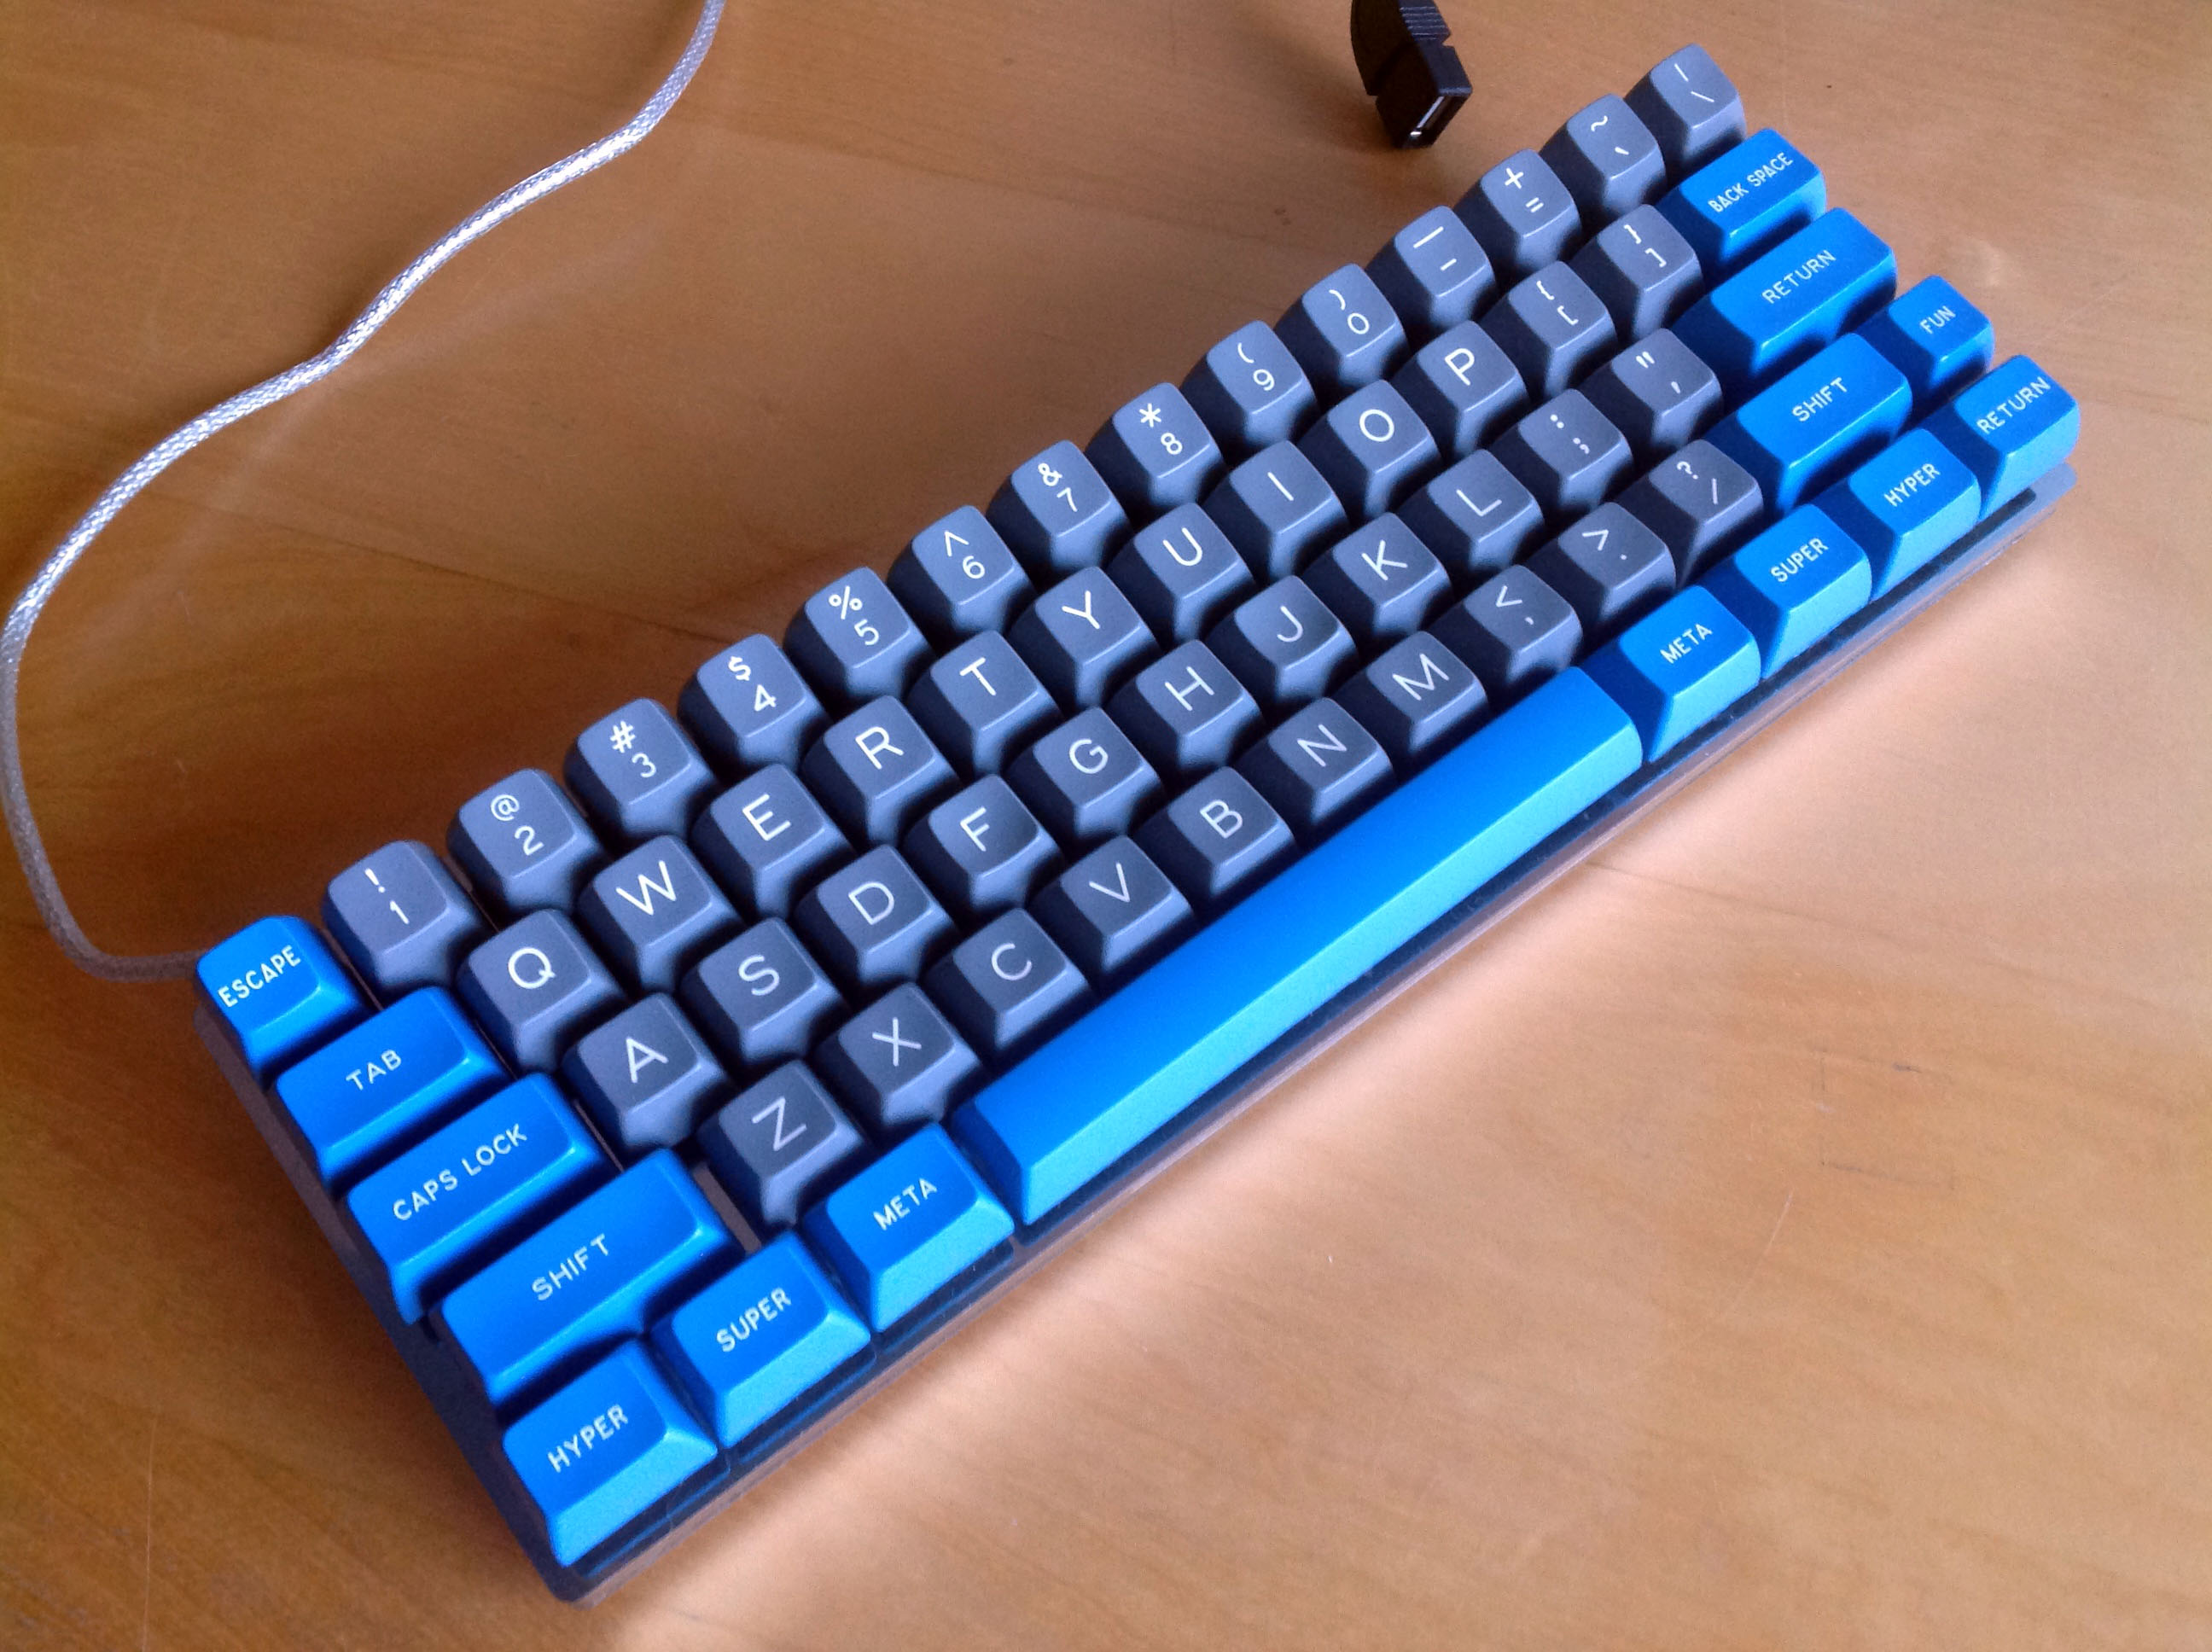
Anyway, here's that wall of Tenkeyless I was talking about. See what I did with the numpad? The downside: it's not exactly symmetrical. Technically, it's a sliver better than a standard TKL, though. And a ton compared to a traditional full size layout.

They are beautifulsean4star wrote: I think it would be pretty easy to cut them down to size with a dremel. Just get them a tad too long.
Great minds, eh? I like your Cherry stabs. I've some PCB mount stabs to try out this time, too. And there may even be a few plate mount Cherry stabs available. (Note to self: pester Kbdfr about those.)jdcarpe wrote:I was thinking something like this? With a full tenkey on the right...
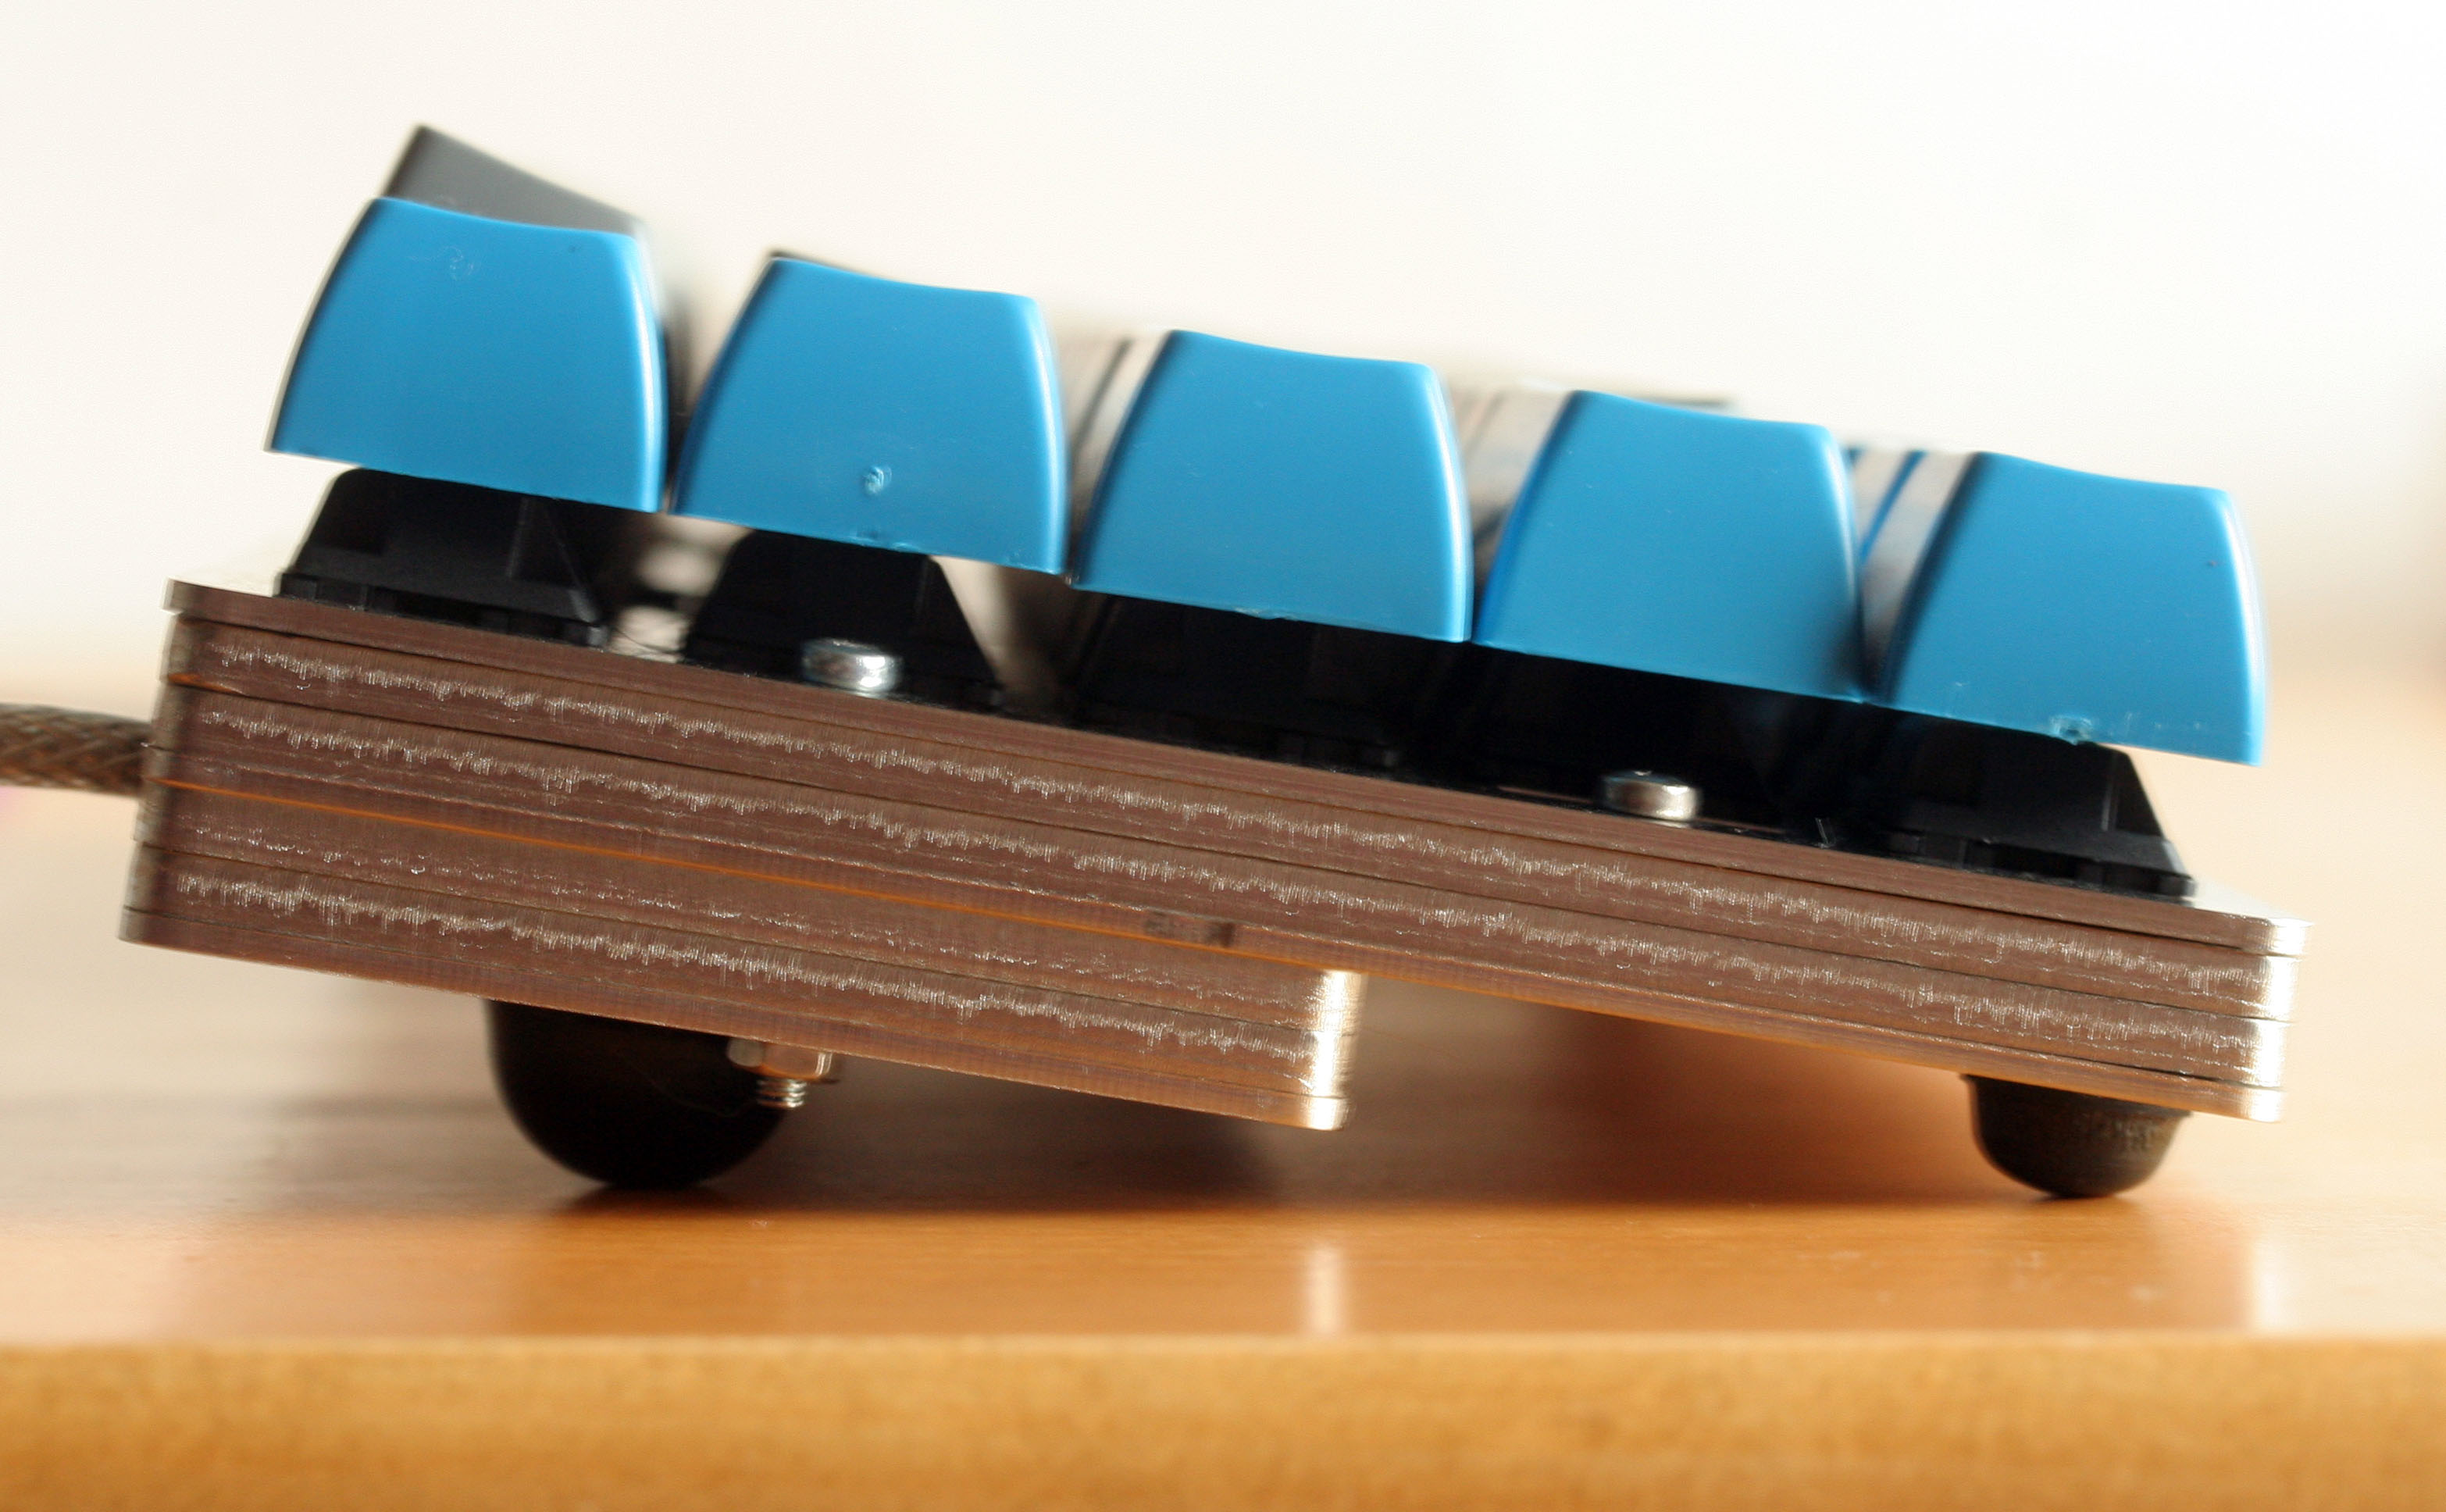
Sweet! It's a very solid little design. Looks like this from the side:CJNE wrote:That's the one! Count me in for at least one of those


