My 4704 Restoration thread

User avatar
fohat
Elder Messenger

28 Dec 2014, 17:16

Touch_It wrote:
I fully plan on disassembling and restoring the barrel plate to glory.

Open to suggestions on color and tips on prepping it.
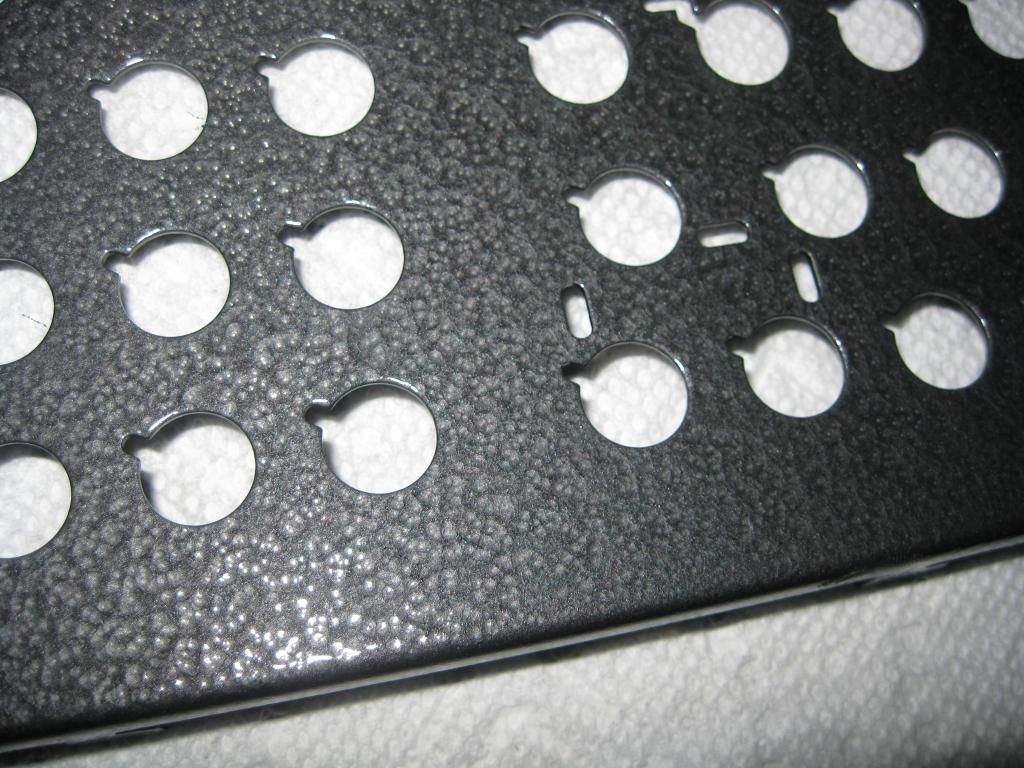
Some of it will depend on your plans for stabilizing the larger keys. Those stupid plastic tabs inserted through the barrel plate to clip down the wires are some of the few really lame and bad decisions that IBM made in the Model F design.

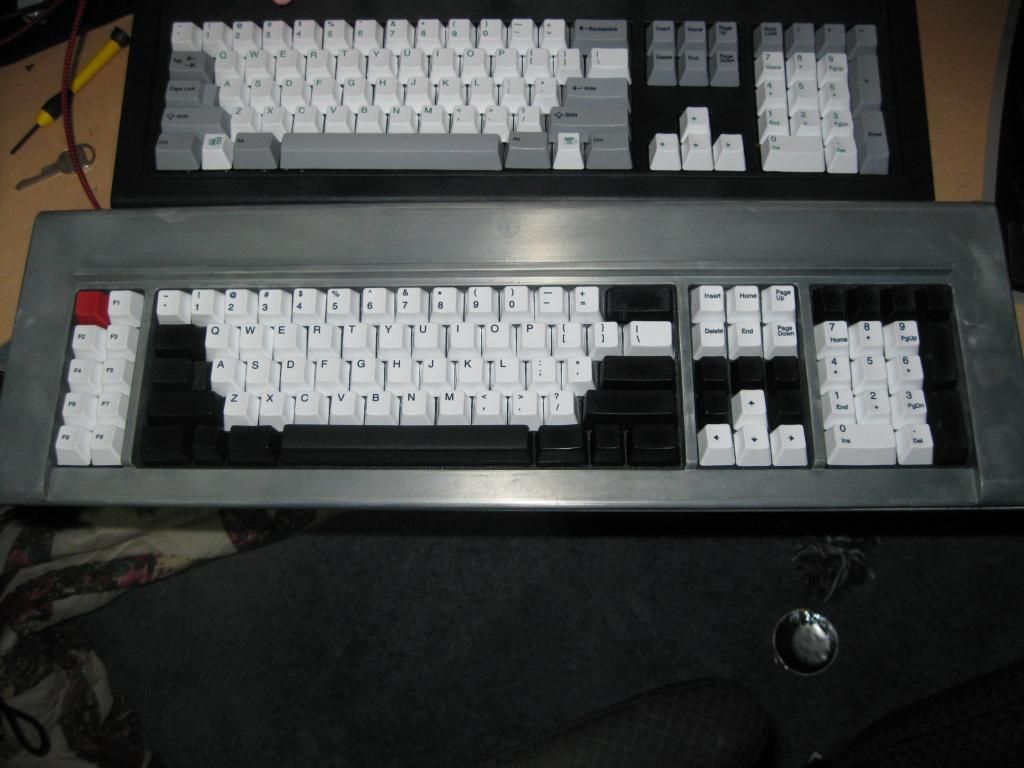
If you are not a purist, you may want to go to plastic barrel insert stabilizers for everything except the spacebar. I like the flexibility of using Model M spacebars, so I have made metal tabs attached with epoxy, but wcass has simple method of using loose washers and gravity.
Unicomp has lots of modern replacements, but clickykeyboards sells vintage salvaged IBM gear.

The inserts are easy to remove, you push them forward from the back towards the front with a small flat head screwdriver. You will wreck 10% of them but it may not matter, except for the spacebar. Do it last, after you get the hang of it, and they are a little sturdier anyway. They can be re-seated later, if necessary, with a little work. I put a flat head screwdriver into the "mouth" of the opening and press down with the shaft of the screwdriver parallel to the plate surface.

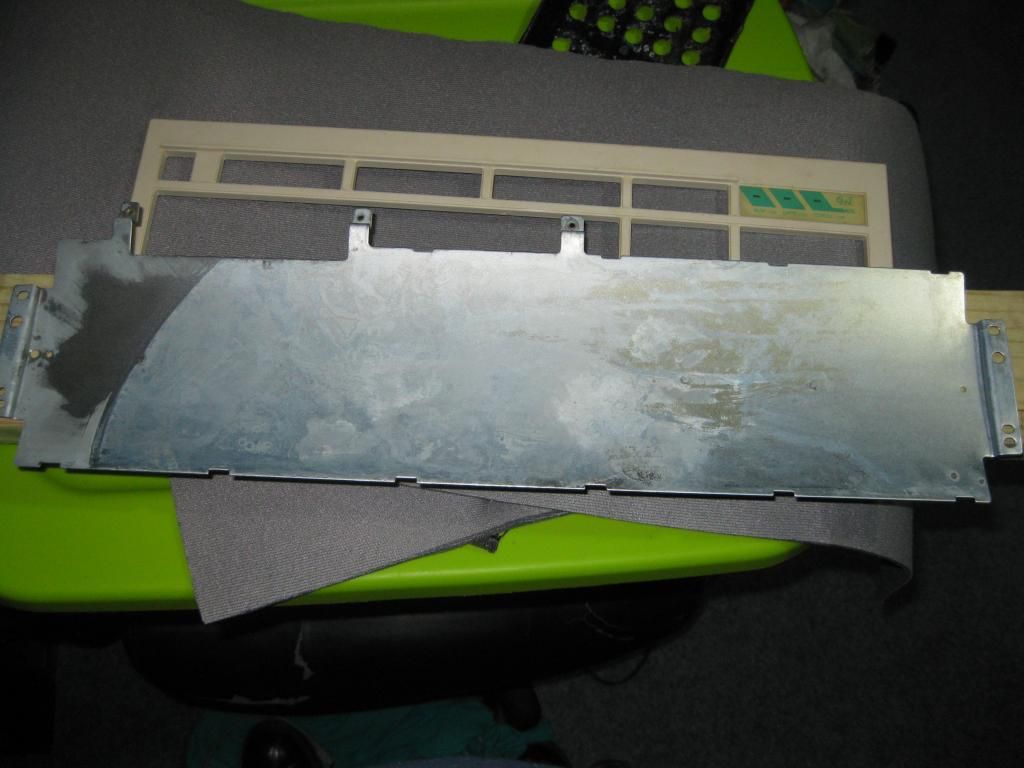
With the tabs off, you can attack the plate with gusto, using whatever harsh methods you like. Just remember that the thicker the paint job, however, the harder it will be to re-seat the tabs into their holes, since the paint will have reduced the internal diameter of the opening.

I love Rustoleum paint and now there is a line of black and metallic paints called "hammered" that are very handsome and wonderful, with the added benefit of disguising minor imperfections and not showing dirt as much as either glossy or flat alternatives.

User avatar
Hypersphere

28 Dec 2014, 18:06

Fohat has given excellent advice already. I agree that it is definitely a good idea to remove all the plastic clips from the barrel plate so that the plate can be completely cleaned and the paint removed. I got good results with wet sanding using 400 grade black alumina paper. I then painted using Rustoleum satin black universal spray paint (with combined primer and paint), applying a very thin and even coat, allowing it to dry for 72 hours, light sanding between coats for a total of 3 coats (not sanding the third coat). I painted by stringing some picture-hanging wire between two holes in a cardboard box and using wire hooks to hang the plate from the strung wire. I used a thin screwdriver to take the plate off the wire and put it back on again to turn the plate so that I could paint both sides.

User avatar
Touch_It

28 Dec 2014, 18:52

All great advice.

@fohat in this case I'm not a purist. I already have a set of proper unicomp plastic inserts and am modifying the layout to ansi. I will go ahead and go with rustoleum hammered black.

@hyper, I will take your advice when painting. It is to cold for me too outside so hopefully I can find someplace warm to do so.

I plan on ordering replacement foam today. After that I will really only need some rustoleum, a solder sucker, a leather punch, and the ability to get over the fear of opening it

User avatar
Touch_It

16 Jan 2015, 03:44

Update. Got a soldering iron, replacement foam, and a hollow punch to create the holes. Beings I have all the necessary supplies to move forward I separated the plates, removed the springs and barrels. The foam didn't crumble but is definitely bad as I figured it would be. I also de soldered the old controller. It was a learning experience for sure.

I found the best technique was to use the soldering iron to heat the tip of the wire and use a small screwdriver to push down the wire on the bend of the ribbon cable below the controller. Mangled the plastic and a few wires but should be easy to sort. I also removed the pcb from the bottom curved plate as it needs a vinegar bath.

The pcb looks to be in good shape, just needs a good cleaning with rubbing alcohol. The top plate I will be sanding and painting this weekend. I will be using rustoleum hammered black. I will also use painting to make my foam template. When I feel more ambitious I will update with links to the foam, paint, and hole punch I will be using. My soldering iron was $5.00 at Walmart. It worked but sucks, lol. Anyways below are some potato pics. Would have taken better ones but once again I felt lazy. Maybe this weekend.

ImageImageImageImageImageImageImage

Included my puppy as he was eager to help. Feel free to give input/ ask questions. I was surprised at how easy the plates separated. Went smooth as butter.

User avatar
seebart
Offtopicthority Instigator

16 Jan 2015, 08:19

very nice, I'm at the same stage with my 3104 but I'm still looking for a good replacement foam/silicon. My plates did not come apart that easily but I managed with "a little force". The sanding of my plate was tough work!
The pcb looks to be in good shape, just needs a good cleaning with rubbing alcohol
I thought about doing that, not sure if I should but heck why not.

http://deskthority.net/keyboards-f2/ibm ... t9509.html

User avatar
fohat
Elder Messenger

16 Jan 2015, 14:36

Here is a cheap tool that might well pay for itself in time savings:

http://www.radioshack.com/radioshack-45 ... LkTK3t6aSo

The paint/punch method for cutting foam has always worked well for me, but if the foam is reasonably intact I would consider re-using it.

https://geekhack.org/index.php?topic=48 ... msg1338079

User avatar
Touch_It

16 Jan 2015, 15:13

@seebart I must say your pictures are amazing compared to mine, lol. Also from what ice read the parts are pretty fidgety when it comes to dust/debris. Also I got some foam from Joann's. I couldn't find it online but was in the fabric roll section. I got enough for about 4 tries in case I messed up. It was under 5 dollars with an online coupon. If it works and I have any leftover I could probably send you some.

@fohat. That de soldering could definitely be useful. I will probably be picking one up. As far as the foam it is in tact but it feels dry in some parts and gummy in others and is not reusable in my opinion unfortunately.

User avatar
snoopy

16 Jan 2015, 15:20

I opened three 4704 yet and in every one of them the foam was so disgusting, sticky, smelly... At the last one I learned and even wore gloves to remove it...

So is it really possible that the foam is in good reusable condition? Was it just misfortune that my were like that?

For me it looked like ibm didn't think about the possiblility that people use those boards after over 30 years again (lol) and used a material that doesn't withstand time very well...

And I learned that the foam has a major impact on the overall feel of the switches, so if its already open, I would definitely always replace it.

User avatar
fohat
Elder Messenger

17 Jan 2015, 02:23

snoopy wrote:
I opened three 4704 yet and in every one of them the foam was so disgusting, sticky, smelly...
Of at least a dozen F-122s I have seen one with great foam (pix in my guide) and a couple with barely acceptable foam.

The F XTs and F ATs I have opened up generally had better foam, with at least half of them easily re-useable.

User avatar
Touch_It

17 Jan 2015, 20:53

Update, did my painting. Turned out decent. I'm neglecting to post a pic of the bottom plate. The distilled white vinegar bath did some weird things to it and it looks pretty bad and I didn't really feel like sanding it as I will rarely see it.

Anyways pics of the top plate and foam below. I took some pics that are less potato-like.

Image

Image

Image

Image

Image

puppy wanted to help again.
Last edited by Touch_It on 17 Jan 2015, 21:12, edited 2 times in total.

User avatar
seebart
Offtopicthority Instigator

17 Jan 2015, 20:58

looking good. I´m not sure if I`ll paint mine. Did you spray or actually paint?

User avatar
chzel

17 Jan 2015, 21:02

Nice finish on that paintjob!
The vinegar probably just revealed what oxidation had already done to the plate!

User avatar
Touch_It

17 Jan 2015, 21:02

seebart wrote: looking good. I´m not sure if I`ll paint mine. Did you spray or actually paint?
Spray paint. Specially this. Rust-oleum hammered black

http://www.menards.com/main/home-decor/ ... c-8046.htm

I should clarify I used rustoleum satin clear on the bottom. I'll go ahead and take a pic.

User avatar
0100010

17 Jan 2015, 21:18

The vinegar turned your bottom plate silver? I just scrubbed mine down with acetone (after removing the plastic isolation sheet for the PCB).

User avatar
seebart
Offtopicthority Instigator

17 Jan 2015, 21:21

The vinegar probably just revealed what oxidation had already done to the plate!
yeah I had some nasty looking yellowish coloration on my plate after vinegar soaking but I sanded that off too.

User avatar
Touch_It

17 Jan 2015, 21:27

0100010 wrote:The vinegar turned your bottom plate silver? I just scrubbed mine down with acetone (after removing the plastic isolation sheet for the PCB).
Yeah it came off really easy. Guess I'll see how it holds up. Don't really want to sand and clear it again.
Last edited by Touch_It on 17 Jan 2015, 21:46, edited 1 time in total.

User avatar
seebart
Offtopicthority Instigator

17 Jan 2015, 21:32

Guess I'll see how it holds up. Don't really want to sand and clear it again.
It´ll stay that way for a while now, no need for overkill. I´m just the type of person who really gets into the sanding hardcore,once I started I can´t stopp. :lol:

User avatar
Touch_It

21 Jan 2015, 07:12

Quick late night update.

Got the beast assembled. Not that bad really. I didn't use clamps or anything, I just manhandled the plates together (helps to have large hands). Put keycaps/case on.

Went to program it and realized, even with the instructions, I have no idea how to :(. Someone needs to give me the idiots guide to this, lol.

Pic for fun! More will come tomorrow, if I'm not lazy.


Image

andrewjoy

21 Jan 2015, 11:32

Ahh the man handle the plate method , can be frustrating but thats what i do on my 122 ( and then once its lined up whack hell out of it with a rubber hammer :P)

looking good , black mods are not to my taste but you can see allot of love has gone into that keyboard

EDIT

programming is to too bad, if the boot loader is installed all you need is the software

you need to set the threshold first , just keep lowering it till all the keys work ( you will have a few that are always on thats ok they are calibration pads

then you just select the dropdown for each key and chose what you want it to do, you also have to set the always on keys to always on and the ones that don't map to anything to always off

the PDF guide is very good give it a read

you can save your layout and share it with people , so if you want to send me a 4704 i can do the layout for you :)


EDIT 2

Are you selling the old caps ? I would buy them if you are .

User avatar
Touch_It

22 Jan 2015, 03:44

Update. After I stopped worrying about auto calibrate I had no issues. Took me 20 minutes. As far as the old keycaps I may be interested in selling them in the future but for the immediate time being I'd like to keep them.

andrewjoy

22 Jan 2015, 12:21

If you do you know where i am :).

User avatar
Redmaus
Gotta start somewhere

12 Feb 2015, 17:52

You do not know how jealous I am of that metal case.
There is so much more painting options available with a metal look.
It is such a shame that the model F 122 keys have a plastic case. I am considering making a custom metal case in the future, when my budget will be more open.

User avatar
seebart
Offtopicthority Instigator

12 Feb 2015, 18:09

You're not the only one who's jealous![emoji50]

User avatar
Redmaus
Gotta start somewhere

14 Feb 2015, 21:29

Seebart do you have any ibm keyboards with metal cases? If not then you know my pain.

User avatar
fohat
Elder Messenger

15 Feb 2015, 00:07

Redmaus wrote: Seebart do you have any ibm keyboards with metal cases? If not then you know my pain.
Very, very, very few of us have IBM keyboards with metal cases, and we are all in pain.

The metal bottom pans of XTs and 122-key terminals are only a small consolation.

User avatar
Touch_It

15 Feb 2015, 00:10

I will say that I got pretty lucky when I stumbled upon someone selling them on GH. The metal case certainly makes the keyboard feel rock solid.

User avatar
Redmaus
Gotta start somewhere

15 Feb 2015, 02:02

Touch_It wrote: I will say that I got pretty lucky when I stumbled upon someone selling them on GH. The metal case certainly makes the keyboard feel rock solid.
How much did you get it for?

User avatar
Touch_It

15 Feb 2015, 02:04

Redmaus wrote:
Touch_It wrote: I will say that I got pretty lucky when I stumbled upon someone selling them on GH. The metal case certainly makes the keyboard feel rock solid.
How much did you get it for?
$150 shipped

Post Reply

Return to “Workshop”