Page 1 of 1
Missing spring of a beam spring !
Posted: 30 Aug 2015, 17:46
by idollar
Hello,
The displaywriter that I started to restore is missing a spring.
Does anyone know where can I source it ?
Also the control keycap is broken underneath, but I guess that I will be able to kind of fix it with epoxy.
Thanks in advance
Posted: 30 Aug 2015, 18:18
by scottc
I have several spare J/4 tripleshot keys. They're not ideal, but I can send you one for the cost of shipping if you want an easy replacement.
Posted: 30 Aug 2015, 18:28
by idollar
This would be very nice. I will PM you
some pictures will follow
Posted: 30 Aug 2015, 19:17
by idollar
Here they are:
- DSC_3378_01.jpg (202.47 KiB) Viewed 6161 times
- DSC_3378.jpg (178.7 KiB) Viewed 6161 times
Posted: 30 Aug 2015, 19:25
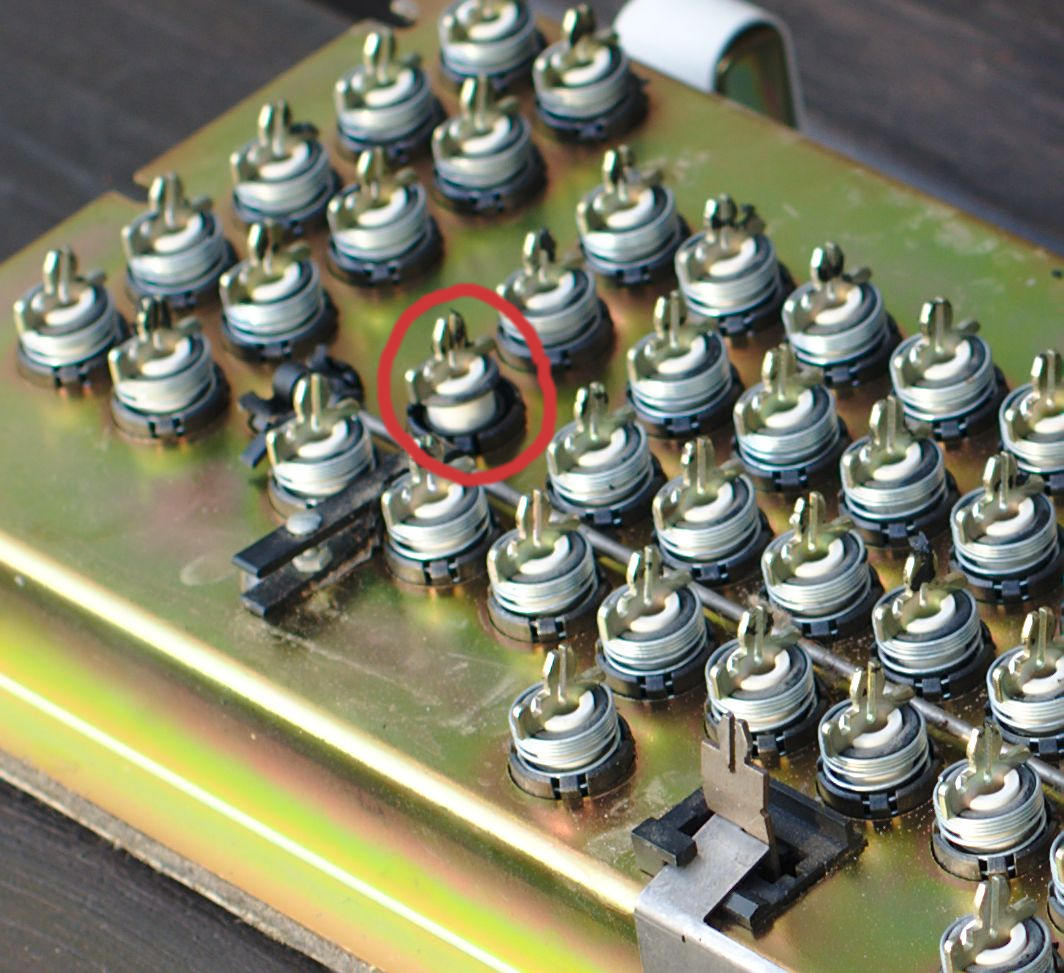
by XMIT
This is the Lock key that is (correctly) missing a spring. The beam spring mechanism pulls the key down (or rather, pulls the sensor foot to remove force from the key press, designed to emulate a Selectric typewriter moving the interposer bar out of the way on a key press). The Lock key stays down. A foot and a linkage connected by a linkage bar to the two Shift keys is responsible for popping it back up.
So, it's not missing per se, it was never there to begin with. But I agree that it would be nice if that key had a spring.
If you do add one - you will need to remove the linkage mechanism as well.
I'm considering stealing the switch immediately to the right of Backspace on my setup. One less key, but then I get my Lock key back as a usable key.
Posted: 30 Aug 2015, 19:28
by idollar
XMIT wrote: This is the Lock key that is (correctly) missing a spring. The beam spring mechanism pulls the key down (or rather, pulls the sensor foot to remove force from the key press, designed to emulate a Selectric typewriter moving the interposer bar out of the way on a key press). The Lock key stays down. A foot and a linkage connected by a linkage bar to the two Shift keys is responsible for popping it back up.
Yes, it is the lock key.
Let me check this bar... I did not know what is was for. Actually a plastic piece felt. It could be that something broke.
Posted: 30 Aug 2015, 19:37
by idollar
Broken, indeed.
I guess that I will not be able to glue it back together (I will try anyhow)
scottc: I will need your spring

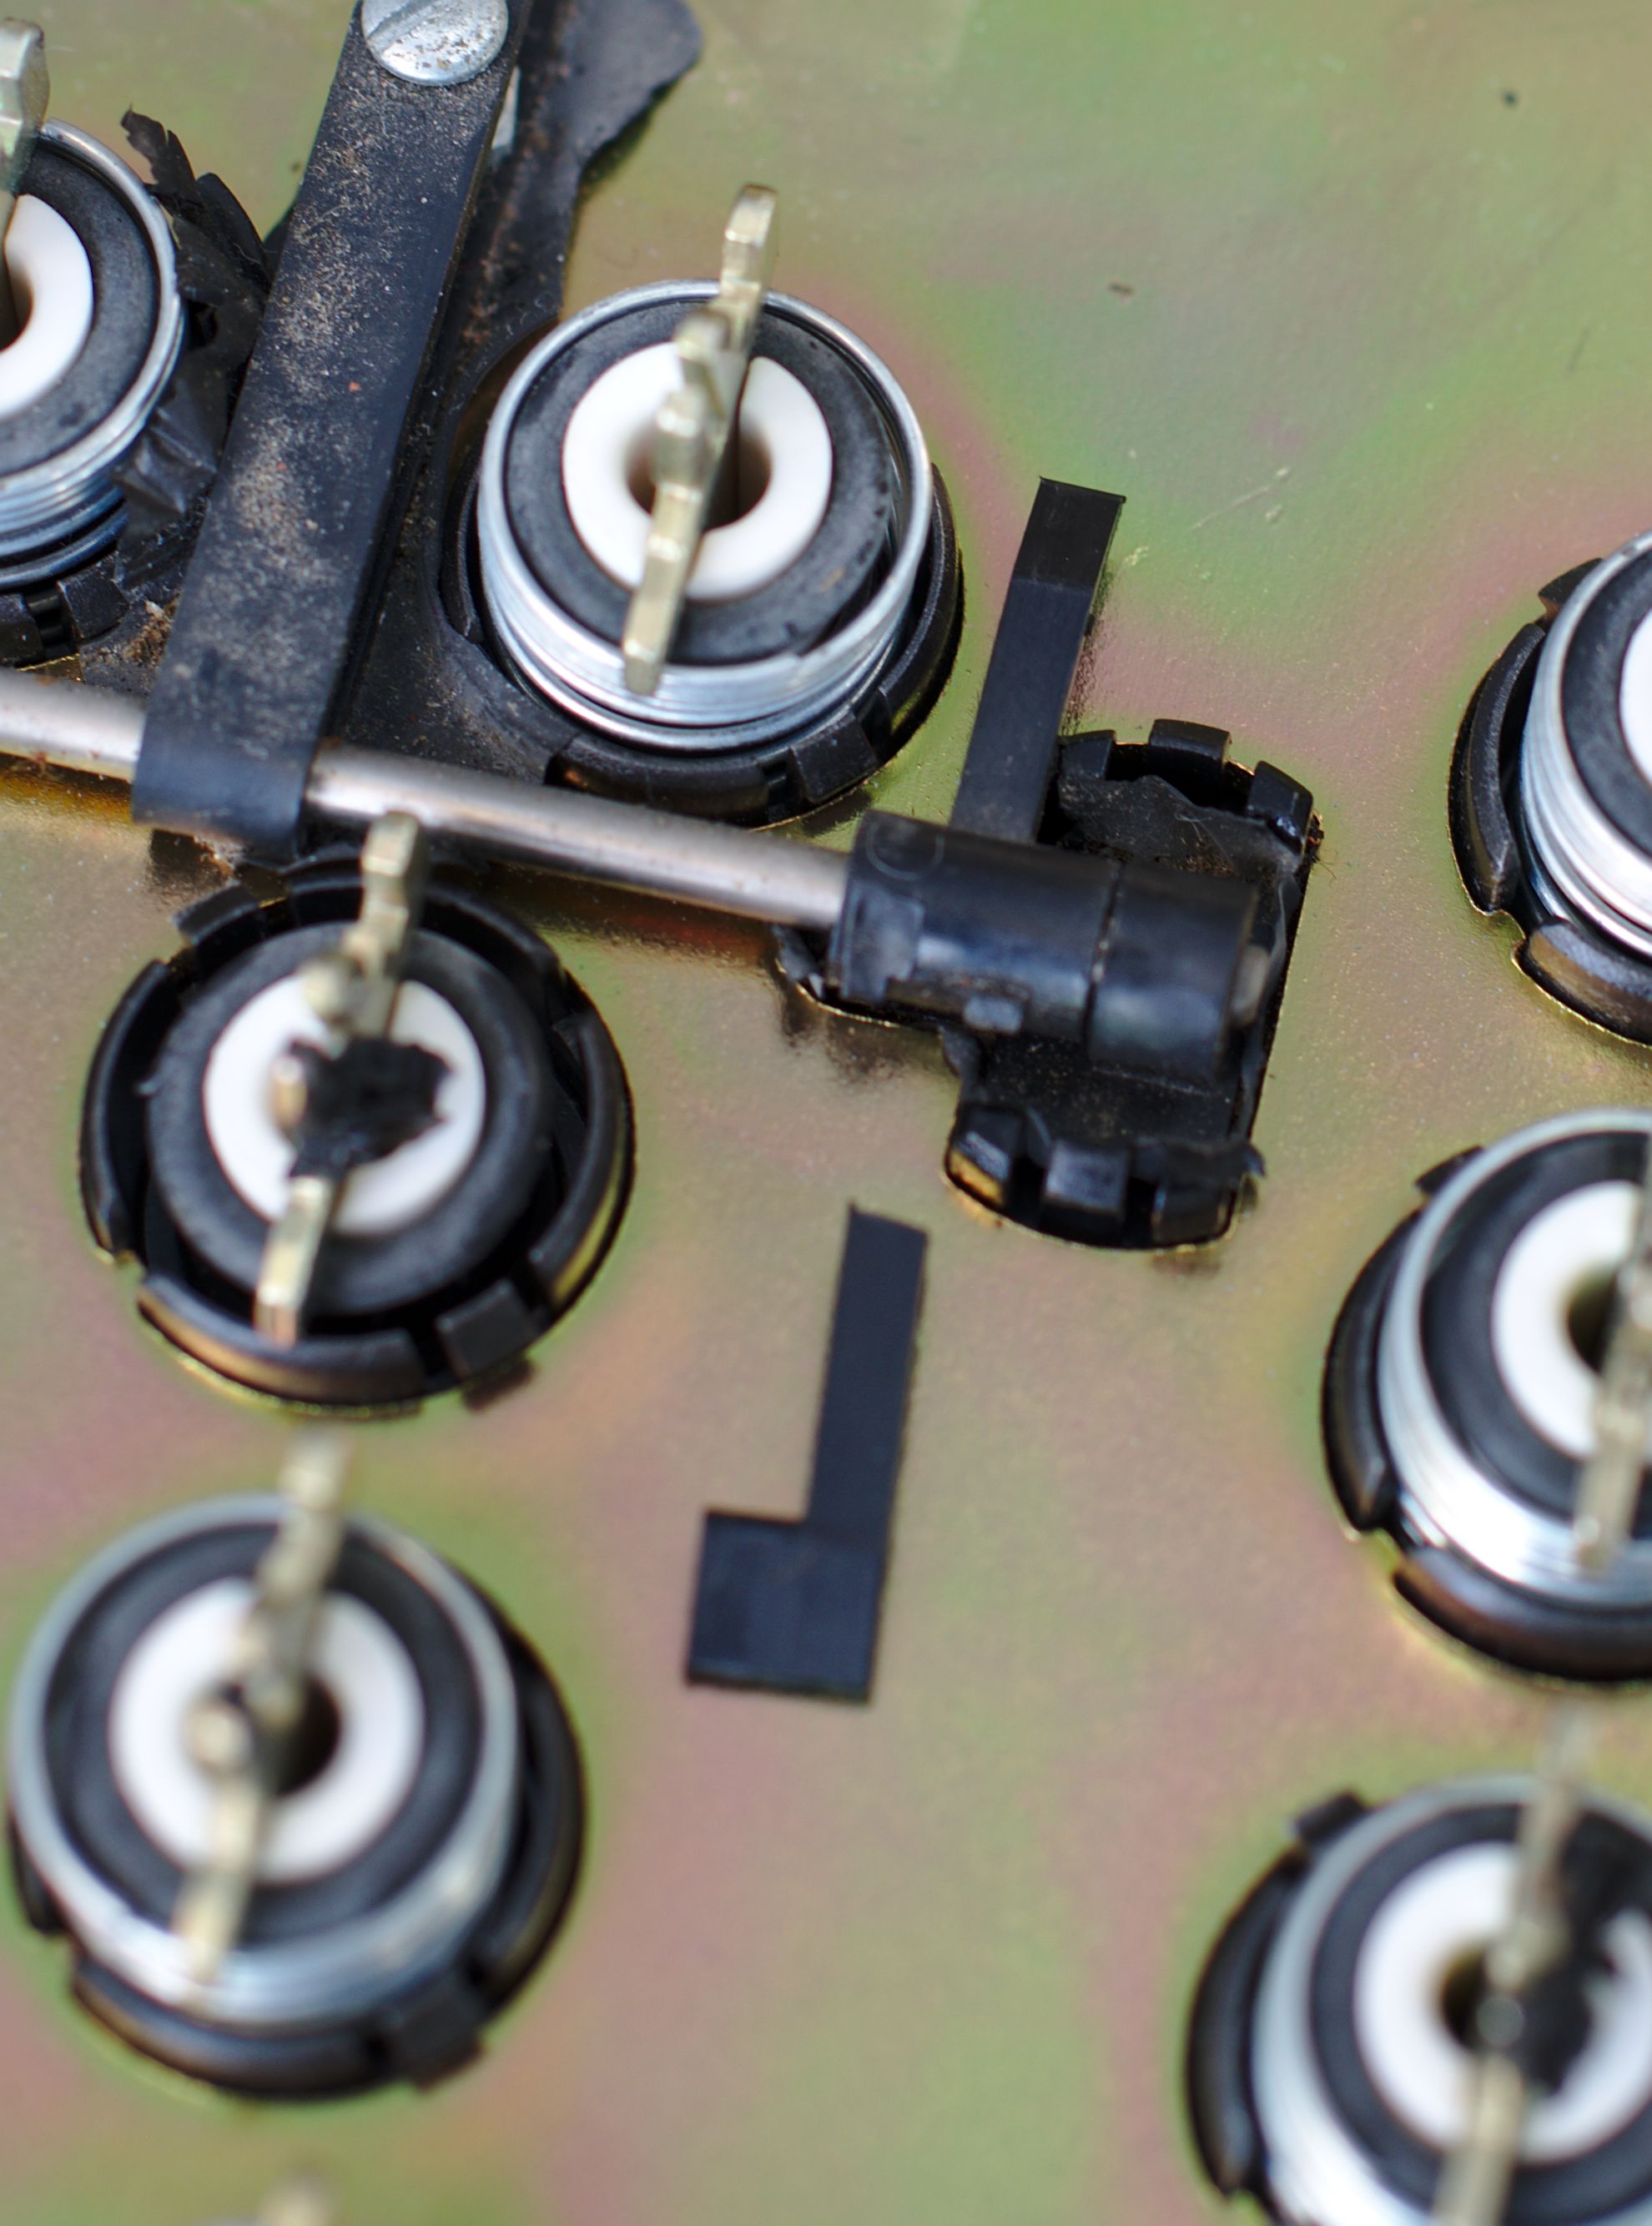
- DSC_3379.jpg (427.33 KiB) Viewed 6139 times
Posted: 30 Aug 2015, 20:38
by scottc
Sorry idollar - I'm not sure if you misunderstood me but I was offering a keycap to replace your broken control key. Unfortunately I don't have any spare key modules or parts as mine suffers from a few broken keys itself.

XMIT wrote: This is the Lock key that is (correctly) missing a spring. The beam spring mechanism pulls the key down (or rather, pulls the sensor foot to remove force from the key press, designed to emulate a Selectric typewriter moving the interposer bar out of the way on a key press). The Lock key stays down. A foot and a linkage connected by a linkage bar to the two Shift keys is responsible for popping it back up.
Interesting! How did you learn this?
Posted: 30 Aug 2015, 20:45
by idollar
Does anyone know what glue shall I use to glue these pieces back ?
Posted: 30 Aug 2015, 20:50
by idollar
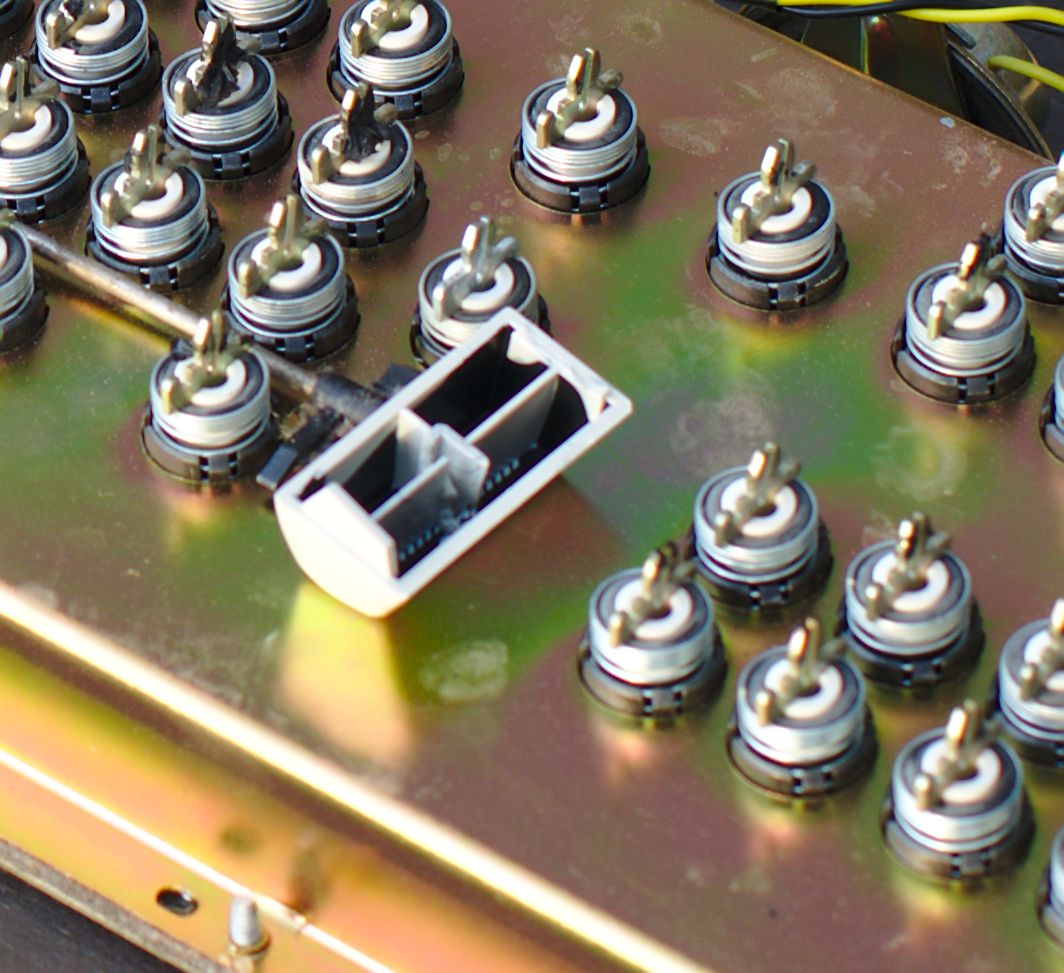
I send some pictures on how to dismantle the bloody bar.
I ended up taking apart the board, including the PCB.
There is a plastic piece underneath that uses the same type of clips that the switches have. There is a kind of an arrow inserted on them. One can push them up:
- DSC_3380.jpg (719.42 KiB) Viewed 6120 times
In the following picture I show you how to push up with the screw driver.

- DSC_3381.jpg (412.22 KiB) Viewed 6120 times
Posted: 30 Aug 2015, 20:51
by idollar
scottc wrote: Sorry idollar - I'm not sure if you misunderstood me but I was offering a keycap to replace your broken control key. Unfortunately I don't have any spare key modules or parts as mine suffers from a few broken keys itself.
Interesting! How did you learn this?
I understand now. Thanks for the offer anyhow. I will try to fix the keycap, this is my secondary problem now.
The main issue is the broken plastic part and/or the spring.
Thanks a lot

Posted: 30 Aug 2015, 20:55
by idollar
And we all know that this is not an entry of the "lots of pictures" series, but the camera was on the tripod.
As veryone knows that the best way to avoid loosing parts of a keyboard is to store it mounted. In the process of mounting it back, I took some pictures. Note that I left the controller dismantlement.
The foam felt apart when I took the bottom. It was very fragile and would stick to everything:
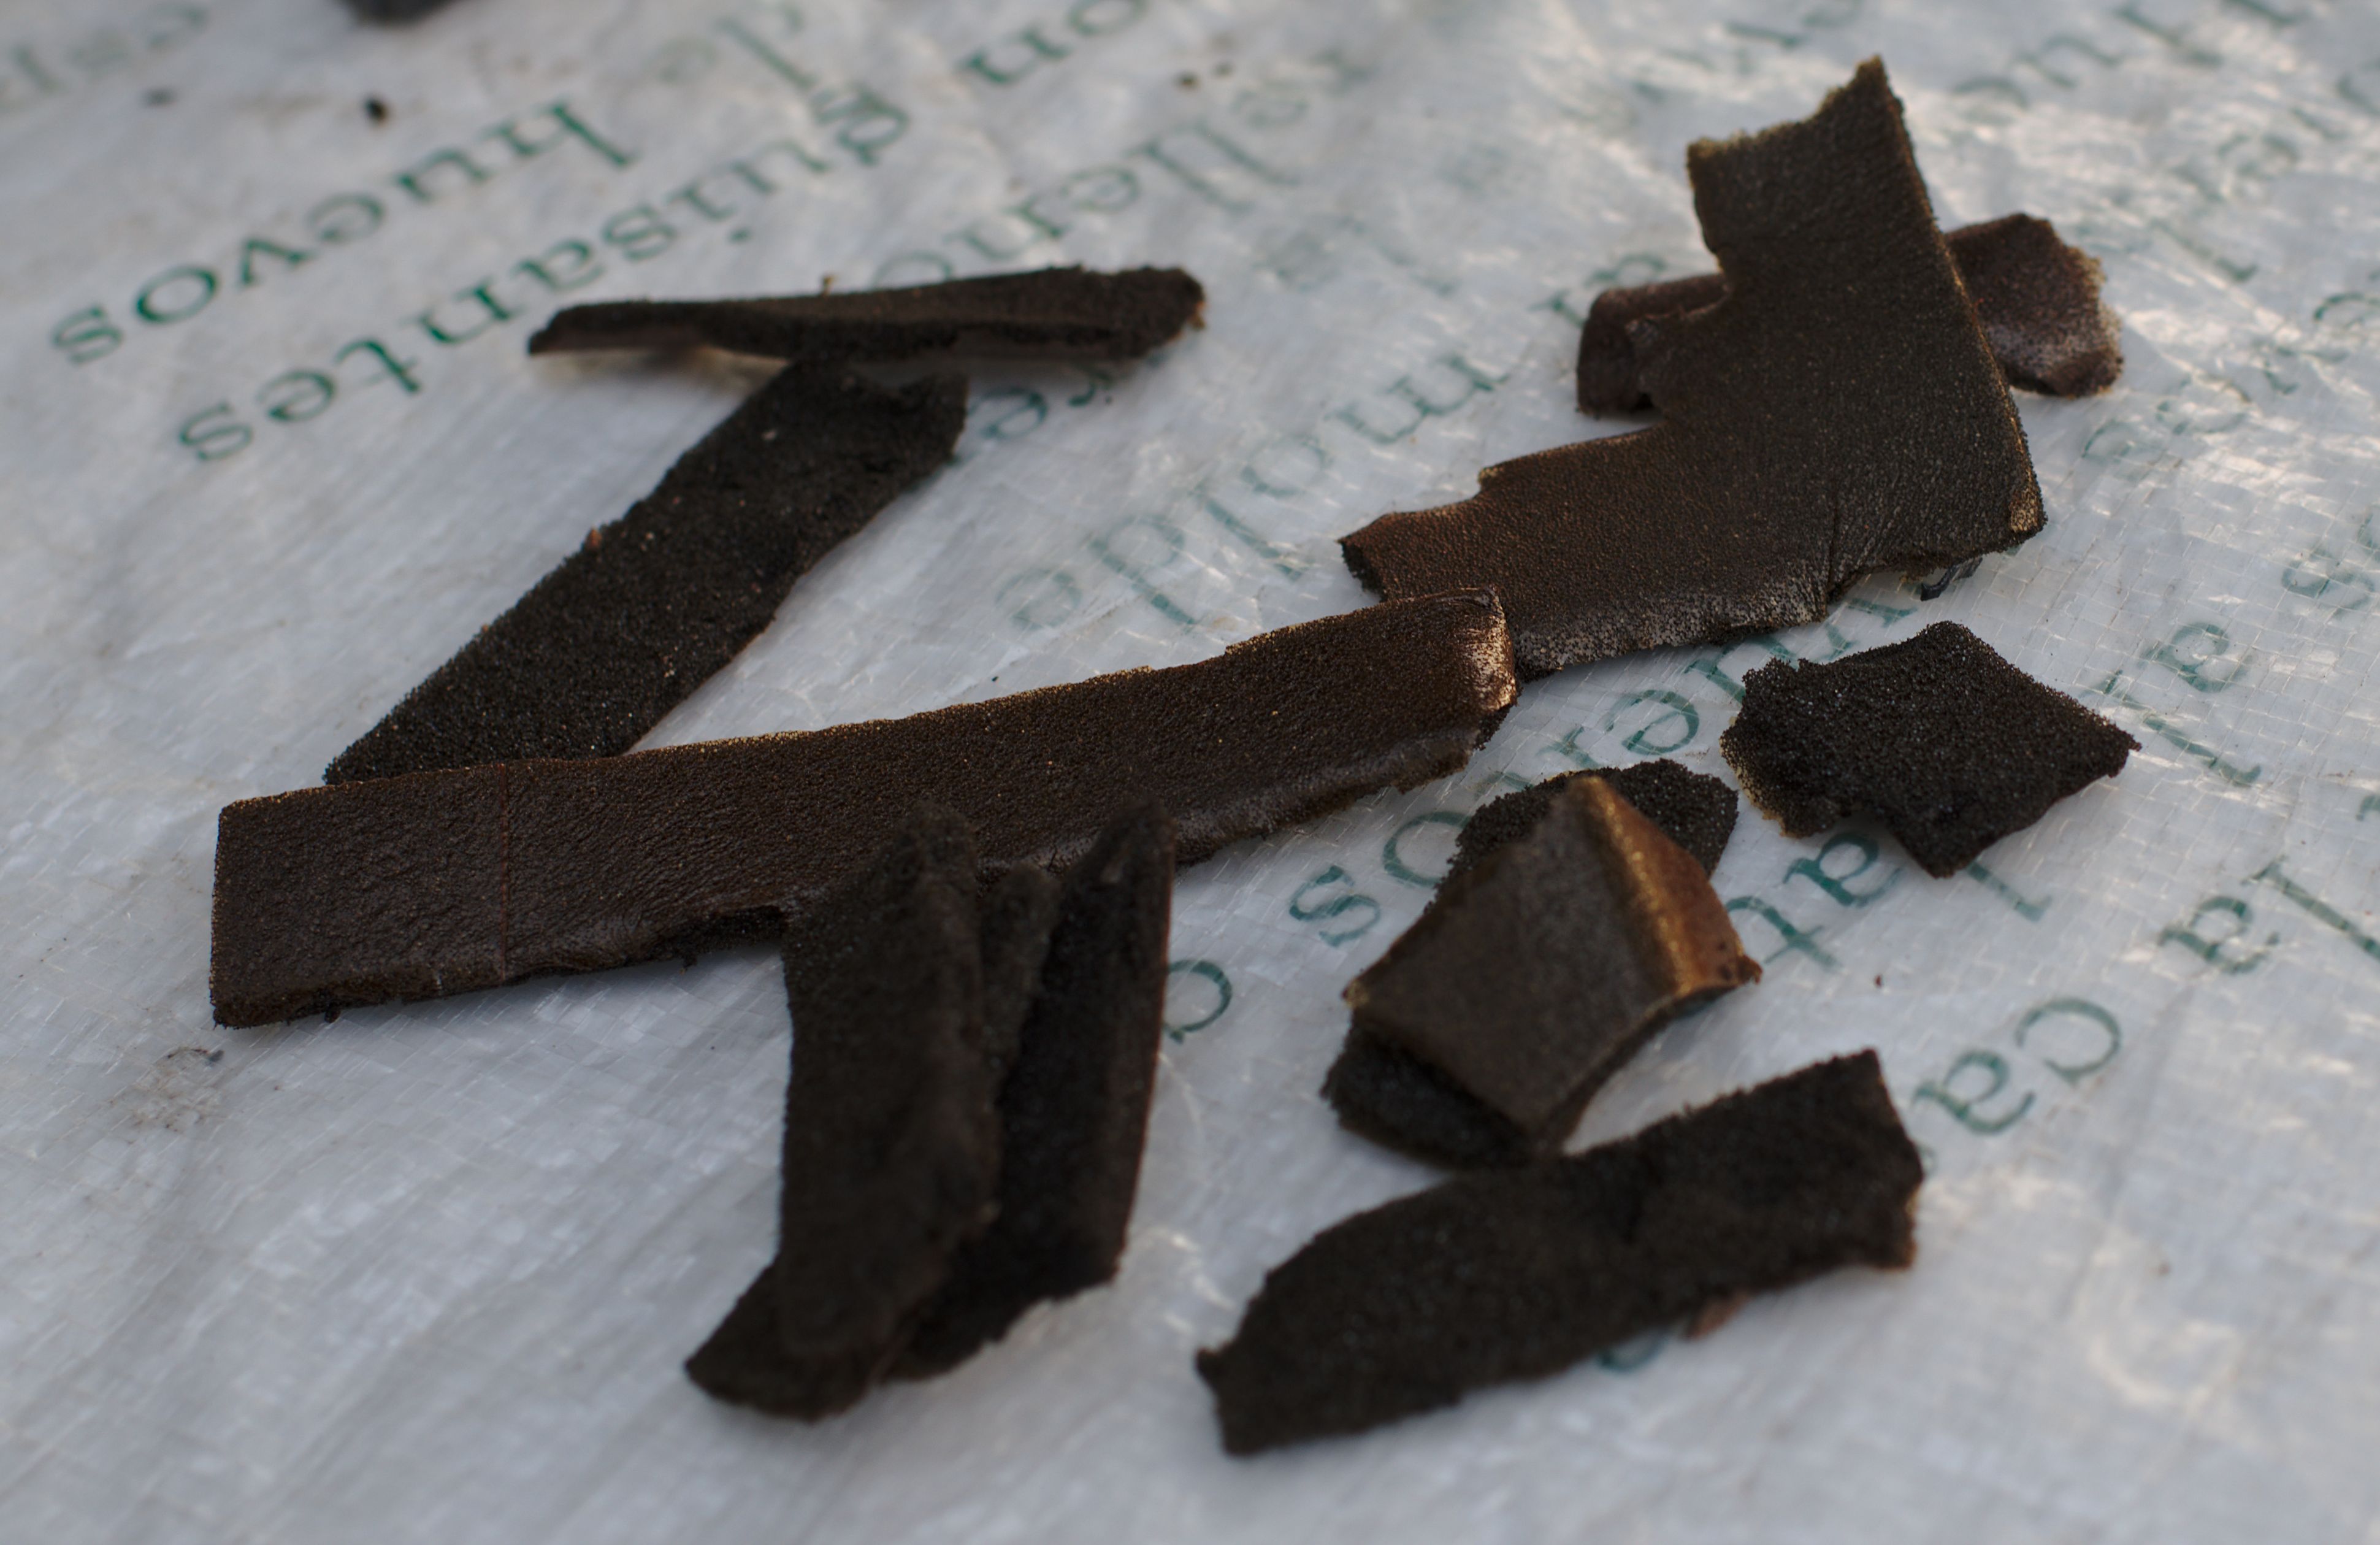
- DSC_3382.jpg (642.39 KiB) Viewed 6103 times
Posted: 30 Aug 2015, 20:56
by idollar
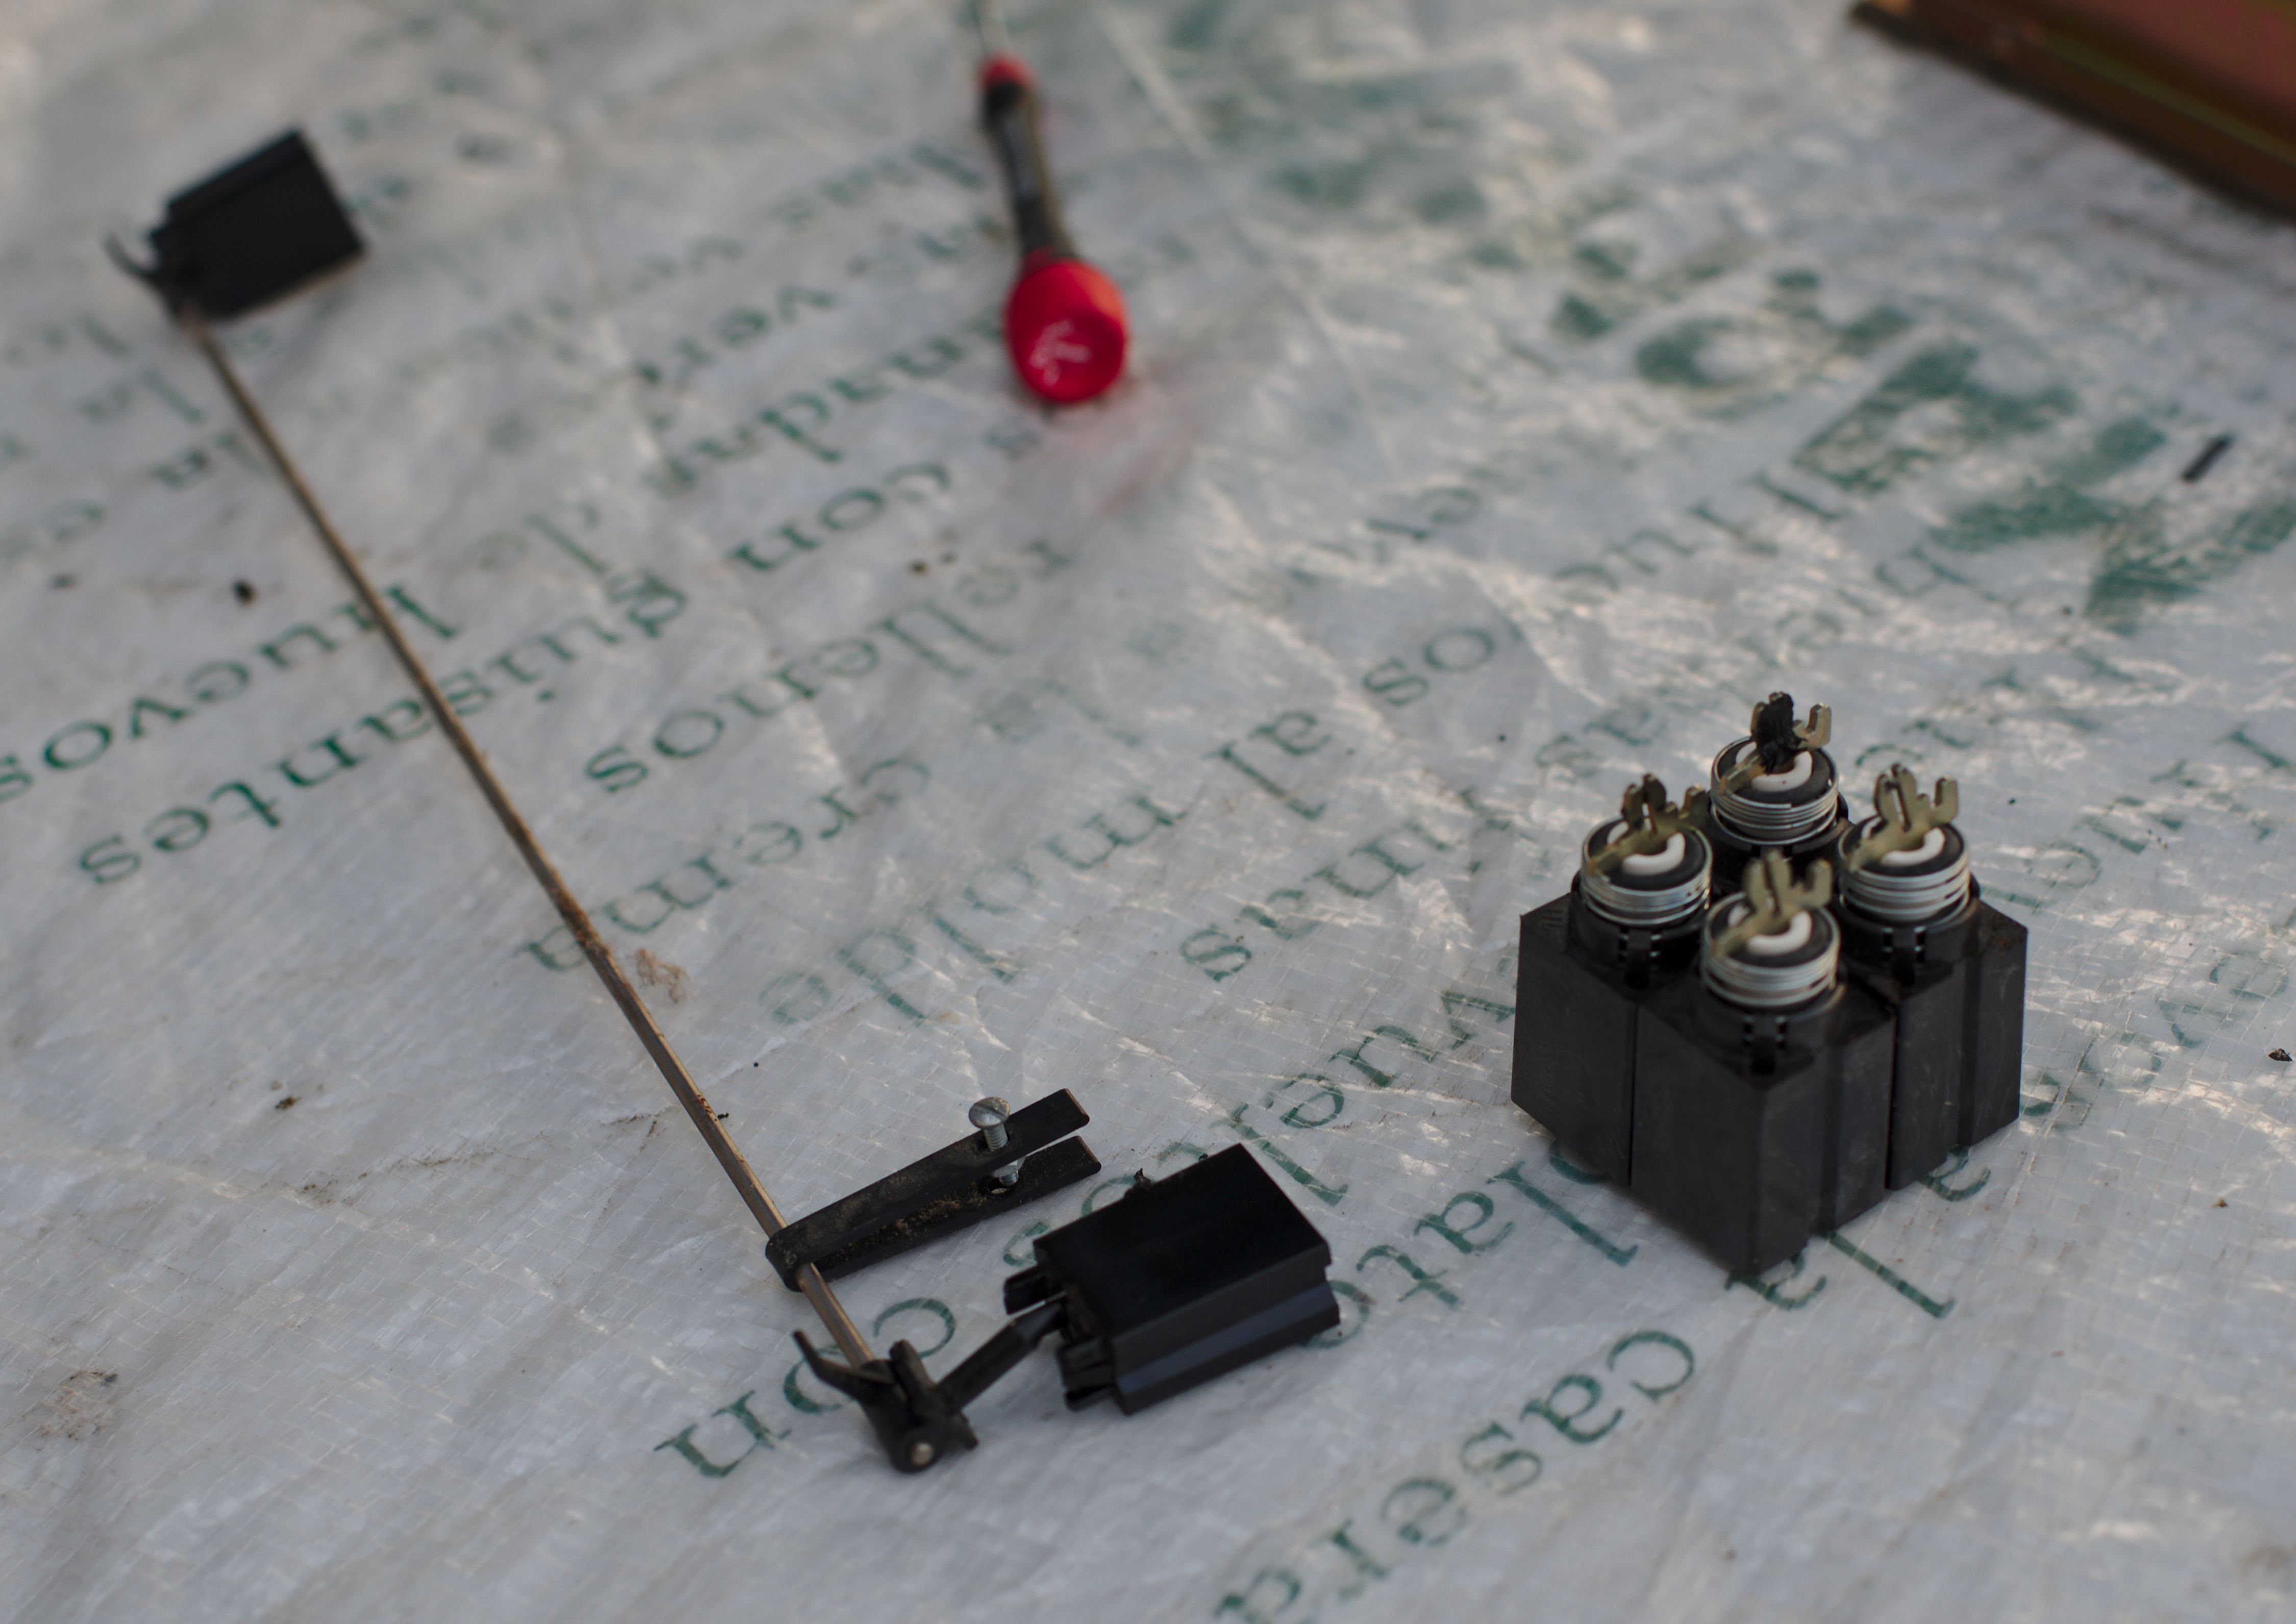
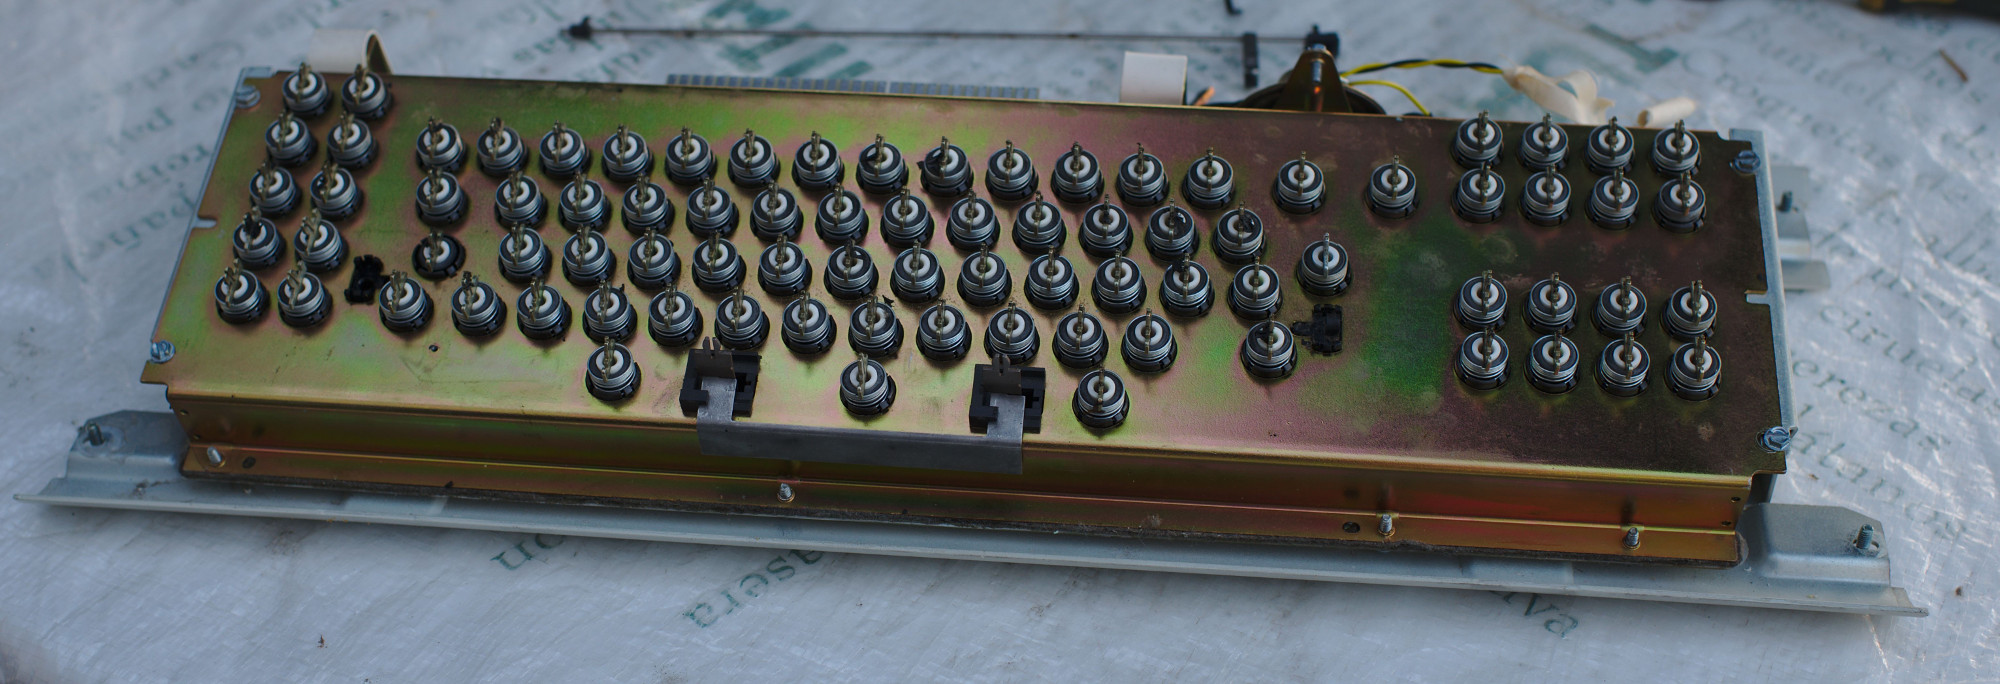
This is who the switches that I took out to check the plastic mount under the arrow show above look like:
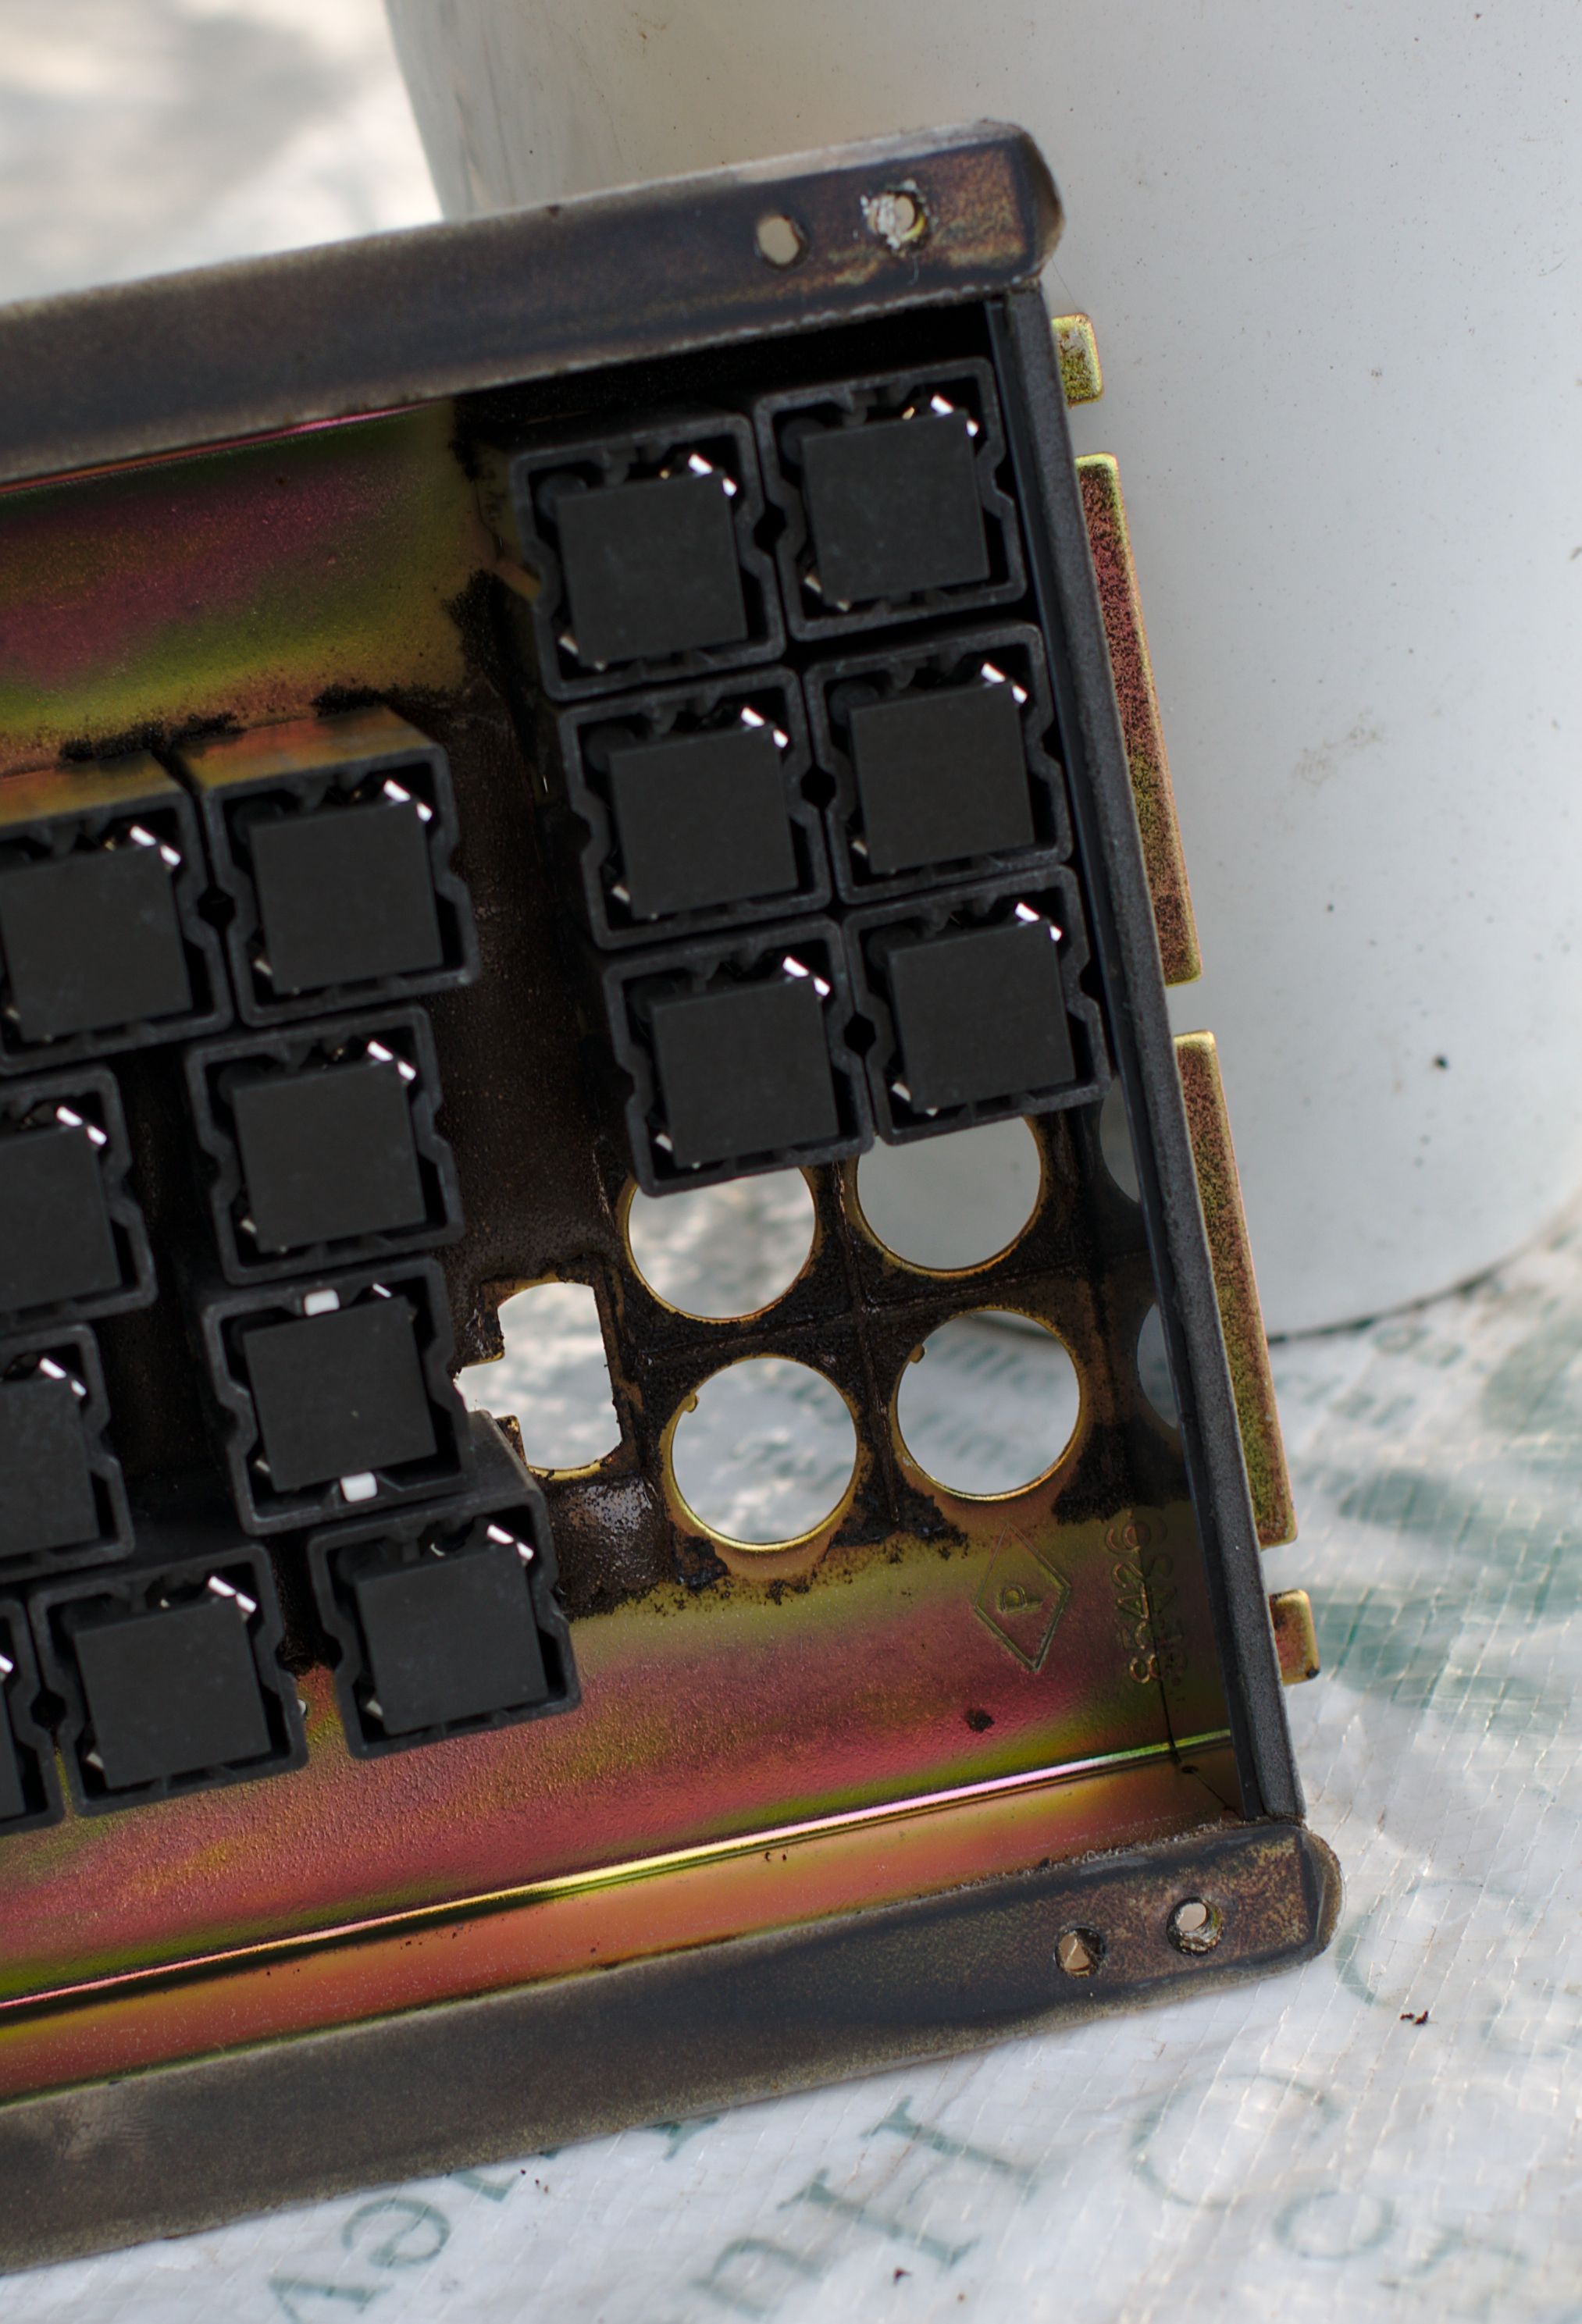
- DSC_3383.jpg (511.82 KiB) Viewed 6102 times
You can see the place for the plastic mount on the left of the missing switches.
Posted: 30 Aug 2015, 21:05
by idollar
The PCB and before mounted back
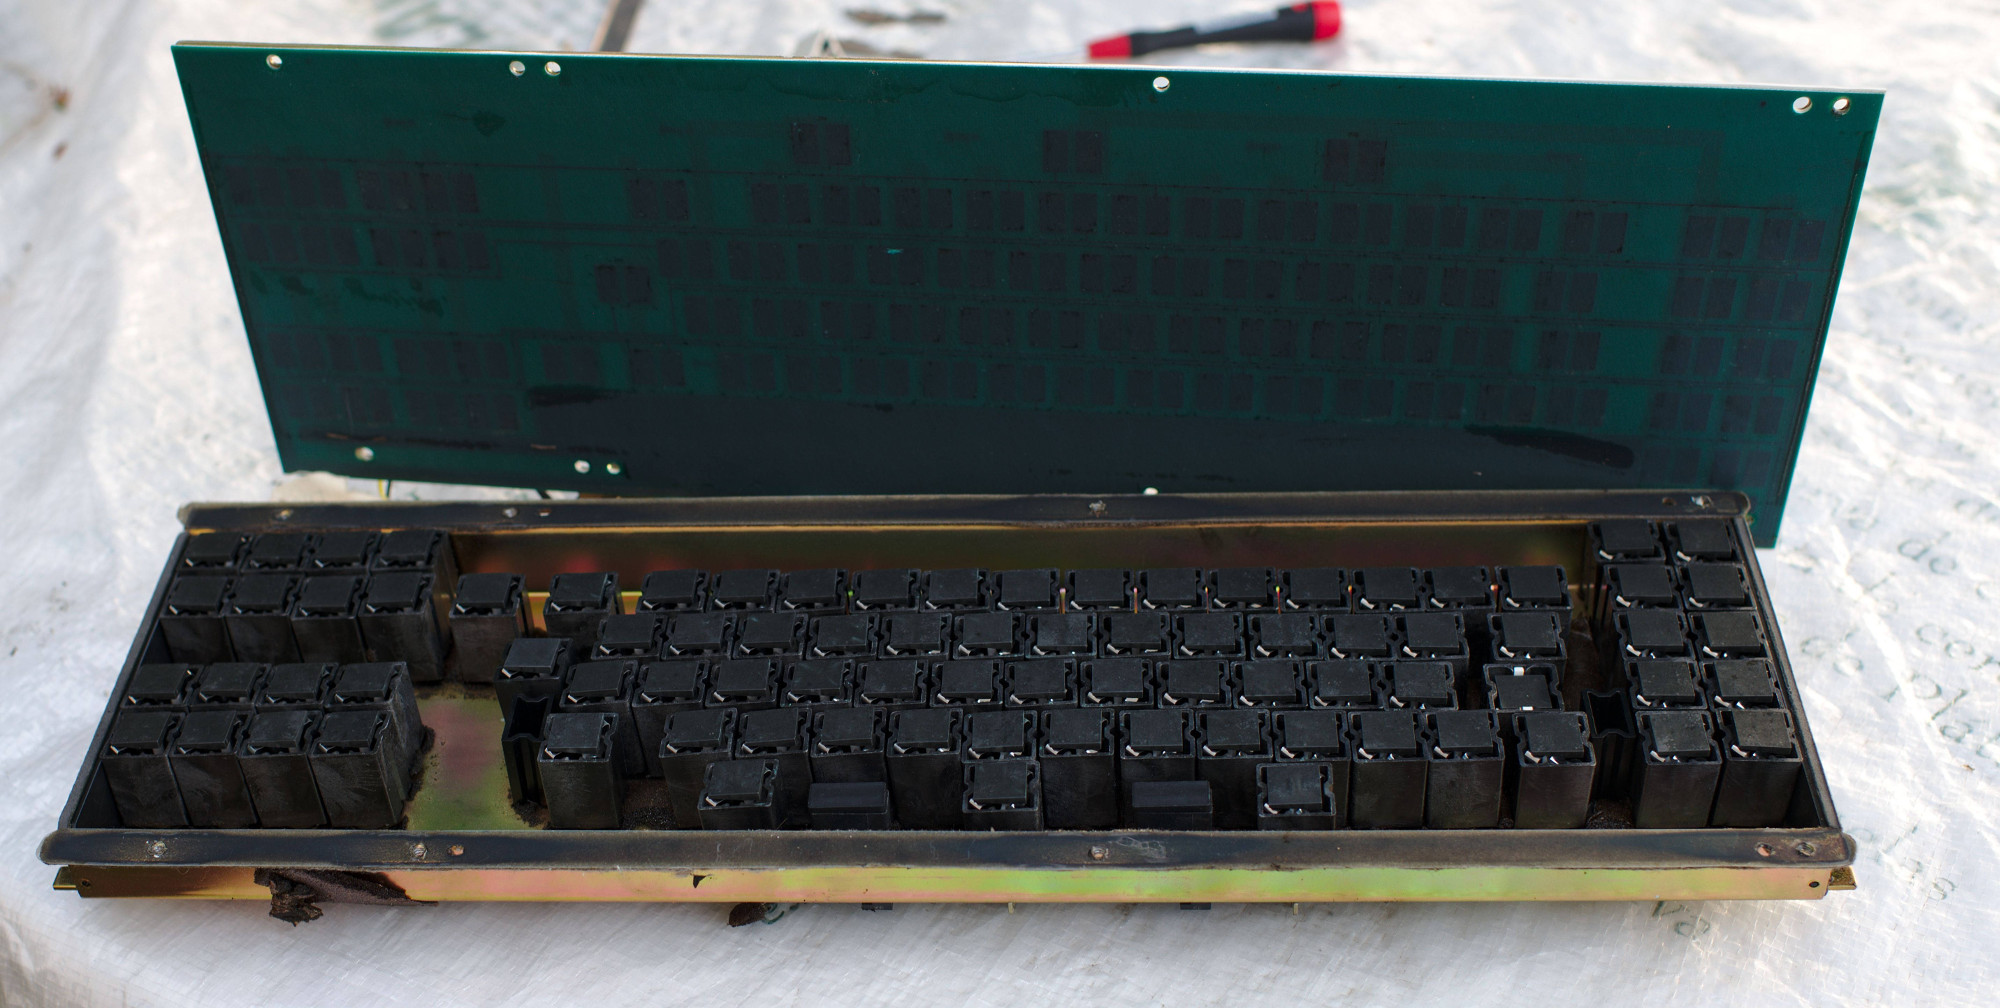
- DSC_3384.jpg (442.78 KiB) Viewed 6085 times
Posted: 30 Aug 2015, 21:06
by idollar
Back plate:

- DSC_3385.jpg (976.01 KiB) Viewed 6083 times
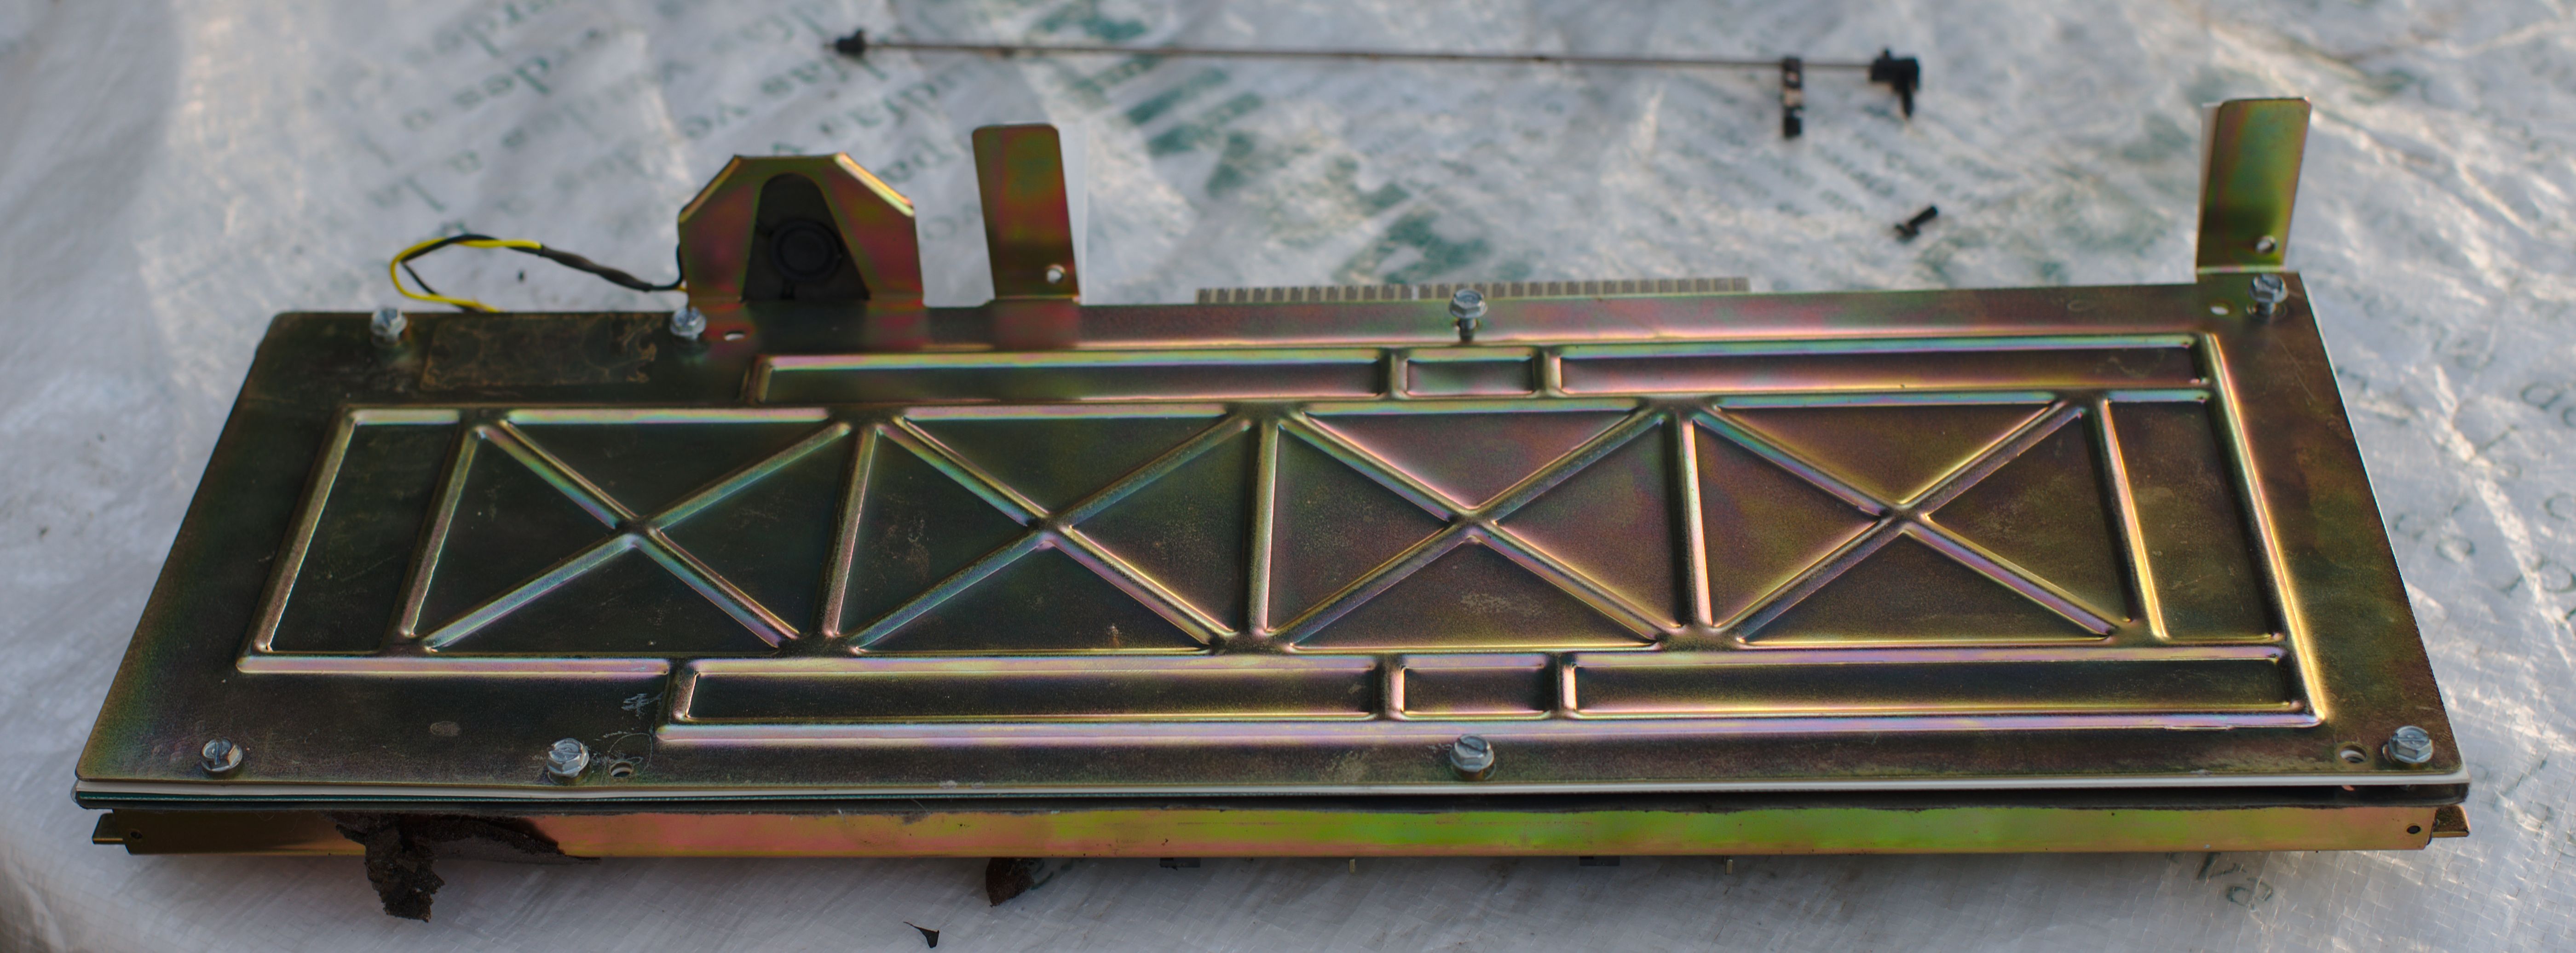
- DSC_3386.jpg (968.24 KiB) Viewed 6083 times
Posted: 30 Aug 2015, 21:08
by idollar
In the case:
- DSC_3389.jpg (399.43 KiB) Viewed 6082 times
Posted: 30 Aug 2015, 21:09
by idollar
Posted: 30 Aug 2015, 21:10
by idollar
The top:
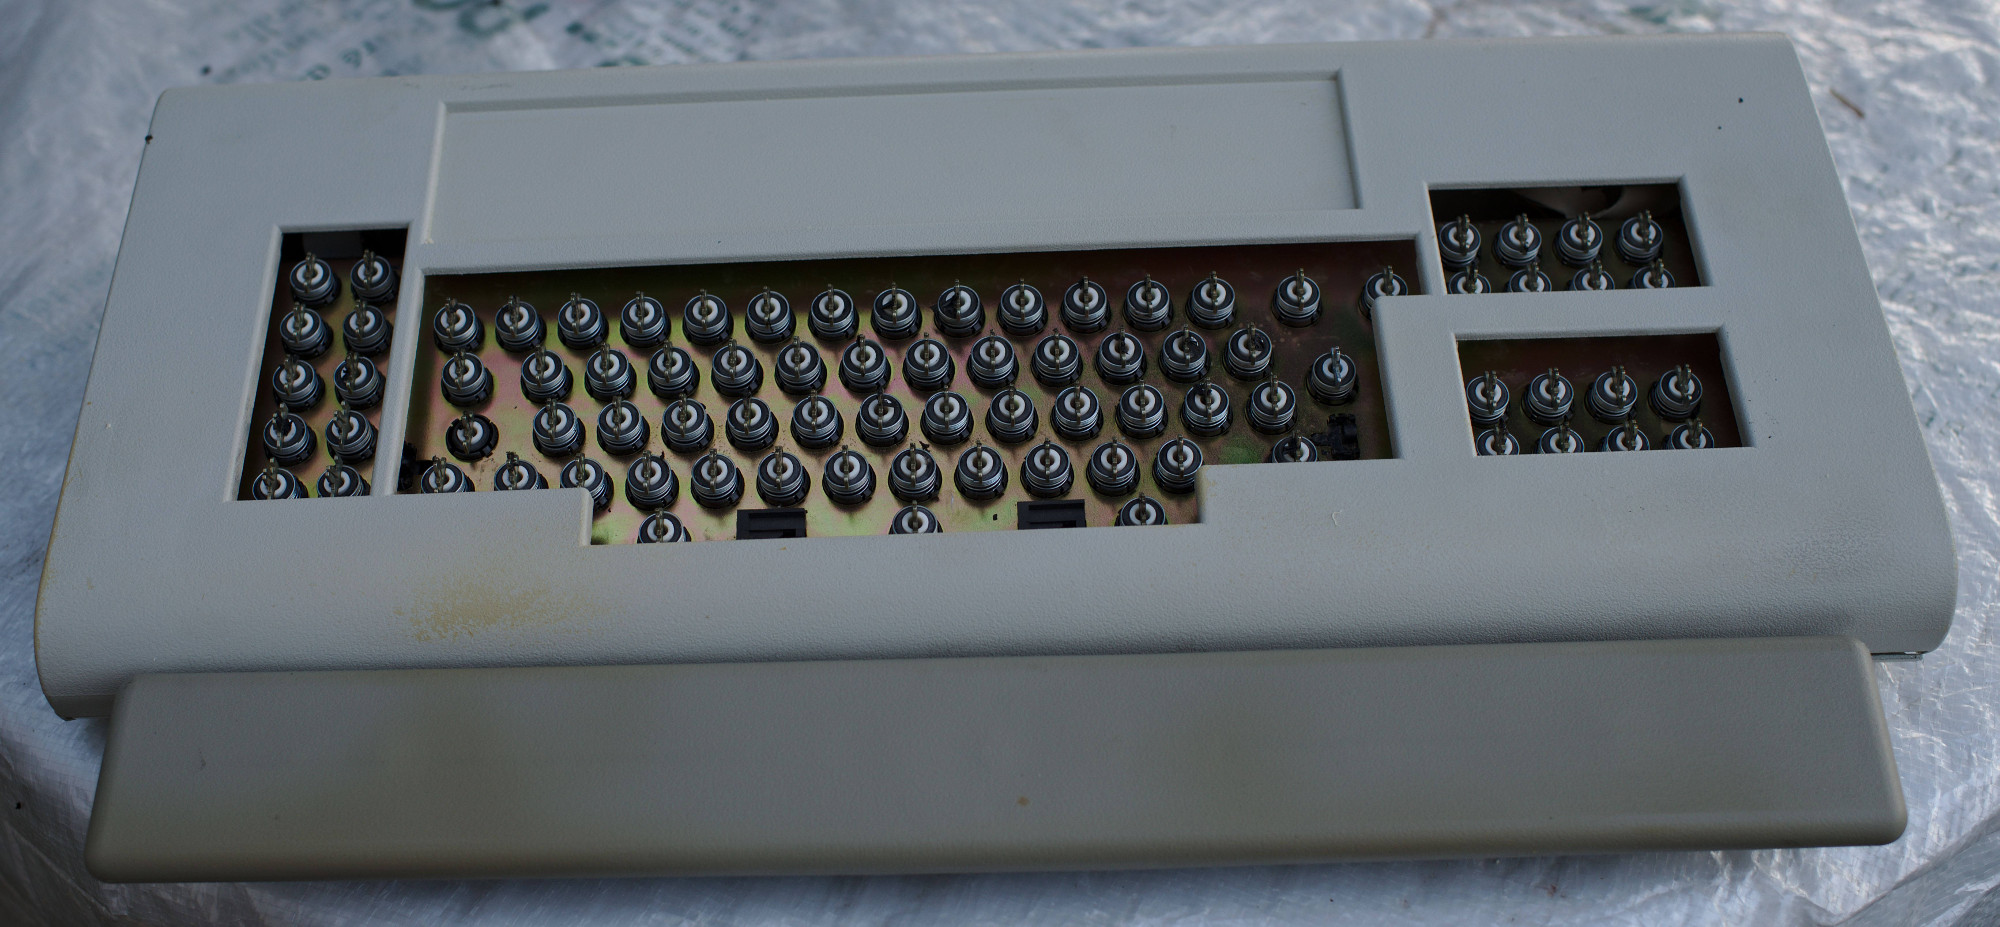
- DSC_3394.jpg (436.53 KiB) Viewed 6079 times
Posted: 30 Aug 2015, 21:12
by idollar
Let me repeat my question again, so it does not get lost in the thread:
Does anyone know what glue shall I use to glue these pieces back ?

- DSC_3379.jpg (427.33 KiB) Viewed 6078 times
Posted: 30 Aug 2015, 21:13
by XMIT
Yeah, it's okay that the foam is so degraded. I would be sure to remove as much of it as you can, and to give all of the individual switches a (gentle!) bath in isopropyl alcohol. Otherwise, between the contamination shield pieces and the foam, you'll end up getting little bits on the PCB that will interfere with sensing and render the keyboard useless until you clean it again. (Ask me how I know.) You can maybe replace that foam with the same sort of foam you might use for a Model F - it serves the same purpose - but you will need to draw your own template.
The screws that secure the PCB to the rest of the case - make sure to tighten them lightly and evenly, otherwise the PCB can bow interfering with capacitive sensing.
I still think your best bet is moving the switch for the key just to the right of Backspace (Index IIRC) and using that for Lock. I find that this funny half-width key interferes with my ability to find Backspace correctly.
Over on GH I posted a key mapping that I find works quite well for these keyboards. When I'm in front of a real computer maybe I'll post that here as well. I was eventually going to post my own workshop thread on the (slow) restoration of my own Displaywriter board.
Oh weird - mine didn't have a palm rest! I would try Krazy Glue (cyanoacrylate) to get the pieces back together.
Did you end up getting one of the boards from phosphorglow? If so - make sure to line it up carefully on the edge connector, so that the contacts are centered. Try to get a photo of this - phosphorglow asked me for one and I never got around to it!
Posted: 30 Aug 2015, 21:14
by XMIT
Oh - if you're going to put a real switch in for the Lock key you don't need the linkage assembly at all. When I take mine apart, I'll remove my linkage bar entirely.
Posted: 30 Aug 2015, 21:19
by idollar
Thanks !
XMIT wrote: Yeah, it's okay that the foam is so degraded. I would be sure to remove as much of it as you can, and to give all of the individual switches a (gentle!) bath in isopropyl alcohol. Otherwise, between the contamination shield pieces and the foam, you'll end up getting little bits on the PCB that will interfere with sensing and render the keyboard useless until you clean it again. (Ask me how I know.) You can maybe replace that foam with the same sort of foam you might use for a Model F - it serves the same purpose - but you will need to draw your own template.
The screws that secure the PCB to the rest of the case - make sure to tighten them lightly and evenly, otherwise the PCB can bow interfering with capacitive sensing.
That was my plan.
I still think your best bet is moving the switch for the key just to the right of Backspace (Index IIRC) and using that for Lock. I find that this funny half-width key interferes with my ability to find Backspace correctly.
Thanks for the advice. I need to think about it.
Over on GH I posted a key mapping that I find works quite well for these keyboards. When I'm in front of a real computer maybe I'll post that here as well. I was eventually going to post my own workshop thread on the (slow) restoration of my own Displaywriter board.
Do it. We can make a "lot of pictures" together. This would be fun.
Oh weird - mine didn't have a palm rest! I would try Krazy Glue (cyanoacrylate) to get the pieces back together.
I will look for the glue. Thanks.
Did you end up getting one of the boards from phosphorglow? If so - make sure to line it up carefully on the edge connector, so that the contacts are centered. Try to get a photo of this - phosphorglow asked me for one and I never got around to it!
I did. I ordered from his site. I had no answer, no feedback. Only an automated email stating that the order was received.
(I will check my email again, it could be also that I missed his email). I also sent him a PM, with the same result.
Posted: 30 Aug 2015, 21:25
by idollar
XMIT wrote: Oh - if you're going to put a real switch in for the Lock key you don't need the linkage assembly at all. When I take mine apart, I'll remove my linkage bar entirely.
I need to make my mind. I guess that the best would be to take the bar to have something closer to a "regular" keyboard.
On the other hand, I would like to restore it as close as possible to the original. I actually have the complete displaywriter, including the printer. It would be fun to bring it alive again.
I will try to glue the parts together anyhow. In any case it is a good experiment.
This is the glue that you recommend me, is't it ?
http://www.ebay.de/itm/Krazy-Glue-Sekun ... 338ccf8132

Posted: 30 Aug 2015, 21:28
by idollar
I forgot to mention that it was
shreebles the one that actually noticed the broken part. It felt during our
"IBM CAMP". (I picked up the displaywriter on this same trip).
Without him, there would be no choice to make.
Thanks
shreebles ! A demonstration on how useful is to do things with others.
Posted: 30 Aug 2015, 21:32
by XMIT
Yep, that's the glue I mentioned. Clean thoroughly using isopropyl alcohol, use a tiny amount of glue, hold in place for 30 seconds... and be gentle on the part in the future. It is better than nothing but only just.
I use 3M DP460 epoxy for when I really need things to stick together well. This is what I use for restoring cracked Model M barrel plates. But it is expensive in three ways: the epoxy itself is expensive, the special applicator gun is expensive, and the mixing nozzles (a consumable) are not cheap and also use a fair amount of epoxy themselves. I try to batch my epoxy work together to minimize waste.
Posted: 30 Aug 2015, 21:39
by idollar
XMIT wrote: Yep, that's the glue I mentioned. Clean thoroughly using isopropyl alcohol, use a tiny amount of glue, hold in place for 30 seconds... and be gentle on the part in the future. It is better than nothing but only just.
Already ordered.
I use 3M DP460 epoxy for when I really need things to stick together well. This is what I use for restoring cracked Model M barrel plates. But it is expensive in three ways: the epoxy itself is expensive, the special applicator gun is expensive, and the mixing nozzles (a consumable) are not cheap and also use a fair amount of epoxy themselves. I try to batch my epoxy work together to minimize waste.
From what you say it should be really good. I will have to check it.
Why don't we create a post in the workshop with the tools that we use ? It will be good to have a single place with all the references.
Posted: 30 Aug 2015, 21:40
by XMIT
Ordered? Okay. Around here it is easy enough to find any similar "super glue" at any grocery store or pharmacy for a couple of dollars.
If your goal is restoration then sure borrowing/stealing a switch may not be ideal. Mine is to use it over USB with an xwhatsit board so this is a better option for me.
Posted: 30 Aug 2015, 21:46
by idollar
XMIT wrote: Ordered? Okay. Around here it is easy enough to find any similar "super glue" at any grocery store or pharmacy for a couple of dollars.
We an also find "super glue" around in Germany. It will be here for the next session....
If your goal is restoration then sure borrowing/stealing a switch may not be ideal. Mine is to use it over USB with an xwhatsit board so this is a better option for me.
I have not made my mind still. I do not have time to restore the rest of the displaywriter. I do not have the software neither.
I need to thing about it. I am currently inclined to the USB option.
Posted: 30 Aug 2015, 22:43
by shreebles
idollar wrote: I forgot to mention that it was
shreebles the one that actually noticed the broken part.
You are very welcome, I'm surprised and happy to see that I was a positive influence on your displaywriter...
See, that is the upside of my short attention span, I can notice things happening very fast

Posted: 30 Aug 2015, 22:57
by idollar
shreebles wrote:
See, that is the upside of my short attention span, I can notice things happening very fast