Page 1 of 1
Replacing G81 internals with G80 internals
Posted: 07 Jan 2017, 13:37
by Slom
Looks like I need to replace the internals of my G81, and now I'm evaluating my options:
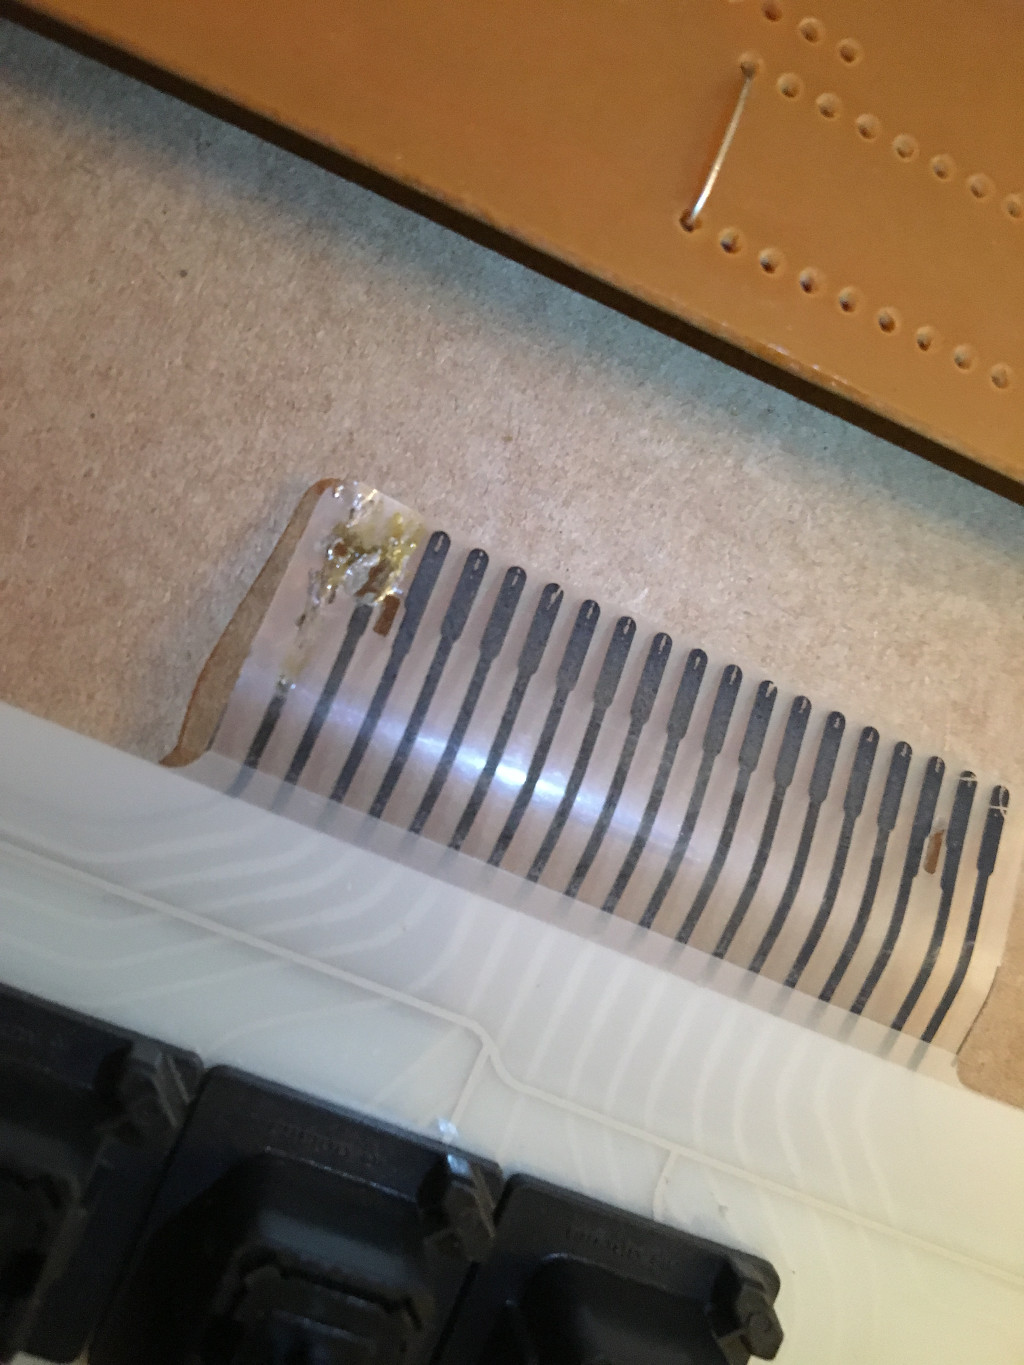
- G81.JPG (268.85 KiB) Viewed 3334 times
Are g80 internals compatible with the G81 case (winkeyless)?
Posted: 07 Jan 2017, 13:44
by seebart
I know a winkeyless G80-3000 PCB fits in a G81-1000 case, but the Cherry product range is so vast that's all I can verify. Good luck!
Posted: 07 Jan 2017, 14:44
by Findecanor
Perhaps that could be repaired, using a "Circuit repair pen", conductive ink or some kind of metal tape. I once managed to bridge a circuit on a membrane using "Bare Metal" foil for model kits - I was surprised to find that it was conductive even on the glue-side. If you have any conductive glue (for heat sinks etc.) then maybe that might also work.
I know that in G8x-3000 with Windows keys, the G81 and G80 have the same case. The winkeyless G80-3000 are different on the inside though.
Posted: 07 Jan 2017, 14:47
by photekq
Winkeyless G80-3000 PCBs fit inside winkeyless G81-3000 cases with no issues. They're the same cases functionally.
Posted: 07 Jan 2017, 15:30
by Alkhar
G80-3000 winkey pcb fit a G81-3000 new case only if you cut the round shapped holder that is present in the case.
I may post a picture if i found one, i think its photek that post in on a GH post maybe, not sure.
As for the older g81 case there should be no problem, the only one is if you want to add a plate to it you have to make cut in the upper shell, again this process was explained here or in a Gh post, with picture and marking for the cutting to make, but its quite experimental, and it had no dimensions, all handmade.
Posted: 09 Jan 2017, 22:02
by Slom
Thanks for all the answers!
photekq wrote: Winkeyless G80-3000 PCBs fit inside winkeyless G81-3000 cases with no issues. They're the same cases functionally.
Thanks, that's the definite answer i have been hoping for

Posted: 09 Jan 2017, 22:07
by Slom
Findecanor wrote: Perhaps that could be repaired, using a "Circuit repair pen", conductive ink or some kind of metal tape. I once managed to bridge a circuit on a membrane using "Bare Metal" foil for model kits - I was surprised to find that it was conductive even on the glue-side. If you have any conductive glue (for heat sinks etc.) then maybe that might also work.
It's hard to see on the picture, but It there are holes where the traces have been ... and the plastic looks molten. No idea how that happened really. At first I thought that I fucked up by not loosening contacts from the controller board, but now I think that this might have been a short of some sort ... but now I'm unsure if there's even enough current there for that to happen.
So I would be hesitant to fix this, just in case it "catches fire" later on.
Posted: 09 Jan 2017, 22:24
by Slom
Alkhar wrote:
As for the older g81 case there should be no problem, the only one is if you want to add a plate to it you have to make cut in the upper shell, again this process was explained here or in a Gh post, with picture and marking for the cutting to make, but its quite experimental, and it had no dimensions, all handmade.
Add a plate above the pcb (as in plate mounted switches) or add a G81 plate under the pcb for case weight and stability ... for the former I would be interested in the link, though only for reading fun
Posted: 10 Jan 2017, 20:58
by gogusrl
Just did that a few days ago. You're looking at a G80-3000HAD pcb in a G81-3000HAU case with G81-3000LPMDE thick lasered pbt keycaps and doubleshot bottom row (because the donor was winkeyed and offcenter). Pretty happy with the result.
