
I built this keypad, strongly inspired by the Apollo DSKY computer interface.
Well, it's a loose replica, anyway. It's not a perfect copy by any means.
Everything will make sense soon... I'll start with some explanation and reasons that lead into why I built this. The keypad project itself is detailed about half way down this post.
Basically, one of my latest projects is a custom Kerbal Space Program "cockpit" styled controller. This is the project that immediately preceded my 75% + 1 Danger Zone keyboard project, and in fact, is the very project that prompted me into getting INTO mechanical keyboards in the first place!
A little background first... Kerbal Space Program is an orbital physics based sandbox game that has you manage your own space program, constructing your own vessels similar to Mercury, Gemini, Apollo, and the Shuttle, as well as probes... Or any combination you can imagine! It's quite similar to the type of program that you'd see with agencies like NASA or ESA. You deal with your finances, contracts, science collection, and R&D to unlock and buy parts to build launchable vessels. You can then use the vehicles you build to explore a small solar system with similarities to our own. You control little green men and women called Kerbals, and hope not to launch them to their deaths! You can build your very own Up Goer 5! Keep the pointy end going up!
A while back, a very awesome coder created a plugin that would export telemetry from the game, and listen to control data over serial or USB, to an Arduino. With this plugin, it's possible to interface an Arduino to the game to provide actual readouts of vessel stats on things like digital displays, analog meters, and indicator lamps, as well as have physical pushbuttons, toggle switches, rotary switches, and joysticks actually control the actions in the game. A number of people have already built fully functional "simpits", the technical term for a simulator cockpit controller.
This is a fellow Kerbal player. He created an AMAZINGLY nice controller down in Australia, and was interviewed by Dave Jones of the EEVblog, at the 2015 Sydney Maker Faire. This is just one of several examples of simpits that people have built for KSP. Very cool stuff, and one of my inspirations to build my own!
You can skip to 10:26 for the actual interview and controller...
https://www.youtube.com/watch?v=XxAElAt ... e&t=10m26s
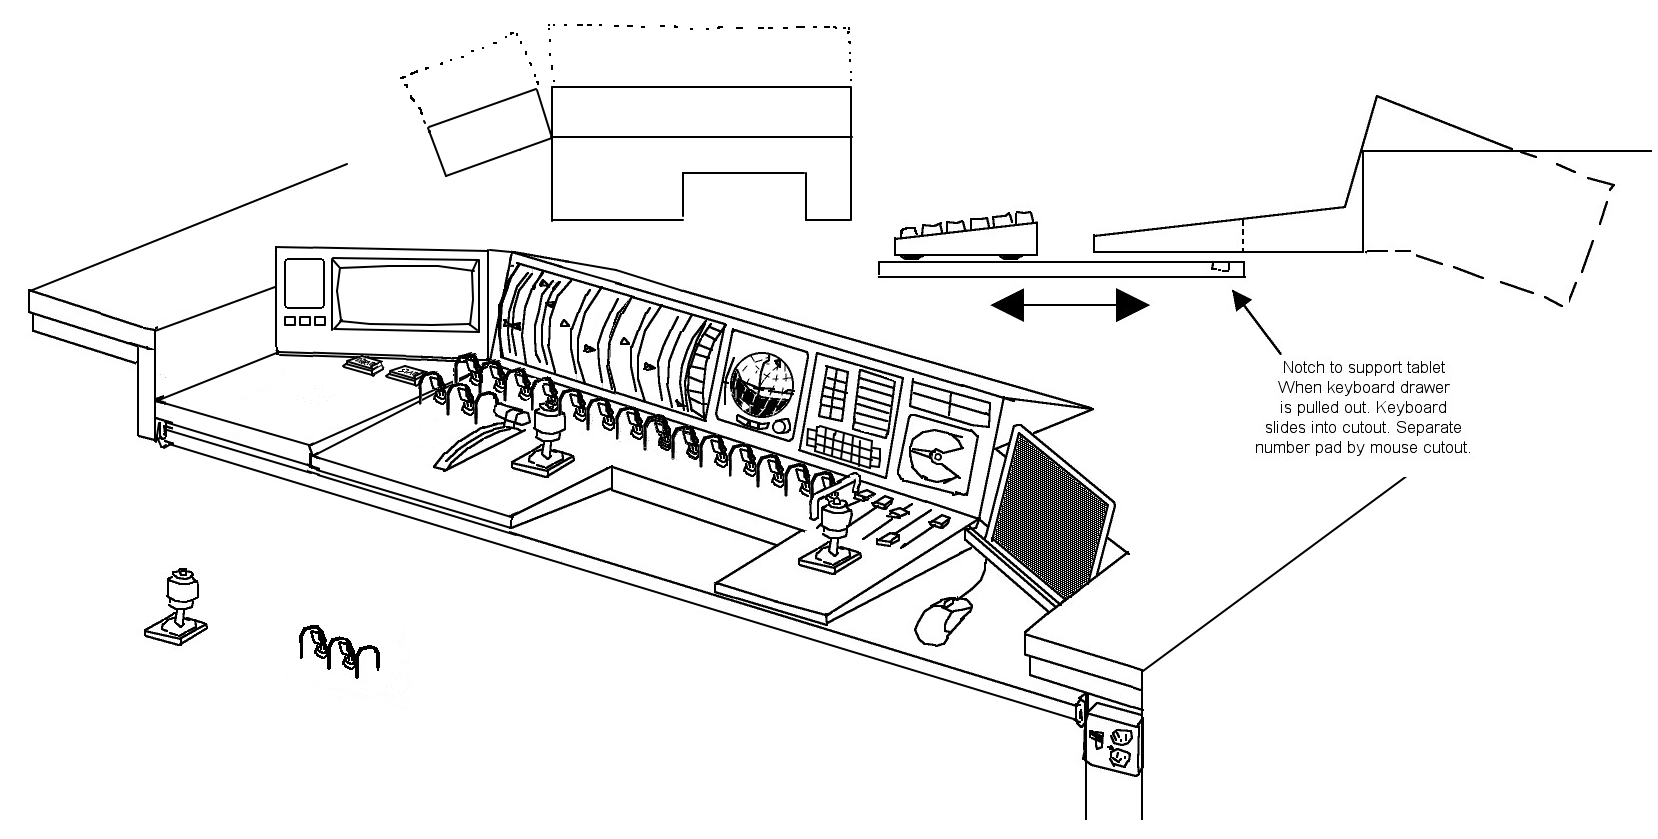
So, this is a rough mockup of my planned arrangement. I'm slowly working on collecting parts and putting them all together. I've got a number of the parts already. I'll share some of that below. It'll be built directly into my desk, seeing as how I have PLENTY of room. I built the desk back when I had three CRT monitors on my computer. LCDs leave me with far more free desk space. Might as well use it!


As you can see above, I have some exceptionally nice hardware for my simpit.
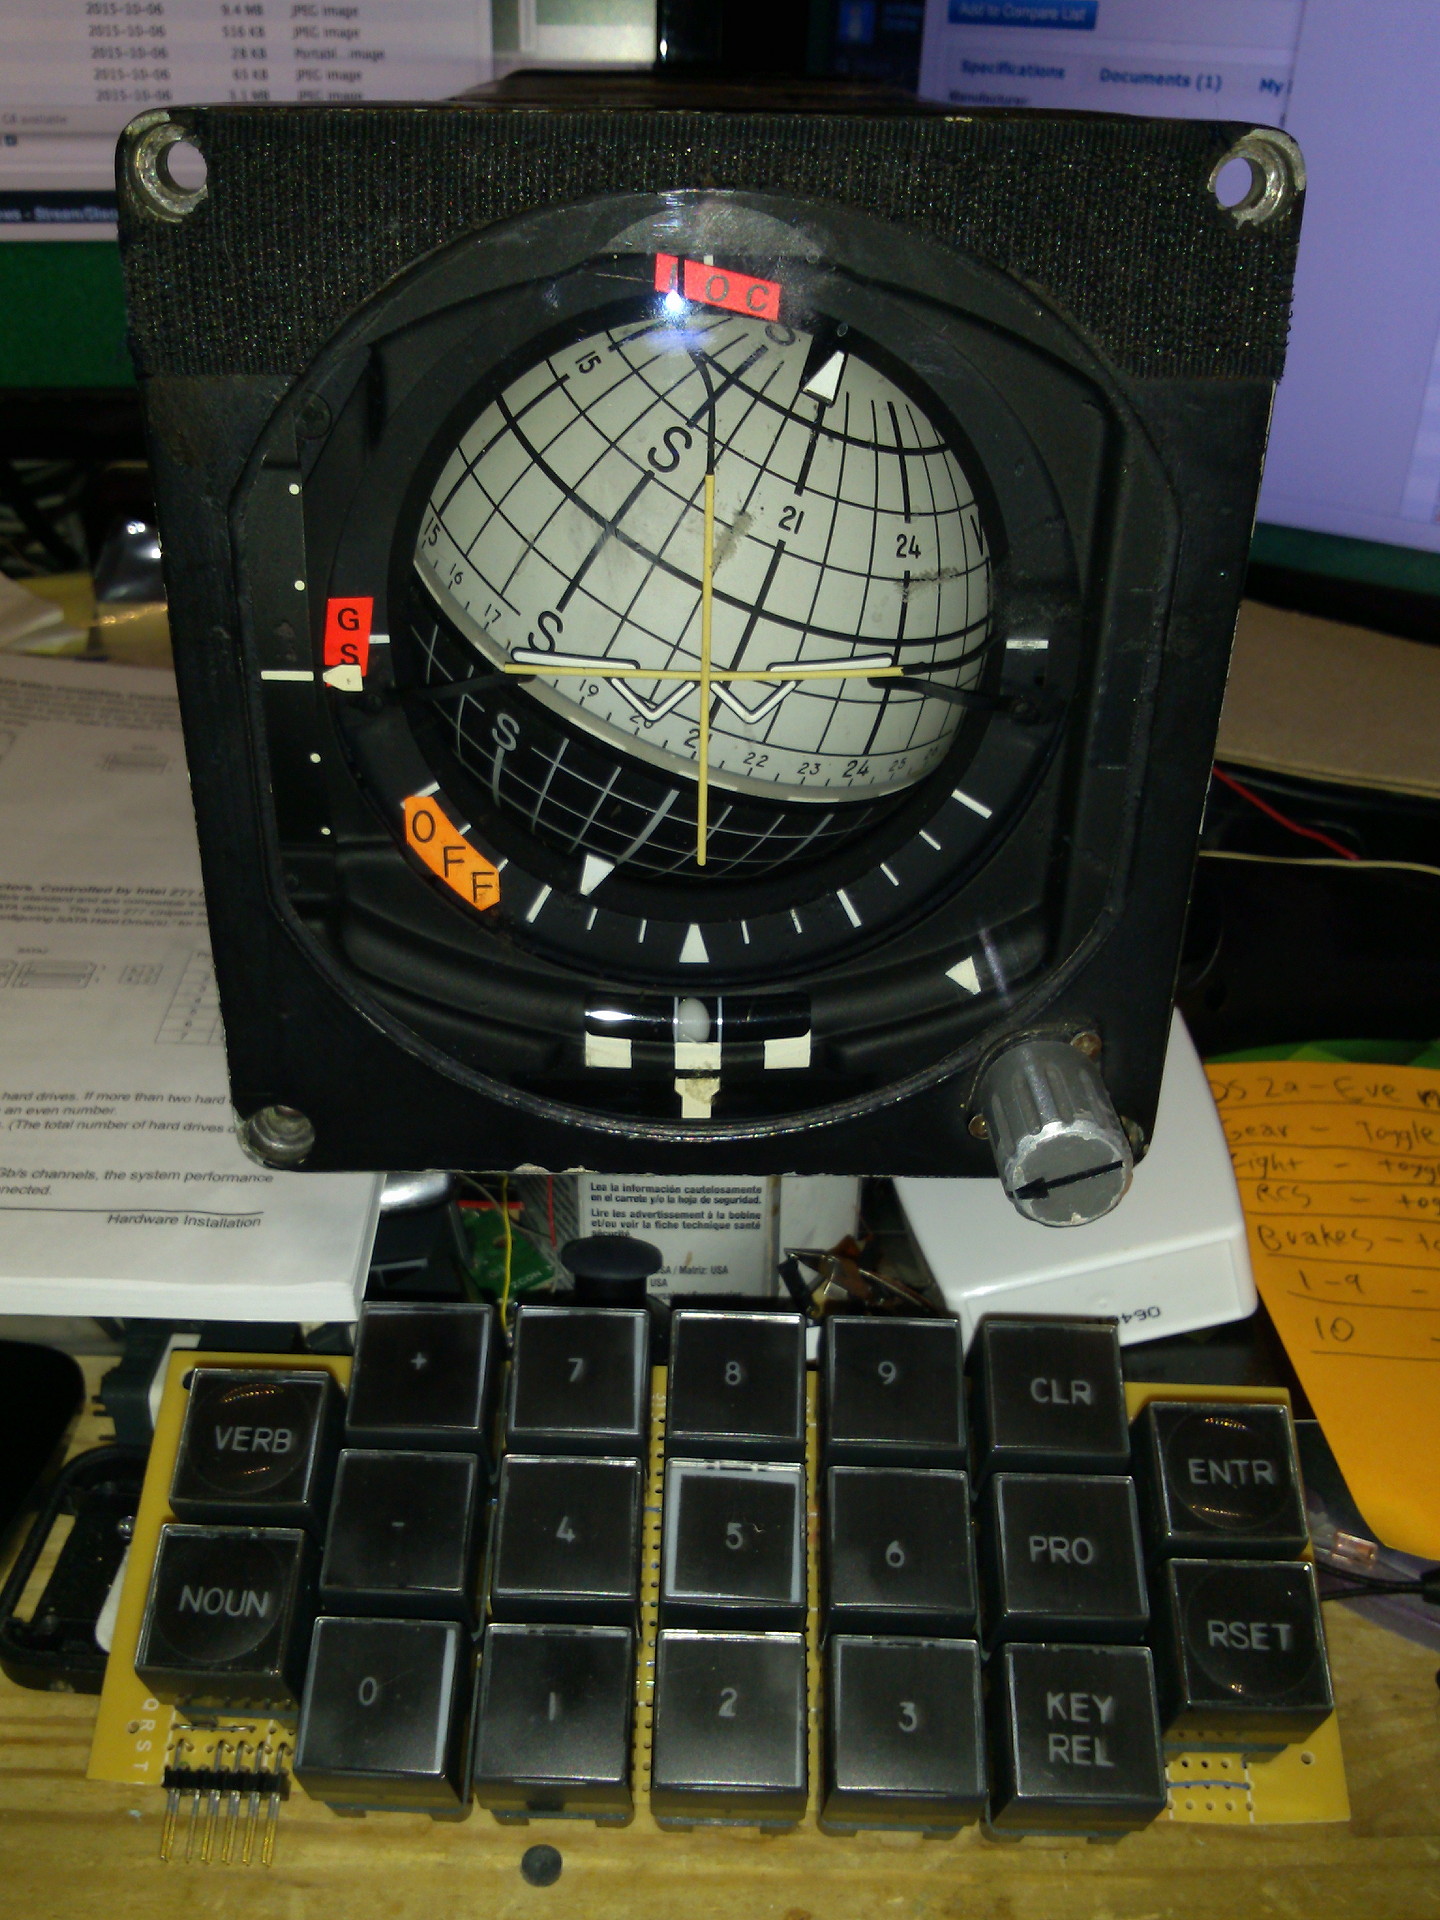
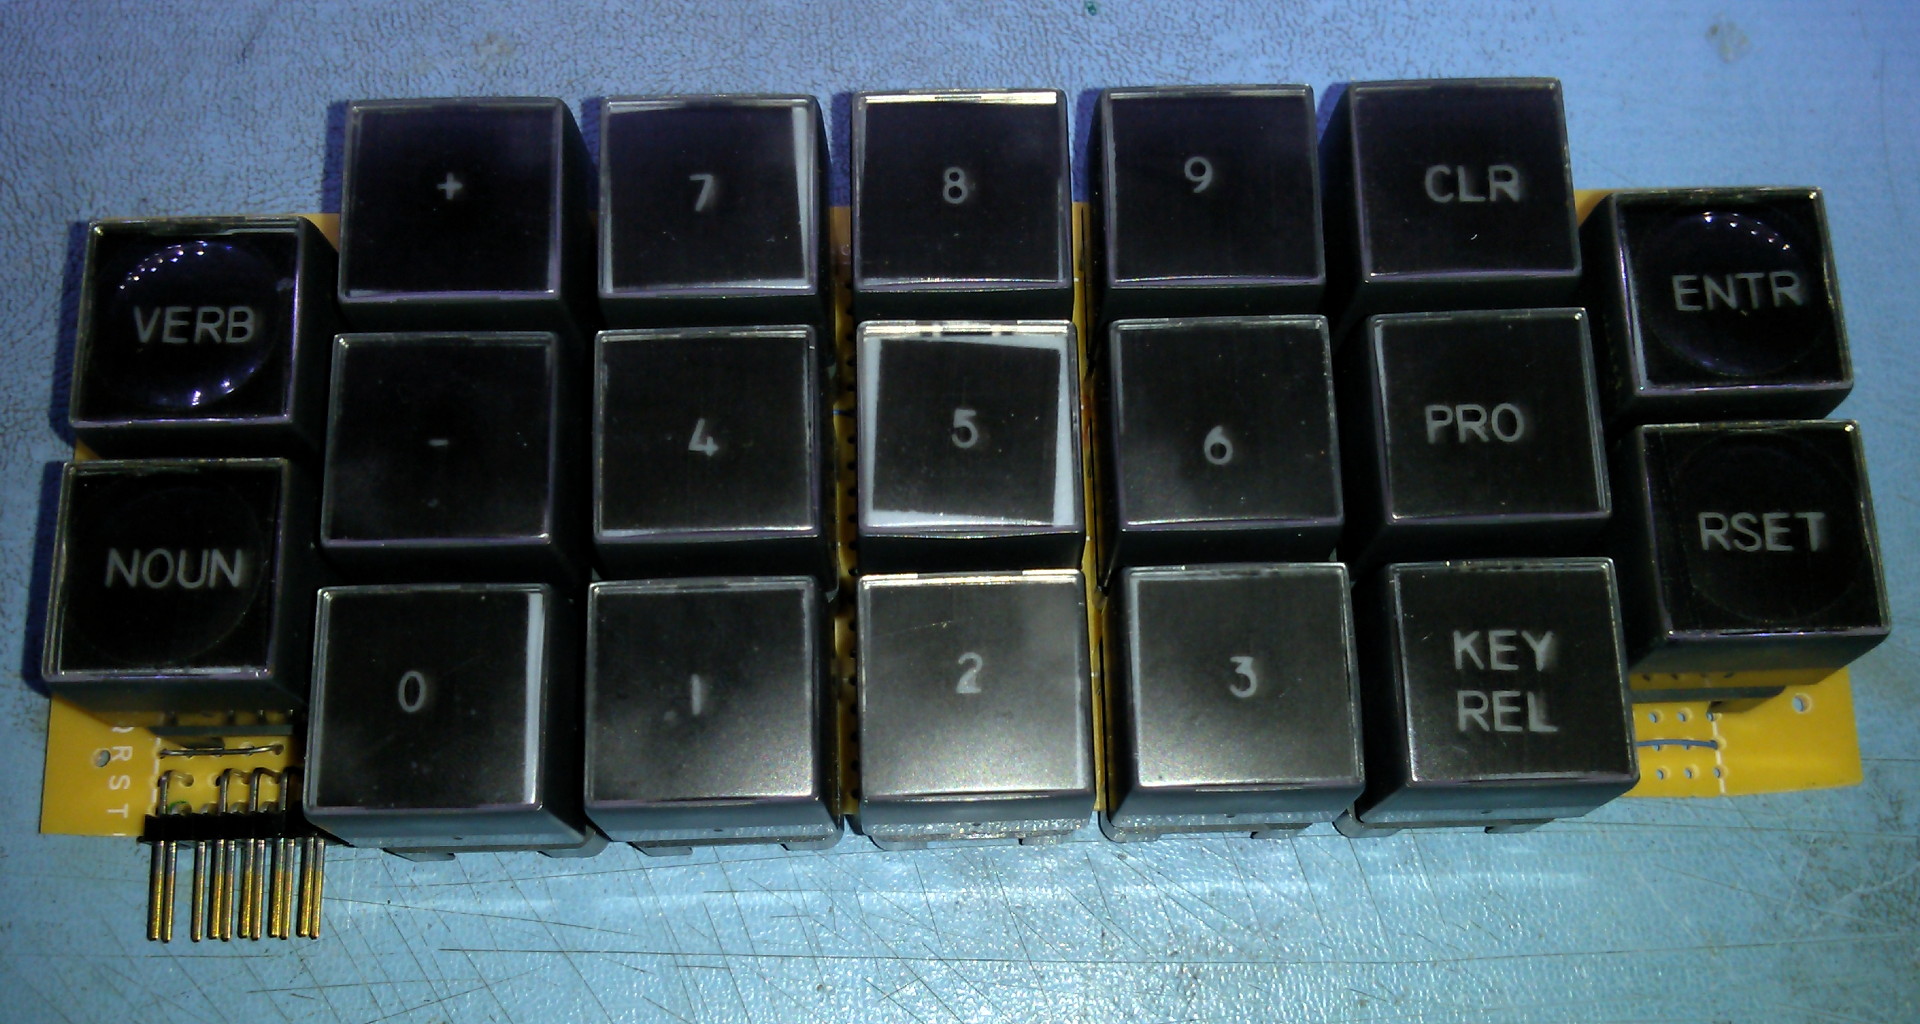
So FINALLY, I get to the point... Beside the FDAI, the most iconic part of the Apollo instrument panel would be the DSKY (DiSplay KeYboard) interface to the AGC (Apollo Guidance Computer). This is the panel we see the astronauts keying values into and reading results from in the VERY awesome movie Apollo 13. NASA was very gracious in letting the crew get intimate access to some real hardware for some parts of the movie (the simulator, for example). The movie also does an incredible job making their props look about as authentic as can be, for a movie. Anyway, the DSKY had 3 sections: The Annunciator Grid, The Readout Display, and the Keypad. While I am not doing a replica that exactly mimics the dimensions and exact appearance, I AM building a Kerbalized DSKY that is heavily inspired by the Apollo DSKY, and would be unmistakable at a glance as being modeled after it.
Below, you can see a pic of an actual DSKY, to compare to the pic above.

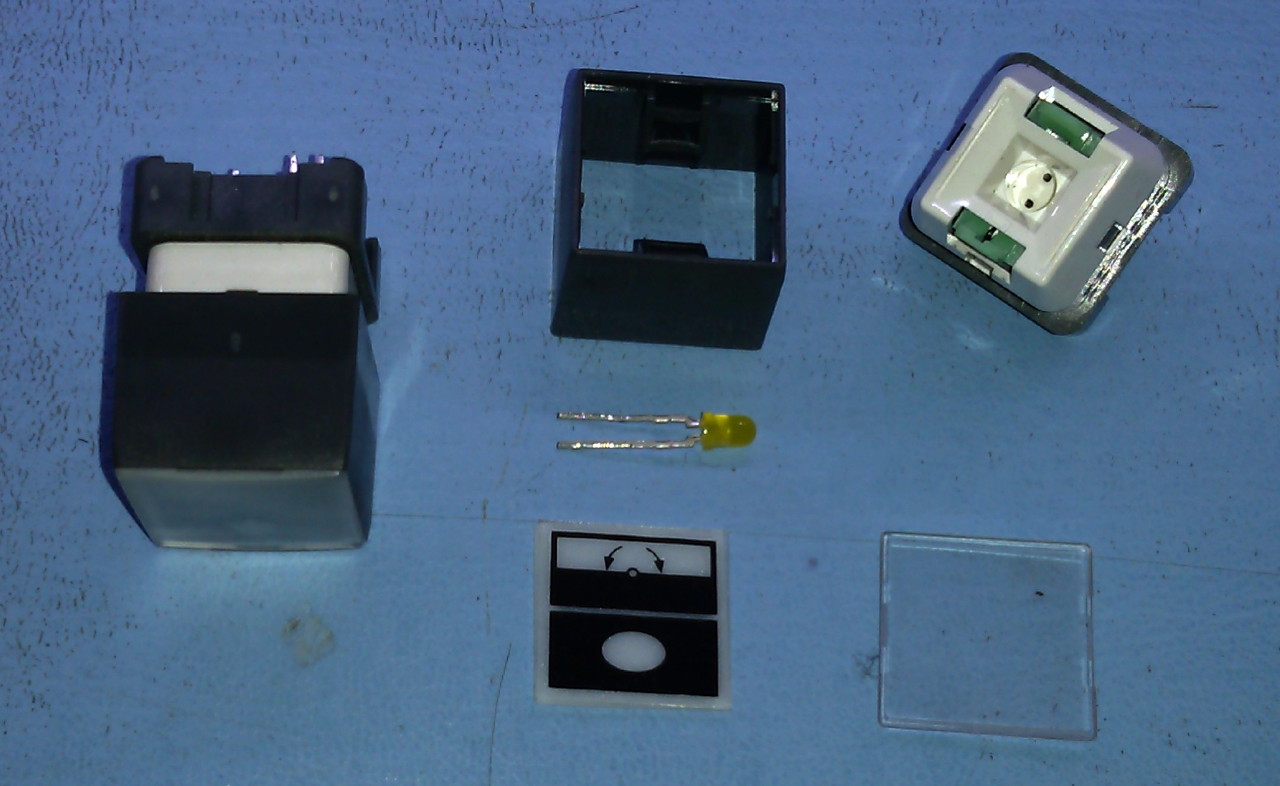
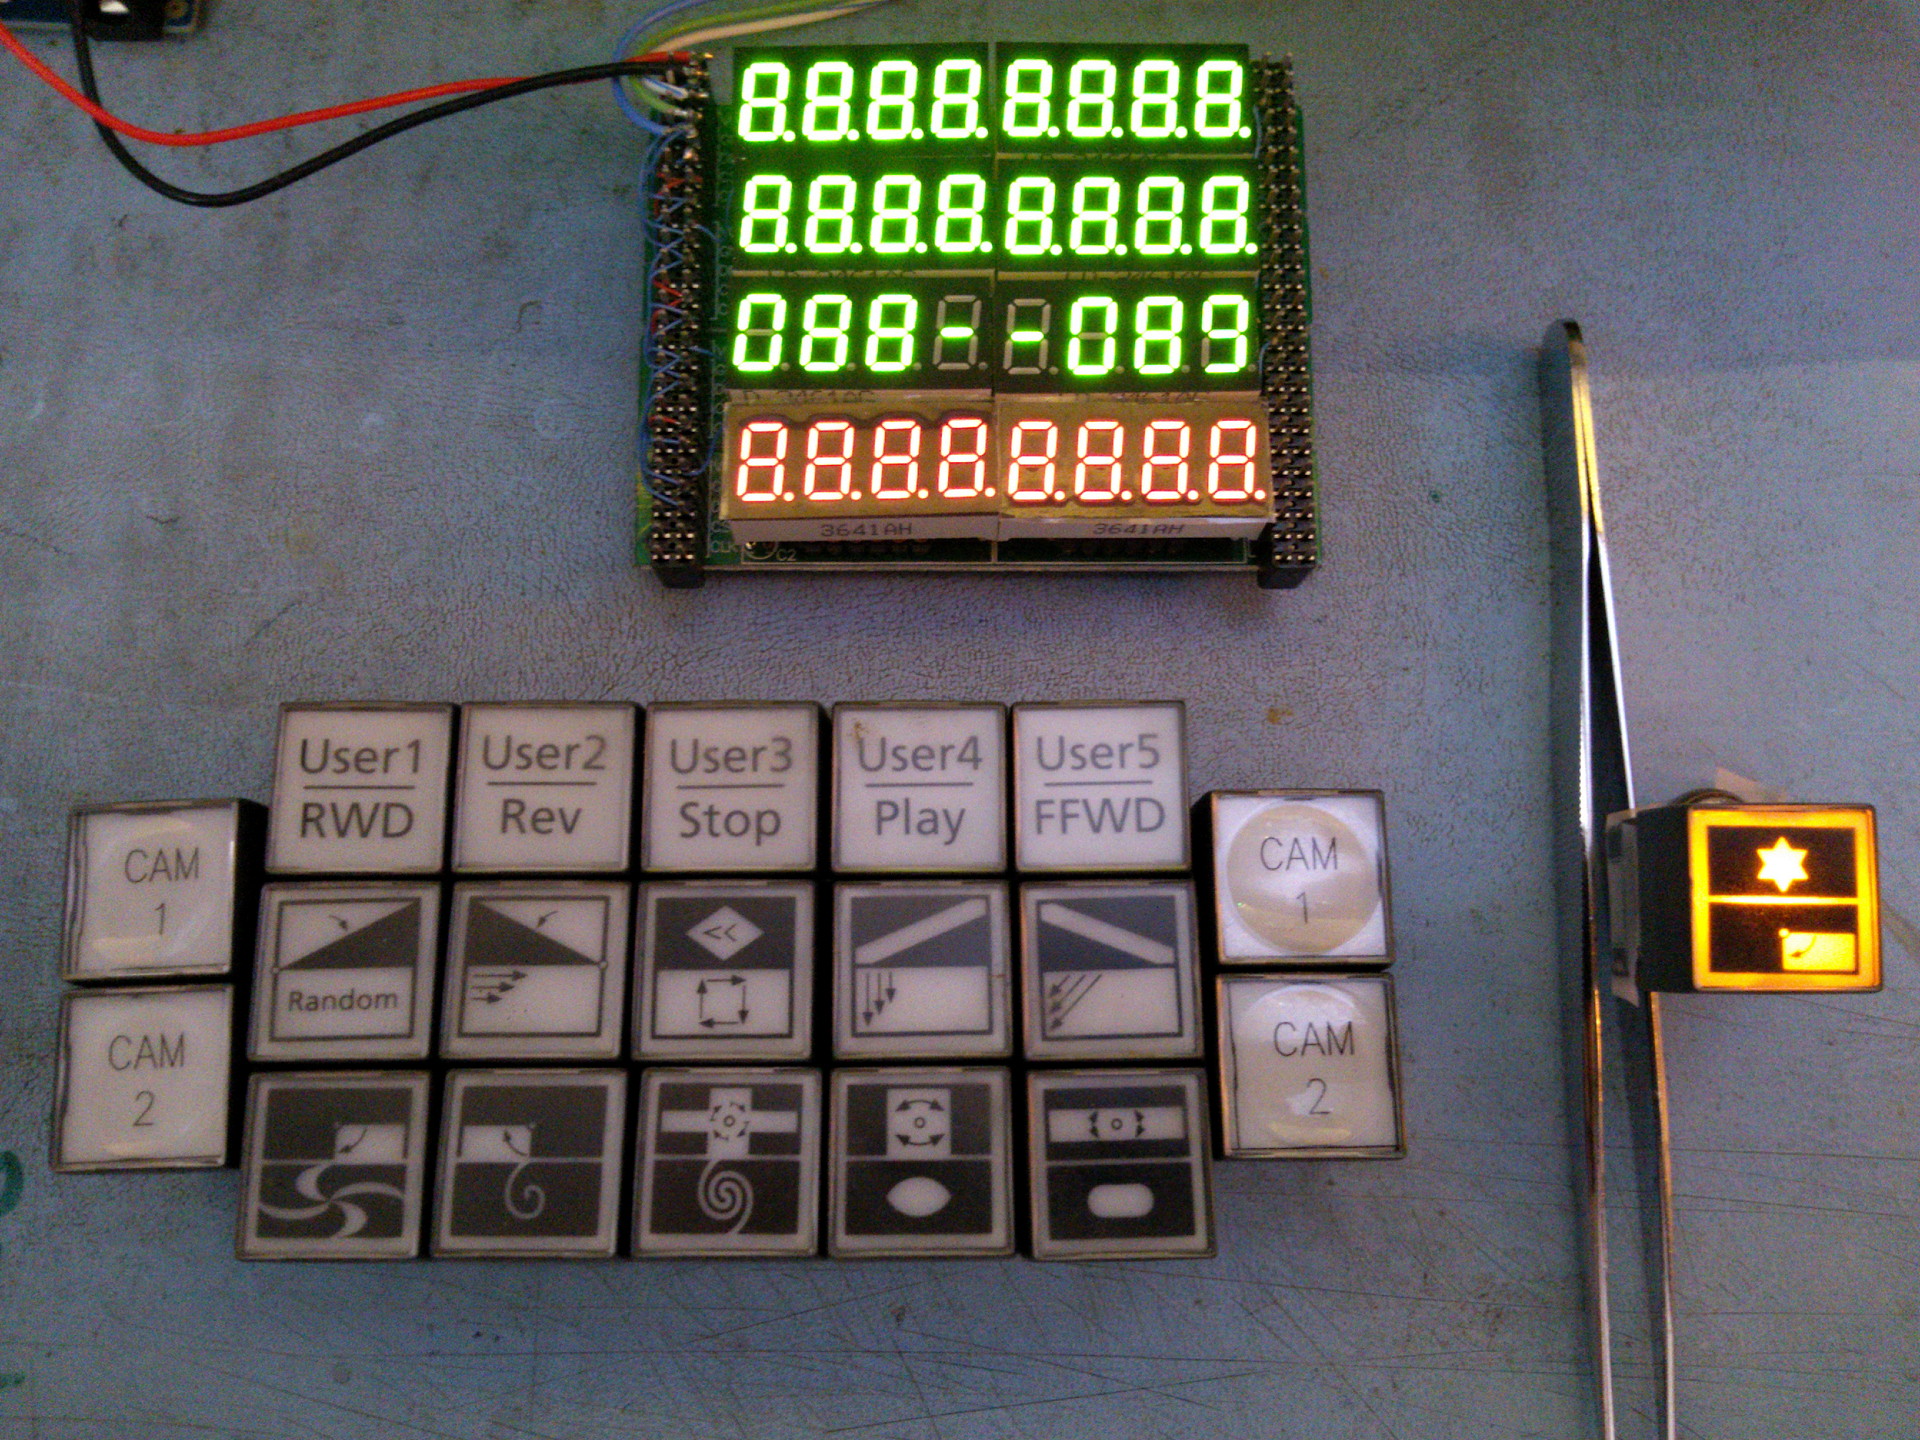
It's not a perfect replica, by any means, and my labels are just awful. I need to replace my printer, cause it streaks and blurs edges, so when I cut a few wrong, I said, "meh, I'll get the final ones done at a print shop". The keys are very firm, linear switches.You don't type on these, you push these! The switches are EAO 99-455B. Mouser carries them for $6.95 EACH! They refer to the switching as a "Low-level element", but I'm uncertain what that actually means. It does say it is gold plated anyway. I used 19 switches... and no I didn't pay Mouser those prices. I had an old video effects switcher that had 86 of those switches, and 127 smaller ones (about 2/3 the size of these). They ARE illuminated too, and the LED is even socketed! You can just remove the LED and replace it with any color you like. You can even drop a bi-directional bi-color LED in to get three colors (+ red, - green, and yellow with AC current, for example). Very nice little switch! Fully relegendable. Pics show the switch disassembled, and the original effects labels I removed, plus one of them lit up. You can see some of the LED 7-segment displays i'll be using to complete the look of my Kerbalized DSKY.
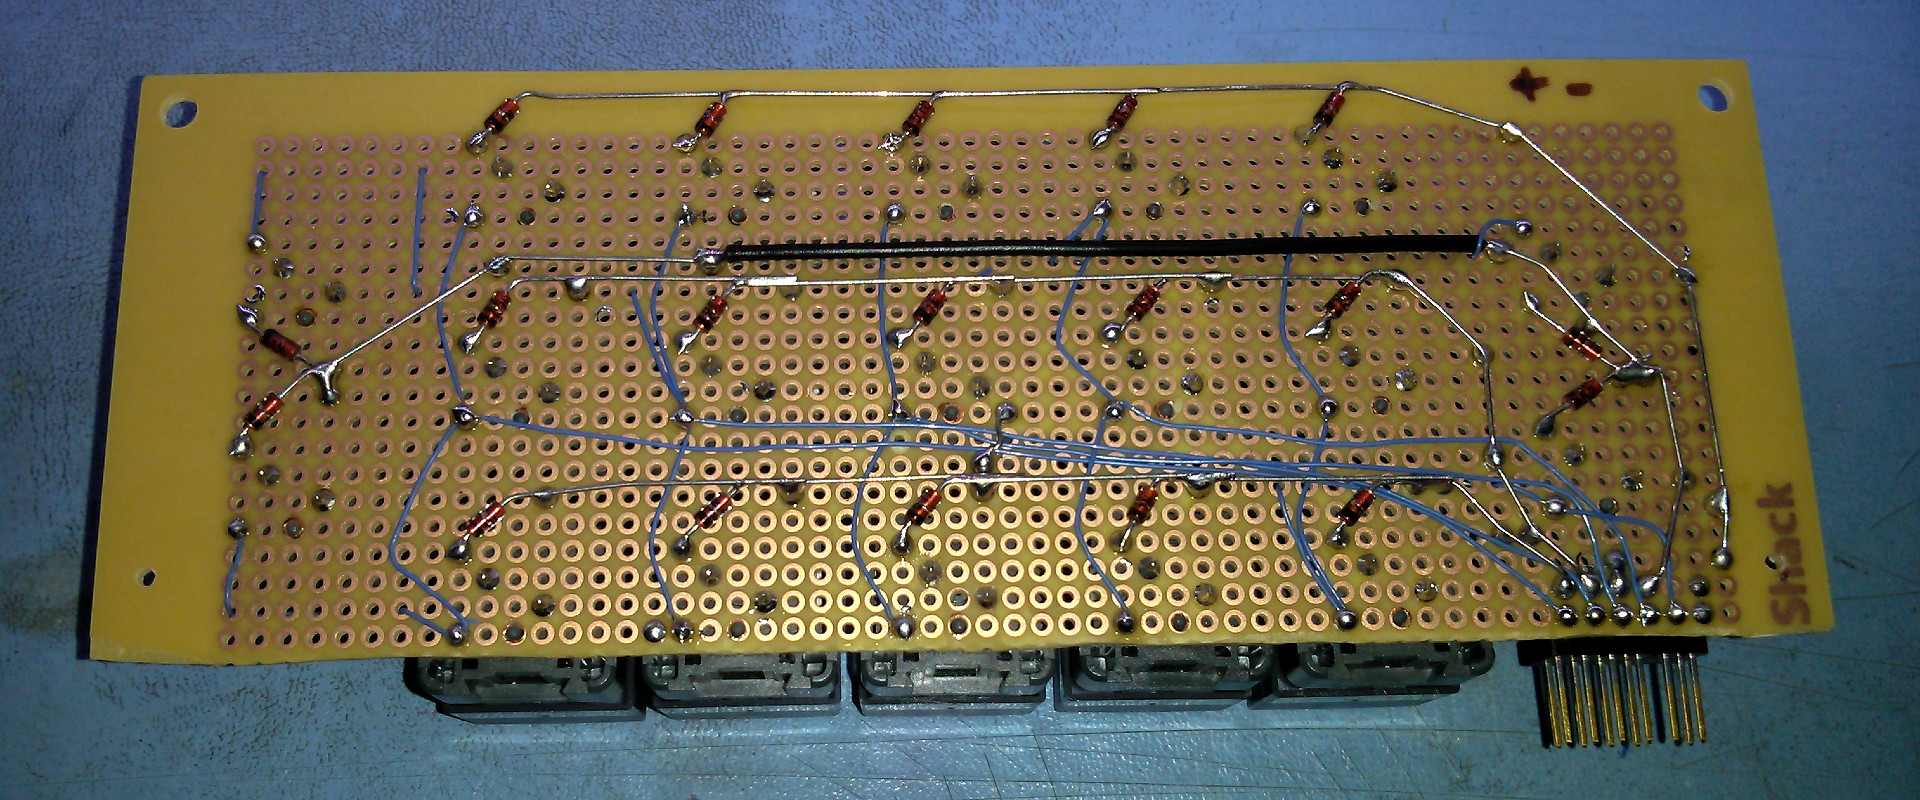
These switches are really nice, because if you just slightly drill out the holes that correspond to the alignment posts, then these nicely fit 0.1 inch grid spacing pre-drilled proto board! You can't do that with an MX switch! I fit the switches to the proto board and then wired them into a 4x5 matrix, with diodes. I actually used some 33 volt zener diodes instead of regular switching diodes... But a 5 volt scan will NEVER exceed 33 volts, thus these zeners are effectively switching diodes at these voltages... I also have over 9000 of them on a reel... 19 down!
I used point to point wiring, relying on the diode leads to form the rows, and wire wrap wire to form the columns. The rows are made up of the three obvious rows, plus all 4 side keys, as a single row. Each 2 side keys is tied to the outer two most columns. The center column only has 3 rows. The 4 rows, and 5 columns are brought out to a right angle pin header. 2 additional pins will provide backlight power. Have not decided if I will run a 5 or a 12 volt bus to it, so I've not wired the LEDs yet. It'll just be a bunch of resistors, wired much like the diodes are on the rows. I'll use thicker wire than the 30 gauge wire wrap wire to join the rows and to wire the common of the LEDs. I had considered individually addressed LEDs, but I'm just not seeing much need for it, at least not with the hardware I have on hand. My DSKY will be used for "meta" game functions... Save, Load, Time Warp, Physics Warp, Stop Warp, etc... Besides, I need things to display on the annunciator grid. If I had buttons doing all the work, I'd render the grid rather empty! It'll likely have indicators for SAS (Stability Assist System), RCS (Reaction Control System), Lights, Gear, Brakes, Chutes, Warp (green for regular Time Warp, red for Physics Warp), Prograde, Retrograde, Normal, Radial, Target, Node, and Anti (to indicate Anti + Radial, Normal, Target, and Node). That also should keep me in the 2x7 grid that the original DSKY typically used.
All in all, I'd say this was a fun little project, and one more step toward finishing my Kerbal Space Program simpit controller. I still am pretty impressed by how this turned out, considering it was literally just a Thursday afternoon. Just had the idea to desolder the switches from the video switcher, throw them on a proto board, and start wiring them! I figure it was good practice for building my actual computer keyboard. I got the Gateron Blues that I'd ordered, but am still waiting for my plate. I also ordered Commodore 64 to MX stem adapters from shape ways, so i'll be able to put SOMETHING on my keyboard, at least till my awesome Danger Zone key cap set arrives... next year... Good thing blues are like bubble wrap... click, click, click... what's that, they can last 20 million cycles! click, click, click... wow... I wish my plate was here... click, click, click...